Adobe Premiere Pro CS4 Operating instructions

Category
Graphics software
Type
Operating instructions
Copyright
Using
ADOBE
®
PREMIERE
®
PRO CS4
Last updated 11/6/2011
© 2009 Adobe Systems Incorporated and its licensors. All rights reserved.
Using Adobe® Premiere® Pro CS4 for Windows® and Mac OS
This user guide is protected under copyright law, furnished for informational use only, is subject to change without notice, and should not be construed as a
commitment by Adobe Systems Incorporated. Adobe Systems Incorporated assumes no responsibility or liability for any errors or inaccuracies that may appear
in the informational content contained in this guide.
This user guide is licensed for use under the terms of the Creative Commons Attribution Non-Commercial 3.0 License. This License allows users to copy,
distribute, and transmit the user guide for noncommercial purposes only so long as (1) proper attribution to Adobe is given as the owner of the user guide; and
(2) any reuse or distribution of the user guide contains a notice that use of the user guide is governed by these terms. The best way to provide notice is to include
the following link. To view a copy of this license, visit
http://creativecommons.org/licenses/by-nc-sa/3.0/
Adobe, the Adobe logo, Adobe Audition, Adobe OnLocation, Adobe Premiere, Acrobat, After Effects, Creative Suite, Encore, Flash, Illustrator, Lightroom,
Photoshop, PostScript, Reader, Soundbooth, and Version Cue are either registered trademarks or trademarks of Adobe Systems Incorporated in the United
States and/or other countries.
OpenType, Microsoft, and Windows are either registered trademarks or trademarks of Microsoft Corporation in the United States and/or other countries.
Macintosh and Mac OS are trademarks of Apple Inc., registered in the United States and other countries. All other trademarks are the property of their respective
owners.
Updated Information/Additional Third Party Code Information available at http://www.adobe.com/go/thirdparty.
MPEG Layer-3 audio compression technology licensed by Fraunhofer IIS and Thomson Multimedia (http://www.mp3licensing.com).
This product includes software developed by the Apache Software Foundation (http://www.apache.org/).
This Program was written with MacApp®: ©1985-1988 Apple Inc. APPLE INC. MAKES NO WARRANTIES WHATSOEVER, EITHER EXPRESS OR IMPLIED,
REGARDING THIS PRODUCT, INCLUDING WARRANTIES WITH RESPECT TO ITS MERCHANTABILITY OR ITS FITNESS FOR ANY PARTICULAR
PURPOSE. The MacApp software is proprietary to Apple Inc. and is licensed to Adobe for distribution only for use in combination with Adobe Premiere.
Speech compression and decompression technology licensed from Nellymoser, Inc. (www.nellymoser.com)
Video in Flash Player is powered by On2 TrueMotion video technology. © 1992-2005 On2 Technologies, Inc. All Rights Reserved. http://www.on2.com
This product includes software developed by the OpenSymphony Group (http://www.opensymphony.com/).
Sorenson Spark video compression and decompression technology licensed from Sorenson Media, Inc.
Notice to U.S. Government end users: The Software and Documentation are “Commercial Items,” as that term is defined at 48 C.F.R. §2.101, consisting of
“Commercial Computer Software” and “Commercial Computer Software Documentation,” as such terms are used in 48 C.F.R. §12.212 or 48 C.F.R. §227.7202,
as applicable. Consistent with 48 C.F.R. §12.212 or 48 C.F.R. §§227.7202-1 through 227.7202-4, as applicable, the Commercial Computer Software and
Commercial Computer Software Documentation are being licensed to U.S. Government end users (a) only as Commercial Items and (b) with only those rights
as are granted to all other end users pursuant to the terms and conditions herein. Unpublished-rights reserved under the copyright laws of the United States.
Adobe agrees to comply with all applicable equal opportunity laws including, if appropriate, the provisions of Executive Order 11246, as amended, Section 402
of the Vietnam Era Veterans Readjustment Assistance Act of 1974 (38 USC 4212), and Section 503 of the Rehabilitation Act of 1973, as amended, and the
regulations at 41 CFR Parts 60-1 through 60-60, 60-250, and 60-741. The affirmative action clause and regulations contained in the preceding sentence shall be
incorporated by reference.
Adobe Systems Incorporated, 345 Park Avenue, San Jose, California 95110, USA.
iii
Last updated 11/6/2011
Contents
Chapter 1: Resources
Installation, activation, and registration . . . . . . . . . . . . . . . . . . . . . . . . . . . . . . . . . . . . . . . . . . . . . . . . . . . . . . . . . . . . . . . . . . . . . . . . . . . . . . . . 1
Help and support . . . . . . . . . . . . . . . . . . . . . . . . . . . . . . . . . . . . . . . . . . . . . . . . . . . . . . . . . . . . . . . . . . . . . . . . . . . . . . . . . . . . . . . . . . . . . . . . . . . . . . 2
New features . . . . . . . . . . . . . . . . . . . . . . . . . . . . . . . . . . . . . . . . . . . . . . . . . . . . . . . . . . . . . . . . . . . . . . . . . . . . . . . . . . . . . . . . . . . . . . . . . . . . . . . . . . 4
Chapter 2: User interface
Changing workspaces . . . . . . . . . . . . . . . . . . . . . . . . . . . . . . . . . . . . . . . . . . . . . . . . . . . . . . . . . . . . . . . . . . . . . . . . . . . . . . . . . . . . . . . . . . . . . . . . . 6
Tools, clip details, and menus . . . . . . . . . . . . . . . . . . . . . . . . . . . . . . . . . . . . . . . . . . . . . . . . . . . . . . . . . . . . . . . . . . . . . . . . . . . . . . . . . . . . . . . . . 11
Preferences . . . . . . . . . . . . . . . . . . . . . . . . . . . . . . . . . . . . . . . . . . . . . . . . . . . . . . . . . . . . . . . . . . . . . . . . . . . . . . . . . . . . . . . . . . . . . . . . . . . . . . . . . . 14
Chapter 3: Workflows and system setup
Basic workflow . . . . . . . . . . . . . . . . . . . . . . . . . . . . . . . . . . . . . . . . . . . . . . . . . . . . . . . . . . . . . . . . . . . . . . . . . . . . . . . . . . . . . . . . . . . . . . . . . . . . . . . 19
File-based workflows . . . . . . . . . . . . . . . . . . . . . . . . . . . . . . . . . . . . . . . . . . . . . . . . . . . . . . . . . . . . . . . . . . . . . . . . . . . . . . . . . . . . . . . . . . . . . . . . . 25
DVD or Blu-ray Disc workflow . . . . . . . . . . . . . . . . . . . . . . . . . . . . . . . . . . . . . . . . . . . . . . . . . . . . . . . . . . . . . . . . . . . . . . . . . . . . . . . . . . . . . . . . . 25
SWF workflow . . . . . . . . . . . . . . . . . . . . . . . . . . . . . . . . . . . . . . . . . . . . . . . . . . . . . . . . . . . . . . . . . . . . . . . . . . . . . . . . . . . . . . . . . . . . . . . . . . . . . . . . 26
Cross-platform workflow . . . . . . . . . . . . . . . . . . . . . . . . . . . . . . . . . . . . . . . . . . . . . . . . . . . . . . . . . . . . . . . . . . . . . . . . . . . . . . . . . . . . . . . . . . . . . 27
Cross-application workflows . . . . . . . . . . . . . . . . . . . . . . . . . . . . . . . . . . . . . . . . . . . . . . . . . . . . . . . . . . . . . . . . . . . . . . . . . . . . . . . . . . . . . . . . . . 27
Adobe Dynamic Link . . . . . . . . . . . . . . . . . . . . . . . . . . . . . . . . . . . . . . . . . . . . . . . . . . . . . . . . . . . . . . . . . . . . . . . . . . . . . . . . . . . . . . . . . . . . . . . . . 34
Metadata workflow . . . . . . . . . . . . . . . . . . . . . . . . . . . . . . . . . . . . . . . . . . . . . . . . . . . . . . . . . . . . . . . . . . . . . . . . . . . . . . . . . . . . . . . . . . . . . . . . . . . 39
Setting up your system . . . . . . . . . . . . . . . . . . . . . . . . . . . . . . . . . . . . . . . . . . . . . . . . . . . . . . . . . . . . . . . . . . . . . . . . . . . . . . . . . . . . . . . . . . . . . . . 40
Chapter 4: Project setup
Creating and changing projects . . . . . . . . . . . . . . . . . . . . . . . . . . . . . . . . . . . . . . . . . . . . . . . . . . . . . . . . . . . . . . . . . . . . . . . . . . . . . . . . . . . . . . . 48
Aspect ratios . . . . . . . . . . . . . . . . . . . . . . . . . . . . . . . . . . . . . . . . . . . . . . . . . . . . . . . . . . . . . . . . . . . . . . . . . . . . . . . . . . . . . . . . . . . . . . . . . . . . . . . . . 51
Chapter 5: Capturing, digitizing, transferring, and importing
Capturing and digitizing . . . . . . . . . . . . . . . . . . . . . . . . . . . . . . . . . . . . . . . . . . . . . . . . . . . . . . . . . . . . . . . . . . . . . . . . . . . . . . . . . . . . . . . . . . . . . . 56
Capturing DV or HDV video . . . . . . . . . . . . . . . . . . . . . . . . . . . . . . . . . . . . . . . . . . . . . . . . . . . . . . . . . . . . . . . . . . . . . . . . . . . . . . . . . . . . . . . . . . . 65
Capturing HD video . . . . . . . . . . . . . . . . . . . . . . . . . . . . . . . . . . . . . . . . . . . . . . . . . . . . . . . . . . . . . . . . . . . . . . . . . . . . . . . . . . . . . . . . . . . . . . . . . . 66
Digitizing analog video . . . . . . . . . . . . . . . . . . . . . . . . . . . . . . . . . . . . . . . . . . . . . . . . . . . . . . . . . . . . . . . . . . . . . . . . . . . . . . . . . . . . . . . . . . . . . . . 67
Capturing content for DVD . . . . . . . . . . . . . . . . . . . . . . . . . . . . . . . . . . . . . . . . . . . . . . . . . . . . . . . . . . . . . . . . . . . . . . . . . . . . . . . . . . . . . . . . . . . 68
Batch capturing and recapturing . . . . . . . . . . . . . . . . . . . . . . . . . . . . . . . . . . . . . . . . . . . . . . . . . . . . . . . . . . . . . . . . . . . . . . . . . . . . . . . . . . . . . . 69
Timecode . . . . . . . . . . . . . . . . . . . . . . . . . . . . . . . . . . . . . . . . . . . . . . . . . . . . . . . . . . . . . . . . . . . . . . . . . . . . . . . . . . . . . . . . . . . . . . . . . . . . . . . . . . . . 76
Transferring and Importing files . . . . . . . . . . . . . . . . . . . . . . . . . . . . . . . . . . . . . . . . . . . . . . . . . . . . . . . . . . . . . . . . . . . . . . . . . . . . . . . . . . . . . . . 80
Importing assets from tapeless formats . . . . . . . . . . . . . . . . . . . . . . . . . . . . . . . . . . . . . . . . . . . . . . . . . . . . . . . . . . . . . . . . . . . . . . . . . . . . . . . 88
Importing still images . . . . . . . . . . . . . . . . . . . . . . . . . . . . . . . . . . . . . . . . . . . . . . . . . . . . . . . . . . . . . . . . . . . . . . . . . . . . . . . . . . . . . . . . . . . . . . . . 90
Importing digital audio . . . . . . . . . . . . . . . . . . . . . . . . . . . . . . . . . . . . . . . . . . . . . . . . . . . . . . . . . . . . . . . . . . . . . . . . . . . . . . . . . . . . . . . . . . . . . . . 93
Importing sequences, clip lists, libraries, and compositions . . . . . . . . . . . . . . . . . . . . . . . . . . . . . . . . . . . . . . . . . . . . . . . . . . . . . . . . . . . . 95
Importing XML project files from Final Cut Pro . . . . . . . . . . . . . . . . . . . . . . . . . . . . . . . . . . . . . . . . . . . . . . . . . . . . . . . . . . . . . . . . . . . . . . . . . 97
Chapter 6: Managing assets
Customizing the Project panel . . . . . . . . . . . . . . . . . . . . . . . . . . . . . . . . . . . . . . . . . . . . . . . . . . . . . . . . . . . . . . . . . . . . . . . . . . . . . . . . . . . . . . . 101
Organizing assets in the Project panel . . . . . . . . . . . . . . . . . . . . . . . . . . . . . . . . . . . . . . . . . . . . . . . . . . . . . . . . . . . . . . . . . . . . . . . . . . . . . . . . 104
Managing metadata . . . . . . . . . . . . . . . . . . . . . . . . . . . . . . . . . . . . . . . . . . . . . . . . . . . . . . . . . . . . . . . . . . . . . . . . . . . . . . . . . . . . . . . . . . . . . . . . . 110
iv
USING ADOBE PREMIERE PRO CS4
Contents
Last updated 11/6/2011
Chapter 7: Monitoring assets
Source Monitor and Program Monitor . . . . . . . . . . . . . . . . . . . . . . . . . . . . . . . . . . . . . . . . . . . . . . . . . . . . . . . . . . . . . . . . . . . . . . . . . . . . . . . . 115
Playing assets . . . . . . . . . . . . . . . . . . . . . . . . . . . . . . . . . . . . . . . . . . . . . . . . . . . . . . . . . . . . . . . . . . . . . . . . . . . . . . . . . . . . . . . . . . . . . . . . . . . . . . . 119
Waveform monitors and vectorscope . . . . . . . . . . . . . . . . . . . . . . . . . . . . . . . . . . . . . . . . . . . . . . . . . . . . . . . . . . . . . . . . . . . . . . . . . . . . . . . . 122
Reference Monitor . . . . . . . . . . . . . . . . . . . . . . . . . . . . . . . . . . . . . . . . . . . . . . . . . . . . . . . . . . . . . . . . . . . . . . . . . . . . . . . . . . . . . . . . . . . . . . . . . . . 125
Chapter 8: Editing sequences and clips
Creating and changing sequences . . . . . . . . . . . . . . . . . . . . . . . . . . . . . . . . . . . . . . . . . . . . . . . . . . . . . . . . . . . . . . . . . . . . . . . . . . . . . . . . . . . 127
Multi-camera sequences . . . . . . . . . . . . . . . . . . . . . . . . . . . . . . . . . . . . . . . . . . . . . . . . . . . . . . . . . . . . . . . . . . . . . . . . . . . . . . . . . . . . . . . . . . . . . 144
Using multiple sequences . . . . . . . . . . . . . . . . . . . . . . . . . . . . . . . . . . . . . . . . . . . . . . . . . . . . . . . . . . . . . . . . . . . . . . . . . . . . . . . . . . . . . . . . . . . 149
Creating clips . . . . . . . . . . . . . . . . . . . . . . . . . . . . . . . . . . . . . . . . . . . . . . . . . . . . . . . . . . . . . . . . . . . . . . . . . . . . . . . . . . . . . . . . . . . . . . . . . . . . . . . 151
Modifying clip properties with Interpret Footage . . . . . . . . . . . . . . . . . . . . . . . . . . . . . . . . . . . . . . . . . . . . . . . . . . . . . . . . . . . . . . . . . . . . . 153
Creating special clips (synthetics) . . . . . . . . . . . . . . . . . . . . . . . . . . . . . . . . . . . . . . . . . . . . . . . . . . . . . . . . . . . . . . . . . . . . . . . . . . . . . . . . . . . . 154
Adding clips to sequences . . . . . . . . . . . . . . . . . . . . . . . . . . . . . . . . . . . . . . . . . . . . . . . . . . . . . . . . . . . . . . . . . . . . . . . . . . . . . . . . . . . . . . . . . . . 156
Trimming clips . . . . . . . . . . . . . . . . . . . . . . . . . . . . . . . . . . . . . . . . . . . . . . . . . . . . . . . . . . . . . . . . . . . . . . . . . . . . . . . . . . . . . . . . . . . . . . . . . . . . . . 165
Working with clips in a sequence . . . . . . . . . . . . . . . . . . . . . . . . . . . . . . . . . . . . . . . . . . . . . . . . . . . . . . . . . . . . . . . . . . . . . . . . . . . . . . . . . . . . 174
Rearranging clips in a sequence . . . . . . . . . . . . . . . . . . . . . . . . . . . . . . . . . . . . . . . . . . . . . . . . . . . . . . . . . . . . . . . . . . . . . . . . . . . . . . . . . . . . . . 179
Rendering and previewing sequences . . . . . . . . . . . . . . . . . . . . . . . . . . . . . . . . . . . . . . . . . . . . . . . . . . . . . . . . . . . . . . . . . . . . . . . . . . . . . . . . 183
Correcting mistakes . . . . . . . . . . . . . . . . . . . . . . . . . . . . . . . . . . . . . . . . . . . . . . . . . . . . . . . . . . . . . . . . . . . . . . . . . . . . . . . . . . . . . . . . . . . . . . . . . 188
Markers . . . . . . . . . . . . . . . . . . . . . . . . . . . . . . . . . . . . . . . . . . . . . . . . . . . . . . . . . . . . . . . . . . . . . . . . . . . . . . . . . . . . . . . . . . . . . . . . . . . . . . . . . . . . . 189
Chapter 9: Editing Audio
Working with audio . . . . . . . . . . . . . . . . . . . . . . . . . . . . . . . . . . . . . . . . . . . . . . . . . . . . . . . . . . . . . . . . . . . . . . . . . . . . . . . . . . . . . . . . . . . . . . . . . 195
Working with clips, channels, and tracks . . . . . . . . . . . . . . . . . . . . . . . . . . . . . . . . . . . . . . . . . . . . . . . . . . . . . . . . . . . . . . . . . . . . . . . . . . . . . 201
Editing audio in a Timeline panel . . . . . . . . . . . . . . . . . . . . . . . . . . . . . . . . . . . . . . . . . . . . . . . . . . . . . . . . . . . . . . . . . . . . . . . . . . . . . . . . . . . . 208
Recording audio . . . . . . . . . . . . . . . . . . . . . . . . . . . . . . . . . . . . . . . . . . . . . . . . . . . . . . . . . . . . . . . . . . . . . . . . . . . . . . . . . . . . . . . . . . . . . . . . . . . . . 211
Adjusting volume levels . . . . . . . . . . . . . . . . . . . . . . . . . . . . . . . . . . . . . . . . . . . . . . . . . . . . . . . . . . . . . . . . . . . . . . . . . . . . . . . . . . . . . . . . . . . . . 215
Audio transitions . . . . . . . . . . . . . . . . . . . . . . . . . . . . . . . . . . . . . . . . . . . . . . . . . . . . . . . . . . . . . . . . . . . . . . . . . . . . . . . . . . . . . . . . . . . . . . . . . . . . 220
Applying effects to audio . . . . . . . . . . . . . . . . . . . . . . . . . . . . . . . . . . . . . . . . . . . . . . . . . . . . . . . . . . . . . . . . . . . . . . . . . . . . . . . . . . . . . . . . . . . . 222
Recording audio mixes . . . . . . . . . . . . . . . . . . . . . . . . . . . . . . . . . . . . . . . . . . . . . . . . . . . . . . . . . . . . . . . . . . . . . . . . . . . . . . . . . . . . . . . . . . . . . . 225
Panning and balancing . . . . . . . . . . . . . . . . . . . . . . . . . . . . . . . . . . . . . . . . . . . . . . . . . . . . . . . . . . . . . . . . . . . . . . . . . . . . . . . . . . . . . . . . . . . . . . 227
Advanced mixing . . . . . . . . . . . . . . . . . . . . . . . . . . . . . . . . . . . . . . . . . . . . . . . . . . . . . . . . . . . . . . . . . . . . . . . . . . . . . . . . . . . . . . . . . . . . . . . . . . . . 231
Editing audio in Adobe Soundbooth . . . . . . . . . . . . . . . . . . . . . . . . . . . . . . . . . . . . . . . . . . . . . . . . . . . . . . . . . . . . . . . . . . . . . . . . . . . . . . . . . 234
Editing audio in Adobe Audition . . . . . . . . . . . . . . . . . . . . . . . . . . . . . . . . . . . . . . . . . . . . . . . . . . . . . . . . . . . . . . . . . . . . . . . . . . . . . . . . . . . . . 235
Correcting common audio problems . . . . . . . . . . . . . . . . . . . . . . . . . . . . . . . . . . . . . . . . . . . . . . . . . . . . . . . . . . . . . . . . . . . . . . . . . . . . . . . . . 236
Chapter 10: Titling
Creating titles . . . . . . . . . . . . . . . . . . . . . . . . . . . . . . . . . . . . . . . . . . . . . . . . . . . . . . . . . . . . . . . . . . . . . . . . . . . . . . . . . . . . . . . . . . . . . . . . . . . . . . . 237
Creating popular types of titles . . . . . . . . . . . . . . . . . . . . . . . . . . . . . . . . . . . . . . . . . . . . . . . . . . . . . . . . . . . . . . . . . . . . . . . . . . . . . . . . . . . . . . 242
Adding text to titles . . . . . . . . . . . . . . . . . . . . . . . . . . . . . . . . . . . . . . . . . . . . . . . . . . . . . . . . . . . . . . . . . . . . . . . . . . . . . . . . . . . . . . . . . . . . . . . . . 242
Adding shapes and images . . . . . . . . . . . . . . . . . . . . . . . . . . . . . . . . . . . . . . . . . . . . . . . . . . . . . . . . . . . . . . . . . . . . . . . . . . . . . . . . . . . . . . . . . . 247
Working with text and objects in titles . . . . . . . . . . . . . . . . . . . . . . . . . . . . . . . . . . . . . . . . . . . . . . . . . . . . . . . . . . . . . . . . . . . . . . . . . . . . . . . 252
Adding fills, strokes, and shadows in titles . . . . . . . . . . . . . . . . . . . . . . . . . . . . . . . . . . . . . . . . . . . . . . . . . . . . . . . . . . . . . . . . . . . . . . . . . . . . 254
Working with styles . . . . . . . . . . . . . . . . . . . . . . . . . . . . . . . . . . . . . . . . . . . . . . . . . . . . . . . . . . . . . . . . . . . . . . . . . . . . . . . . . . . . . . . . . . . . . . . . . 259
Creating rolling and crawling titles . . . . . . . . . . . . . . . . . . . . . . . . . . . . . . . . . . . . . . . . . . . . . . . . . . . . . . . . . . . . . . . . . . . . . . . . . . . . . . . . . . . 261
v
USING ADOBE PREMIERE PRO CS4
Contents
Last updated 11/6/2011
Chapter 11: Effects and transitions
Working with effects . . . . . . . . . . . . . . . . . . . . . . . . . . . . . . . . . . . . . . . . . . . . . . . . . . . . . . . . . . . . . . . . . . . . . . . . . . . . . . . . . . . . . . . . . . . . . . . . 262
Applying, removing, and organizing effects . . . . . . . . . . . . . . . . . . . . . . . . . . . . . . . . . . . . . . . . . . . . . . . . . . . . . . . . . . . . . . . . . . . . . . . . . . 265
Adjusting effects . . . . . . . . . . . . . . . . . . . . . . . . . . . . . . . . . . . . . . . . . . . . . . . . . . . . . . . . . . . . . . . . . . . . . . . . . . . . . . . . . . . . . . . . . . . . . . . . . . . . 269
Customizing effect presets . . . . . . . . . . . . . . . . . . . . . . . . . . . . . . . . . . . . . . . . . . . . . . . . . . . . . . . . . . . . . . . . . . . . . . . . . . . . . . . . . . . . . . . . . . . 276
Creating common effects . . . . . . . . . . . . . . . . . . . . . . . . . . . . . . . . . . . . . . . . . . . . . . . . . . . . . . . . . . . . . . . . . . . . . . . . . . . . . . . . . . . . . . . . . . . . 278
Motion . . . . . . . . . . . . . . . . . . . . . . . . . . . . . . . . . . . . . . . . . . . . . . . . . . . . . . . . . . . . . . . . . . . . . . . . . . . . . . . . . . . . . . . . . . . . . . . . . . . . . . . . . . . . . . 280
Changing clip duration, speed, or interlacing . . . . . . . . . . . . . . . . . . . . . . . . . . . . . . . . . . . . . . . . . . . . . . . . . . . . . . . . . . . . . . . . . . . . . . . . . 287
Color correction . . . . . . . . . . . . . . . . . . . . . . . . . . . . . . . . . . . . . . . . . . . . . . . . . . . . . . . . . . . . . . . . . . . . . . . . . . . . . . . . . . . . . . . . . . . . . . . . . . . . . 298
Special color and luminance adjustments . . . . . . . . . . . . . . . . . . . . . . . . . . . . . . . . . . . . . . . . . . . . . . . . . . . . . . . . . . . . . . . . . . . . . . . . . . . . 313
Transition overview . . . . . . . . . . . . . . . . . . . . . . . . . . . . . . . . . . . . . . . . . . . . . . . . . . . . . . . . . . . . . . . . . . . . . . . . . . . . . . . . . . . . . . . . . . . . . . . . . 319
Applying transitions . . . . . . . . . . . . . . . . . . . . . . . . . . . . . . . . . . . . . . . . . . . . . . . . . . . . . . . . . . . . . . . . . . . . . . . . . . . . . . . . . . . . . . . . . . . . . . . . . 322
Fine-tuning transitions . . . . . . . . . . . . . . . . . . . . . . . . . . . . . . . . . . . . . . . . . . . . . . . . . . . . . . . . . . . . . . . . . . . . . . . . . . . . . . . . . . . . . . . . . . . . . . 324
Customizing transitions . . . . . . . . . . . . . . . . . . . . . . . . . . . . . . . . . . . . . . . . . . . . . . . . . . . . . . . . . . . . . . . . . . . . . . . . . . . . . . . . . . . . . . . . . . . . . 328
About the effect reference . . . . . . . . . . . . . . . . . . . . . . . . . . . . . . . . . . . . . . . . . . . . . . . . . . . . . . . . . . . . . . . . . . . . . . . . . . . . . . . . . . . . . . . . . . . 329
Audio effects . . . . . . . . . . . . . . . . . . . . . . . . . . . . . . . . . . . . . . . . . . . . . . . . . . . . . . . . . . . . . . . . . . . . . . . . . . . . . . . . . . . . . . . . . . . . . . . . . . . . . . . . 331
Audio crossfade transitions . . . . . . . . . . . . . . . . . . . . . . . . . . . . . . . . . . . . . . . . . . . . . . . . . . . . . . . . . . . . . . . . . . . . . . . . . . . . . . . . . . . . . . . . . . 339
Adjust effects . . . . . . . . . . . . . . . . . . . . . . . . . . . . . . . . . . . . . . . . . . . . . . . . . . . . . . . . . . . . . . . . . . . . . . . . . . . . . . . . . . . . . . . . . . . . . . . . . . . . . . . 340
Blur and Sharpen effects . . . . . . . . . . . . . . . . . . . . . . . . . . . . . . . . . . . . . . . . . . . . . . . . . . . . . . . . . . . . . . . . . . . . . . . . . . . . . . . . . . . . . . . . . . . . . 343
Channel effects . . . . . . . . . . . . . . . . . . . . . . . . . . . . . . . . . . . . . . . . . . . . . . . . . . . . . . . . . . . . . . . . . . . . . . . . . . . . . . . . . . . . . . . . . . . . . . . . . . . . . . 346
Color Correction effects . . . . . . . . . . . . . . . . . . . . . . . . . . . . . . . . . . . . . . . . . . . . . . . . . . . . . . . . . . . . . . . . . . . . . . . . . . . . . . . . . . . . . . . . . . . . . 349
Distort effects . . . . . . . . . . . . . . . . . . . . . . . . . . . . . . . . . . . . . . . . . . . . . . . . . . . . . . . . . . . . . . . . . . . . . . . . . . . . . . . . . . . . . . . . . . . . . . . . . . . . . . . 362
GPU effects (Windows only) . . . . . . . . . . . . . . . . . . . . . . . . . . . . . . . . . . . . . . . . . . . . . . . . . . . . . . . . . . . . . . . . . . . . . . . . . . . . . . . . . . . . . . . . . . 366
Generate effects . . . . . . . . . . . . . . . . . . . . . . . . . . . . . . . . . . . . . . . . . . . . . . . . . . . . . . . . . . . . . . . . . . . . . . . . . . . . . . . . . . . . . . . . . . . . . . . . . . . . . 367
Image Control effects . . . . . . . . . . . . . . . . . . . . . . . . . . . . . . . . . . . . . . . . . . . . . . . . . . . . . . . . . . . . . . . . . . . . . . . . . . . . . . . . . . . . . . . . . . . . . . . . 374
Keying effects . . . . . . . . . . . . . . . . . . . . . . . . . . . . . . . . . . . . . . . . . . . . . . . . . . . . . . . . . . . . . . . . . . . . . . . . . . . . . . . . . . . . . . . . . . . . . . . . . . . . . . . 375
Noise & Grain effects . . . . . . . . . . . . . . . . . . . . . . . . . . . . . . . . . . . . . . . . . . . . . . . . . . . . . . . . . . . . . . . . . . . . . . . . . . . . . . . . . . . . . . . . . . . . . . . . 380
Perspective effects . . . . . . . . . . . . . . . . . . . . . . . . . . . . . . . . . . . . . . . . . . . . . . . . . . . . . . . . . . . . . . . . . . . . . . . . . . . . . . . . . . . . . . . . . . . . . . . . . . 383
Render effects . . . . . . . . . . . . . . . . . . . . . . . . . . . . . . . . . . . . . . . . . . . . . . . . . . . . . . . . . . . . . . . . . . . . . . . . . . . . . . . . . . . . . . . . . . . . . . . . . . . . . . . 385
Stylize effects . . . . . . . . . . . . . . . . . . . . . . . . . . . . . . . . . . . . . . . . . . . . . . . . . . . . . . . . . . . . . . . . . . . . . . . . . . . . . . . . . . . . . . . . . . . . . . . . . . . . . . . 385
Time effects . . . . . . . . . . . . . . . . . . . . . . . . . . . . . . . . . . . . . . . . . . . . . . . . . . . . . . . . . . . . . . . . . . . . . . . . . . . . . . . . . . . . . . . . . . . . . . . . . . . . . . . . . 390
Transform effects . . . . . . . . . . . . . . . . . . . . . . . . . . . . . . . . . . . . . . . . . . . . . . . . . . . . . . . . . . . . . . . . . . . . . . . . . . . . . . . . . . . . . . . . . . . . . . . . . . . . 393
Transition effects . . . . . . . . . . . . . . . . . . . . . . . . . . . . . . . . . . . . . . . . . . . . . . . . . . . . . . . . . . . . . . . . . . . . . . . . . . . . . . . . . . . . . . . . . . . . . . . . . . . . 394
Utility effects . . . . . . . . . . . . . . . . . . . . . . . . . . . . . . . . . . . . . . . . . . . . . . . . . . . . . . . . . . . . . . . . . . . . . . . . . . . . . . . . . . . . . . . . . . . . . . . . . . . . . . . . 396
Video effects . . . . . . . . . . . . . . . . . . . . . . . . . . . . . . . . . . . . . . . . . . . . . . . . . . . . . . . . . . . . . . . . . . . . . . . . . . . . . . . . . . . . . . . . . . . . . . . . . . . . . . . . 397
Video dissolve transitions . . . . . . . . . . . . . . . . . . . . . . . . . . . . . . . . . . . . . . . . . . . . . . . . . . . . . . . . . . . . . . . . . . . . . . . . . . . . . . . . . . . . . . . . . . . . 397
Chapter 12: Animation
Animating effects . . . . . . . . . . . . . . . . . . . . . . . . . . . . . . . . . . . . . . . . . . . . . . . . . . . . . . . . . . . . . . . . . . . . . . . . . . . . . . . . . . . . . . . . . . . . . . . . . . . 399
Adding, navigating, and setting keyframes . . . . . . . . . . . . . . . . . . . . . . . . . . . . . . . . . . . . . . . . . . . . . . . . . . . . . . . . . . . . . . . . . . . . . . . . . . . 403
Moving and copying keyframes . . . . . . . . . . . . . . . . . . . . . . . . . . . . . . . . . . . . . . . . . . . . . . . . . . . . . . . . . . . . . . . . . . . . . . . . . . . . . . . . . . . . . . 408
Controlling effect changes using keyframe interpolation . . . . . . . . . . . . . . . . . . . . . . . . . . . . . . . . . . . . . . . . . . . . . . . . . . . . . . . . . . . . . 410
Creating common animations . . . . . . . . . . . . . . . . . . . . . . . . . . . . . . . . . . . . . . . . . . . . . . . . . . . . . . . . . . . . . . . . . . . . . . . . . . . . . . . . . . . . . . . 413
vi
USING ADOBE PREMIERE PRO CS4
Contents
Last updated 11/6/2011
Chapter 13: Compositing
Compositing video . . . . . . . . . . . . . . . . . . . . . . . . . . . . . . . . . . . . . . . . . . . . . . . . . . . . . . . . . . . . . . . . . . . . . . . . . . . . . . . . . . . . . . . . . . . . . . . . . . 415
Transparency (masks, alpha channels) . . . . . . . . . . . . . . . . . . . . . . . . . . . . . . . . . . . . . . . . . . . . . . . . . . . . . . . . . . . . . . . . . . . . . . . . . . . . . . . . 418
Creating transparency and solid colors with keys and mattes . . . . . . . . . . . . . . . . . . . . . . . . . . . . . . . . . . . . . . . . . . . . . . . . . . . . . . . . . 419
Chapter 14: Exporting
Basics of exporting . . . . . . . . . . . . . . . . . . . . . . . . . . . . . . . . . . . . . . . . . . . . . . . . . . . . . . . . . . . . . . . . . . . . . . . . . . . . . . . . . . . . . . . . . . . . . . . . . . 427
Adobe Media Encoder . . . . . . . . . . . . . . . . . . . . . . . . . . . . . . . . . . . . . . . . . . . . . . . . . . . . . . . . . . . . . . . . . . . . . . . . . . . . . . . . . . . . . . . . . . . . . . . 434
Formats exported directly from Premiere Pro . . . . . . . . . . . . . . . . . . . . . . . . . . . . . . . . . . . . . . . . . . . . . . . . . . . . . . . . . . . . . . . . . . . . . . . . . 446
Exporting editable movie or audio files . . . . . . . . . . . . . . . . . . . . . . . . . . . . . . . . . . . . . . . . . . . . . . . . . . . . . . . . . . . . . . . . . . . . . . . . . . . . . . . 447
Exporting OMF files for Pro Tools . . . . . . . . . . . . . . . . . . . . . . . . . . . . . . . . . . . . . . . . . . . . . . . . . . . . . . . . . . . . . . . . . . . . . . . . . . . . . . . . . . . . . 449
Exporting HD and HDV sequences . . . . . . . . . . . . . . . . . . . . . . . . . . . . . . . . . . . . . . . . . . . . . . . . . . . . . . . . . . . . . . . . . . . . . . . . . . . . . . . . . . . 452
Exporting still images and still-image sequences . . . . . . . . . . . . . . . . . . . . . . . . . . . . . . . . . . . . . . . . . . . . . . . . . . . . . . . . . . . . . . . . . . . . . 452
Exporting PDF documents for comments . . . . . . . . . . . . . . . . . . . . . . . . . . . . . . . . . . . . . . . . . . . . . . . . . . . . . . . . . . . . . . . . . . . . . . . . . . . . 453
Exporting to DVD, Blu-ray Disc, or CD . . . . . . . . . . . . . . . . . . . . . . . . . . . . . . . . . . . . . . . . . . . . . . . . . . . . . . . . . . . . . . . . . . . . . . . . . . . . . . . . 455
Exporting projects for other applications or archiving . . . . . . . . . . . . . . . . . . . . . . . . . . . . . . . . . . . . . . . . . . . . . . . . . . . . . . . . . . . . . . . . 458
Exporting to videotape or film . . . . . . . . . . . . . . . . . . . . . . . . . . . . . . . . . . . . . . . . . . . . . . . . . . . . . . . . . . . . . . . . . . . . . . . . . . . . . . . . . . . . . . . 462
Exporting for the web . . . . . . . . . . . . . . . . . . . . . . . . . . . . . . . . . . . . . . . . . . . . . . . . . . . . . . . . . . . . . . . . . . . . . . . . . . . . . . . . . . . . . . . . . . . . . . . 465
Exporting to iPods, cell phones, PSPs and other mobile devices . . . . . . . . . . . . . . . . . . . . . . . . . . . . . . . . . . . . . . . . . . . . . . . . . . . . . . . 470
Exporting XMP metadata . . . . . . . . . . . . . . . . . . . . . . . . . . . . . . . . . . . . . . . . . . . . . . . . . . . . . . . . . . . . . . . . . . . . . . . . . . . . . . . . . . . . . . . . . . . . 472
Chapter 15: Keyboard shortcuts
Finding and customizing keyboard shortcuts . . . . . . . . . . . . . . . . . . . . . . . . . . . . . . . . . . . . . . . . . . . . . . . . . . . . . . . . . . . . . . . . . . . . . . . . . 474
Default keyboard shortcuts . . . . . . . . . . . . . . . . . . . . . . . . . . . . . . . . . . . . . . . . . . . . . . . . . . . . . . . . . . . . . . . . . . . . . . . . . . . . . . . . . . . . . . . . . . 476
Index ...............................................................................................................483
1
Last updated 11/6/2011
Chapter 1: Resources
Installation, activation, and registration
Before installing Adobe Premiere Pro software, review complete system requirements and recommendations in the
Read Me file. The Read Me file is on the installation disc, as well as on the
Premiere Pro support section of the Adobe
website.
For Premiere Pro system requirements, see the Adobe website.
For lists of various categories of hardware compatible with Adobe Premiere Pro, see the Adobe website.
Install the software
1 Quit all applications running on your computer.
2 Insert the installation disc into your DVD drive, and follow the on-screen instructions.
Note: The free trial version of Adobe Premiere Pro software does not include some features that depend upon software
licensed from parties other than Adobe. For example, some codecs for encoding MPEG formats are available only with
the full version of Adobe Premiere Pro software.
For a detailed list of limitations of the trial version of Premiere Pro software, see the Adobe website.
For frequently asked questions about trial versions, see the Adobe website.
Help with installation
For help with installation issues, see the Installation Support Center at www.adobe.com/go/cs4install.
License activation
During the installation process, your Adobe software contacts Adobe to complete the license activation process. No
personal data is transmitted. For more information on product activation, visit the Adobe website at
www.adobe.com/go/activation.
A single-user retail license activation supports two computers. For example, you can install the product on a desktop
computer at work and on a laptop computer at home. If you want to install the software on a third computer, first
deactivate it on one of the other two computers. Choose Help
> Deactivate.
Register
Register your product to receive complimentary installation support, notifications of updates, and other services.
To register, follow the on-screen instructions in the Registration dialog box, which appears after you install the
software.
If you postpone registration, you can register at any time by choosing Help > Registration.
2
USING ADOBE PREMIERE PRO CS4
Resources
Last updated 11/6/2011
Adobe Product Improvement Program
After you have used your Adobe software a certain number of times, a dialog box appears, asking whether you want
to participate in the Adobe Product Improvement Program.
If you choose to participate, data about your use of Adobe software is sent to Adobe. No personal information is
recorded or sent. The Adobe Product Improvement Program only collects information about the features and tools
that you use in the software and how often you use them.
You can opt in to or opt out of the program at any time:
To participate, choose Help > Adobe Product Improvement Program and click Yes, Participate.
To stop participating, choose Help > Adobe Product Improvement Program and click No, Thank You.
ReadMe
A ReadMe file for your software is available on-line and on the installation disc. Open the file to read important
information about topics such as the following:
System requirements
Installation (including uninstalling the software)
Activation and registration
Font installation
Troubleshooting
Customer support
Legal notices
Help and support
Community Help
Community Help is an integrated environment on Adobe.com that gives you access to community-generated content
moderated by Adobe and industry experts. Comments from users help guide you to an answer.
Community Help draws on a number of resources, including:
Videos, tutorials, tips and techniques, blogs, articles, and examples for designers and developers.
Complete on-line product Help, which is updated regularly by the Adobe documentation team.
All other content on Adobe.com, including knowledgebase articles, downloads and updates, Developer
Connection, and more.
Choose Help > product name Help in the application to access the Help and Support page, the portal to all of the
Community Help content for your product. You can also use the Help search field in some Creative Suite 4
applications, or press F1 (Windows), to access Community Help for your product.
The sites searched by the default Community Help search engine are hand-selected and reviewed for quality by Adobe
and Adobe Community Experts. Adobe experts also work to ensure that the top search results include a mixture of
different kinds of content, including results from on-line product Help.
For more information on using Community Help, see http://help.adobe.com/en_US/CommunityHelp/.
3
USING ADOBE PREMIERE PRO CS4
Resources
Last updated 11/6/2011
For a video overview of Community Help, see www.adobe.com/go/lrvid4117_xp.
For frequently asked questions about Community Help, see http://community.adobe.com/help/profile/faq.html
Product Help
Adobe provides a comprehensive user guide for each product in several formats, including on-line product Help, PDF,
and printed book. Results from on-line product Help are included in your results whenever you search Community Help.
If you’re connected to the Internet, the Help menu within the product opens the product Help and Support page by
default. This page is a portal to all of the Community Help content for the product. If you want to consult or search
on-line product Help only, you can access it by clicking the product Help link in the upper-right corner of the Help
and Support page. Be sure to select the This Help System Only option before you do your search.
If you’re not connected to the Internet, the Help menu within the product opens local Help, a subset of the content
available in on-line product Help. Because local Help is not as complete or up-to-date as on-line product Help, Adobe
recommends that you use the PDF version of product Help if you want to stay offline. A downloadable PDF of
complete product Help is available from two places:
The product’s Help and Support page (upper-right corner of the page)
Local and web Help (top of the Help interface)
For more information on accessing product help, see http://help.adobe.com/en_US/CommunityHelp/.
If you are working in Adobe InDesign, Photoshop, Illustrator, Flash, Fireworks, or Dreamweaver, and you want to turn
off Community Help so that local Help opens by default, do the following:
1 Open the Connections panel (Window > Extensions > Connections).
2 From the Connections panel menu , select Offline Options.
3 Select Keep Me Offline and click OK.
Note: When you disable web services from the Connections panel, all other web services (such as Adobe Kuler and Adobe
ConnectNow) are also disabled.
Printed resources
Printed versions of the complete on-line product Help are available for the cost of shipping and handling at
www.adobe.com/go/store.
Support resources
Visit the Adobe Support website at www.adobe.com/support to learn about free and paid technical support options.
4
USING ADOBE PREMIERE PRO CS4
Resources
Last updated 11/6/2011
New features
Premiere Pro CS4, in combination with AdobeOnLocation CS4, and Adobe Encore CS4, makes every step of video
production more efficient. They provide tools for every step, from on-location capture, through post-production, to
final delivery. These products run either on Windows or Mac OS. Here's a quick look at some of the new features.
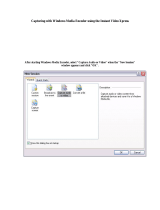
New tapeless camera support Take advantage of the efficiency of tapeless cameras. Edit files from the latest tapeless
formats natively, including AVCHD, P2 (including the AVC-I codec), and XDCAM EX, without transcoding or
rewrapping. With the integrated Media Browser, you can browse your hard disks from inside Premiere Pro. You can
find footage, and then import the content directly into your Premiere Pro project.
Batch encoding Save time by automating the process of creating multiple encoded versions of your content using the
new batch encoder. Use any combination of sequences and clips as sources. Encode to a wide variety of video formats,
including FLV and F4V, Windows Media, MPEG-2, H.264, QuickTime, and more. Maximize your productivity by
continuing to work while files encode in the background.
Improved integration Tighter-than-ever integration among Premiere Pro, Adobe OnLocation, Encore, and
Soundbooth™ ensure end-to-end workflows that are smooth and efficient. Adobe Dynamic Link allows you to move
seamlessly among Premiere Pro, Soundbooth, After Effects, and Encore without rendering. You can work quickly and
stay focused. Save rendering time by natively importing Photoshop® PSD files with video and blending modes, sharing
more effects with After Effects®, and importing video sequences in Encore without having to encode them. You can
send entire shot lists directly to Premiere Pro from Adobe OnLocation, complete with all the metadata that was logged
during the shoot. Export interactive DVD elements created with Encore as SWF files for online viewing.
Improved editing efficiency
Work faster with powerful and flexible editing enhancements. Premiere Pro includes over
50 of the most requested enhancements that make the editing workflow more efficient. Apply effects to multiple
selections, get timecode information faster, speed up work in the timeline with new keyboard shortcuts, and much more.
Speech Search Quickly find the specific area of a shot by searching for keywords within the content. Premiere Pro
speech recognition technology converts your audio to a transcript and synchronizes it to the video. You can go directly
to the place of interest, and even cut video based on the script.
New and improved Adobe OnLocation CS4 Adobe OnLocation™ CS4, now cross-platform, is powerful direct-to-disk
recording and monitoring software to help you produce superior-quality results from your video camera. Featuring a
redesigned interface, Adobe OnLocation CS4 gives you an impressive array of production tools to help you shoot
better and faster while saving you time and money. Easily manage shots and takes with the new shot list. Adobe
OnLocation automatically creates metadata that speeds your workflow at every step of production.
End-to-end metadata workflow Easily track video metadata throughout your workflow. Import metadata into Adobe
OnLocation while you’re shooting. Log clip information directly in the project panel using a unique spreadsheet-style
interface that speeds up the process, and eliminates re-entering the same information for each clip in Premiere Pro.
Then, pass metadata through, on export, for publishing to the web, or for use in other Adobe applications.
Faster, customizable SWF file output With one click, easily create SWF versions of your DVD and Blu-ray Disc
projects for the web, without opening another application. Now with added flexibility, you can create content
compatible with Adobe Flash® Player, complete with DVD interactivity, menus, URL links, and HTML templates.
Export different video sizes for FLV file streaming or progressive download, customize SWF file player skins and
reduce FLV file encoding time by using optimized encode settings in Adobe Media Encoder. Build new revenue
sources based on secure streaming or protected download delivery models.
Industry-leading Blu-ray Disc output Create high-definition Blu-ray discs with advanced menus and subtitles with
Adobe Encore CS4 software, included with Adobe Premiere® Pro CS4.
5
USING ADOBE PREMIERE PRO CS4
Resources
Last updated 11/6/2011
Thousands of visual and audio effects via Adobe Resource Central Create or customize existing video and audio using
numerous effects available via Adobe Resource Central. Get live access to fresh, new content and news. Get helpful
tutorials and training materials without leaving your workflow. (Internet connection required.)
Maximum Render Quality option You can improve rendering of motion, improve deinterlacing, and improve scaling
of video. Select Maximum Render Quality in your sequence settings or Use Maximum Render Quality in your export
settings.
Export To OMF for Pro Tools Export audio from any sequence to an OMF file for sweetening in DigiDesign Pro Tools.
Edit In Adobe Audition You can export the audio tracks from a sequence directly from Premiere Pro into Adobe
Audition, for full-featured sound editing and sweetening.
More Help topics
www.adobe.com/go/lrvid4068_pr
6
Last updated 11/6/2011
Chapter 2: User interface
The similarity in the user interface design among all Adobe video and audio products allows users to move projects
through the applications best suited for each task in the workflow.
Changing workspaces
About workspaces
Adobe video and audio applications provide a consistent, customizable workspace. Although each application has its
own set of panels (such as Project, Metadata, and Timeline), you move and group panels in the same way across
products.
The main window of a program is the application window. Panels are organized in this window in an arrangement
called a workspace. The default workspace contains groups of panels as well as panels that stand alone.
You customize a workspace by arranging panels in the layout that best suits your working style. As you rearrange
panels, the other panels resize automatically to fit the window. You can create and save several custom workspaces for
different tasks—for example, one for editing and one for previewing.
You can use floating windows to create a workspace more like those in previous versions of Adobe applications, or to
place panels on multiple monitors.
Example workspace
A. Application window B. Grouped panels C. Individual panel
Choose a workspace
Each Adobe video and audio application includes several predefined workspaces that optimize the layout of panels for
specific tasks. When you choose one of these workspaces, or any custom workspaces you’ve saved, the current
workspace is redrawn accordingly.
Open the project you want to work on, choose Window > Workspace, and select the desired workspace.
BC
A
7
USING ADOBE PREMIERE PRO CS4
User interface
Last updated 11/6/2011
Dock, group, or float panels
You can dock panels together, move them into or out of groups, and undock them so they float above the application
window. As you drag a panel, drop zones—areas onto which you can move the panel—become highlighted. The drop
zone you choose determines where the panel is inserted, and whether it docks or groups with other panels.
Docking zones
Docking zones exist along the edges of a panel, group, or window. Docking a panel places it adjacent to the existing
group, resizing all groups to accommodate the new panel.
Dragging panel (A) onto docking zone (B) to dock it (C)
Grouping zones
Grouping zones exist in the middle of a panel or group, and along the tab area of panels. Grouping a panel stacks it
with other panels.
Dragging panel (A) onto grouping zone (B) to group it with existing panels (C)
Dock or group panels
1 If the panel you want to dock or group is not visible, choose it from the Window menu.
C
B
A
B
C
A
8
USING ADOBE PREMIERE PRO CS4
User interface
Last updated 11/6/2011
2 Do one of the following:
To move an individual panel, drag the gripper area in the upper-left corner of a panel’s tab onto the desired drop zone.
Drag panel gripper to move one panel
To move an entire group, drag the group gripper in the upper-right corner onto the desired drop zone.
Drag group gripper to move entire group
The application docks or groups the panel, according to the type of drop zone.
Undock a panel in a floating window
When you undock a panel in a floating window, you can add panels to the window and modify it similarly to the
application window. You can use floating windows to make use of a secondary monitor, or to create workspaces like
those in earlier versions of Adobe applications.
Select the panel you want to undock (if it’s not visible, choose it from the Window menu), and then do one of the
following:
Choose Undock Panel or Undock Frame from the panel menu. Undock Frame undocks the panel group.
Hold down Ctrl (Windows®) or Command (Mac OS®), and drag the panel or group from its current location.
When you release the mouse button, the panel or group appears in a new floating window.
Drag the panel or group outside the application window. (If the application window is maximized, drag the
panel to the Windows taskbar.)
9
USING ADOBE PREMIERE PRO CS4
User interface
Last updated 11/6/2011
Resize panel groups
When you position the pointer over dividers between panel groups, resize icons appear. When you drag these icons,
all groups that share the divider are resized. For example, suppose your workspace contains three panel groups stacked
vertically. If you drag the divider between the bottom two groups, they are resized, but the topmost group doesn’t
change.
To quickly maximize a panel beneath the pointer, press the tilde (~) key. (Do not press Shift.) Press the tilde key again
to return the panel to its original size.
1 Do either of the following:
To resize either horizontally or vertically, position the pointer between two panel groups. The pointer becomes a
double-arrow
.
To resize in both directions at once, position the pointer at the intersection between three or more panel groups.
The pointer becomes a four-way arrow
.
2 Hold down the mouse button, and drag to resize the panel groups.
Dragging divider between panel groups to resize them horizontally
A. Original group with resize icon B. Resized groups
Open, close, and scroll to panels
Even if a panel is open, it may be out of sight, beneath other panels. Choosing a panel from the Window menu brings
it to the front. Likewise, if a panel group is very narrow, a scroll bar above the group reveals all the panel tabs.
When you close a panel group in the application window, the other groups resize to make use of the newly available
space. When you close a floating window, the panels within it close, too.
To open or close a panel, choose it from the Window menu.
To close a panel or window, click its Close button .
To see all the panel tabs in a narrow panel group, drag the horizontal scroll bar.
A
B
10
USING ADOBE PREMIERE PRO CS4
User interface
Last updated 11/6/2011
Drag horizontal scroll bar to see all panels in narrow group
Navigate the panels
You can use keyboard shortcuts to activate panels in rotation.
Do one of the following:
To activate panels in rotation to the right, press Ctrl+Shift+> (Windows), or Control+Shift+> (Mac OS).
To activate panels in rotation to the left, press Ctrl+Shift+< (Windows), or Control+Shift+< (Mac OS).
Display any panel full-screen
You can expand any panel to display it in full-screen mode, and toggle back to normal view.
1 Select the panel you want to view full-screen.
2 Press the grave accent key (`), or the key that takes its place on your keyboard. Typically, this key lies just to the left
of the numeral one (1) key. Some refer to this key as the back quote key, or the tilde (~) key.
Press the back quote key again to toggle back to normal view.
Note: When Adobe Premiere Pro is installed on a computer with a non-U.S. keyboard, the Maximize Or Restore Frame
command is mapped to a key other than the back quote key. The key for Maximize Or Restore Frame is listed in the
Keyboard Customization dialog box. To find it, select the Adobe
Premiere Pro Defaults set. Then, select Application from
the menu. Scroll down past the Help heading to Maximize Or Restore Frame.
More Help topics
Find keyboard shortcuts” on page 474
Save, reset, or delete workspaces
Save a custom workspace
As you customize a workspace, the application tracks your changes, storing the most recent layout. To store a specific
layout more permanently, save a custom workspace. Saved custom workspaces appear in the Workspace menu, where
you can return to and reset them.
Arrange the frames and panels as desired, and then choose Window > Workspace > New Workspace. Type a name
for the workspace, and click
OK.
Note: If a project saved with a custom workspace is opened on another system, the application looks for a workspace with
a matching name. If it can’t find a match (or the monitor configuration doesn’t match), it uses the current local
workspace.
11
USING ADOBE PREMIERE PRO CS4
User interface
Last updated 11/6/2011
Reset a workspace
Reset the current workspace to return to its original, saved layout of panels.
Choose Window > Workspace > Reset workspace name.
Delete a workspace
1 Choose Window > Workspace > Delete Workspace.
2 Choose the workspace you want to delete, and then click OK.
Note: You cannot delete the currently active workspace.
Working with multiple monitors
To increase the available screen space, use multiple monitors. When you work with multiple monitors, the application
window appears on one monitor, and you place floating windows on the second monitor. Monitor configurations are
stored in the workspace.
More Help topics
Dock, group, or float panels” on page 7
Import a workspace with a project
Workspace selections and customizations made in a project are saved in the project file. By default, Premiere Pro opens
projects in the current workspace. However, you can instead open a project in the workspace last used with it. This
option is particularly helpful if you often rearrange the workspace for each project.
Before opening a project, select Window > Workspace > Import Workspace From Projects.
Brighten or darken the interface
You may prefer to lower the brightness when working in a darkened editing suite or when making color corrections.
Changing the brightness affects panels, windows, and dialog boxes but doesn’t affect scroll bars, title bars, and menus
that aren’t inside panels. In addition, the change doesn’t affect the application background in Windows.
1 Choose Edit > Preferences > Appearance (Windows) or Premiere Pro > Preferences > Appearance (Mac OS).
2 Drag the User Interface Brightness slider to the left or right. Click Default to restore the default brightness level.
Tools, clip details, and menus
Tools
The Tools panel contains a number of tools for editing sequences in a Timeline panel. When you select a tool, the
pointer changes shape according to the selection. For example, when you select the Razor tool and position the pointer
over a clip in a Timeline panel, the icon changes to a razor
. However, the Selection tool icon may change to
reflect the task currently being performed. In some cases, pressing a modifier key (such as Shift) as you use a tool
changes its function, and its icon changes accordingly. Select tools from the Tools panel, or use a keyboard shortcut.
You can resize the Tools panel and orient it vertically or horizontally.
Note: The Selection tool is the default tool. It’s used for everything other than specialized functions. If the program isn’t
responding as you expect, make sure that the Selection tool is selected.
12
USING ADOBE PREMIERE PRO CS4
User interface
Last updated 11/6/2011
Toolbox
A. Selection tool B. Ripple Edit tool C. Rate Stretch tool D. Slip tool E. Pen tool F. Hand tool G. Track Select tool H. Rolling Edit tool I. Razor
tool J. Slide tool K. Zoom tool
Select any tool to activate it for use in a Timeline panel by clicking it or pressing its keyboard shortcut. Let the cursor
hover over a tool to see its name and keyboard shortcut.
Selection Tool The standard tool for selecting clips, menu items, and other objects in the user interface. It’s generally
a good practice to select the Selection Tool as soon as you are done using any of the other, more specialized, tools. For
more information about using the Selection Tool, see
Select one or more clips” on page 177.
Track Selection Tool Select this tool to select all the clips to the right of the cursor in a sequence. To select a clip and
all clips to the right in its own track, click the clip. To select a clip and all clips to its right in all tracks, Shift-click the
clip. Pressing Shift changes the Track Selection Tool into the Multi-track Selection Tool. For more information about
using the Track Selection Tool, see
Select one or more clips” on page 177 and Delete all clips on one track” on
page 183.
Ripple Edit Tool Select this tool to trim the In or Out point of a clip in a Timeline. The Ripple Edit Tool closes gaps
caused by the edit and cascades clips to the right or left in the Timeline in order to preserve all edits to the left or right
of the trimmed clip. For more information about using the Ripple Edit tool, see
Perform rolling and ripple edits” on
page 170.
Rolling Edit Tool Select this tool to roll the edit point between two clips in a Timeline, simultaneously trimming the In
point of one and the Out point of the other, while leaving the combined duration of the two unchanged. For more
information about using the Rolling Edit tool, see
Perform rolling and ripple edits” on page 170.
Rate Stretch Tool Select this tool to shorten a clip in a Timeline by speeding up its playback, or to lengthen it by
slowing it down. The Rate Stretch Tool changes speed and duration, but leaves the In and Out points of the clip
unchanged. For more information about using the Rate Stretch Tool, see
Change clip speed and duration with the
Rate Stretch tool” on page 290.
Razor Tool Select this tool to make one or more incisions in clips in a Timeline. Click a point in a clip to split it at that
precise location. To split clips in all tracks at that location, Shift-click the spot in any of the clips. For more information
about using the Razor Tool, see
Split or cut one or more clips with the Razor tool” on page 181.
Slip Tool Select this tool to simultaneously change the In and Out points of a clip in a Timeline, while keeping the time
span between them constant. For example, if a 10-second clip has been trimmed to five seconds in a sequence, you can
use the Slip Tool to show an earlier part of the clip, while retaining its five-second duration and its location in the
Timeline. For more information about using the Slip Tool, see
Perform slip and slide edits” on page 172.
Slide Tool Select this tool to move a clip to the left or right in a Timeline while simultaneously trimming the two clips
that surround it. The combined duration of the three clips, and the location of the group in the Timeline, remain
unchanged. For more information about using the Slide Tool, see
Perform slip and slide edits” on page 172.
Pen Tool Select this tool to set or select keyframes, or to adjust connector lines in a Timeline. Click and drag a
connector line vertically to adjust it. Ctrl-click (Windows) or Command-click (Mac OS) on a connector line to set a
keyframe. Shift-click noncontiguous keyframes to select them. Drag a marquee over contiguous keyframes to select
them. For more information about using the Pen Tool, see
Select keyframes” on page 405.
A
B
C
D
E
F
G
H
I
J
K
13
USING ADOBE PREMIERE PRO CS4
User interface
Last updated 11/6/2011
Hand Tool Select this tool to move the viewing area of a Timeline to the right or left. Click and drag left or right
anywhere in the viewing area.
Zoom Tool Select this tool to zoom in or out in a Timeline viewing area. Click in the viewing area to zoom in by one
increment. Alt-click (Windows) or Option-click (Mac OS) to zoom out by one increment. For more information about
using the Zoom Tool, see
Navigate in a sequence” on page 128.
Clip details in the Info panel
The Info panel displays several data about a selected item, and timecode information for clips under the current-time
indicator in the Timeline.
At the top of the panel, information is displayed for the current selection. This may vary depending on its media type,
the active panel, and so on. For example, the Info panel displays information unique to an empty space in a Timeline
panel, or a clip in the Project panel.
Video Indicates frame rate, frame size, and pixel aspect ratio, in that order.
Audio Indicates sample rate, bit depth, and channels, in that order.
Tape Indicates the name of the tape.
In Indicates the In point timecode of the selected clip.
Out Indicates the Out point timecode of the selected clip.
Duration Indicates the duration of the selected clip.
The section below the current selection data contains the timecode values for the active sequence and for clips in each
of its video and audio tracks. These are displayed in a stacking order that matches the Timeline for easy visual
correlation. Video track timecodes are displayed with the highest track number on top, and audio tracks are displayed
with the highest track number on the bottom. The only time this section is blank is when all sequences are closed.
When a track is added to or deleted from the current sequence, the Info panel updates to accurately display the number
of tracks in the sequence. There is no limit on the number of tracks displayed. Similarly, when the user switches to a
different sequence, the Info panel updates to display the correct number of tracks in that sequence.
The Info panel displays timecode for the current selection and for all track items under the current-time indicator.
When the playhead crosses a blank area in the timeline, no timecode value is displayed for that track, but the track label
remains visible and undimmed. This ensures that the vertical stack layout of the timecodes is easily correlated with the
physical layout of the tracks in the sequence.
14
USING ADOBE PREMIERE PRO CS4
User interface
Last updated 11/6/2011
The Info panel
A. Name of selected clip B. Data for selected clip C. Tape name D. Sequence timecode locations of clip Start and End points E. Name of active
sequence F. Source timecode location in selected clip of current-time indicator G. Source timecode location in clips on video tracks of current-
time indicator H. Source timecode location in clips on audio tracks of current-time indicator
Display context and panel menus
In addition to choosing from the menus at the top of your screen, you can choose from context menus, which display
commands relative to the active tool or selected item. Panel menus display commands relative to the active panel.
To display panel menus, click the button in the upper-right corner of the panel.
To display context menus, right-click a panel.
Preferences
Change your preferences
You can customize the look and behavior of Premiere Pro in many ways, from determining the default length of
transitions to setting the brightness of the user interface. Most of these preferences will remain in effect until you
change them. The preferences you set for scratch disks, however, are saved with your projects, so that whenever you
open an project, it automatically defaults to the scratch disks you selected for it when you set up that project.
Choose Edit > Preferences (Windows) or Premiere Pro > Preferences (Mac OS), and select the category of
preferences you wish to change.
General preferences
In the General pane of the Preferences dialog box, you can customize settings for everything from playback preroll
duration to bin behaviors.
More Help topics
Play a sequence or clip with preroll and postroll pauses” on page 120
Specify and apply default transitions” on page 323
Change the default duration for still images” on page 296
C
A
F
E
B
D
G
H
  • Page 1 1
  • Page 2 2
  • Page 3 3
  • Page 4 4
  • Page 5 5
  • Page 6 6
  • Page 7 7
  • Page 8 8
  • Page 9 9
  • Page 10 10
  • Page 11 11
  • Page 12 12
  • Page 13 13
  • Page 14 14
  • Page 15 15
  • Page 16 16
  • Page 17 17
  • Page 18 18
  • Page 19 19
  • Page 20 20
  • Page 21 21
  • Page 22 22
  • Page 23 23
  • Page 24 24
  • Page 25 25
  • Page 26 26
  • Page 27 27
  • Page 28 28
  • Page 29 29
  • Page 30 30
  • Page 31 31
  • Page 32 32
  • Page 33 33
  • Page 34 34
  • Page 35 35
  • Page 36 36
  • Page 37 37
  • Page 38 38
  • Page 39 39
  • Page 40 40
  • Page 41 41
  • Page 42 42
  • Page 43 43
  • Page 44 44
  • Page 45 45
  • Page 46 46
  • Page 47 47
  • Page 48 48
  • Page 49 49
  • Page 50 50
  • Page 51 51
  • Page 52 52
  • Page 53 53
  • Page 54 54
  • Page 55 55
  • Page 56 56
  • Page 57 57
  • Page 58 58
  • Page 59 59
  • Page 60 60
  • Page 61 61
  • Page 62 62
  • Page 63 63
  • Page 64 64
  • Page 65 65
  • Page 66 66
  • Page 67 67
  • Page 68 68
  • Page 69 69
  • Page 70 70
  • Page 71 71
  • Page 72 72
  • Page 73 73
  • Page 74 74
  • Page 75 75
  • Page 76 76
  • Page 77 77
  • Page 78 78
  • Page 79 79
  • Page 80 80
  • Page 81 81
  • Page 82 82
  • Page 83 83
  • Page 84 84
  • Page 85 85
  • Page 86 86
  • Page 87 87
  • Page 88 88
  • Page 89 89
  • Page 90 90
  • Page 91 91
  • Page 92 92
  • Page 93 93
  • Page 94 94
  • Page 95 95
  • Page 96 96
  • Page 97 97
  • Page 98 98
  • Page 99 99
  • Page 100 100
  • Page 101 101
  • Page 102 102
  • Page 103 103
  • Page 104 104
  • Page 105 105
  • Page 106 106
  • Page 107 107
  • Page 108 108
  • Page 109 109
  • Page 110 110
  • Page 111 111
  • Page 112 112
  • Page 113 113
  • Page 114 114
  • Page 115 115
  • Page 116 116
  • Page 117 117
  • Page 118 118
  • Page 119 119
  • Page 120 120
  • Page 121 121
  • Page 122 122
  • Page 123 123
  • Page 124 124
  • Page 125 125
  • Page 126 126
  • Page 127 127
  • Page 128 128
  • Page 129 129
  • Page 130 130
  • Page 131 131
  • Page 132 132
  • Page 133 133
  • Page 134 134
  • Page 135 135
  • Page 136 136
  • Page 137 137
  • Page 138 138
  • Page 139 139
  • Page 140 140
  • Page 141 141
  • Page 142 142
  • Page 143 143
  • Page 144 144
  • Page 145 145
  • Page 146 146
  • Page 147 147
  • Page 148 148
  • Page 149 149
  • Page 150 150
  • Page 151 151
  • Page 152 152
  • Page 153 153
  • Page 154 154
  • Page 155 155
  • Page 156 156
  • Page 157 157
  • Page 158 158
  • Page 159 159
  • Page 160 160
  • Page 161 161
  • Page 162 162
  • Page 163 163
  • Page 164 164
  • Page 165 165
  • Page 166 166
  • Page 167 167
  • Page 168 168
  • Page 169 169
  • Page 170 170
  • Page 171 171
  • Page 172 172
  • Page 173 173
  • Page 174 174
  • Page 175 175
  • Page 176 176
  • Page 177 177
  • Page 178 178
  • Page 179 179
  • Page 180 180
  • Page 181 181
  • Page 182 182
  • Page 183 183
  • Page 184 184
  • Page 185 185
  • Page 186 186
  • Page 187 187
  • Page 188 188
  • Page 189 189
  • Page 190 190
  • Page 191 191
  • Page 192 192
  • Page 193 193
  • Page 194 194
  • Page 195 195
  • Page 196 196
  • Page 197 197
  • Page 198 198
  • Page 199 199
  • Page 200 200
  • Page 201 201
  • Page 202 202
  • Page 203 203
  • Page 204 204
  • Page 205 205
  • Page 206 206
  • Page 207 207
  • Page 208 208
  • Page 209 209
  • Page 210 210
  • Page 211 211
  • Page 212 212
  • Page 213 213
  • Page 214 214
  • Page 215 215
  • Page 216 216
  • Page 217 217
  • Page 218 218
  • Page 219 219
  • Page 220 220
  • Page 221 221
  • Page 222 222
  • Page 223 223
  • Page 224 224
  • Page 225 225
  • Page 226 226
  • Page 227 227
  • Page 228 228
  • Page 229 229
  • Page 230 230
  • Page 231 231
  • Page 232 232
  • Page 233 233
  • Page 234 234
  • Page 235 235
  • Page 236 236
  • Page 237 237
  • Page 238 238
  • Page 239 239
  • Page 240 240
  • Page 241 241
  • Page 242 242
  • Page 243 243
  • Page 244 244
  • Page 245 245
  • Page 246 246
  • Page 247 247
  • Page 248 248
  • Page 249 249
  • Page 250 250
  • Page 251 251
  • Page 252 252
  • Page 253 253
  • Page 254 254
  • Page 255 255
  • Page 256 256
  • Page 257 257
  • Page 258 258
  • Page 259 259
  • Page 260 260
  • Page 261 261
  • Page 262 262
  • Page 263 263
  • Page 264 264
  • Page 265 265
  • Page 266 266
  • Page 267 267
  • Page 268 268
  • Page 269 269
  • Page 270 270
  • Page 271 271
  • Page 272 272
  • Page 273 273
  • Page 274 274
  • Page 275 275
  • Page 276 276
  • Page 277 277
  • Page 278 278
  • Page 279 279
  • Page 280 280
  • Page 281 281
  • Page 282 282
  • Page 283 283
  • Page 284 284
  • Page 285 285
  • Page 286 286
  • Page 287 287
  • Page 288 288
  • Page 289 289
  • Page 290 290
  • Page 291 291
  • Page 292 292
  • Page 293 293
  • Page 294 294
  • Page 295 295
  • Page 296 296
  • Page 297 297
  • Page 298 298
  • Page 299 299
  • Page 300 300
  • Page 301 301
  • Page 302 302
  • Page 303 303
  • Page 304 304
  • Page 305 305
  • Page 306 306
  • Page 307 307
  • Page 308 308
  • Page 309 309
  • Page 310 310
  • Page 311 311
  • Page 312 312
  • Page 313 313
  • Page 314 314
  • Page 315 315
  • Page 316 316
  • Page 317 317
  • Page 318 318
  • Page 319 319
  • Page 320 320
  • Page 321 321
  • Page 322 322
  • Page 323 323
  • Page 324 324
  • Page 325 325
  • Page 326 326
  • Page 327 327
  • Page 328 328
  • Page 329 329
  • Page 330 330
  • Page 331 331
  • Page 332 332
  • Page 333 333
  • Page 334 334
  • Page 335 335
  • Page 336 336
  • Page 337 337
  • Page 338 338
  • Page 339 339
  • Page 340 340
  • Page 341 341
  • Page 342 342
  • Page 343 343
  • Page 344 344
  • Page 345 345
  • Page 346 346
  • Page 347 347
  • Page 348 348
  • Page 349 349
  • Page 350 350
  • Page 351 351
  • Page 352 352
  • Page 353 353
  • Page 354 354
  • Page 355 355
  • Page 356 356
  • Page 357 357
  • Page 358 358
  • Page 359 359
  • Page 360 360
  • Page 361 361
  • Page 362 362
  • Page 363 363
  • Page 364 364
  • Page 365 365
  • Page 366 366
  • Page 367 367
  • Page 368 368
  • Page 369 369
  • Page 370 370
  • Page 371 371
  • Page 372 372
  • Page 373 373
  • Page 374 374
  • Page 375 375
  • Page 376 376
  • Page 377 377
  • Page 378 378
  • Page 379 379
  • Page 380 380
  • Page 381 381
  • Page 382 382
  • Page 383 383
  • Page 384 384
  • Page 385 385
  • Page 386 386
  • Page 387 387
  • Page 388 388
  • Page 389 389
  • Page 390 390
  • Page 391 391
  • Page 392 392
  • Page 393 393
  • Page 394 394
  • Page 395 395
  • Page 396 396
  • Page 397 397
  • Page 398 398
  • Page 399 399
  • Page 400 400
  • Page 401 401
  • Page 402 402
  • Page 403 403
  • Page 404 404
  • Page 405 405
  • Page 406 406
  • Page 407 407
  • Page 408 408
  • Page 409 409
  • Page 410 410
  • Page 411 411
  • Page 412 412
  • Page 413 413
  • Page 414 414
  • Page 415 415
  • Page 416 416
  • Page 417 417
  • Page 418 418
  • Page 419 419
  • Page 420 420
  • Page 421 421
  • Page 422 422
  • Page 423 423
  • Page 424 424
  • Page 425 425
  • Page 426 426
  • Page 427 427
  • Page 428 428
  • Page 429 429
  • Page 430 430
  • Page 431 431
  • Page 432 432
  • Page 433 433
  • Page 434 434
  • Page 435 435
  • Page 436 436
  • Page 437 437
  • Page 438 438
  • Page 439 439
  • Page 440 440
  • Page 441 441
  • Page 442 442
  • Page 443 443
  • Page 444 444
  • Page 445 445
  • Page 446 446
  • Page 447 447
  • Page 448 448
  • Page 449 449
  • Page 450 450
  • Page 451 451
  • Page 452 452
  • Page 453 453
  • Page 454 454
  • Page 455 455
  • Page 456 456
  • Page 457 457
  • Page 458 458
  • Page 459 459
  • Page 460 460
  • Page 461 461
  • Page 462 462
  • Page 463 463
  • Page 464 464
  • Page 465 465
  • Page 466 466
  • Page 467 467
  • Page 468 468
  • Page 469 469
  • Page 470 470
  • Page 471 471
  • Page 472 472
  • Page 473 473
  • Page 474 474
  • Page 475 475
  • Page 476 476
  • Page 477 477
  • Page 478 478
  • Page 479 479
  • Page 480 480
  • Page 481 481
  • Page 482 482
  • Page 483 483
  • Page 484 484
  • Page 485 485
  • Page 486 486
  • Page 487 487
  • Page 488 488
  • Page 489 489
  • Page 490 490
  • Page 491 491

Adobe Premiere Pro CS4 Operating instructions

Category
Graphics software
Type
Operating instructions

Ask a question and I''ll find the answer in the document

Finding information in a document is now easier with AI