HTC Arrive Sprint Quick start guide
- Category
- Smartphones
- Type
- Quick start guide

©2011 Sprint. SPRINT and the logo are trademarks of Sprint.
Other marks are the property of their respective owners.
1/20/11
www.sprint.com
Basics Guide

Table of Contents
1. Device Basics . . . . . . . . . . . . . . . . . . . . . . . . 1
Your Device . . . . . . . . . . . . . . . . . . . . . . . . . . . . . . . . 2
Turning Your Device On and Off . . . . . . . . . . . . . . 4
Hubs . . . . . . . . . . . . . . . . . . . . . . . . . . . . . . . . . . . . . . 5
What Do the Icons on My Device Mean? . . . . . . 6
Battery and Charger . . . . . . . . . . . . . . . . . . . . . . . . 8
Displaying Your Phone Number . . . . . . . . . . . . . 10
Making and Answering Calls . . . . . . . . . . . . . . . . 11
Entering Text . . . . . . . . . . . . . . . . . . . . . . . . . . . . . . 15
2. Settings . . . . . . . . . . . . . . . . . . . . . . . . . . . . 19
Personalization Settings . . . . . . . . . . . . . . . . . . . . 19
Sound Settings . . . . . . . . . . . . . . . . . . . . . . . . . . . 20
Display Settings . . . . . . . . . . . . . . . . . . . . . . . . . . 22
Location Settings . . . . . . . . . . . . . . . . . . . . . . . . . 22
Airplane Mode . . . . . . . . . . . . . . . . . . . . . . . . . . . 23
TTY Use With Sprint Service . . . . . . . . . . . . . . . 23
Security Settings . . . . . . . . . . . . . . . . . . . . . . . . . . . 24
Email and Account Settings . . . . . . . . . . . . . . . . 27
Date & Time Settings . . . . . . . . . . . . . . . . . . . . . . 31
3. Contacts . . . . . . . . . . . . . . . . . . . . . . . . . . . 32
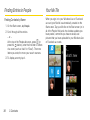
About the People Hub . . . . . . . . . . . . . . . . . . . . . 32
Viewing Your Contacts and Their Feeds . . . . . . 32
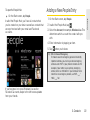
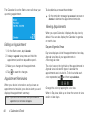
Adding a New People Entry . . . . . . . . . . . . . . . . 33
Saving a Phone Number . . . . . . . . . . . . . . . . . . . 34
Viewing Contact Information . . . . . . . . . . . . . . . . 34
Merging Entries in People . . . . . . . . . . . . . . . . . . 35
Editing an Entry in People . . . . . . . . . . . . . . . . . . 36
Finding Entries in People . . . . . . . . . . . . . . . . . . . 38
Your Me Tile . . . . . . . . . . . . . . . . . . . . . . . . . . . . . . 38
4. Calendar & Tools . . . . . . . . . . . . . . . . . . . 39
Calendar . . . . . . . . . . . . . . . . . . . . . . . . . . . . . . . . . 39
Calculator . . . . . . . . . . . . . . . . . . . . . . . . . . . . . . . . 43
Microsoft Office Mobile 2010 . . . . . . . . . . . . . . . . 43
5. Voice Services . . . . . . . . . . . . . . . . . . . . . 45
Automatic Speech Recognition (ASR) . . . . . . . . 45
Tip: Looking for something? If you don’t see it in the headings
listed here, try the Index on page 122.

6. Camera & Multimedia . . . . . . . . . . . . . . . . 47
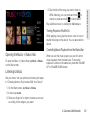
Taking Pictures and Capturing Videos . . . . . . . . 47
Viewing Pictures and Videos Using the
Pictures Hub . . . . . . . . . . . . . . . . . . . . . . . . . . . . . 50
Getting Your Media Files to Your Device
Using Zune . . . . . . . . . . . . . . . . . . . . . . . . . . . . . . . 52
Using the Music + Videos Hub . . . . . . . . . . . . . . 52
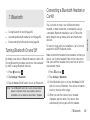
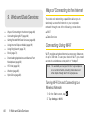
7. Bluetooth . . . . . . . . . . . . . . . . . . . . . . . . . . . 55
Turning Bluetooth On and Off . . . . . . . . . . . . . . 55
Connecting a Bluetooth Headset or Car Kit . . 55
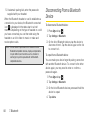
Disconnecting From a Bluetooth Device . . . . . 56
8. Sprint Service: The Basics . . . . . . . . . . . 57
Voicemail . . . . . . . . . . . . . . . . . . . . . . . . . . . . . . . . . 57
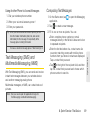
Text Messaging (SMS) and Multimedia
Messaging (MMS) . . . . . . . . . . . . . . . . . . . . . . . . 59
Caller ID . . . . . . . . . . . . . . . . . . . . . . . . . . . . . . . . . 63
Call Waiting . . . . . . . . . . . . . . . . . . . . . . . . . . . . . . 63
Making a 3-Way Call . . . . . . . . . . . . . . . . . . . . . . 64
Call Forwarding . . . . . . . . . . . . . . . . . . . . . . . . . . . 64
9. Web and Data Services . . . . . . . . . . . . . 66
Ways of Connecting to the Internet . . . . . . . . . . 66
Connecting Using Wi-Fi . . . . . . . . . . . . . . . . . . . . 66
Getting Started With Data Services . . . . . . . . . . 68
Using Internet Explorer Mobile . . . . . . . . . . . . . . 69
Using Bing Search . . . . . . . . . . . . . . . . . . . . . . . . 73
Email . . . . . . . . . . . . . . . . . . . . . . . . . . . . . . . . . . . . 74
Downloading Applications and Games
From Marketplace . . . . . . . . . . . . . . . . . . . . . . . . . 80
HTC Hub . . . . . . . . . . . . . . . . . . . . . . . . . . . . . . . . 80
Weather . . . . . . . . . . . . . . . . . . . . . . . . . . . . . . . . . . 82
Sprint Zone . . . . . . . . . . . . . . . . . . . . . . . . . . . . . . . 84
10. Games . . . . . . . . . . . . . . . . . . . . . . . . . . . . . 85
Signing Into Xbox LIVE . . . . . . . . . . . . . . . . . . . . . 85
Games Hub . . . . . . . . . . . . . . . . . . . . . . . . . . . . . . 86
Downloading and Installing
Xbox LIVE Extras . . . . . . . . . . . . . . . . . . . . . . . . . . 86
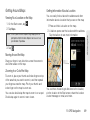
11. GPS Navigation . . . . . . . . . . . . . . . . . . . . . 87
GPS and Location Services . . . . . . . . . . . . . . . . . 87
TeleNav GPS Navigator . . . . . . . . . . . . . . . . . . . . 87
Bing Maps . . . . . . . . . . . . . . . . . . . . . . . . . . . . . . . . 88

12. Important Safety Information . . . . . . . . . 92
Important Health Information and
Safety Precautions . . . . . . . . . . . . . . . . . . . . . . . . 92
General Precautions . . . . . . . . . . . . . . . . . . . . . . . 99
Additional Safety Information . . . . . . . . . . . . . . 102
Regulatory Agency Identifications . . . . . . . . . . 108
Federal Communication Commission
Interference Statement . . . . . . . . . . . . . . . . . . . . 109
SAR Information . . . . . . . . . . . . . . . . . . . . . . . . . . 112
Telecommunications & Internet
Association (TIA) Safety Information . . . . . . . . . 113
WEEE Notice . . . . . . . . . . . . . . . . . . . . . . . . . . . . . 114
RoHS Compliance . . . . . . . . . . . . . . . . . . . . . . . . 115
Owner’s Record . . . . . . . . . . . . . . . . . . . . . . . . . . 115
Basics Guide Proprietary Notices . . . . . . . . . . . 116
13. Manufacturer’s Warranty . . . . . . . . . . . . 117
Manufacturer’s Warranty . . . . . . . . . . . . . . . . . . . 118
Privacy Restrictions . . . . . . . . . . . . . . . . . . . . . . 120
Weather Disclaimer . . . . . . . . . . . . . . . . . . . . . . 120
Warranty Disclaimer . . . . . . . . . . . . . . . . . . . . . . 120
Limitation of Damages . . . . . . . . . . . . . . . . . . . . . 121
Index. . . . . . . . . . . . . . . . . . . . . . . . . . . . . . . . . . . 122
Consejo: Para encontrar en guía para usuarios en español,
por favor visita a
www.sprint.com y haz clic en
Support > Devices.
To find a user guide in Spanish, please visit
www.sprint.com and click Support > Devices.
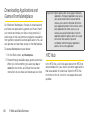
Important Privacy Message – Sprint’s policies often do not
apply to third-party applications. Third-party applications may
access your personal information or require Sprint to disclose
your customer information to the third-party application
provider. To find out how a third-party application will collect,
access, use, or disclose your personal information, check the
application provider’s policies, which can usually be found on
their website. If you aren’t comfortable with the third-party
application’s policies, don’t use the application.

1. Device Basics 1
Device Basics
⽧ Your Device (page 2)
⽧ Turning Your Device On and Off (page 4)
⽧ Hubs (page 5)
⽧ What Do the Icons on My Device Mean? (page 6)
⽧ Battery and Charger (page 8)
⽧ Displaying Your Phone Number (page 10)
⽧ Making and Answering Calls (page 11)
⽧ Entering Text (page 15)
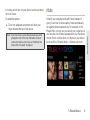
Your new HTC Arrive
TM
and Sprint can get you to
everything you love easier and faster. With glance and
go access through the Start screen and live tiles, you’ll
be able to see your upcoming appointments, recent
activity by contacts, new photos, and more. Use the
information in this section to get to know your device
better.
1. Device Basics
Tip: Device Software Upgrades – Updates to your device’s
software may become available from time to time. Each
time you connect your device to your computer and start
the Zune software, you’ll be notified of any new updates.

21. Device Basics
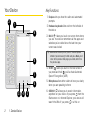
Your Device
Key Functions
1. Earpiece lets you hear the caller and automated
prompts.
2. Hardware keyboard slides out from the left side of
the device.
3. BACK ( ) takes you back one screen from where
you are. Your device remembers all the apps and
websites you’ve visited since the last time your
screen was locked.
4. START ( ) takes you back to the Start screen. If
you press and hold , you’ll activate Automatic
Speech Recognition (ASR).
5. Microphone allows other callers to hear you clearly
when you are speaking to them.
6. SEARCH () allows you to search information
anywhere on your device. If you press from the
Start screen or in Internet Explorer, your device will
search the Web. If you press in a Hub or
1
2
3 4 5
6
7
9
8
Tip: Back works differently when you’re in Internet Explorer
Mobile. If you’re browsing the Web and press Back, you’ll
return to the previous Web page you visited, rather than
the previous app.

1. Device Basics 3
Device Basics
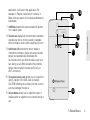
application, it will search the application. For
example, in People, it searches for contacts; in
Maps, it lets you search for locations, addresses, or
businesses.
7. CAMERA activates the camera to take still photos
or to capture video.
8. Touchscreen displays all the information needed to
operate your device. It lets you select, navigate,
enter information, and control everything by touch.
9. Notification LED provides the device status or
notification information. It also acts as a proximity
sensor and automatically deactivates the
touchscreen when you hold the device near your
face during a call. When activated, the proximity
sensor does not affect the device’s 3G, 4G, or
Wi-Fi connection.
10. Charger/Accessory Jack allows you to connect the
device charger or the USB cable (included).
CAUTION! Inserting an accessory into the incorrect
jack may damage the device.
11 . Volume Button allows you to adjust the ringer or
media volume or adjust the voice volume during a
call.
10
11
12
13
14
15
16

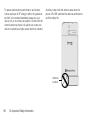
41. Device Basics
12.
Camera Lens lets you take pictures and videos.
13. Speaker lets you hear the different ringers and
sounds. The speaker also lets you hear the caller’s
voice in speakerphone mode.
14 . Flash helps illuminate subjects in low-light
environments when the camera is focusing and
capturing a photo or video.
15. 3.5 mm Headset Jack allows you to plug in the
included stereo headset or an optional headset for
convenient, hands-free conversations. CAUTION!
Inserting an accessory into the incorrect jack may
damage the device.
16. Power Button lets you turn the device or screen on
or off.
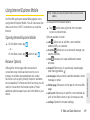
Turning Your Device On and Off
Turning Your Device On
䊳 Press at the top of the device.
Turning Your Device Off
䊳 Press and hold for about two seconds.
Turning the Screen Off When Not in Use
(Sleep Mode)
To save battery power, the device automatically turns
off the screen after a certain period of time when you
leave it idle. You will still be able to receive messages
and calls while the device’s screen is off.
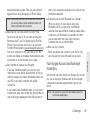
You can also turn off and lock the screen by pressing
. Pressing again or receiving an
Note: When the screen is locked and you press , it will
only turn off the screen and not the device. You will
need to unlock the screen first before you press and
hold to turn the device off. See “Turning the
Screen Off When Not in Use (Sleep Mode)” for details.

1. Device Basics 5
Device Basics
incoming call will turn on your device screen and show
the lock screen.
To unlock the screen:
䊳 Touch the wallpaper anywhere and slide your
finger towards the top of the device.
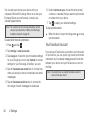
Hubs
Simplify your everyday tasks with Hubs. Instead of
going in and out of various apps, Hubs automatically
tie together related experiences. For example, in the
People Hub, not only can you see all your contacts, but
you can also check status updates from your Facebook
friends. Check out the other cool Hubs on your device
such as Office, Pictures, Music + Videos, and more.
Note: If you have set up a screen lock password, you will be
prompted to enter it. For more information on how to
create and enable a screen lock, see “Protecting Your
Device With a Password” on page 24.

61. Device Basics
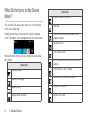
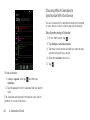
What Do the Icons on My Device
Mean?
You can tell a lot about your device by checking the
icons in its status bar.
Simply tap the top of the screen to show the status
icons. The status icons disappear after a few seconds.
Here are some of the icons you might see and what
they mean:
Status Bar
Signal strength
Battery is charging
Battery is full
Battery state unknown
Airplane mode is turned on
Roaming
Calls are being forwarded based on the
network settings
3G data service
1xRTT data service
Wi-Fi enabled but not connected to a Wi-Fi
network
Connected to a Wi-Fi network
Connected to a Bluetooth headset
Ringer set to vibrate
Ringer set to silent
Status Bar

1. Device Basics 7
Device Basics
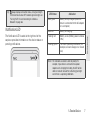
Notification LED
The Notification LED located at the right end of the
earpiece provides information on the device status or
pending notifications.
Tip: always displays connection status, not signal strength.
To find out how to view Wi-Fi network signal strength, see
“Turning Wi-Fi On and Connecting to a Wireless
Network” on page 66.
LED Status Indication
Solid green Battery is fully charged (when the
device is connected to the AC adapter
or a computer).
Solid red Battery is charging.
Flashing red Battery is low. (Battery power is below
14% .)
Flashing green You have a pending notification (for
example, a new message or a missed
call).
Note: The indicators are listed in order of priority. For
example, if your device is connected to a power
adapter and is charging the battery, the LED will be
solid red and will not switch to a flashing green light
even if there is a pending notification.

81. Device Basics
Battery and Charger
Sprint-approved or HTC-approved batteries and
accessories can be found at Sprint Stores or through
HTC; or call
1-866-866-7509 to order. They’re also
available at
www.sprint.com.
About the Battery
Your device uses a rechargable battery. How long the
battery lasts before it needs recharging depends on
how you use your device, including the device features
and accessories you use. For example, always leaving
your Bluetooth connection on, long phone calls, and
frequent Web browsing all use more power. Poor signal
strength from your mobile network and extreme
temperatures can also drain your battery quickly.
Battery Capacity
Your device is equipped with a rechargeable battery.
The battery provides up to 6 hours of continuous talk
time.
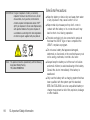
WARNING: Use only Sprint-approved or HTC-approved
batteries and chargers with your device. The
failure to use an Sprint-approved or
HTC-approved battery and charger may
increase the risk that your device will overheat,
catch fire, or explode, resulting in serious bodily
injury, death, or property damage.
Note: Long backlight settings, searching for service, vibrate
mode, browser use, and other variables may reduce
the battery’s talk and standby times.
Tip: Watch your device’s battery level indicator and charge
the battery before it runs out of power.

1. Device Basics 9
Device Basics
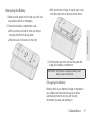
Removing the Battery
1. Make sure the power is off so that you don’t lose
any stored numbers or messages.
2. Remove the battery compartment cover.
䡲 With your device turned off, hold your device
securely with the front facing down.
䡲 Slide the back of the device to the right.
䡲 With your thumb or finger, lift up the back cover
from the small notch at the side of the device.
3. Lift the battery out at the notch at the lower left
edge of the battery compartment.
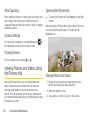
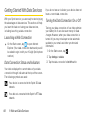
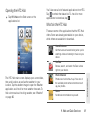
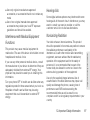
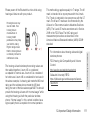
Charging the Battery
Keeping track of your battery’s charge is important. If
your battery level becomes too low, your device
automatically turns off, and you will lose any
information you were just working on.
WARNING: Do not handle a damaged or leaking Li-Ion
battery as you can be burned.

10 1. Device Basics
Always use a Sprint-approved or HTC-approved
desktop charger, travel charger, or vehicle power
adapter to charge your battery.
1. Insert the small end of the USB cord into the
charger/accessory jack on the lower left side of
your device.
2. Insert the larger end of the USB cord into the AC
adapter.
3. Plug the AC adapter in to an electrical outlet to
start charging the battery.
While the battery is charging, you will see a solid red
Notification LED. If the device is on and not in sleep
mode, you will also see the charging battery icon
( ). Once fully charged, you will see a solid green
Notification LED and a full battery icon ( ) in the
status bar.
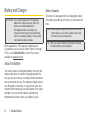
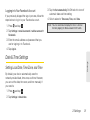
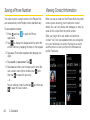
Displaying Your Phone Number
䊳 Tap Phone on the Start screen, tap , and
then tap
call settings. You’ll see the following
information:
Tip: With the Sprint-approved Li-ion battery, you can recharge
the battery before it becomes completely run down.
Setting Description
My phone number
Displays your phone number
Voicemail number
Shows the current voicemail
service being used. Tap to change
the voicemail number.
International assist
Turn international assist on or off.
Long tones
Turn long tones on or off.

1. Device Basics 11
Device Basics
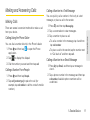
Making and Answering Calls
Making Calls
There are several convenient methods to make a call
from your device.
Calling Using the Phone Dialer
You can dial a number directly in the Phone’s dialer.
1. Press and then tap to open the Phone
application.
2. Tap to display the dialpad.
3. Dial the number you want and then tap call.
Calling a Number From People
1. Press and then tap People.
2. Tap call [number type] to place the call (for
example, tap
call mobile to call the contact’s mobile
number).
Calling a Number in a Text Message
You can quickly call a number in the body of a text
message, or place a call to the sender.
1. Press , and then tap Messaging.
2. Tap a conversation to view messages.
3. Tap a number to place a call.
䡲 To call a number in the message, tap it and then
tap
call number.
䡲 To place a call to the sender, tap the number next
to “Call back at” and then tap
call.
Calling a Number in an Email Message
1. Press , tap Email, and then tap a message to
view it.
2. Tap a phone number in the message and then tap
call number. Available phone numbers will be
underlined.

12 1. Device Basics
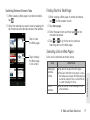
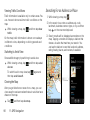
Receiving Calls
When you receive a phone call from a contact, the
incoming call screen appears and displays the caller
ID icon, name, and phone number of the calling party.
When you receive a phone call from someone who is
not stored in People, only the default caller ID icon and
phone number appear on the incoming call screen.
Answering an Incoming Call
䢇 If the display is on, tap answer.
䢇 If the display is off, when the lock screen appears,
slide up from the bottom of the lock screen, and then
tap
answer.
Muting the Ringer
To mute the ringer without rejecting the call, you can do
any of the following:
䢇 Press the volume button up or down.
䢇 Press .
䢇 Place the device face down on a level surface.
Rejecting an Incoming Call
䢇 If the display is on, tap ignore.
䢇 When the lock screen appears, slide up from the
bottom of the lock screen, and then tap
ignore.
Ending a Call
䊳 Tap end call.
Missed Call Notification
When you do not answer an incoming call, you will see
the missed call icon with the number of missed calls
on the lock screen.
You will also see the number of missed calls on the
Phone tile.
Note: If your device is turned off, all calls automatically go to
voicemail.
Note: If your device is already facing down, the device will still
ring when there are subsequent incoming calls.

1. Device Basics 13
Device Basics
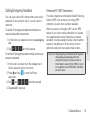
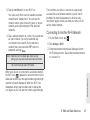
Calling Emergency Numbers
You can place calls to 911 without entering the device
password (if one has been set) or if your account is
restricted.
To call the 911 emergency number when the device’s
screen is locked with a screen lock:
1. On the enter your password screen, tap emergency
call.
2. Tap , and then tap call.
To call the 911 emergency number normally or when your
account is restricted:
1. If the screen is locked, touch the wallpaper and
slide it upward to unlock the screen.
2. Press and tap to open the Phone
application.
3. Tap , tap , and then tap call.
4. Tap end call to hang up.
Enhanced 911 (E911) Information
This device features an embedded Global Positioning
System (GPS) chip necessary for utilizing E911
emergency location services where available.
When you place an emergency 911 call, the GPS
feature of your device seeks information to calculate
your approximate location. Depending on several
variables, including availability and access to satellite
signals, it may take up to 30 seconds or more to
determine and report your approximate location.
Important: Always report your location to the 911 operator
when placing an emergency call.
Some
designated emergency call takers, known as
Public Safety Answering Points (PSAPs), may not
be equipped to receive GPS location information
from your device.

14 1. Device Basi cs
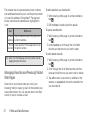
In-Call Options
When a call is in progress, use the onscreen buttons to
mute or unmute the microphone or to turn the
speakerphone on or off. You can choose whether to
add a call, place the call on hold, and more.
Switching Between Calls
If you’re already on a call and accept another call, you
can choose to switch between the two calls.
1. When you receive another call, tap answer to
accept the second call, and to put the first call on
hold.
2. To switch between the calls, tap the bar at the top
of the screen.
3. To end the current call and return to the other call,
tap
end call.
Turning the Speakerphone On or Off During a
Call
1. Tap .
2. Tap speaker. Tap speaker again to turn off the
speakerphone.
Muting the Microphone During a Call
1. Tap .
2. Tap mute. Tap mute again to turn on the
microphone.
Ending a Call
䊳 On the screen, tap end call.
WARNING: Make sure you don’t have the device against
your ear when you have the speakerphone on. It
may damage your hearing.
Tip: If the phone display is off, press to turn on the
screen so you can tap end call.

1. Device Basics 15
Device Basics
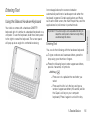
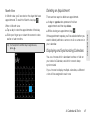
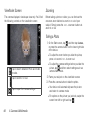
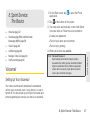
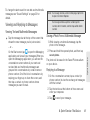
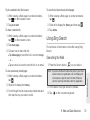
Entering Text
Using the Slideout Hardware Keyboard
Your device comes with a hardware QWERTY
keyboard, which is similar to a standard keyboard on a
computer. To use the keyboard, slide the screen panel
to the right to reveal the keyboard. The screen panel
will pop up at an angle for comfortable viewing.
In most applications, the screen orientation
automatically switches to landscape mode when the
keyboard is opened. Certain applications and Hubs,
such as the Start screen, the main People Hub, and the
applications list, will remain in portrait mode.
Entering Text
You can do the following with the hardware keyboard:
䢇 To type numbers and lowercase letters, press the
keys using your thumbs or fingers.
䢇 Press the following keys to enter uppercase letters,
special characters, or symbols:
䡲 Shift key ()
● Press once to capitalize the next letter you
select.
● Press and hold to lock the key and type a
series of uppercase letters (this works just like
the Caps Lock key on your computer
keyboard). Press it again to unlock the key.
Important: The screen angle is non-adjustable. Do not try to
adjust the screen past its maximum angle. Doing
so will damage the device.

16 1. Device Basics
䡲 Function key ()
● To enter the symbol or punctuation mark that
is shown at the upper right corner of a key,
press , and then press the corresponding
key.
● Press and hold to lock the key and type a
series of special characters. Press it again to
unlock the key.
䡲 To open the Symbol Pad, press ( ). This allows
you to enter symbols and numbers using the
onscreen keyboard.
䡲 Press ( ) to insert a hard return when typing.
䡲 Press the arrow keys ( , , , or ) for
directional movement.
䡲 To delete the previous character, press ( ).
Press and hold to continue deleting.
䡲 Press ( ) and then tap an icon to insert a
smiley.
䡲 For special characters, press a letter and then
press ( ) to select the character from the
onscreen menu. For example, press “a” and then
press ( ) and then tap an option to enter æ, à,
and more.
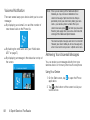
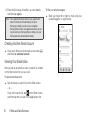
Using the Onscreen Keyboard
When you start an application or select a box that
requires you to enter text or numbers, you will see the
onscreen keyboard.
Changing to Landscape Orientation
When entering text, you can choose to use the
landscape orientation of the onscreen keyboard by
turning the device sideways. This pops up a larger
keyboard that lets you type easily using two thumbs
Note: The landscape orientation keyboard is not supported in
all applications.
Page is loading ...
Page is loading ...
Page is loading ...
Page is loading ...
Page is loading ...
Page is loading ...
Page is loading ...
Page is loading ...
Page is loading ...
Page is loading ...
Page is loading ...
Page is loading ...
Page is loading ...
Page is loading ...
Page is loading ...
Page is loading ...
Page is loading ...
Page is loading ...
Page is loading ...
Page is loading ...
Page is loading ...
Page is loading ...
Page is loading ...
Page is loading ...
Page is loading ...
Page is loading ...
Page is loading ...
Page is loading ...
Page is loading ...
Page is loading ...
Page is loading ...
Page is loading ...
Page is loading ...
Page is loading ...
Page is loading ...
Page is loading ...
Page is loading ...
Page is loading ...
Page is loading ...
Page is loading ...
Page is loading ...
Page is loading ...
Page is loading ...
Page is loading ...
Page is loading ...
Page is loading ...
Page is loading ...
Page is loading ...
Page is loading ...
Page is loading ...
Page is loading ...
Page is loading ...
Page is loading ...
Page is loading ...
Page is loading ...
Page is loading ...
Page is loading ...
Page is loading ...
Page is loading ...
Page is loading ...
Page is loading ...
Page is loading ...
Page is loading ...
Page is loading ...
Page is loading ...
Page is loading ...
Page is loading ...
Page is loading ...
Page is loading ...
Page is loading ...
Page is loading ...
Page is loading ...
Page is loading ...
Page is loading ...
Page is loading ...
Page is loading ...
Page is loading ...
Page is loading ...
Page is loading ...
Page is loading ...
Page is loading ...
Page is loading ...
Page is loading ...
Page is loading ...
Page is loading ...
Page is loading ...
Page is loading ...
Page is loading ...
Page is loading ...
Page is loading ...
Page is loading ...
Page is loading ...
Page is loading ...
Page is loading ...
Page is loading ...
Page is loading ...
Page is loading ...
Page is loading ...
Page is loading ...
Page is loading ...
Page is loading ...
Page is loading ...
Page is loading ...
Page is loading ...
Page is loading ...
Page is loading ...
Page is loading ...
Page is loading ...
Page is loading ...
-
 1
1
-
 2
2
-
 3
3
-
 4
4
-
 5
5
-
 6
6
-
 7
7
-
 8
8
-
 9
9
-
 10
10
-
 11
11
-
 12
12
-
 13
13
-
 14
14
-
 15
15
-
 16
16
-
 17
17
-
 18
18
-
 19
19
-
 20
20
-
 21
21
-
 22
22
-
 23
23
-
 24
24
-
 25
25
-
 26
26
-
 27
27
-
 28
28
-
 29
29
-
 30
30
-
 31
31
-
 32
32
-
 33
33
-
 34
34
-
 35
35
-
 36
36
-
 37
37
-
 38
38
-
 39
39
-
 40
40
-
 41
41
-
 42
42
-
 43
43
-
 44
44
-
 45
45
-
 46
46
-
 47
47
-
 48
48
-
 49
49
-
 50
50
-
 51
51
-
 52
52
-
 53
53
-
 54
54
-
 55
55
-
 56
56
-
 57
57
-
 58
58
-
 59
59
-
 60
60
-
 61
61
-
 62
62
-
 63
63
-
 64
64
-
 65
65
-
 66
66
-
 67
67
-
 68
68
-
 69
69
-
 70
70
-
 71
71
-
 72
72
-
 73
73
-
 74
74
-
 75
75
-
 76
76
-
 77
77
-
 78
78
-
 79
79
-
 80
80
-
 81
81
-
 82
82
-
 83
83
-
 84
84
-
 85
85
-
 86
86
-
 87
87
-
 88
88
-
 89
89
-
 90
90
-
 91
91
-
 92
92
-
 93
93
-
 94
94
-
 95
95
-
 96
96
-
 97
97
-
 98
98
-
 99
99
-
 100
100
-
 101
101
-
 102
102
-
 103
103
-
 104
104
-
 105
105
-
 106
106
-
 107
107
-
 108
108
-
 109
109
-
 110
110
-
 111
111
-
 112
112
-
 113
113
-
 114
114
-
 115
115
-
 116
116
-
 117
117
-
 118
118
-
 119
119
-
 120
120
-
 121
121
-
 122
122
-
 123
123
-
 124
124
-
 125
125
-
 126
126
-
 127
127
-
 128
128
-
 129
129


HTC Arrive Sprint Quick start guide
- Category
- Smartphones
- Type
- Quick start guide
Ask a question and I''ll find the answer in the document
Finding information in a document is now easier with AI
Related papers
Other documents
-
Sprint Nextel PG86100 User manual
-
Samsung Epic 4G Sprint User guide
-
-
LG Optimus S User manual
-
-
-
-
KYOCERA 2001832 User manual
-
-
LG LS LS855 Sprint User guide