Page is loading ...

P
ermanent - Bayonet Mount
97652 Rev. C (04.05.18)
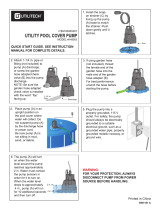
Congratulations and thank you for purchasing a Thetford product.
Owner’s &
Installation Manual
Contents
Installation 2
Operation 7
Troubleshooting 9
Service Kits 25
Contenu
Installation 12
Mode d’emploi 21
Dépannage 24
Ensembles de réparation 25
Contenido
Instalación 12
Operación 21
Resolución de problemas 24
Juegos de servicio 25

2
SANICON
®
Turbo Model 400S - Permanent Bayonet Mount 97652 Rev. C (04.05.18)
Installation
Overview
Follow the instructions below to attach the SANICON® 400S to
the RV coach.
Read and understand the warnings listed in this docu-
ment before you install, operate, or service this system. If
you do not obey these warnings there is a risk of property
loss, injury, or electrocution. Do not make any changes to
this unit as this could result in property damage, injury, or
electrocution.
Thetford Corporation accepts no responsibility or liability for
damage to equipment, injury, or death that may result from the
system’s improper installation, service, or operation.
Thetford Corporation recommends that plumbing and electrical
work be performed by a licensed tradesperson. Local permit and
code compliance is required.
Contents
■ (1x) SANICON® Turbo 400S Assembly - with OT (over-
temperature) protected pump
■ (1x) Hose and Nozzle Assembly with nozzle caps
■ (1x) Hanger Strap
■ (1x) Fuse Holder
■ 35 AMP Fuse
■ (1x) Switch Box Assembly
■ (2x) Electrical Connectors
■ Owner’s & Installation Manual
■ (2x) Labels with serial #
■ Pipe Hanger
■ (1x) 1/4” Bolt and Nut
■
Required Materials (Not Provided)
■ Plumbing and End Caps (if necessary)
■ Wiring
■ Mounting Hardware
■ Schedule 30, 40, 80, or DWV rated hard pipe fi ttings or
minimum 10 PSI fl exible pipe rating for pressure side of
pump.
General Guidelines
Gray water bypass can be achieved by plumbing the discharge
line in a manner that gravity can allow liquid to fl ow to the hose
with no upward plumbing.
All systems rely on gravity to move the liquid waste to the pump;
therefore, make sure that the pump inlet is mounted below the RV
holding tank.
Plan the installation so that the pump does not extend beyond the
side of the coach
NOTICE
AVIS
AVISO
CAUTION
!
ATTENTION
!
ATTENTION
ATTENTION
!
ATENCIÓN
ATTENTION
!
DANGER
Each assembly comes with two labels. One label should be
placed in the hose compartment; the other should be placed in the
Owner’s & Installation Manual.
■ If black and gray tanks are heated, treat SANICON® Turbo
400S in same manner.
■ Duty Cycle: Intermittent, fi ve minutes continuous operation;
20 minutes off.
■ It is important to plumb hose avoiding sharp angles or
bends during use or storage.
■ Placement of the hose connection MUST be serviceable by
the customer.
Warnings and Cautions
Read and understand the warnings and cautions listed in this
document before you install or operate this unit.
Do not make any changes to this unit, as this could result
in property damage or injury.
Gray and black water tanks MUST BE COMPLETELY
FREE FROM DEBRIS before installing and operating the
pump. Failure to comply with this warning could result in
a voided product warranty and equipment failure.
Plumbing from pump to storage compartment MUST be
plumbed with
Schedule 30, 40, 80, or DWV rated
hard pipe fi ttings or minimum 10 PSI fl exible pipe
rating for pressure side of pump.
The installation site of the pump MUST be able to support
a minimum of 30 pounds.
Plan for suffi cient clearance under the RV once the SANI-
CON® system is installed. Lowest point of unit MUST be
above axles of coach.
The pump is suitable for indoor and outdoor use.
Thermal Cut-Off Switch
Because SANICON
®
Turbo pumps are designed for intermittent
duty, the pump contains a thermal-cut-off switch for your safety.
Typical run time is 15-20 minutes of pumping before the pump
turns itself off and needs to cool for at least 20 minutes before the
thermal-cut-out resets and the pump can run again.
■ If the pump is run immediately after a thermal reset, it will run
for approximately 5-8 minutes.
■ If allowed to cool for several hours it will run the full 20 min-
utes.
Questions?
If you have any questions or need assistance, please contact
Technical Support at 1-800-444-7210, available Monday through
Friday 8 a.m. to 6 p.m., Eastern Standard Time.
NOTICE
AVIS
AVISO
CAUTION
!
NOTICE

97652 Rev. C (04.05.18) SANICON
®
Turbo Model 400S - Permanent Bayonet Mount
3
Orientation
Ref. Description
K1 Pump Assembly
K1.1 1.5” Discharge Port
K1.2 Wire Lead (not shown)
K1.3 3” Bayonet Adapter
K2 1.5” Discharge Hose Assembly (One end connects to pump,
other end connects to nozzle then RV dump station.)
K2.1 Discharge Hose Cuff
K2.2 Universal Nozzle
K2.3 Small Nozzle Cap
K2.4 Large Nozzle Cap
K3 Switch Box / Wiring
K4 Fuse Holder / 35AMP Fuse
K5 Wiring Connectors
K6 3” Pipe Hanger (3.5” inner diameter)
K7 (1x) Pipe Strap
K7.1 Bolt and nut
Fig. 1
K1
K7
K5
Contents
K3
K6
K4
Hose & Nozzle Assembly
K2.3
K2.4
K2
K2.2
K2.1
Fig. 1b
K7.1
Pump Assembly
K1.1
K1.2
K1.3
K1
Fig. 1a
K2
T0000138A

4
SANICON
®
Turbo Model 400S - Permanent Bayonet Mount 97652 Rev. C (04.05.18)
2D
85
86
18G BLU 18G BLU
Fig. 2
Electrical System
Wire Gauge Size Chart
If Wire Gauge for distance from
source* is:
0-18 feet
(Included)
19-32 Feet 33-50 feet Circuit Breaker
12 VOLTS - Install 10 Gauge 8 Gauge 6 Gauge 35 amp
* Distance measured assumes power
and ground wires
Fig. 3
Hose Barb Planning
Regardless of installation selection, plan to minimize stress points on the hose.
90
o
Hose Barb -
Plumbed from Bottom
T000115-1A
RECOMMENDATION: Plumb the hose barb AT OR NEAR BOTTOM of the compartment with the hose barb pointing AWAY
from the RV coach.
NOTICE
90
o
Hose Barb -
Plumbed from Side
T000115-2A
90
o
Hose Barb -
Plumbed from Back
T000115-3A
Switch Box Assembly Pump Assembly
T000090C
2A
K4
2B
K1
K3
2C
Included in product
2D
Ref. Description
2A Battery
2B Relay
2C Over-Temperature Switch (90°C) normally closed
2D Ground
While the pump is turned on, verify electrical system
by measuring voltage at motor; (must be 12V).
Improper installation may cause damage to motor or
decrease pump effi ciency.
The positive and negative wires should be braided to
prevent radio interference during operation.
NOTICE
AVIS
AVISO
CAUTION
!
NOTICE
Ref. Description
K1
Macerator Pump
K3
Macerator Switch
K4 35A Fuse/Breaker
Fig. 2 represents recommended wiring confi guration. Other wiring
confi gurations are possible based on your installation.
■ Wiring confi guration MUST include internal over-tempera-
ture switch and relay for protection of pump.
■ Pump requires a 12-VDC/35 AMP dedicated circuit with 35
AMP breaker or fuse between main bus or battery.
■ Wire size is dependent on distance between pump and
power source. Actual wire sizes should be calculated ac-
cording to installation.

97652 Rev. C (04.05.18) SANICON
®
Turbo Model 400S - Permanent Bayonet Mount
5
Connect Electrical
+
Fuse
BAT
AUX
Fig. 4
Wires should be covered to protect from foreign objects
and water
NOTICE
AVIS
AVISO
CAUTION
!
ATTENTION
!
ATTENTION
ATTENTION
!
ATENCIÓN
ATTENTION
!
DANGER
ART00129C
4A
K4
4B
4A.1
K1.5
K1.4
K1.6
K1
K3
K3.1
Refer to Fig. 1 and Fig. 4.
Ref. Description
4A RV Power Source
4A.1 Power Source Red Wire
4B Ground Lug / Chassis Ground or negative battery terminal
K1 Pump Assembly
K1.4 Pump Black Wire
K1.5 Pump Blue Wire
K1.6 Pump Black Wire - Negative (Long Wire)
K3 Switch Box / Wiring
K3.1 Quick Connects Red Wire
K4 Fuse Holder / 35AMP Fuse
Wire Size
■ Wire size is dependent on the distance between the pump
and power source. Actual wire sizes should be calculated
according to installation. Refer to Fig. 3.
■ Excess wire can be cut to length.
1. Disconnect positive red wire to the RV battery
(4A).
2. Attach the switch box
(K3) inside RV compartment (5D).
3. Route and connect the black and blue switch box leads to
the short black
(K1.4) and blue pump (K1.5) leads using
supplied electrical connectors. To seal heat shrink connectors,
heat the connectors after wires are connected. Connect
additional wiring if required.
4. Route the long black wire (negative)
(K1.6) from the pump
assembly
(K1) to the battery’s (4A) negative terminal, or
to a ground lug on the RV, or to an OEM provided chassis
ground
(4B).
5. Locate the power source (battery or other main power source)
where the electrical connection will be made.
6. Route the red wire
(K3.1) from the switch box (K3) to the
fuse holder
(K4).
7. Crimp one end of the fuse holder to the red wire
(K3.1) and
attach the other end to the red wire
(4A.1).
The fuse holder
(K4) should be mounted within 18 “ of
the power source.
8. Attach the other end of the red wire
(4A.1) to the power
source
(4A).
9. Protect all the wiring for the SANICON® system with a wire
sheath (not provided).
10. Reconnect the red (positive) wire, that was removed in step 1
of this procedure, to the RV’s battery.
NOTICE

6
SANICON
®
Turbo Model 400S - Permanent Bayonet Mount 97652 Rev. C (04.05.18)
Pump Assembly
5A
5C
T000089A
5B
K2
K1
Fig. 5
5E
5D
Ref. Description
K1 Pump Assembly
K2 1.5” Discharge Hose Assembly (One end connects to plumb-
ing, other end connects to nozzle then RV dump
station.)
5A
Plumbing (Hard or fl exible pipe) to discharge hose
5B Gate Valves (black, gray, manual over-ride); number of valves
vary according to each coach setup
5C Hose Storage Compartment
5D RV Sidewall
5E
RV Sewer Outlet
Install the Pump
Refer to Fig. 1, 1A, 1B and Fig. 5.
K1.1 Discharge Port
■ 1.25” rubber coupling should be used to connect hard
plumbing to discharge port.
■ Plumbing should be kept as short as possible to increase
pump effi ciency.
■ Spa hose (sold separately) can be attached directly to the
discharge port. A heat gun may be required to install.
K1.3. 3” Inlet Port
■ Support with 3.5” inner diameter hanger (K6) between
bayonet and pump housing and use pipe strap
(K7) to
attach hanger to RV.
K2.1. Discharge Hose Cuff
■ Hose cuff accepts 1.5” hose barb, should be clamped with
supplied clamp .
■ Hose barb (not supplied) should be securely fastened
inside of discharge hose compartment.
Prepare
■ Evaluate the RV gray and black water outlets (5A) to
determine if the plumbing needs re-configuration.
If the installed unit interferes with the dump valve handles
or extends beyond the side wall of the RV, plumbing
modifi cations to the RV are required. It is recommended
to reconfi gure the RV plumbing with bonded fi ttings, but
off the shelf bayonet fi ttings can be used to relocate the
installed position of the pump. Refer to Fig. 5.
Install
1. Connect bayonet adapter (K1.3) to RV’s drain outlet (5E).
2. Verify installed unit will not interfere with operation of gray
and black water RV dump valve handles
(5B).
3. Verify installed unit will not extend beyond side wall of RV.
4. Drill a hole near end of pipe strap
(K7) with a letter H drill.
5. Attach pipe strap
(K7) to pipe hanger (K6) with the pro-
vided ¼” bolt and nut.
6. Place pipe hanger on pump between pump housing and
the bayonet adapter. Tighten pipe hanger.
7. Fasten other end of pipe strap to the underside of RV to
support the weight of the pump.
8. Attach plumbing (not provided)
(5A) to pump outlet and
route to hose storage compartment.
■ Plumbing should be kept as short as possible to in-
crease pump efficiency. Refer to Fig. 6.
■ Gray water bypass can be achieved by plumbing dis-
charge line in a manner that gravity allows liquid to flow
to the hose with no upward plumbing.
9. Terminate outlet plumbing with 1.5” hose barb (provided
with Thetford storage box) inside hose storage box com-
partment.
10. Attach hose
(K2) and nozzle assembly to 1.5” hose barb
with supplied clamp.
11. Check system for leaks using water.
NOTICE

97652 Rev. C (04.05.18) SANICON
®
Turbo Model 400S - Permanent Bayonet Mount
7
Overview
Congratulations on your purchase of the SANICON
®
400S - the
cleanest, most sanitary, and convenient way to empty your RV
holding tank!
Read and understand the warnings listed in this docu-
ment before you operate or service this system. If you do
not obey these warnings there is a risk of property loss,
injury, or electrocution. Do not make any changes to this
unit as this could result in property damage, injury, or
electrocution.
Thetford Corporation accepts no responsibility or liability for
damage to equipment, injury, or death that may result from the
system’s improper installation, service, or operation.
Thetford Corporation recommends that plumbing and electrical
work be performed by a licensed tradesperson. Local permit and
code compliance is required.
Cautions and Warnings
Read and understand the warnings and cautions listed in this
document before you operate, or service this unit.
Wear appropriate personal protective equipment when
using the SANICON® system.
Do not make any changes to this unit, as this could result
in property damage or injury.
■ Flush only organic human waste and toilet tissue.
Do not fl ush non-dissolving articles such as feminine
hygiene products, paper towels, or moist towelettes,
as this will damage the macerator and will void your
warranty.
■ To avoid pump failure, if you are using an accessory
garden hose on the end of the nozzle, make sure
that the inner diameter of the hose is .75“ (1.9 cm) or
greater.
Questions?
If you have any questions or need assistance, please contact
Customer Service at 1-800-543-1219, available Monday through
Friday 8 a.m. to 6 p.m., Eastern Standard Time.
Inspect pump connection to the RV annually. Make sure
there are no cracks in the rubber coupling and the mount-
ing hardware is secure. Replace when necessary.
Operation
NOTICE
AVIS
AVISO
CAUTION
!
ATTENTION
!
ATTENTION
ATTENTION
!
ATENCIÓN
ATTENTION
!
DANGER
NOTICE
AVIS
AVISO
CAUTION
!
ATTENTION
!
ATTENTION
ATTENTION
!
ATENCIÓN
ATTENTION
!
DANGER
NOTICE
AVIS
AVISO
CAUTION
!
NOTICE
To extend the life of the discharge hose (K2), avoid
sharp bends and stress at hose cuffs and support the
hose within 2”- 5” of cuff
(K2.1) when in use.
NOTICE
Pump Performance
Pumping performance varies with hose size and length
Hose
& Length
Height Flow Rate
(gal/min)
Minutes to
Empty 100
Gallons
SANICON
®
hose 1.5" x
21'
9' 11.1 9
SANICON
®
hose 1.5" x
21'
0 18.7 5
SANICON
®
hose 1.5" x
21' w/ 100' 3/4" garden
hose
9' 0.7 143
SANICON
®
hose 1.5" x
21' w/ 100' 3/4" garden
hose
0 3.7 27
SANICON
®
hose 1.5" x
21' w/ 50' 3/4" garden
hose
0 6.2 16
i
i
Thermal cut-off will occur after 20 minutes. Refer to
“Thermal Cut-Off Switch” discussion.
ATTACH TO DUMP STATION
Refer to Fig. 1 and Fig. 5.
1. Open hose storage compartment (5C); pull out hose and
nozzle with caps (
K2); do not disconnect from coach.
Remove cap (
K2.4) for full hose extension.
2. Unscrew large nozzle cap (
K2.4).
3. Attach universal nozzle (
K2.2) to dump station.
EMPTY BLACK WATER TANK
Refer to Fig. 1 and Fig. 5.
1. ENSURE universal nozzle (K2.2) is securely attached to
dump station! Refer to “Attach to Dump Station” procedure.
TIP For Cleaner Storage: Emptying the black water tank
fi rst, allows gray water to cleanse the system.
2. Open black water tank gate valve (
5B).
3. Use (
K3) to turn pump on.
4. Do not leave unit unattended.
TIP: The hose expands as fl uid moves to dump station
and contracts when tank is empty.
5. Use (
K3) to turn pump off.
6. Close black water tank gate valve (
5B).
Fig. 6
i
NOTICE
NOTICE
NOTICE

8
SANICON
®
Turbo Model 400S - Permanent Bayonet Mount 97652 Rev. C (04.05.18)
1. Ensure all contents have been drained from system.
2. Disconnect the power by removing the pump fuse or discon-
necting the battery.
3. Verify all gate valves (
5B) are closed.
4. Locate pipe hanger
(K6) and loosen clamp bolt.
Obstruction Removal
5. Remove the pump from the RV outlet (5E).
6. Remove the obstruction.
7. Attach the pump inlet to the RV outlet (
5E) and tighten hose
and pipe hanger.
8. Reconnect the power.
9. Operate system using gray water; check for leaks.
Be sure to have container available for captur-
ing system fl uid!
NOTICE
Turn off power and remove pump fuse. Once the obstruc-
tion is removed, there is potential injury to hands or
fi ngers in the path of the impeller if the power is on!
NOTICE
AVIS
AVISO
CAUTION
!
ATTENTION
!
ATTENTION
ATTENTION
!
ATENCIÓN
ATTENTION
!
DANGER
Plumbing from the discharge port (K1.1) may need to
be disconnected.
NOTICE
Do NOT remove pump housing. Obstruction MUST be
removed through inlet.
NOTICE
AVIS
AVISO
CAUTION
!
ATTENTION
!
ATTENTION
ATTENTION
!
ATENCIÓN
ATTENTION
!
DANGER
Refer to Fig.1 and Fig. 5.
Winterizing
Refer to Fig. 1 and Fig. 5.
1. Ensure all tanks are empty.
2. Pour RV antifreeze into the empty black water tank.
Be sure to have container available for capturing system
fl uid!
NOTICE
Operation, cont’d.
1. Ensure pump is off.
2. Drain hose (
K2) by holding at a sloped angle to direct excess
water into the dump station.
3. Disconnect nozzle (
K2.2) from dump station.
4. Install cap(s) (
K2.3, K2.4).
5. Return hose to coach hose compartment (
5C); leave hose
connected to coach.
PREPARE HOSE FOR STORAGE
Refer to Fig. 1 and Fig. 5.
TIP For Faster Draining: Leave gray gate valve (5B)
open allowing hose to vent and expediting the process.
NOTICE
Helpful Hints
■ Additional hoses can be purchased from Thetford and used
to extend the length of the evacuation hose. Connect the
hoses using 1.5” (3.8 cm) barbed coupling with clamp.
■ If you wish to extend the evacuation hose, connect a .75”
(1.9 cm) inner diameter garden hose to the end of the
nozzle.
■ Before storing the hose, make sure that all liquid has drained from
the hose.
A longer evacuation hose reduces fl ow rate.
NOTICE
Gray water bypass is possible if the discharge plumbing
does not fl ow upward.
NOTICE
1. ENSURE universal nozzle (K2.2) is securely attached to
dump station! Refer to “Attach to Dump Station” procedure.
2. Open gray water tank gate valve (
5B).
3. Use (
K3) to turn pump on.
4. Do not leave unit unattended.
5. Use (
K3) to turn pump off.
EMPTY GRAY WATER TANK(S)
Refer to Fig. 1 and Fig. 5.
6. Close gray water tank gate valve (5B).
7. Repeat Steps 2-6 for secondary gray tanks.
TIP For Cleaner Storage: Emptying black water tank fi rst,
allows gray water to cleanse the system.
NOTICE
TIP: The hose expands as fl uid moves to dump station
and contracts when tank is empty.
NOTICE
Gray water bypass is possible if the discharge
plumbing does not fl ow upward.
NOTICE
3. Turn on pump.
4. Run pump until the antifreeze begins to discharge from
universal nozzle (
K2.2).
5. Turn pump switch to the Off position.
6. Drain hose (
K2) by holding at a sloped angle to remove
excess water; return hose to storage position.

97652 Rev. C (04.05.18) SANICON
®
Turbo Model 400S - Permanent Bayonet Mount
9
Troubleshooting
Problem Solution
Waste discharge
pressure stops or
decreases dramati-
cally.
■ Are the holding tanks empty?
■ With pump on, look for location
where hose expansion differs;
check for obstruction at that point.
■ Turn the pump switch to the Off
position:
■ TO CHECK FOR OB-
STRUCTION IN HOSE
(
K2): Visually check for
foreign matter lodged in the
hose by running your hand
along hose.
■ TO CHECK FOR OB-
STRUCTION IN IMPEL-
LER: Refer to “Obstruction
Removal” section.
■ Failure to clear a clog could cause
damage to the pump, which will
void the warranty.
The pump operates,
but no liquid is ex-
pelled.
■ Are the holding tanks empty?
■ Check that the RV gate valves are
open.
■ Pump may be clogged.
The motor will not
run.
Make sure:
■ Pump is turned on.
■ RV battery is charged.
■ Circuit breaker/fuse is functioning.
■ Pump is receiving voltage.
■ Foreign object is not preventing
impeller operation.
How do I disassem-
ble the system to
check for an object
lodged in the pump?
■ Refer to “Obstruction Removal”
discussion.
Warranty
For defi ned warranty terms, review the one-page warranty
statement - see www.thetford.com.
Please give Serial Number (located on the pump or
manual sticker) for calls to customer service and warranty
issues.
NOTICE

97652 Rev. C (04.05.18) SANICON
®
Turbo Model 400S - Permanent Bayonet Mount
25
See your dealer for more information
about Thetford products.
Or, write or call:
Pour obtenir de plus amples
renseignements sur les produits
Thetford, communiquez avec votre
détaillant. Vous pouvez aussi nous écrire
ou nous appeler à :
Para obtener mayor información
acerca de los productos Thetford,
visite al distribuidor más cercano,
o bien llame o escriba a:
Thetford Corporation
P.O. Box 1285
Ann Arbor, MI 48106
1-800-543-1219
www.thetford.com
Questions?/Des questions?/¿Preguntas? 1-800-543-1219
Ref
No.
N°
N.°
Description
Description Descripción
SK1 97661
Pump Assembly Ensemble de pompe Juego de bomba
SK2 97514 Nozzle Cap, Garden Hose
Cap, Nozzle Gasket
Capuchon d’embout, capuchon
de tuyau d’arrosage,
joint d’embout
Tapa de boquilla, tapa de manguera
de jardín, empaquetadura de boquilla
SK3 97520 Nozzle, Clamp Embout, collier Boquilla, abrazadera
SK4 97521 Hose, Clamp and Coupler Tuyau, collier et raccord Manguera, abrazadera y acoplador
SK5 97662 Pipe Hanger and Strap Support à tuyau et sangle Colgador y correa de tubo
SK6 97603 Switch Box with Wiring Boîtier d’interrupteur et câblage Caja del interruptor con cables
Service Kits Ensembles
de réparation
Juegos de
servicio
SK3
SK4
Fig. 7
T0000131A
SK1
SK2
SK6 SK5

97652 Rev. B (04.05.18)
Place the serial number sticker in this box.
Placez ici l’autocollant du numéro de série.
Coloque la etiqueta del número de serie en
este recuadro.
/