"-'--usingthe SabbathFeature.(onsomemodels)
(Designed for use on the Jewish Sabbath and Hofidays) ge.com
The Sabbath feature can be used for baking/roasting only. It cannot be used for broiling, self-cleaning or
Delay Start cooking.
NOTE: The oven light comes on automatically (on some models) when the door is opened and goes off when the
door is closed. Thebulb maybe removed. See the OvenLight Replacement section. Onmodels with alight switch
on the control panel, the oven light may be turned on and left on.
%
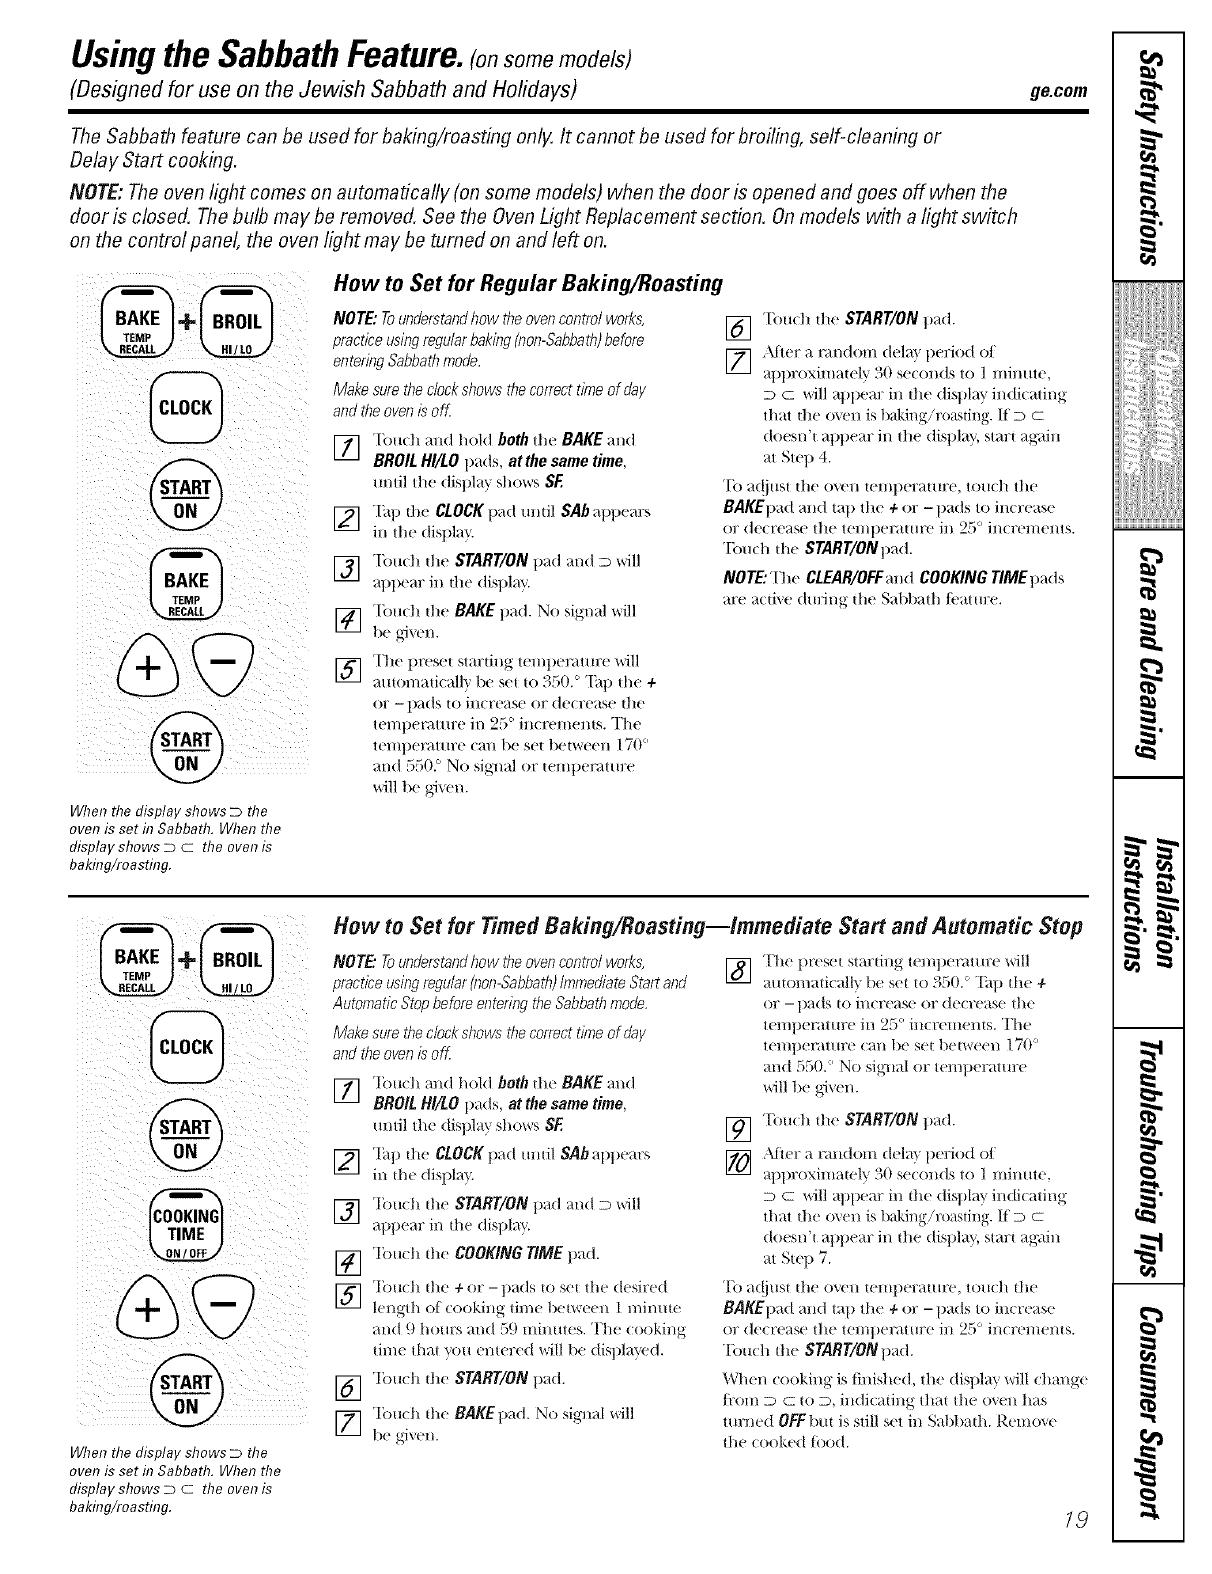
When the display shows D the
oven is set in Sabbath. When the
display shows D C the oven is
baking/roasting.
How to Set for Regular Baking/Roasting
NOTE: Tounderstandhow theoven control works,
practice usingregular baking (non-Sabbath)before
entering Sabbathmode.
Make surethe clockshows thecorrect time of day
and theoven is off
] Touch and hold both tim BAKE and
BROIL HI/LO tlads, at the same time,
until tilt' display shows SF
] "[_tp dl{ CLOCKtlad tmtil SAb appears
in the disllla" _
] "['oudl die START/ON pad and D will
appear in the dispk_y.
] "['(mdl file BAKE pad. No signal will
be gJ'_ el/,
] The preset starting tenq)emmre'will
amomatiealh' be set to 350. ° "[_tp die 4-
or - pads 1o illerease or decrease tile
temllemture in ,25° ineremems. The
tempel_mu:e call be set between 170 °
and 550. ° No signal or temperature
will be given.
[] Touch die START/ON pad.
[_ ?Jier a ran(tom dela} period ot
at)ill oxima|ely 30 se(ollds tO ] II/illllte,
D C will appear ill tile displ_ff indicating
that file o_m is baking/ro_ksting. If D C
doesn't appear in tile display, start ag'ain
at Step 4.
To a(!iust tile oven temperaulre, touch tile
BAKEllad and tall tile + or - llads to increase
or decrease tile tel/lileraIlll'e ill 2.'_ ° increl//ents.
Touch die START/ONpad.
NO rE:The CLEAR/OFFand COOKING TIME pads
are a(d_e (huJng ill(' Sal)l)_lth IL'atmx'.
When the display shows D the
oven is set f17Sabbath. When the
display shows D C the oven is
baking/roasting.
How to Set for Timed Baking/Roasting--Immediate Start and Automatic Step
NOTE."To understand how the oven control works, [_] "[']le tlreseI startillg tc l//i)el_ttla:e will
practice usingregular))on-Sabbaa) Immediate Start and _ amon/aiicalh lie set t() 350. ° "[_l) the ÷
Automatic Stopbefore entedng theSabbathmode,
Make surethe clockshows thecorrect time of day
and theoven is oK
] Touch and hold both die BAKE and
BROIL HI/LO llads, at the same time,
/ i tl_ ( isI 1"ffshox*Js S_.
] Tap file CLOCKpad mldl SAb allp_ ars
in the disilla }
] "lbuch die START/ON pad and D will
apllear in die displa?,.
] "lbuch die COOKINGTIMEpad.
] Touch the + or -pads to set the d< sired
length of (:ooldng time llerween I minme
and 9 hours and 59 minutes. The c(/oking
time that xou entered _dll be disl)la}ed.
[_ 'lbuch die START/ONpat1.
] "lbuch die BAKEpad. No signal will
beg_v_n.
or - i)_(ts t(/illcre_s( or (lecre_tse tile
temperature in 25 ° increments. The
temperature tall be set bet\_een 170'
and 550.' No sigllal or temperature
will be gJ'_en.
] Tuudl die START/ON pad.
] \lt(r a l_lll(lOiIl delm period of
/pilroxiln _t(1?. )0 s_ on(Is to 1 minme,
D C will _q)pear ill tile (liN)kiy indicating
that the oxen is baking/roasting. K D C
d(/esn't appear in tile displm., start ag:dn
at Step 7.
"['o at!jtlst tile oveil teil/ii(rattlr(' , tO/l(h tile
BAKEIlad and tail tile 4- or - ilads to increase
or decr(ase the temperature in 25 ° increments.
Touch tile START/ONpad.
When cooking is finished, the display will chmlg_
fl:om D C to D, indicating that tl/_ oxen has
turned OFF lint is still set in Sabbath. Remox(
tile cooked toed.
19
w
m
h
m
w m
h
r_
g


