Page is loading ...

Instruction
Manual
Welding & Fastening
Monitor
Type 5825A2
Indicator and Analysis Tool
for Spot Welding and
Joining Processes
ä
5825A2_002-568e-04.11

Instruction
Manual
Welding & Fastening
Monitor
Type 5825A2
Indicator and Analysis Tool
for Spot Welding and
Joining Processes
ä
5825A2_002-568e-04.11


Foreword
5825A2_002-568e-04.11 Page 1
Foreword
Thank you for choosing a Kistler quality product
characterized by technical innovation, precision and long
life.
Information in this document is subject to change without
notice. Kistler reserves the right to change or improve its
products and make changes in the content without
obligation to notify any person or organization of such
changes or improvements.
©2011 Kistler Group. All rights reserved. Except as
expressly provided herein, no part of this manual may be
reproduced for any purpose without the express prior
written consent of Kistler Group.
Kistler Group
Eulachstrasse 22
8408 Winterthur
Switzerland
Tel. +41 52 224 11 11
Fax +41 52 224 14 14
www.kistler.com

Welding & Fastening Monitor, Type 5825A2
Page 2 5825A2_002-568e-04.11
Content
1. Introduction ................................................................................................................................... 3
2. Important Notes............................................................................................................................. 4
2.1 For Your Safety .................................................................................................................... 4
2.2 Unpacking............................................................................................................................ 4
2.3 Transport and Storage.......................................................................................................... 5
2.4 Electromagnetic Compatibility (EMC)................................................................................... 5
2.5 Disposal Instructions for Electrical and Electronic Equipment ................................................ 6
2.6 Hints on Using This Instruction Manual................................................................................ 6
3. Welding & Fastening Monitor Type 5825A2 ................................................................................. 7
3.1 Description........................................................................................................................... 7
3.2 Application........................................................................................................................... 8
3.3 Description of the Main Functions........................................................................................ 9
3.4 Welding Cycle Evaluation................................................................................................... 12
3.5 Fastening Cycle Evaluation ................................................................................................. 15
3.6 Optional Accessories .......................................................................................................... 16
3.7 Connectors......................................................................................................................... 17
3.7.1 Transmitter Connector........................................................................................... 17
3.7.2 Connector for Serial Interface, RS-232C ................................................................ 17
3.7.3 Connector for Analog Signal Output and ext. Trigger Input .................................. 17
3.7.4 Connector for Power Supply ................................................................................. 17
3.8 Technical Data ................................................................................................................... 18
3.9 Block Schematic Diagram ................................................................................................... 20
3.10 Cabling Example ................................................................................................................ 21
3.11 Dimensions......................................................................................................................... 22
3.12 EC Declaration of Conformity............................................................................................. 23
Total Pages 23

Introduction
5825A2_002-568e-04.11 Page 3
1. Introduction
Thank you for deciding in favor of a Kistler quality product.
Please read through this instruction manual carefully, so
that you will be able to use the versatile properties of your
new equipment to the best advantage.
To the extent permitted by law Kistler does not accept any
liability if this instruction manual is not followed or
products other than those listed under Accessories are
used.
Kistler offers a wide range of measuring instruments and
total solutions:
Piezoelectric sensors for measuring force, torque, strain,
pressure, acceleration, shock, vibration and acoustic-
emission
Strain gage sensor systems for measuring force and
moment
Piezoresistive pressure sensors and transmitters
Signal conditioners, indicators and calibrators
Electronic control and monitoring systems as well as
software for specific measurement applications
Data transmission modules (telemetry)
Kistler also designs entire measuring systems for special
applications, for example in the automobile industry, in
plastics processing and in biomechanics.
Our general catalogue gives an overview of our product
range. Detailed data sheets are available for almost all pro-
ducts.
If there are particular questions which you still want to
raise after studying these instructions, the world-wide
Kistler customer service will be happy to advise you on any
problems with particular applications.

Welding & Fastening Monitor, Type 5825A2
Page 4 5825A2_002-568e-04.11
2. Important Notes
It is essential for you to study the following information;
compliance with these instructions is essential for your
personal safety when using this product and will also
ensure its long, fault-free operation.
2.1 For Your Safety
This product has been constructed and tested for ä
compliance according to EC Directive 73/23/EC related
with the standard of EN 60950:1997 and has left the
factory in a perfectly safe condition. In order to maintain
this condition and ensure safe operation, compliance is
required with the instructions and warning notes in these
instruction manual or imprinted on the product.
It must be assumed that safe operation is no longer possible:
when the product shows visible signs of damage,
when the product is no longer operating,
after lengthy storage under unsuitable conditions and
after rough transport conditions.
If, in such cases, safe operation can no longer be
guaranteed, the product must be returned immediately to
the authorized Kistler distributor/sales outlet for repair.
The product must be disconnected from all power sources
prior to repairs or exchange of parts.
Great care is also necessary when connecting the various
cables. If a live cable is accidentally connected to a signal
output, this can cause permanent damage to the product.
2.2 Unpacking
Check all packaging for visible transport damage. Report
any such damage to the transporters and to the authorized
Kistler distributor/sales outlet.
Check the scope of delivery before first use of the
equipment. Report any missing parts to the authorized
Kistler distributor/sales outlet.

Important Notes
5825A2_002-568e-04.11 Page 5
2.3 Transport and Storage
If the device is to be transported or stored for a lengthy
period of time, the following safety precautions must be
taken:
The temperature must remain within the range
–10 … 70 °C.
Make sure that no dirt enters the device.
The environment should be as dry as possible and free
from vibrations.
Make sure that the device is placed in a position where
no pressure can be exerted upon it.
As long as the device remains unused, it should always
be stored in its original packaging.
2.4 Electromagnetic Compatibility (EMC)
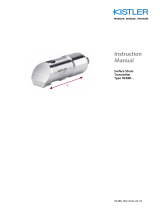
The Welding Force Calibration Transmitter 9831C… has
ä conformity and complies with the EMC standards EN
61000-6-3 (interference emission, industrial area) and EN
61000-6-2 (interference immunity, industrial area).
In the tests carried out in this connection, the signal ground
was connected to the equipment case. The common-mode
voltage must not exceed ±40 V.
In general, where ground loops and faults occur, tests will
be necessary to find the best solution.

Welding & Fastening Monitor, Type 5825A2
Page 6 5825A2_002-568e-04.11
2.5 Disposal Instructions for Electrical and Electronic Equipment
Do not discard old electronic instruments in municipal
trash. For disposal at end of life, please return this
product to an authorized local electronic waste disposal
service or contact the nearest Kistler Instrument sales
office for return instructions.
2.6 Hints on Using This Instruction Manual
We recommend you basically to read through the entire
instruction manual. But if you are in a hurry and already
have experience with Kistler devices, you can restrict
yourself to the actual information you require.

Welding & Fastening Monitor Type 5825A2
5825A2_002-568e-04.11 Page 7
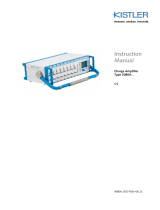
3. Welding & Fastening Monitor Type 5825A2
The Welding & Fastening Monitor (WFM) together with
the welding force calibration transmitter Type 9831C…
constitutes a high-performance portable measuring system
for the analysis and optimization of welding and joining
processes, such as spot welding or clinching.
Portable indicator for the actuation of welding force
calibration transmitter Type 9831C…
Three selectable operating modes: "Welding",
"Fastening" and "Voltmeter".
Numeric display of all important characteristics of the
force curve (e.g. in the "Welding" mode the 15
relevant process values per welding cycle).
Storage of the characteristic values of up to 100
measuring cycles (welding cycles)
Automatic measuring range detection with welding
force calibration transmitter connected for types with a
measuring range of 5, 10 and 45 kN.
Rugged industrial version with impact protection,
carrying strap and membrane keyboard.
Analog measurand output (monitor output) of the force
signal.
External or internal triggering.
Simple update of the monitor firmware with "Flash
Loader" program
Data export via RS-232C interface.
3.1 Description
The Welding & Fastening Monitor allows post-cycle
evaluation of force curves. The force curve is recorded by
means of a welding force calibration transmitter Type
9831C…, which is connected directly to the indicator.
In addition to the main operating mode "Welding", which
allows the welding process to be optimized by measuring
and analyzing the electrode force over time in conjunction
with the welding current switching signal, the monitor
offers an additional two operating modes. In the
"Fastening" mode, it is possible to use a welding force
calibration transmitter Type 9831C… equipped with
suitable inserts (e.g. Type 9426B20) also for force
measurement and analysis in joining processes such as
"clinching". In the "Voltmeter" operating mode, the
monitor acts as a digital voltmeter with an input measuring
range of ±5 V, for example with welding force calibration
transmitter Type 9831C… connected, the monitor directly
indicates the transmitter output voltage.
The monitor offers a large number of adjustment facilities
which are accessible via the monitor menu. In addition, the
Welding & Fastening Monitor has a series of external

Welding & Fastening Monitor, Type 5825A2
Page 8 5825A2_002-568e-04.11
connection facilities. For example, the analog output signal
from the sensor, an external trigger signal or an RS-232C
interface can be connected to an appropriate system or a
data acquisition unit.
With its rugged construction including impact protection
and carrying strap as well as its membrane keyboard, this
handy, battery-operated indicator is ideal for portable use
in a harsh industrial environment.
3.2 Application
The Welding & Fastening Monitor in conjunction with the
welding force calibration transmitter Type 9831C… can be
used for the following applications:
Check measurements on welding robots or joining
machines (such as clinching) in production lines.
Adjustment of welding systems or joining machines to
new work pieces.
Calibration of joining machines or spot welding tongs
for welding sheet metal parts.
Optimization of process times and welding cycles.
Main Characteristics of Welding & Fastening Monitor
Type 5825A2
Supply and control of the integrated charge amplifier of
the welding force sensor
Storage of up to 100 welding cycle evaluations
RS-232C interface
Analog signal outputs for electrode force and welding
voltage
Automatic measuring range detection of the sensor
Connection for external trigger signal

Welding & Fastening Monitor Type 5825A2
5825A2_002-568e-04.11 Page 9
3.3 Description of the Main Functions
Selection between three operating modes
Welding
Volt Meter
Fastening
"Instant" Measuring Mode (Continuous Measurement)
This measuring mode is available in all three operating
modes (Welding, Fastening and Voltmeter) and can be
selected with the arrow keys .
The force signal is continuously indicated. The function key
F3 (Reset) produces a reset pulse for the charge amplifier
connected.
Operating Mode "Welding"
After the measurement has been started with the
"Measure" key and the selected trigger threshold reached
(or as a result of an external trigger pulse), the force curve
is recorded until the end of the set measuring time t meas.
The measuring curve is sampled at a sampling rate of 1 ms
(1 kHz). The first 1 000 measurand are stored and used to
determine the value dt, i.e. from a set measuring time t
meas >1 s, the entire force curve is no longer stored, but
only the first second of the measuring time. If the set value
xx% Fwav is reached only after more than one second
measuring time, or if the welding signal is absent (welding
voltage), then the related value dt is not measured and an
error message appears.
At the end of the measuring time t meas, the characteristic
values of the force curve relevant for welding quality are
measured and shown in the display.
All characteristic values of a measuring cycle can be
automatically or manually stored in a nonvolatile ring
memory (EEPROM) with 100 memory locations.
This means that the characteristic values determined from a
maximum of 100 measuring cycles can be stored. The
contents of the ring memory can be output as ASCII code
via the integrated RS-232C interface.

Welding & Fastening Monitor, Type 5825A2
Page 10 5825A2_002-568e-04.11
The arrow keys can be used to switch between the
instantaneous value (Instant) and the last measured or
calculated characteristic values of a cycle (see also 3.4
Welding Cycle Evaluation).
Operating Mode "Voltmeter"
The monitor acts as a digital voltmeter with an input
measuring range of ±5 V, for example with welding force
calibration transmitter Type 9831C… connected, the
monitor indicates the transmitter output voltage directly.
The arrow keys can be used to switch between the
instantaneous value (Instant) U max and U min.
Operating Mode "Fastening"
After the measurement has been started with the
"Measure" key and the trigger threshold has been reached
(or with an external trigger pulse), the force curve is
recorded until the end of the set measuring time t meas.
The measuring curve is sampled with a sampling rate of 1
ms (1 kHz). The measuring curve recorded is evaluated
within the defined measuring window.
Exactly as in the "Welding" operating mode, all
characteristic values measured in a measuring cycle are
stored automatically or manually in a nonvolatile ring
memory (EEPROM) with 100 memory locations, and can
be output as ASCII code via the integrated RS-232C
interface (see also 3.5 Fastening Cycle Evaluation).
Log Output and Storage of a Measuring Cycle
All characteristic values of a measuring cycle can be stored
in a nonvolatile ring memory (EEPROM) with 100 memory
locations either automatically ("Auto Shots" menu item
must be activated) or manually ("F2" key). This means that
the characteristic values measured from a maximum of 100
measuring cycles can be stored.
By pressing the "F1" key, the characteristic values of each
previously stored measuring cycle can be read out
manually again and shown on the display. The two arrow
keys are used to select the memory location for storage
and display.

Welding & Fastening Monitor Type 5825A2
5825A2_002-568e-04.11 Page 11
A log of each memory cycle stored can be sent to the
RS-232C interface via the "Memory" menu item.
Data Transfer CONTINUOUS
The monitor continually digitizes the force curve (monitor
in "Instant" measuring mode) and automatically feeds the
force value (Instant = instantaneous value) to the RS-232C
interface in ASCII format every 6 or 12 ms (at 9 600 baud
or 19 200 baud respectively) in the exponential format to
three decimal places without the unit (example:
"4.113E+01").
Data Transfer ON REQUEST
The monitor digitizes the force curve continuously (monitor
in the "Instant" measuring mode) and feeds the force
value (Instant = instantaneous value) to the RS-232C
interface in ASCII format after actuation of the "Send" key
or as a result of a command from a higher level control
unit.
Transfer of Stored Measurands (Example "Fastening")
Memory 1
Fastening
Fwmax Fwmin Fwstart Fwend Fwav
4.567 0.000 0.000 3.449 2.004 kN
ty tw
0.4 s 1.0 s
Time:(h m s)15 26 00 Date:(d m y) 16 05 03
Transfer of Stored Measurands (Example "Welding")
Memory 1
Welding Correct Shoot
Fmax Fwmax Fwmin 90%Fwav
4.570 4.404 2.739 3.213
Fwon Fwoff Fwav Fwend
3.002 2.728 3.572 0.000 kN
dt tw td twon
19ms 253ms 276ms 257ms
twoff twse tmeas
578ms 321ms 1sec
Time:(h m s)15 20 00 Date(d m y) 16 05 06

Welding & Fastening Monitor, Type 5825A2
Page 12 5825A2_002-568e-04.11
3.4 Welding Cycle Evaluation
Each measured welding cycle is evaluated over time with
respect to the "welding current on" signal.
Fig. 1: Example of a typical continuous welding force
cycle F=f(t) showing characteristic values.

Welding & Fastening Monitor Type 5825A2
5825A2_002-568e-04.11 Page 13
Fig. 2: Example of a typical pulsing welding force cycle
F=f(t) showing characteristic values.

Welding & Fastening Monitor, Type 5825A2
Page 14 5825A2_002-568e-04.11
Finst Instantaneous value of the welding force F (not
stored).
Fmax Maximum electrode force over the entire
measuring time tmeas (Fmax selectable with
peak value or instantaneous value display).
Fwon Electrode force at welding voltage turn on.
Fwoff Electrode force at welding voltage turn off.
Fwav Mean value of the electrode force during the
welding process (application of welding
voltage).
xx%Fwav xx % of Fwav (calculated value); recommended
set point for the start of the welding process
(default value: xx%Fwav = 90 %; xx adjustable
from 50 … 95 %).
Fwmin Minimum electrode force during the welding
process.
Fwmax Maximum electrode force during the welding
process.
Fwend Force at the end of total measuring time.
td ime from the start of the measurement
(reaching the set trigger level or external trigger
pulse) until xx% Fwav (calculated value) is
reached.
dt Time difference between reaching xx%Fwav
until the start of the welding process
(calculated value); this time should be as short
as possible.
–dt: Welding voltage reached late (delayed by
time dt), i.e. after reaching the xx%Fwav
threshold.
Action: Shorten the squeeze time in the
welding control unit by time dt.
+dt: Welding voltage reached prematurely by
time dt, i.e. before reaching the xx%Fwav
threshold.
Action: Extend the squeez time in the
welding control unit by time dt.
tw Duration of the welding process (weld signal);
with impulse welding, this is the total time of
the individual pulses without pauses.
twon Time elapsed to welding voltage turn on (from
reaching the trigger level or external trigger).
twoff Time elapsed to welding voltage turn off (from
reaching the trigger level or external trigger).
twse Total time of the welding process in pulse
welding (total time of the individual pulses with
pauses).
tmeas Total measuring time from reaching the trigger
level or external trigger pulse.

Welding & Fastening Monitor Type 5825A2
5825A2_002-568e-04.11 Page 15
3.5 Fastening Cycle Evaluation
Each measured Fastening cycle is evaluated over time with
respect to the "measuring window" signal.
Fig. 3: Example of a typical continuous welding force
cycle F=f(t) showing characteristic values.
Fwmax Maximum force within the measuring window
twin
Fwmin Minimum force within the measuring window twin
Fwav Mean value of the force within the measuring
window twin
Fwstart Force at the start of the measuring window
Fwend Force at the end of the measuring window
ty Delay, window shift (0 … 100 s)
twin Measuring window of duration t win
tmeas Measuring time

Welding & Fastening Monitor, Type 5825A2
Page 16 5825A2_002-568e-04.11
3.6 Optional Accessories
Type/Art. No.
RS-232C connecting cable, 1200A27
PC to Welding & Fastening Monitor
Type 5825A2, l = 5 m
Connecting cable, l = 1 m, 1700A70
D-Sub 9-pin pos – 2 x BNC pos.
and one terminal (incl. 1 x 5.530.032,
1 x 5.530.003, 2 x 5.530.034)
Connecting cable for welding 1500A35
force calibration transmitter
Type 9831C…, l = 1,5 m
Mini-Combicon terminal 2-conductor 5.530.032
grid 3,81 0,25 – 1,5 mm2 (socket)
Mini-Combicon terminal 2-conductor 5.530.033
grid 3,81 0,25 – 1,5 mm2 (pin)
Mini-Combicon cable housing 5.530.034
2-conductor grid 3,81
Desktop Power Pack (linear), 5.510.220
230 VAC/50 Hz – 12 VDC / 300 mA
Connecting cable for welding 1700A66
force calibration transmitter
Type 9831C…, l = 2 m

Welding & Fastening Monitor Type 5825A2
5825A2_002-568e-04.11 Page 17
3.7 Connectors
3.7.1 Transmitter Connector
Connector 8-pin, DIN 45326 neg.
Pin allocation:
3.7.2 Connector for Serial Interface, RS-232C
Connector Sub-D, 9-pin, neg.
Pin allocation:
3.7.3 Connector for Analog Signal Output and ext. Trigger Input
Connector Sub-D, 9-pin, neg.
3.7.4 Connector for Power Supply
12 V DC In: 2-conductor jack according to EIAJ standard
/