Page is loading ...

Installation and Operating Guide
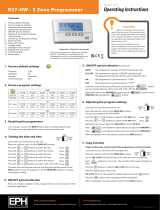
2 Zone Programmer
R27 V2

3
3
4
5
6
7
12
Programming Modes
12
Factory Program Settings
10
Quick Introduction to your R27 V2 programmer
11
Mode Selection
Table of contents
Installation Instructions
Operating Instructions
13
Adjust the Program Setting in 5/2 Day Mode
14
Reviewing the Program Settings
14
Boost Function
15
Advance Function
Factory Default Settings
Specications
LCD Display
Button Description
Wiring Diagram
Mounting & Installation

19
22
17
18
Operating Instructions Continued
23
24
Locking the Keypad
Copy Function
Backlight Mode Selection
24
Resetting the Programmer
25
25
Master Reset
Service Interval
16
Menu Function
16
P01 Setting the Date, Time and the Programming Mode
P02 Holiday Mode
P03 Frost Protection
P04 Zone Title
20
P05 PIN

2 Zone Programmer
Installation Instructions

3
EPH Controls Ltd.
Factory Default Settings
Contacts: 230VAC
Program: 5/2D
Backlight: On
Keypad Lock: O
Frost Protection: O
Operating Mode: Auto
Pin Lock: O
Service Interval: O
Zone Title: HOT WATER
HEATING
Specications
Power Supply: 230VAC
Ambient Temperature: 0 … 50˚C
Dimensions: 161 x 100 x 31 mm
Contact Rating: 3(1)A
Program Memory 5 Years
Temperature Sensor: NTC 100K
Backlight: White
IP Rating: IP20
Battery: 3VDC Lithium
LIR2032 & CR2032
Backplate: British System Standard
Pollution degree: 2 (Resistance to voltage
surge 2000V; as per
EN60730)
Software Class: Class A

4R27 V2
[1]
[3]
[4][2] [5]
[6]
[7]
[1] Displays current time.
[2] Displays current day of the week.
[3] Displays when frost protection is activated.
[4] Displays when keypad is locked.
[5] Displays current date.
[6] Displays zone title.
[7] Displays current mode.
LCD Display

5
EPH Controls Ltd.
Button Description
OK Button
Master Reset
Program
Button
Advance
Button
Plus
Button
Minus
Button
Menu Button
Boost Button
Zone Select
Button
MENU
Boost
Select
OK
PROG ADV

6R27 V2
Wiring Diagram
LN
ONOFF ONOFF
ZONE
1
200-240V~
50/60Hz
ZONE
2
ZONE
1
ZONE
2
Terminal Connections
Earth
N Neutral
L Live
1 Zone 1 OFF - N/C Normally closed connection
2 Zone 2 OFF - N/C Normally closed connection
3 Zone 1 ON - N/O Normally open connection
4 Zone 2 ON - N/O Normally open connection

7
EPH Controls Ltd.
Mounting & Installation
161 31
100

8R27 V2
1) Remove the programmer from its packaging.
2) Choose a mounting location for the programmer:
- Mount the programmer 1.5 metres above the oor level.
- Prevent direct exposure to sunlight or other heating / cooling sources.
3) Use a philips screwdriver to loosen the screws of the backplate on the bottom of the programmer.
The programmer is lifted upwards from the bottom and removed from the backplate.
(See Diagram 3 on Page 7)
4) Screw the backplate onto a recessed conduit box or directly to the surface.
5) Wire the backplate as per the wiring diagram on page 6.
6) Sit the programmer onto the backplate making sure the programmer pins and the backplate
contacts are making a sound connection, push the programmer ush to the surface and tighten
the screws of the backplate from the bottom. (See Diagram 6 on Page 7)
Mounting & Installation continued
Caution!
Installation and connection should only be carried out by a qualied person.
Only qualied electricians or authorised service sta are permitted to open the programmer.
If the programmer is used in a way not specied by the manufacturer, its safety may be impaired.
Prior to setting the programmer, it is necessary to complete all required settings described in this section.
Before commencing installation, the programmer must be rst disconnected from the mains.
This programmer can be surface mounted or mounted to a recessed conduit box.

2 Zone Programmer
Operating Instructions

10 R27 V2
The R27 V2 programmer will be used to control two separate zones in your central heating system.
Each zone can be independently operated and programmed to suit your needs. Each zone has up to
three daily heating programs called P1, P2 and P3. See Page 13 for instructions on how to adjust the
program settings.
On the LCD screen of your programmer you will see two separate sections, one to represent each
zone.
Within these sections you can see what mode the zone is currently in.
When in the AUTO mode, it will show when the zone is next programmed to be switched ON or OFF.
For ‘Mode Selection’ please see page 11 for further explanation.
When the zone is ON, you will see the red LED for that zone light up. This indicates that power is being
sent from the programmer on this zone.
Quick introduction to your R27V2 programmer:

11
EPH Controls Ltd.
There are four modes available for selection.
AUTO The zone operates up to three ‘ON/OFF’ periods per day (P1,P2,P3).
ALL DAY The zone operates one ‘ON/OFF’ period per day. This operates from the rst ‘ON’ time to the
third ’OFF’ time.
ON The zone is permanently ON.
OFF The zone is permanently OFF.
Press Select to change between AUTO, ALL DAY, ON & OFF.
The current mode will be shown on the screen under the specic zone.
The Select are found under the front cover. Each zone has its own Select .
Mode Selection AUTO

12 R27 V2
Factory Program Setting 5/2d
5/2 Day
P1 ON P1 OFF P2 ON P2 OFF P3 ON P3 OFF
Mon-Fri 06:30 08:30 12:00 12:00 16:30 22:30
Sat-Sun 07:30 10:00 12:00 12:00 17:00 23:00
7 Day
P1 ON P1 OFF P2 ON P2 OFF P3 ON P3 OFF
All 7 days 06:30 08:30 12:00 12:00 16:30 22:30
24 Hour
P1 ON P1 OFF P2 ON P2 OFF P3 ON P3 OFF
Everyday 06:30 08:30 12:00 12:00 16:30 22:30
This programmer has the following programming modes.
5/2 Day mode Programming Monday to Friday as one block and
Saturday and Sunday as a 2nd block.
7 Day mode Programming all 7 days individually.
24 Hour mode Programming all 7 days as one block.
Programming Modes

13
EPH Controls Ltd.
Press PROG .
Programming for Monday to Friday for Zone1 is now selected.
To change programming for Zone 2, press the appropriate Select .
Press and to adjust the P1 ON time. Press OK .
Press and to adjust the P1 OFF time. Press OK .
Repeat this process to adjust P2 and P3 times.
Programming for Saturday to Sunday is now selected.
Press and to adjust the P1 ON time. Press OK .
Press and to adjust the P1 OFF time. Press OK .
Repeat this process to adjust P2 and P3 times.
Press MENU to return to normal operation.
While in programming mode, pressing Select will jump to the next day (block of days) without
changing the program.
Adjust the Program Setting in 5/2 Day Mode
Note:
1. To change from 5/2d to 7D or 24H programming, refer to page 16, Menu P01.
2. If you don’t wish to use one or more of the daily programs then simply set the start time and end time to be
identical. For example, if P2 is set to start at 12:00 and end at 12:00 the programmer will simply ignore this
program and proceed to the next switching time.

14 R27 V2
Press PROG .
Press OK to scroll through the periods for the individual day (block of days).
Press Select to jump to the next day (block of days).
Press MENU to return to normal operation.
You must press the specic Select to review the schedule for that zone.
Reviewing the Program Settings
Each zone can be boosted for 30 minutes, 1, 2 or 3 hours while the zone is in the AUTO, ALL DAY &
OFF mode.
Press Boost 1, 2, 3 or 4 times, to apply the desired BOOST period to the Zone.
When a Boost is pressed there is a 5 second delay before activation where ‘BOOST’ will ash on the
screen, this gives the user the time to select the desired BOOST period.
To cancel a BOOST, press the respective Boost again.
When a BOOST period has ended or has been cancelled, the Zone will return to the mode that was
previously active prior to the BOOST.
Boost Function
Note: A BOOST cannot be applied while in the ON or Holiday Mode.

15
EPH Controls Ltd.
When a zone is in the AUTO or ALLDAYmode, the Advance function allows the user to bring the zone
or zones forward to the next switching time.
If the zone is currently timed to be OFF and ADV is pressed, the zone will be switched ON until the
end of the next switching time. If the zone is currently timed to be ON and ADV is pressed, the zone
will be switched OFF until the start of the next switching time.
Press ADV .
Zone1 and Zone 2 will begin to ash.
Press the appropriate Select .
The zone will display ‘ADVANCE ON’ or ‘ADVANCE OFF’ until the end of the next switching time.
Zone 1 will stop ashing and enter Advance mode.
Zone 2 will remain ashing.
Repeat this process with Zone 2 if required.
Press OK .
To cancel an ADVANCE, press the appropriate Select .
When an ADVANCE period has ended or has been cancelled, the zone will return to the mode that
was previously active prior to the ADVANCE.
Advance Function

16 R27 V2
Menu Function
This menu allows the user to adjust additional functions.
To access the menu, press MENU .
Press MENU , ‘P01 tInE’ will appear on the screen.
Press OK , the year will begin to ash.
Press and to adjust the year. Press OK .
Press and to adjust the month. Press OK .
Press and to adjust the day. Press OK .
Press and to adjust the hour. Press OK .
Press and to adjust the minute. Press OK .
Press and to adjust from 5/2d to 7d or 24h mode. Press OK .
Press and to turn DST (Day Light Saving time) On or O.
Press MENU and the programmer will return to normal operation.
P01 Setting the Date, Time and the Programming Mode DST ON
Note:
Please see page 12 for descriptions of Programming Modes.

17
EPH Controls Ltd.
This menu allows the user to switch o their heating system by dening a start and end date.
Press MENU , ‘P01’ will appear on the screen.
Press until ‘P02 HOL’ will appears on the screen.
Press OK , ‘HOLIDAY FROM’, the date and time will appear on the screen. The year will begin to ash.
Press and to adjust the year. Press OK .
Press and to adjust the month. Press OK .
Press and to adjust the day. Press OK .
Press and to adjust the hour. Press OK .
‘HOLIDAY TO’ and the date and time will appear on the screen. The year will begin to ash.
Press and to adjust the year. Press OK .
Press and to adjust the month. Press OK .
Press and to adjust the day. Press OK .
Press and to adjust the hour. Press OK .
The programmer will now be switched o during this selected period.
To cancel the HOLIDAY, press OK .
The programmer will return to the normal operation when a holiday has nished or been cancelled.
P02 Holiday Mode

18 R27 V2
Menu Function continued
This menu allows the user to activate the frost protection between a range of 5°C and 20°C.
Frost protection is default set to OFF.
Press MENU , ‘P01’ will appear on the screen.
Press until ‘P03 FrOST’ appears on the screen.
Press OK , ‘OFF’ will appear on the screen.
Press to select ‘ON’. Press OK .
‘5˚C’ will ash on the screen.
Press and to select your desired frost protection temperature. Press OK .
Press MENU and the programmer will return to normal operation.
The Frost symbol will display on the screen if the user activates it in the menu.
If the ambient room temperature drops below the desired frost protection temperature, all zones of
the programmer will activate and the frost symbol will ash until the frost protection temperature has
been achieved.
P03 Frost Protection OFF
/