Teka LI3 1480 EU User manual

Category
Washing machines
Type
User manual

This manual is also suitable for

INSTRUCTION MANUAL
MANUAL DE INSTRUCCIONES
ES
EN
LI3 1480 E
P.02
P.03
Contents
Safety Precautions
Safety Precautions .............................................................
Overview of Washing Machine ...........................................
Install Washing Machine ....................................................
Operate Washing Machine .................................................
Checklist and Preparation before Washing Clothes ............
View of Control Panel ........................................................
.........................................................
Table of Washing Procedures ............................................
Maintenance .......................................................................
.....
Select the procedure
Cleaning and Maintenance of Washing Machine Cabinet
Troubleshooting ...............................................................
Remove the problems........................................................
Appendix ...........................................................................
Care Lable.................................................................
Product Specifications ...............................................
Product Fiches...........................................................
Built-In Installation.........................................................
3
7
8
11
11
16
18
22
23
23
26
27
28
28
29
30
31
- If the supply cord is damaged,it must be replaced by the
manufacturer,its service agent or similarly qualified
persons in order to avoid a hazard.
- The new hose-sets supplied with the appliance are to
be used and that old hose-sets should not be reused.
- This washing machine is for indoor use only.
- The openings must not be obstructed by a carpet.
- (This warning is only for EUROPEAN market )This ap-
pliance can be used by children aged from 8 years and
above and persons with reduced physical,sensory or
mental capabilities or lack of experience and knowledge
if they have been given supervision or instruction con-
cerning use of the appliance in a safeway and underst-
and the hazards involved. Children shall not play with
the appliance.Cleaning and user maintenance shall not
be made by children without supervision.
- (This warning is not for EUROPEAN market)This appl-
iance is not intended for use by persons (including chi-
ldren) with reduced physical, sensory or mental capa-
bilities, or lack of experience and knowledge, unless
they have been given supervision or instruction conc-
erning use of the appliance by a person responsible
for their safety.Children should be supervised to ensure
that they do not play with the appliance.
- Pull out its plug from the power socket before cleaning
or maintenance.
- Make sure that all pockets are emptied.
Safety Precautions
P.04
P.05
Safety Precautions
Safety Precautions
- Sharp and rigid items such as coin,brooch,nail,screw or
stone etc.may cause serious damages to this machine.
- Pull out its plug and cut off water supply after the operation.
- Please check whether the water inside the drum has been
drained before opening its door.Please do not open the
door if there is any water visible.
- Pets and kids may climb into the machine. Check the
machine before every operation.
- Glass door may be very hot during the operation.Keep
kids and pets far away from the machine during the
operation.
- Take care that power voltage and frequency shall be id-
entical to those of washing machine.
- Do not use any socket with rated current less than that of
washing machine.Never pull out power plug with wet hand.
- To ensure your safety,power cord plug must be inserted
into an earthed three-pole socket.Check carefully and
make sure that your socket is properly and reliably earthed.
- Children of less than 3 years should be kept away unless
continously supervised.
- Kids should be supervised to ensure that they do not pl-
ay with the machine.
- Packing materials may be dangerous to the kids.
Please keep all packing materials (plastic bags,foams
etc) far away from the kids.
- Washing machine shall not be installed in bath room or
very wet rooms as well as in the rooms with explosive or
caustic gases.
- Make sure that the water and electrical devices must
be connected by a qualified technician in accordance
with the manufacturer's instructions and local safety
regulations.
- Before operating this machine,all packages and trans-
port bolts must be removed.Otherwise,the washing
machine may be seriously damaged while washing the
clothes.
- Before washing the clothes at first time, the washing
machine shall be operated in one round of the whole
procedures without the clothes inside.
- Your washing machine is only for home use and is only
designed for the textiles suitable for machine washing.
- Flammable and explosive or toxic solvents are forbidden.
Gasoline and alcohol etc.Shall not be used as detergents.
Please only select the detergents suitable for machine
washing, especially for drum.
- It is forbidden to wash carpets.
- Be careful of burning when washing machine drains hot
washing water.
- Never refill the water by hand during washing.
- After the program is completed, Please wait for two
minutes to open the door.
- Please remember to disconnect water and power sup-
- The washing machine with single inlet valve only can
be connected to the cold water supply. The washing
machine with double inlet valves can be connected to
the hot water and cold water supply.
P.06
P.07
Safety Precautions
Overview of Washing Machine
Inlet pipe
H (optional)
Inlet pipe
C
Transport
plughole
Outlet hose
(optionalsupport )
Component
Accessories
Door
Detergent Drawer
Control Panel
Power Plug
Outlet Hose
Detergent Box
ply immediately after the clothes are washed.
- Do not climb up and sit on top cover of the machine.
- Do not lean against machine door.
- Please do not close the door with excessive forces.If it
is found difficult to close the door,please check if the
excessive clothes are put in or distributed well.
- The household washing machine isn't intended to be
built-in.
- Cautions during Handling Machine
1.Transport bolts shall be reinstalled to the machine by
a specialized person.
2.The accumulated water shall be drained out of the machine.
3. Handle the machine carefully. Never hold each protr-
uded part on the machine while lifting. Machine door
can not be used as the handle during the conveyance.
- Notes on disposal:
This marking indicates that this product should not
be disposed with other household wastes throug-
hout the EU.To prevent possible harm to the env-
ironment or human health from uncontrolled waste
disposal,recycle it responsibly to promote the su-
stainable reuse of material resources.To return
your used device,please use the collection systems
or contact the retailer where the product was pur-
chased. They return and can take this product for
environmental safe recycling.
H plug
( )
ole
optional
P.08
P.09
Install Washing Machine
3.Ensure the positioning status of washing machine. Loosen the lock nut with spanner
and turn the leg with hand until it closely contacts with the floor. Press the leg with one
hand and fasten the nut closely to the cabinet with the other hand.
4.After being locked properly, press four corners again to make sure that they has been
adjusted properly. If it is still unstable, it has to repeat Steps 2 and 3.
Connect inlet pipe
Connect the inlet pipe as indicated in the figure.
For the model which has hot valve , please connect
the hot vale to hot water tap. Energy will decrease
automatically for some program.
Install inlet pipe
1.Connect the elbow to tap and fasten it
clockwise.
2.Connect the other end of inlet pipe to the inlet
valve at the backside of washing machine and
fasten the pipe tightly clockwise.
Notes: after connection, if there is any leakage
with hose, then repeat the steps to connect inlet
pipe. The most common type of tap shall be
used to supply water. If tap is square or too big,
then standard tap shall be changed.
Place outlet hose
There are two ways to place the end of outlet hose:
1.Put it beside the water trough.
Hole plug
This Hole plug is used to jam the hole on the back
cabinet.
Unpacking the washing machine
Unpack your washing machine and check if there is any damage during the transportation.
Also make sure that all the items (as shown in Page 5) in the attached bag are received.
If there is any damage to the washing machine during the transportation, or any item is
missing, please contact the local dealer immediately.
Dispose the packing materials
The packing materials of this machine may be dangerous to kids. Please dispose them
properly and avoid easy touch by kids. Please dispose the related packing materials
according to the relevant local regulations. Please do no throw the packing materials
away together with the other daily living rubbishes.
Remove transport bolts
Before using this washing machine, transport bolts
must be removed from the backside of
this machine. Please take the following steps to
remove the bolts:
1.Loosen all bolts with spanner and then remove them.
2.Stop the holes with transport hole plugs.
3.Keep the transport bolts properly for future use.
Select the location
Before installing the washing machine, the location characterized as follows shall be
selected:
- Rigid, dry, and level surface (if not level, please make it level with reference to the
following figure “Adjust Leg)
- Avoid direct sunlight
- Sufficient ventilation
- Room temperature is above 0 C
- Keep far away from the heat resources such as coal or gas.
Make sure that the washing machine will not stand on power cord.
Do not install the washing machine on the carpet floor.
Adjust Leg
1.When positioning the washing machine, please
first check if the legs are closely attached to the
cabinet. If not, please turn them to their original
positions with hand or spanner and tighten the
nuts with spanner.
2.After positioning the washing machine, press
four corners on top cover of washing machine
in sequence. If the washing machine is not
stable when being pressed, this leg shall be
adjusted.
5.Put a solid cylinder (e.g. pop cans) oppositely on the top cover of the washing machine from in
the left, right, front and back directions. If the cylinder keeps stable, the washing machine is
positioned level. If it rolls, the washing machine is positioned unlevel. The rolling direction is the
direction of lower ground surface. Then, the two legs in this direction shall be raised at the same time
until the washing machine is level. Steps 1~3 are repeated to make the bottom legs closely against
the ground and the nuts shall be locked tightly.
P.10
P.11
Install Washing Machine
1.This machine must be earthed properly. If there is any short circuit, earthing can reduce
the danger of electrical shock.
This machine is equipped with power cord, which includes plug, earthing wire at earthing
terminal.
2.Washing machine shall be operated in a circuit separate from other electrical appliances.
Otherwise, power protector may be tripped or fuse may be burned out.
Operate Washing Machine
Checklist and Preparation before Washing Clothes
Please read this operation method carefully to avoid the troubles of washing machine and
damages of clothes.
Check if the first-washed clothes will bed decolorized.
After a white towel touched with liquid detergent is used to wash the invisible corners of the
clothes, check if the white towel is stained with
clothes' original color.
As for the scarves and those clothes that easily
get decolorized among imported clothes, please
wash them separately before washing.
As for the stains on sleeves, collars and pockets,
use the liquid detergent and wash it with brush
gently. Finally put them into the washing machine
to achieve more ideal washing effects.
As for temperature-sensitive clothes, they shall
be washed as required in the labels. Otherwise,
it may cause color change or distortion.
Keep in Mind:
Never put the clothes to be washed in washing machine for a long period of time.
Otherwise it may get moldy and cause spots. Therefore, please wash the clothes in time.
The clothes also may get color changed or distorted if they are not washed according to
the stated washing temperature.
Clothes that can not be washed by washing machine
The clothes that may get distorted if being immersed in water:
Ties, waistcoats, western-style clothes, outer garments etc. may have obvious shrinkage
if being immersed in water; the decolorized clothes such as blended spinning clothes of
artificial fiber etc.
WARNING
2.Connect it to the branch drain pipe of the trough.
Electrical Connection
- As the maximum current through the unit is 10A when you are using its heating function,
please make sure the power supply system (current, power voltage and wire) at your
home can meet the normal loading requirements of the electrical appliances.
- Please connect the power to a socket which is correctly installed and properly earthed.
- Make sure the power voltage at your place is same to that in the machine's rating label.
- Power plug must match the socket and cabinet must be properly and effectively earthed.
- Do not use multi-purpose plug or socket as extension cord.
- Do not connect and pull out plug with wet hand.
- When connecting and pulling out the plug, hold the plug tightly and then pull it out. Do
not pull power cord forcibly.
- If power cord is damaged or has any sign of being broken, special power cord must be
selected or purchased from its manufacturer or service center for replacement.
Max.100cm
Min.60cm
Min.60cm
Max.100cm
Position outlet hose properly so that the floor will not be damaged by water leakage.
- When installing outlet hose, fix it
properly with a rope.
- Position outlet hose properly so that
the floor will not be damaged by water
leakage.
Trough
Hose Retainer
B
ind
Max.100cm
Min.60cm
Min.60cm
Max.100cm
- If outlet hose is too long, do not force
it into washing machine as it will cause
abnormal noises.
Notes:
If the machine has outlet hose support, please install it like the following pictures.
P.12
P.13
Operate Washing Machine
Wrinkle-style clothes, embossed clothes, resin clothes etc. may get distorted when being
immersed in water. Among cotton and wool materials, the clothes that get easily distorted
are wrinkle-style silk, fur products and fur decorations;
Clothes with decoration, long dress and traditional clothes etc are the products to get
decolorized easily.
Please do not wash the clothes without material labels and washing requirements.
Never wash the clothes stained with the chemicals such as gasoline, petroleum, benzene,
paint thinner and alcohol.
Please pay attention with regard to detergents
Low bubble” detergent or washing powder or washing powder special for drum washing
machine shall be selected according to fiber types (cotton, synthetic fiber, soft products and
wool products), colors, washing temperatures, dirty degrees and types. Otherwise,
excessive bubbles may be generated and overflowed out of the drawer so that accidents
may take place.
Bleacher belongs to alkali type and can damage clothes, so it is suggested to use as little
as possible.
Powder detergents can easily leave the residues in the clothes so as to generate the bad
smell, so they shall be sufficiently rinsed.
Detergent can not easily get dissolved completely if there is too much detergent or water
temperature is rather low. It can remain in clothes, pipes and washing machines to
pollute the clothes.
Washing shall follow the weight of clothes, dirty degrees, local water hardness as well as
the recommendations from the detergent manufacturers. Please consult the water
company if you are not clear of water hardness.
Notes:
Keep detergents and additives in safe and dry places out of touch by kids.
Please take out the items out of the pockets.
Please check the pockets of the clothes to be
washed, empty the rigid items such as
decorations and coins, otherwise washing
machine may be damaged or have abnormal
troubles.
For the clothes to be washed, they are classified
according to the following characteristics:
The symbol types of care labels: the clothes to be
washed are classified into cotton, blended fiber, synthetic fiber, silk, wool and artificial fiber.
Color: white and colorful colors shall be identified. All new colorful articles shall be washed
in a separate way.
Size: the articles of different sizes are washed together to increase the washing effects.
Sensitivity: soft articles shall be washed separately. As for new pure wool textiles, curtains
and silks, the soft washing procedure shall be selected. Check the labels in all washing
articles.
The clothes shall be sorted before being put into washing machine. As for the curtains with
hooks, the hooks shall be removed before being washed.
The decorations on the clothes may damage the washing machine. As for the clothes with
buttons or embroideries, they shall be turned over before being washed.
Clean up fasteners:
Zips shall be zipped close and buttons or hooks shall be fixed. The loose band or ribbon
shall be bound together.
It is suggested to put bras into the pillowslip
with zip or buttons sealed to prevent the steel
wire from popping out of bras into the drum and
damaging the machine.
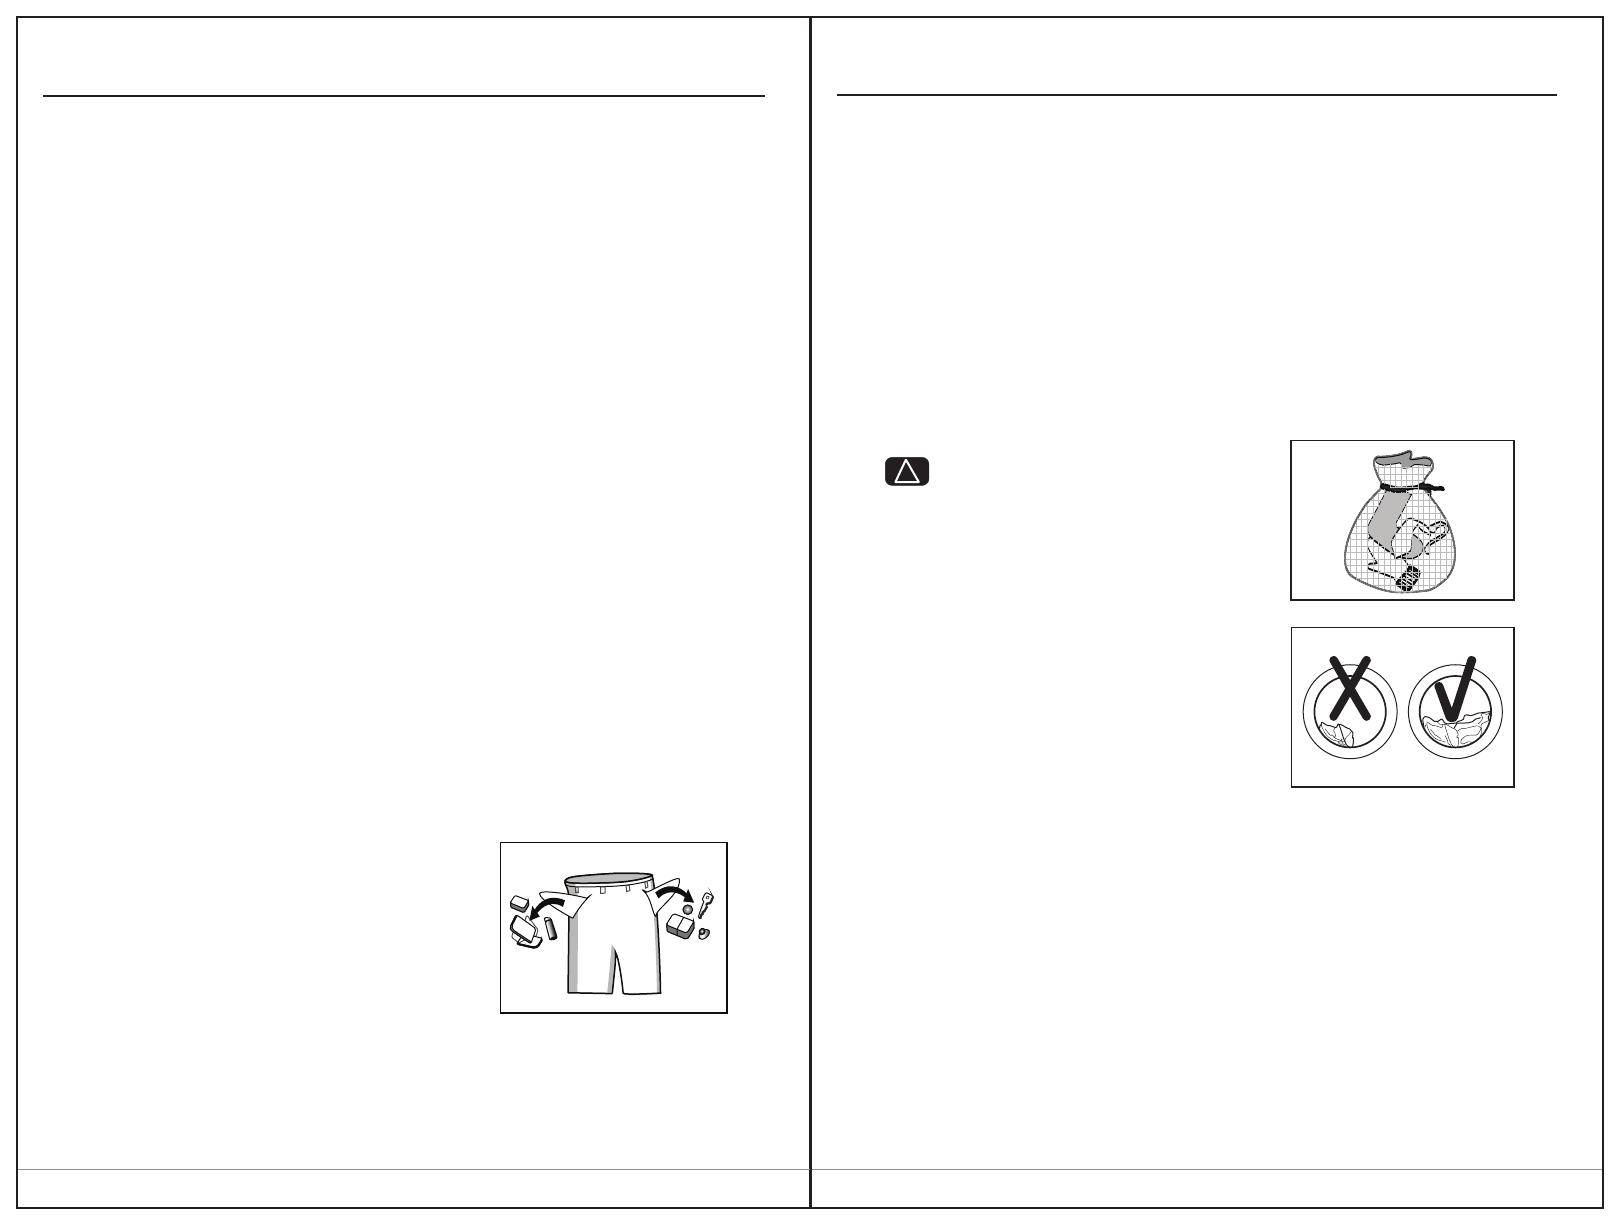
Especially delicate textiles such as laced curtains,
straightjackets, small articles (tight socks,
handkerchiefs, ties etc.) shall be put into string
bag for washing.
When washing a single big and heavy dress such
as Turkish towels, jeans, wadded jackets etc.,
it may easily cause great eccentricity and give
alarm due to great unbalance. Therefore it is
suggested to add one or two more clothes to be
washed together so that draining can be done
smoothly.
Clean away dusts, stains and pet hairs from the clothes.
The clothes may be damaged and disturb washing effects during the friction between
dusts, stains and clothes.
To protect baby skin
Baby articles (baby clothes and towels) including napkins shall be washed separately.
If they are washed together with the adults' clothes, they may be infected. Rinsing times
shall be increased to ensure the thorough rinsing and cleaning without the detergent
residues.
It is suggested that the parts that are easily stained such as white sockets, collars
and sleeves etc. shall be hand washed before being put into washing machine to
achieve more ideal washing effects.
Please use powder or liquid detergents. The residues of the soap could remain in the
gaps of the clothes if soap is used.
P.14
P.15
Operate Washing Machine
Confirm the washing capacity:
Do not put excessive washings; otherwise it may affect the washing effects. Please confirm
the maximum affordable washing quantity according to the following table.
The clothes which easily get fuzzed shall be turned over for washing
The clothes which easily get fuzzed shall be washed separately; otherwise the other
articles can be stained with dust and thrum etc. Preferably, black clothes and cotton
clothes shall be washed separately because they can easily get stained with the thrums
of other colors when being washed together.
Please check before washing.
Washing machine shall not wash water-proof materials (ski suits, outside napkin
pads, curtains).
As for the fiber products that water can not get soaked easily into such as water-proof
cushions, and clothes, it is better not to wash. Otherwise there will be water bursting out
or abnormal vibration to cause danger while rinsing and draining so that the clothes also
may be damaged. (Such as outside napkin pads, raincoats, umbrella, ski suits, car covers,
sleeping sacks etc.)
Cautions during Draining
Draining of normal clothes:
Moistures of washings are drained through drain hole.
Draining of water-proof clothes and fiber products:
In the normal washing and draining status, moistures of water-proof clothes and fiber
products can not be drained while washing water is gathered in one direction so that the
eccentricity of washing machine is too great and vibration or moving is caused.
Delicate
Quick start
1.After washing, the washing machine will make the sound
2.Close the water tap;
3.Press the On/Off and pull out the power plug.
;
After washing notes:
1 Install the washing machine
7 Plug the power supply
6 Turn on the water tap
9 Select the desired programme
5 Put down (hang up) the drain pipe
4 Close the door
10 Press the [start/pause]
3 Measure out the detergent
2 Open the door and
Load the laundry
8 Press the On/Off
8.0kg
8.0kg
4.0kg
2.0kg
2.5kg
Cotton
Synthetics
Wool
6.0kg
6.0kg
3.0kg
2.0kg
2.5kg
7.0kg
7.0kg
3.5kg
2.0kg
2.5kg
P.16
P.17
Operate Washing Machine
View of Control Panel
Operate Washing Machine
Start/Pause
Press the button to start or
pause the wash cycle.
On/Off
Press once to turn the washing machine on,
press again to turn the washing machine off.
Notes:
1.The Control panel line chart is for reference only, Please refer to real product as standard.
2.The Control panel could be changed without written notice. Please visit the website of Washing Machine or call up the service line for
consultation.
Function setting
Programme
For the convenience of users to washing
clothes with the different programme.
LED Display
Display the Pre wash /Extra Rinse/Remain
time /Door lock/Child lock running state.
Press the button to regulate
the temperature.
Temp.
Press the button repeatedly
to regulate the speed.
Speed
Delay
It is used for delay wash (0-24h).The delaying
time means the wash will begin in xxh later.
Press the button repeatedly to set the Pre
Wash, Extra Rinse function.
P.18
P.19
Operate Washing Machine
- Cotton Intensive
You can select this procedure to wash the daily washable clothes. The washing period
is quite long with quite strong washing intension. It is recommended to wash the daily
cotton articles, for example: bed sheets, quilt covers, pillowcases, gowns, underwear etc.
- Hand Wash
- Synthetic
You can select this procedure to wash the quite delicate clothes. The procedure is shorter
compared with that for cottons and the washing intension is quite gentle. It is recommended
to wash synthetic articles, for example: shirts, coats, blending. As for curtains and laced
textiles, the procedure “Synthetic ” shall be selected. While washing the knitting textiles,
detergent quantity shall be reduced due to its loose string construction and easily forming
bubbles.
- Cotton 60/40/20
You can select this procedure to wash the daily clothes. The washing period is quite long
with quite strong washing intension. The temperature is default is 60/40/20 .
- Express 15'
This procedure is suitable for washing few and not very dirty with 15'.
As for few light dirty clothes, the default temperature is cold.
- Baby Care
You can select this procedure to wash your babys clothes, it can make the baby's wear
cleaner and make the rinse performance better to protect the baby skin.
- Sports
You can select this procedure to wash the sportswear.
- Mixed
You can select this procedure wash the tough clothes, that need much more time and
strength. It is used for the daily clothes fo cotton, such as sheets, chained, pillowcases
bathrobe and underwear.
- Wool
You can select this procedure to wash the wool textiles labeled with “Machine Wash.
Please select the proper washing temperature according to the label on the articles to be
washed. Furthermore, the proper detergent shall be selected for wool textiles.
First, turn the rotary switch to select the corresponding procedures according to the types
of textiles.
Second, select the proper temperature according to the dirtiness. Generally, the higher the
temperature is, the more the power is consumed.
Last, select the proper revolution speed. The higher the revolution speed is, the drier the
textiles are spun, but higher the noises will also be increased.
The surfaces of delicate textiles will have wrinkles and the working life of washing
machine will be shortened.
PLEASE NOTE: to protect the clothes, the lower revolution speed shall be selected for delicate textiles.
The main washing procedures depend on the types of the clothes to be washed as follows:
Operate Washing Machine
Washing Clothes at first time
Before washing clothes at first time, the washing machine shall be operated in
one round of the whole procedures without clothes in as follows:
1.Connect power source and water.
2.Put a little detergent into the box and close it.
3.Press the button “On/Off.
4.Press the button “Start/Pause.
The drawer is separated as follows:
I: Pre-detergent or washing powder.
II: Main detergent
: Washing additive,such as fabric softener or tackifier.
Put detergent into washing machine.
1.Pull out the drawer.
2.Fill pre-detergent into Case I (when necessary).
3.Fill detergent into Case II.
4.Fill softener into Case (when necessary).
Notes:
- As for the agglomerated or ropy detergent or additive, before they are poured into the detergent box,
it is suggested to use some water for dilution to prevent the inlet of detergent box from being blocked
and overflowing while filling water.
-
option1: detergent (powder) . option2(liquid)
Please choose suitable type of detergent for the various washing temperature to get the best washing
effect with less water and energy consumption.
Select the procedure
The proper washing procedures shall be selected according to the types, quantities, and
dirtiness of the clothes to be washed in combination with the following washing
temperature table.
Start up washing machine
Connect the power. Check if water pipes are connected properly. Open the tap completely.
Put in the clothes to be washed and fill in the detergent and tackifier. Then press the button
On/Off,Select the proper procedures and functions and press the button “Start/Pause.
90
60
Seriously besmirched, pure white cotton or flax (for example: coffee
table cloths, canteen table cloths, towels, bed sheets)
Moderately besmirched, colorful flax, cotton and synthetic articles
with certain decolorizing degree (for example: shirts, night pajamas;
Slightly besmirched, pure white flax
Normally besmirched articles ( synthetic and wool)for example:
40 ,30 ,
Cold water20 ℃,
Operate Washing Machine
P.20
P.21
- Bubble Removal Function
Bubble Check Function: Redundant bubbles will occur when there is excessive detergent,
which will affect wash and rinse effects. The procedure will check automatically and one
bubble removal procedure will be added automatically to remove bubbles when excessive
bubbles are checked.
- Power off Memory
For the convenience of the users, this program remember the washing program and function
that is the choice of the users at the last time. The next time if you dont need to do any change
of the washing machine gets power off at the running state. The washing machine will continue
the wash when it gets power again.
- Suppression of the acoustic signals
This is an additional buzzer function on your appliance. After deactivating the buzzer function,
the buzzer will be closed.
After starting the machine, press the “Temp.” button for 3 seconds and you will hear a beep,
then the buzzer will be closed. To restart the buzzer function, press the “Temp.button
again for 3 seconds. The setting will be kept until the next reset.
Warning: After deactivating the buzzer function, the sounds will not be activated any more.
Operate Washing Machine
- Delicate
You can select this procedure to wash your delicate clothes. Its washing intension is gentler
and revolution speed is less compared with the procedure “Synthetic. It is recommended
for the articles to be washed softly.
- Drain Only
Separate Drain only Procedure.
- Spin Only
Separate spin only procedure. Soap water or rinse water shall be drained out before spinning.
- Rinse&Spin
Separate Rinse&Spin Procedure.
- My Cycle
Press Speed 3sec. for my cycle to memory the procedure. The default my cycle is cotton.
The main function can be selected as follows:
- Prewash
The Prewash function can get an extra wash before main wash.
- Extra Rinse
The laundry will undergo extra rinse once after you select it.
- Delay
Delay function can be set with this button, the delaying time is 0-24H.
Set the delay function:
1.Select a programme;
2.Press the Delay button to choose the time;
3.Press Start/Pause to commence the Delay operation.
Cancel the Delay function :Press the Delay button until the display will be 0H . It should be
pressed before starting the program. If the program already started, should press the
On/Off button.
Notes: If there is any break in the power supply while the machine is operating, a special
memory stores the selected programme and when the power is restarted ,press the
Start/Pause button the left time is continues.
- Child Lock
To avoid that the washing procedure cannot operate normally due to the mis operation by
kids during the washing procedure, you can select this function, In this case, the other
buttons except On/Off button can not work, at this state ,the machine power off when press
the key on/off. The machine remembers the program child lock and the program during
powered off when press the key on/off again.
Press “Temp.” and “Speed” together 3 seconds during the running procedure, the buzzer
will beep ,Start/Pause button as well as the rotary switch are locked. Press the two buttons
for 3 seconds together and buzzer will beep to release to locking. But cut off the power
supply , the kid’s protection is also release to locking. The kids protection will not be
cancelled after all procedures are completed.
P.22
P.23
Before your maintenance starts, please do pull out the power plug or disconnect power
and close the tap.
- Solvents are forbidden to avoid that the washing machine is damaged, and toxic gases
are generated or exploded.
- Never use water to sprinkle and wash the washing machine.
- It is forbidden that the detergents containing PCMX are used to clean the washing machine.
Cleaning and Maintenance of Washing Machine Cabinet
Proper maintenance on the washing machine can extend its working life. The surface can
be cleaned with diluted non-abrasive neutral detergents when necessary. If there is any
water overflow, use the wet cloth to wipe it off immediately. No sharp items are allowed to
strike the cabinet.
Notes: formic acid and its diluted solvents or equivalent are forbidden.
Clean Internal Drum
The rusts left inside the drum by the metal articles shall be removed immediately with
chlorine-free detergents.
Never use steel wool.
Dispose a Frozen Washing Machine
When the temperature drops below zero and your washing machine gets frozen, you may:
1.Disconnect the power supply for the washing machine.
2.Wash the tap with warm water to loosen inlet pipe.
3.Take down inlet pipe and immerse it in warm water.
4.Pour warm water into washing drum and wait for 10 minutes.
5.Reconnect inlet pipe to the tap and check whether inlet and outlet are working normally.
Notes: when the washing machine is reused, make sure the ambient temperature is above 0 C
Anti-freeze
If your washing machine is located in the room where it can get frozen easily, please drain
the remaining water inside drain pipe and inlet pipe thoroughly.
Remove the remaining water in inlet pipe:
1.Close the tap.
2.Screw off the inlet pipe from tap and put its end into the container.
3.Start up any procedure except single Wash or Drain
procedure. Water will be drained out of inlet pipe if any
for about 40 seconds.
4.Reconnect the inlet pipe to tap.
Remove the remaining water in drain pump
To avoid burning, it shall be done after the hot water
inside the machine cools down.
Maintenance
Operate Washing Machine
Table of Washing Procedures
The energy class is A++(6.0kg), Energy test program: Cotton 60/40 , Speed: the highest speed; Other as the default. A+++(7.0/8.0)
Notes: The parameters in this table are only for user's reference. The actual parameters maybe different with the parameters in above mentioned table.
Half load for 6.0/7.0/8.0Kg machine:3.0/3.5/4.0Kg.
Cotton 60/40 are the “standard Cotton 60/40” programme and the standard washing programs to which the information in the label
and the fiche relates, and they are suitable to clean normally soiled cotton laundry and that they are the most efficient programmes in
terms of combined energy and water consumptions for washing that type of cotton laundry,that the actual water temperature may differ
from the declared cycle temperature.
Load(kg)
Detergent Box
Procedure
Description
Default Speed
(RPM)
Default Time
(H)
Cotton Intensive
Default Temp.
()
40
Sports
40
Mixed
40
Drain Only
Spin Only
Rinse&Spin
Hand Wash(Eco)
Cold
Express15'
20
Wool
40
Delicate
30
● Means must ○ Means optional Means not necessary
Synthetic
40
Cotton 60
60
Cotton 40
40
Cold
Baby care
Delay
60
Softener
Case
×
8.0
8.0
4.0
8.0
8.0
8.0
2.0
2.0
2.0
2.5
4.0
8.0
8.0
2.0
4.0
6.0
6.0
3.0
6.0
6.0
7.0
2.0
2.0
2.0
2.5
3.0
6.0
6.0
2.0
3.0
1400
800
800
1000
1000
1000
800
400
600
800
1200
1200
800
1000
1200
Prewash
Extra rinse
1200
800
800
1000
1000
1000
800
400
600
800
1000
1000
800
1000
1000
2:40
1200/1400
1:19
1:13
0:01
0:14
0:31
1:00
1:13
1:06
1:00
1:40
1:47
1:32
0:15
1:39
Cotton 20
7.0
7.0
3.5
7.0
7.0
7.0
2.0
2.0
2.0
2.5
3.5
7.0
7.0
2.0
3.5
P.25P.24
Maintenance
Pull out the power plug to avoid electrical shock before washing.
After using the washing machine, pull out the power cord and close the door tightly to avoid
pinching the kids.
Remove foreign matters
Drain Pump Filter:
Drain pump filter can filter the yarns and small foreign matters from the washings.
Clean the filter periodically to ensure the normal operation of washing machine.
According to the soil level within the cycles and the frequency of the cycles, you have to inspect
and clean the filter regularly.
The pump should be inspected if the machine does not empty and/or spin;
The machine makes an unusual noise during draining due to objects such as safety pins, coins
etc. blocking the pump.
The Service_panel proceed as follows:
When the appliance is in use and depending on the programme selected there can be hot water
in the
pump. Never remove the pump cover during a wash cycle, always wait until the appliance has finished
the cycle, and is empty. When replacing the cover, ensure it is securely retight end so.
Warning!
2.Turn the filter down as
shown with the figure and
take out sundries matters.
1.After the power is dis-
connected, pull out the
Dam-Board.
3.Reinstall each part back
after sundries matters are
removed.
Dam-Board
Maintenance
Clean detergent box and grooves
Clean detergent drawer and grooves
1.Press down the arrow location on softener cover
inside the drawer.
2.Lift the clip up and take out softener cover and wash
all grooves with water.
3.Restore the softener cover and push the drawer into
position.
Clean inlet filter
Inlet filter shall must be cleaned if there is not any or
insufficient water in when the tap is opened.
Clean the tap filter:
1.Close the tap.
2.Select any procedure except “Wash” or “Drain
procedure.
3.Press the button “Start/Pause” and keep the
procedure running for about 40 seconds.
4.Remove the inlet pipe from the tap.
5.Use water to wash the filter.
6.Reconnect the inlet pipe.
Washing the filter in washing machine:
1.Screw off the inlet pipe from the backside of the
machine.
2.Pull out the filter with long nose pliers and reinstall
it back after being washed.
3.Reconnect the inlet pipe.
4.Open the tap and make sure there is no water leakage.
5.Close the tap.
Notes: Generally, the tap filter is washed first and then the filter in washing machine will be washed.
If only the filter in washing machine is washed, then the steps 1~3 in cleaning the tap filter shall be
repeated.
P.26
P.27
Door lock
problem
Door is not closed properly.
Restart after the door is closed.
Reason
Solution
Description
Display
LED
Please call up service line if there are still troubles.
Drain problem
while washing
Water injecting
problem while
washing
Tap is not opened or water
flows too slowly.
Inlet valve filter is blocked.
Inlet pipe is twisted.
If water is not supplied
Open the tap or wait till the
water supply becomes normal.
Check inlet valve filter.
Straighten the water pipe
Check the other taps in the
room.
Please call up service line if there are still troubles.
Outlet hose is blocked or twisted
Drain pump is blocked
Wash and straighten outlet hose.
Wash drain pump filter
Please call up the service line if there is any other problem.
Remove the problems
T
r
ou
ble
s
R
ea
s
on
S
olu
t
io
n
W
ash
ing ma
chin
e
c
a
nn
ot st
art up
Ch
e
ck i
f the door i
s c
lo
s
e
d t
ig
ht
l
y.
C
h
eck i
f po
w
e
r p
lug is i
nsert
e
d w
ell
.
C
heck if wa
t
er supp
l
y t
ap is op
e
ned.
C
he
c
k if b
u
t
t
o
n “
S
t
art
/P
a
u
s
e
” i
s p
r
ess
e
d
.
Chec
k i
f b
ut
t
o
n “
On
/
Of
f
” is pr
es
se
d
.
Do
or ca
n
n
o
t be
op
en
e
d
H
eatin
g f
a
ult
Wate
r l
e
a
kage
W
ate
r i
s
o
v
erf
lo
w
e
d f
r
om
t
he bott
om of t
he
mach
ine
I
n
d
ica
tor o
r
dis
p
la
y d
o
e
s
not lig
ht.
D
eter
ge
n
t
r
e
s
id
u
e
s i
n the
box
W
a
s
h
in
g e
f
f
ects
are n
o
t good
Abno
r
m
a
l n
ois
e
Gre
at vib
r
a
t
i
on
The c
l
o
t
he
s ar
e t
o
o d
ir
ty.
I
n
suffi
cie
nt de
t
erg
e
n
t quant
i
t
y.
W
ashi
ng powder is da
m
p
e
ne
d
a
nd a
gglo
m
e
r
at
e
d
.
P
o
w
e
r is dis
conne
c
t
ed.
P
C b
o
ard h
a
s p
roble
m
s.
H
arn
e
ss ha
s conne
c
t
io
n
pro
blem.
T
he inlet p
ipe is not c
on
n
e
c
t
e
d
f
i
r
mly
.
O
u
t
l
et hose ha
s w
a
t
er le
a
k
ag
e.
N
T
C is da
m
a
g
ed and h
ea
t
ing
p
ip
e i
s agin
g.
M
a
ch
i
ne's s
a
fe
t
y pr
ote
c
t
io
n
d
esi
gn is w
o
r
kin
g
.
Th
e con
n
ect
i
on betw
e
e
n in
let
pi
pe o
r o
u
t
l
et ho
s
e an
d tap or
wash
i
ng ma
c
hin
e is not tigh
t
.
Dra
i
n p
ip
e i
n the ro
o
m i
s b
l
ock
e
d.
D
i
sc
o
n
n
e
ct t
h
e p
o
we
r.
C
an n
orm
ally w
a
s
h th
e c
l
oth
e
s
.
On
l
y c
a
n
no
t wa
s
h wi
th h
e
a
t
i
ng.
S
h
all con
t
a
ct t
he s
e
r
v
i
ce ce
nt
e
r p
r
o
m
pt
l
y.
Check and f
a
st
en wate
r p
ip
es
.
Clea
n u
p outle
t h
o
s
e a
n
d a
s
k a
specializ
e
d p
e
r
s
on to r
e
p
air it whe
n
nec
es
sa
ry.
F
ix t
he in
l
et pi
pe.
Re
p
la
c
e t
he d
ra
i
n h
os
e
.
Ch
e
c
k i
f t
he power i
s s
hut do
w
n a
nd
p
o
wer p
lu
g i
s conn
ect
ed c
o
rr
ec
tly
.
I
f n
o
t, pl
eas
e c
a
ll u
p s
erv
ic
e lin
e
.
Cle
a
n a
n
d w
i
pe th
e box.
Us
e li
qui
d dete
r
gen
ts or t
he dete
rg
e
n
ts
s
p
e
c
i
a
l f
or dr
u
m
.
S
ele
ct a p
r
op
e
r p
r
o
ce
d
u
re.
Add the pro
p
er d
et
e
r
gen
t q
u
a
nt
i
ty
accord
in
g to t
he in
st
ru
c
t
ions in
de
t
ergent pa
c
kage
.
C
h
eck i
f the fi
xing (b
olt
s) h
a
s b
e
e
n r
e
m
o
ved.
I
f c
a
b
i
net is i
nstal
le
d o
n t
he s
oli
d a
nd le
v
e
l
f
loo
r.
Chec
k if t
h
e
re a
r
e any b
a
rr
ett
es o
r m
eta
l
art
icle
s insi
de.
Ch
eck i
f t
he le
gs i
n t
he w
a
s
h
in
g m
a
c
hi
n
e
ar
e adj
uste
d l
eve
l
.
Troubleshooting
P.28
P.29
Dimension(W* D* H)
Net Weight
Rated Power
MAX.Current
Standard Water Pressure
Washing Capacity
Power Supply
595* 540* 825
63kg
2000W
10A
0.05MPa~1MPa
8.0kg
220-240V~,50Hz
595* *825540
53kg
2000W
10A
0.05MPa~1MPa
6.0kg
220-240V~,50Hz
Product Specifications
595* 540* 825
63kg
2000W
10A
0.05MPa~1MPa
7.0kg
220-240V~,50Hz
The label and sign on the fabric can help you to choose the best way to launder your clothes.
Iron
Do not iron
Dry clean
Do not dry clean
Warm iron.medium
(max 150)
Cool iron(max 110 )
A
F
Dry clean normal cycle
with any solvent
Dry clean normal cycle
petroleum solvent only
Dry flat
Tumble dry normal Drip dry
Hang to dry
/Line dry
Tumble dry. Low heat
(max 110)
Tumble dry. Medium
(max 150 )
C
C
Bleach
Do not bleach
Hand wash
Do not wash
40
Wa r m w a s h
(max 40 )
Chlorine bleach
may be used
Normal wash
Gentle wash
Chlorine bleach
not be used
Do not tumble dry
Iron with cloth
Steam Iron
Dry after wash
Line Dry in shade
Warmly dry clean
No WringLine Dry
No machine wash
To avoid fire,electrical shock and other accidents,please remember the following reminding:
- Only the voltage indicated in power label can be used. If you are not clear of the voltage
at home, please contact the local power bureau.
- When you are using the heating function, the maximum current through the washing
machine will reach 10A. Therefore, please make sure the power supply units (current,
voltage and cable) can meet the normal load requirements for the machine.
- Protect the power cord properly. Power cord shall be fixed well so that it will not trip the
people or other things and be damaged. Special attention shall be paid to the socket. It
shall be plugged into the sockets easily and attention shall be paid to the plug location.
- Do not make the wall-mounted socket overloaded or cable extended. Overloading of the
wiring may cause fire or electrical shock. Do not pull out power plug with wet hand.
- To ensure your safety, power plug shall be inserted into an earthed three-pole socket.
Carefully check and ensure that your socket is properly and reliably earthed.
Appendix
P.30
P.31
Built-In Installation
Before installed the washing machine, please read this Built-In instructions carefully
and keep it for future reference. This appliance has been designed to be built into the
kitchen furniture. The recess should have the dimensions shown in Fig.
When installing the appliance into the kitchen ensure ,if possible, the hoses are
placed in either of the two recesses on the back of the appliance. This will help to prevent
the hoses from becoming kinked or trapped.
furniture
Overview
The appliance is originally prearranged for the assembly of a door opening from right to
left or from left to right.
Preparation and assembly of the door
The door is open from left to right The door is open from right to left
82
5
mm
600mm
825mm
5
40
mm
5
9
5
mm
152.5mm
17.5mm
580mm
Brand: TEKA
Model: LI3 1480 E
Rated capacity:8kg
Energy efficiency class:A+++
EU Ecolabel:N/A
Energy consumption 196kwh per year, based on 220 standard washing cycles for cotton
at 60°C/40°C at full and partial load, and the consumption of the
low-power modes.Actual energy consumption will depend on how the appliance is used.
Water consumption 11000 litres per year, based on 220 standard washing cycles for cotton
60°C /40°C at full and partial load. Actual water consumption will depend
on how the appliance is used.
Spin-drying efficiency class B on a scale from G (least efficient) to A (most efficient)
Maximum spin speed:1400rpm
Off mode power consumption:0.5W
Left-on mode power consumption:1.0W
Airborne acoustical noise (washing):57
Airborne acoustical noise (spinning):76
Notes: The airborne acoustical noise emissions during washing/spinning for the cotton
60 programme at full load.
Notes:
1. Programme setting for testing in accordance with applicable standard EN60456-2011.
2. When using the test programmes, wash the specified load using the maximum spin speed.
3. The actual parameters will depend on how the applicance is used,and maybe different with
the parameters in above mentioned table.
Consumption values(1400rpm):
Standard Programme
Cotton 6C
Cotton 6C
Cotton 4C
Load
0.94kwh
54L
229min
209min
166min
50%
55%
55%
45L
45L
8kg
4.0kg
4.0kg
Energy
consumption
Water
consumption
Remaining
moisture content
Programme
duration
0.94kwh
0.67kwh
Product Fiche
P.32
P.33
Built-In Installation Built-In Installation
2.Installation the hinges and spacer
Fix the hinges to the machine by means of the ST4*12 screws. The hinges can be adjusted
to compensate for possible uneven thickness of the door.
Drill hole on the door
according to the 1.Drill the hole on the door fixed position paper.
2.Fixed position paper on the door.
Paste on the Door(The door on the right)
Shear fixed position paper
Position Paper Position Paper
16- 22mm
12m m
35m m
12m m
2mm
Paste on the Door(The door on the left)
Top Top
Left Ope n
Right Op en
Appendix
1. Make the mark on the door according to the cupboard and washing machine height.
Preparation the Fixed position paper
1.Self-tapping screws
(ST4*12)
2.Self-tapping screws
(M5*12)
3.Hinges
4.Counter magnet
5.Spacer
6.Fixed position paper
Tools
1.
2.Automatic Driver
3.Ruler
4.Pencil
Screw Driver
5
1
2
4
3
6
1
2
3
4
Position Paper
P.34
P.35
Built-In Installation
Installation the counter magnet
The appliance is prearranged for a magnetic closure of the door. To enable a correct
operation of this device, it is necessary to screw the counter-magnet into the inner side
of the door.
Installation the door
23
30
31
2 3
4 5
  • Page 1 1
  • Page 2 2
  • Page 3 3
  • Page 4 4
  • Page 5 5
  • Page 6 6
  • Page 7 7
  • Page 8 8
  • Page 9 9
  • Page 10 10
  • Page 11 11
  • Page 12 12
  • Page 13 13
  • Page 14 14
  • Page 15 15
  • Page 16 16
  • Page 17 17
  • Page 18 18
  • Page 19 19
  • Page 20 20
  • Page 21 21
  • Page 22 22
  • Page 23 23
  • Page 24 24
  • Page 25 25
  • Page 26 26
  • Page 27 27
  • Page 28 28
  • Page 29 29
  • Page 30 30
  • Page 31 31
  • Page 32 32
  • Page 33 33

Teka LI3 1480 EU User manual

Category
Washing machines
Type
User manual
This manual is also suitable for

Ask a question and I''ll find the answer in the document

Finding information in a document is now easier with AI