Page is loading ...

MSP 227
USER MANUAL
Article No: RGB-RD-UM-MSP 227 E001
Revision No: V1.0

MSP 227 User Manual
1
CONTENTS
CONTENTS ..................................................................................................................................................... 1
Declarations .................................................................................................................................................. 2
FCC/Warranty ........................................................................................................................................ 2
Operators Safety Summary ................................................................................................................... 3
Installation Safety Summary .................................................................................................................. 3
Chapter 1 Your Product.................................................................................................................................. 5
1.1 In the Box......................................................................................................................................... 5
1.2 Product Overview ............................................................................................................................ 6
1.2.1 Front Panel ........................................................................................................................... 7
1.2.2 Back Panel ............................................................................................................................ 8
1.2.3 Bottom Panel and Dial Switch .............................................................................................. 9
1.2.4 Dimension .......................................................................................................................... 10
Chapter 2 Installing Your Product ................................................................................................................ 11
2.1 Plugging in Signals ......................................................................................................................... 11
2.2 Plugging in Main Power ................................................................................................................. 11
2.3 Turning on Your Product ............................................................................................................... 11
Chapter 3 Using Your Product ...................................................................................................................... 12
3.1 Using the MENU Button ................................................................................................................ 12
3.2 Understanding the MENU Structure ............................................................................................. 13
3.3 Using the Menu ............................................................................................................................. 14
3.3.1 Understanding the Main Menu .......................................................................................... 14
3.3.2 Picture Mode ...................................................................................................................... 14
3.3.3 Color Temperature.............................................................................................................. 16
3.3.4 Input ................................................................................................................................... 18
3.3.5 Zoom Out ............................................................................................................................ 18
3.3.6 Screen ................................................................................................................................. 19
3.3.7 Language/菜单语言 ........................................................................................................... 20
3.4 System Connection ........................................................................................................................ 21
Chapter 4 Ordering Codes ........................................................................................................................... 22
4.1 Product .......................................................................................................................................... 22
Chapter 5 Support ....................................................................................................................................... 23
5.1 Contact Us ..................................................................................................................................... 23
Chapter 6 Appendix ..................................................................................................................................... 24
6.1 Specification .................................................................................................................................. 24
6.2 Terms & Definitions ....................................................................................................................... 25
6.3 Revision History ............................................................................................................................. 29

MSP 227 User Manual
2
Thank you for choosing our product!
This User Manual is designed to show you how to use this video processor quickly and make use of all
the features. Please read all directions and instructions carefully before using this product.
Declarations
FCC/Warranty
Federal Communications Commission (FCC) Statement
This equipment has been tested and found to comply with the limits for a class A digital device, pursuant
to Part 15 of the FCC rules. These limits are designed to provide reasonable protection against harmful
interference when the equipment is operated in a commercial environment. This equipment generates,
uses, and can radiate radio frequency energy and, if not installed and used in accordance with the
instruction manual, may cause harmful interference to radio communications. Operation of this
equipment in a residential area may cause harmful interference, in which case the user will be
responsible for correcting any interference.
Guarantee and Compensation
RGBlink provides a guarantee relating to perfect manufacturing as part of the legally stipulated
terms of guarantee. On receipt, the purchaser must immediately inspect all delivered goods for
damage incurred during transport, as well as for material and manufacturing faults. RGBlink must be
informed immediately in writing of any complains.
The period of guarantee begins on the date of transfer of risks, in the case of special systems and
software on the date of commissioning, at latest 30 days after the transfer of risks. In the event of
justified notice of compliant, RGBlink can repair the fault or provide a replacement at its own discretion
within an appropriate period. If this measure proves to be impossible or unsuccessful, the purchaser can
demand a reduction in the purchase price or cancellation of the contract. All other claims, in particular
those relating to compensation for direct or indirect damage, and also damage attributed to the
operation of software as well as to other service provided by RGBlink, being a component of the system
or independent service, will be deemed invalid provided the damage is not proven to be attributed to the
absence of properties guaranteed in writing or due to the intent or gross negligence or part of RGBlink.
If the purchaser or a third party carries out modifications or repairs on goods delivered by RGBlink, or if
the goods are handled incorrectly, in particular if the systems are commissioned operated incorrectly or if,
after the transfer of risks, the goods are subject to influences not agreed upon in the contract, all
guarantee claims of the purchaser will be rendered invalid. Not included in the guarantee coverage are
system failures which are attributed to programs or special electronic circuitry provided by the purchaser,
e.g. interfaces. Normal wear as well as normal maintenance are not subject to the guarantee provided by
RGBlink either.
The environmental conditions as well as the servicing and maintenance regulations specified in this
manual must be complied with by the customer.

MSP 227 User Manual
3
Operators Safety Summary
The general safety information in this summary is for operating personnel.
Do Not Remove Covers or Panels
There are no user-serviceable parts within the unit. Removal of the top cover will expose dangerous
voltages. To avoid personal injury, do not remove the top cover. Do not operate the unit without the
cover installed.
Power Source
This product is intended to operate from a power source that will not apply more than 230 volts rms
between the supply conductors or between both supply conductor and ground. A protective ground
connection by way of grounding conductor in the power cord is essential for safe operation.
Grounding the Product
This product is grounded through the grounding conductor of the power cord. To avoid electrical shock,
plug the power cord into a properly wired receptacle before connecting to the product input or output
terminals. A protective-ground connection by way of the grounding conductor in the power cord is
essential for safe operation.
Use the Proper Power Cord
Use only the power cord and connector specified for your product. Use only a power cord that is in good
condition. Refer cord and connector changes to qualified service personnel.
Use the Proper Fuse
To avoid fire hazard, use only the fuse having identical type, voltage rating, and current rating
characteristics. Refer fuse replacement to qualified service personnel.
Do Not Operate in Explosive Atmospheres
To avoid explosion, do not operate this product in an explosive atmosphere.
Installation Safety Summary
Safety Precautions
For all MSP 227 processor installation procedures, please observe the following important safety and
handling rules to avoid damage to yourself and the equipment.
To protect users from electric shock, ensure that the chassis connects to earth via the ground wire
provided in the AC power Cord.
The AC Socket-outlet should be installed near the equipment and be easily accessible.
Unpacking and Inspection

MSP 227 User Manual
4
Before opening MSP 227 processor shipping box, inspect it for damage. If you find any damage, notify
the shipping carrier immediately for all claims adjustments. As you open the box, compare its contents
against the packing slip. If you find any shortages, contact your sales representative.
Once you have removed all the components from their packaging and checked that all the listed
components are present, visually inspect the system to ensure there was no damage during shipping. If
there is damage, notify the shipping carrier immediately for all claims adjustments.
Site Preparation
The environment in which you install your MSP 227 should be clean, properly lit, free from static, and
have adequate power, ventilation, and space for all components.

MSP 227 User Manual
5
Chapter 1 Your Product
1.1 In the Box
AC Power Cord
Adapter
DVI-HDMI
Adapter
DVI-VGA
Adapter
DVI-YPbPr/AV

Chapter 1: Your Product
MSP 227 User Manual
6
1.2 Product Overview
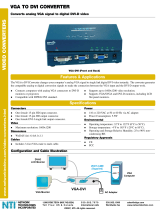
MSP 227 converts any input of AV/YPbPr/VGA/DVI/HDMI to any output of AV/YPbPr/VGA/
DVI/HDMI.
Buttons on the front panel to setup and configure the MSP 227.
When no Menu on the screen, “Enter/Output” button works as Output to select output
port, such as AV, YPbPr, VGA, DVI or HDMI.
Dial Switch on the bottom to set output format (1080p, 720p, etc.).
Input/Output resolution: Up to 1920x1200/1920x1080/1600x1200.
HDCP compliant.

Chapter 1: Your Product
MSP 227 User Manual
7
1.2.1 Front Panel
USB Connectors
1
USB-A-USB
Used to software upgrade.
Indicators
2
Indicators
The indicator is on when the output format is AV, YPbPr, VGA, DVI or HDMI.
Illuminated Buttons
3
MENU Button
This button used for menu selections – refer to Understanding the MENU Structure.
Push the button for 3 seconds will lock the front panel.
4
UP Button
This button used for selecting the last option or increasing the settings.
5
DOWN Button
This button used for selecting the next option or decreasing the settings.
6
LEFT Button
This button used for selecting the left option.
7
RIGHT Button
This button used for selecting the right option.
8
ENTER/OUTPUT Button
This button used for confirmation.
When no Menu on the screen, “Enter/Output” button works as Output to select
output port.

Chapter 1: Your Product
MSP 227 User Manual
8
1.2.2 Back Panel
Input Connectors
1
DVI-I – DVI
Standard DVI signals can input. Additionally this DVI port supports VGA/HDMI/YbPr/AV
with the use of a DVI to VGA/HDMI/YPbPr adapter.
Output Connectors
2
DVI-I – DVI
Connect to the monitor or LED display which has DVI interface. (This connector does
not support hotplug).
Power Connection
3
Power Input
Standard 12V/3A power supply.

Chapter 1: Your Product
MSP 227 User Manual
9
1.2.3 Bottom Panel and Dial Switch
Dial Switch
Dial Switch
Used to set the output format. Please refer to the graph instruction on the bottom panel for
specific operation.
Bottom Panel

Chapter 1: Your Product
MSP 227 User Manual
10
1.2.4 Dimension
Following is the dimension of MSP 227 for your reference:

MSP 227 User Manual
11
Chapter 2 Installing Your Product
2.1 Plugging in Signals
Connect signals to the product (ensure all devices are powered off first). Tighten connector
screws/locks where provided.
2.2 Plugging in Main Power
Connect AC power cord to device and plug into wall socket.
2.3 Turning on Your Product
Turn on power at wall socket and the device will get into working status.

MSP 227 User Manual
12
Chapter 3 Using Your Product
3.1 Using the MENU Button
1. Connect one end of the DVI cable to the DVI output of MSP 227, and the other end to the DVI
input of the display, turn on the power for the display and MSP 227.
2. Push the “MENU” button and enter to the menu items.
3. Push the “UP”, “DOWN”, “LEFT” and “RIGHT” button to select the menus.
4. Push the “ENTER/OUTPUT” button to select the menu or settings.
5. Push the “MENU” button to return to the main menu.
6. All the menus and operations are shown on the display.

Chapter 3: Using Your Product
MSP 227 User Manual
13
3.2 Understanding the MENU Structure
The MENU structure is shown in the figure below:

Chapter 3: Using Your Product
MSP 227 User Manual
14
3.3 Using the Menu
3.3.1 Understanding the Main Menu
Push the [MENU] button in the default state, the display will show the main menus as below:
There are 6 menu items in the main menu, and display in 1 page. Push the [UP/DOWN] button to
select the menu items, and push the [ENTER/OUTPUT] button to confirm. If push the [MENU]
button, the OLED display will return to the last level menu.
3.3.2 Picture Mode

Chapter 3: Using Your Product
MSP 227 User Manual
15
Picture Mode
Standard Mode
Default Contrast 50, Brightness 55, Color 50, Sharpness 0 and Tint 50 in
standard mode. No setup required.
Mild
Default Contrast 48, Brightness 48, Color 50, Sharpness 0 and Tint 50 in
mild mode. No setup required.
User

Chapter 3: Using Your Product
MSP 227 User Manual
16
Default Color 50, Sharpness 0 and Tint 50 in user mode. User can set the
Contrast and Brightness.
Dynamic
Default Contrast 55, Brightness 48, Color 55, Sharpness 0 and Tint 50 in
dynamic mode. No setup required.
3.3.3 Color Temperature

Chapter 3: Using Your Product
MSP 227 User Manual
17
Color
Temperature
Medium
Default Red 50, Green 50 and Blue 50 if select medium. No setup required.
Warm
Default Red 70, Green 38 and Blue 50 if select warm. No setup required.
User
User can set Red, Green and Blue if select user mode.
Cool
Default Red 50, Green 38 and Blue 70 if select Cool. No setup required.

Chapter 3: Using Your Product
MSP 227 User Manual
18
3.3.4 Input
Input
Auto (Default input), AV, YPbPr, VGA and HDMI can be selected.
3.3.5 Zoom Out
Zoom Out
Level 1, default setting.
Level 2, Zoom out 2%.
Level 3, Zoom out 6%.
Level 4, Zoom out 10%.
*: Only available when AV output.
Note: MSP 227 V1.0 can not support this function.

Chapter 3: Using Your Product
MSP 227 User Manual
19
3.3.6 Screen
Screen
Auto Adjust
Enable or disable the auto adjust function.
Auto Adjust
Auto adjust is available if select “On” for auto adjust option.
Horizontal Pos.
Push the [UP/DOWN] button to increase or decrease the horizontal position
value.
Vertical Pos.
Push the [UP/DOWN] button to increase or decrease the vertical position
value.
Size
Push the [UP/DOWN] button to increase or decrease the size.
Phase
Push the [UP/DOWN] button to increase or decrease the phase.
/