Page is loading ...

959 Watts
Model: RVM1435
Counter Saver Plus Microwave Oven
Owner's Manual
Important Safety Information
2
J
Operating Instructions
_2
2
Helpful Information
J_
If SomethingGoes Wrong
Ill
liOl1 INIF
Hotpoint.com
164D3370P294
39-40364 ]
06-03 JR

READ ALL SAkETY
INFORMATION BEFORE USING
For yotlr bal(q y lhe illli)rllla[ioll ill /his lllalltlal
nlusl be tollowed It, nlinimize tile risk of tire
DD L_f -TA [ F'F[[-'_ )_ T_ or explosion or lo prment properly damage.
! II.I_'-lUllUJ_¥J personal inj ur} or loss of lift'.
TO AVOID OoNotAttempt
POSSIBI_2
EXPOSUt_
7"0 EXCESSIVE
_o operate tllis o_xm
with tim door open
since open-door
operallOll CHll restll|
ill hannfld exposure
_o lnicrowave energ).
MICRO WAVE ,t is impormn, no, to
,lelent or L_llllpeF with
ENER GY ,le sad, ,v intel'locks.
Do Not Place ally' object
belween /he OV(?II ][l'O/ll
Ihce and Ihv door or
allow soil or cleaner
residue io nCCtlllltll_tte
ell sealing surlaces
properb qtmlil]ed
seY'vl ce persolillel.
Do Not Operate tile o_xm
if il is dmnaged. 11 is
particularly importmn
Ilia| the ovell door
close properly and
that there is _lo
damage to the:
I dool bent).
2 hin4es and latches
broken or loosened,.
3 (looI seals and seMing
SLII'I _tces
The Oven Should Not
be adjusted or repaired
b\ _lllvone excep/

\Velcome to the GE timfily.
We're t)roud ot ore: qu_dity
products and we belie\'e
in depe;`;`dable service.
"fi)n'll see it in tiffs
eas_-lo-nse mmmal and
you'll hear it in tl;`e IHendly
voices of our consmner
selMce del}armlem.
Best of _dl, you'll experience
_l'[ese values e_(h ti;`i;`e yet/
/lse }o/lr l//icrow_lve. That's
important, because your new
micro_m e will be part ot
yore: limfily/_)r a long time.
Start Here!... Before using your Microwave
Write down the model
and serial nmnbers here.
_I]]e_ ;u'e (m a label inside
the o\ ei/.
Staple yourreceipt to the
inside back cover ofthis
manual. Youwill needit
toobtainservice under
warranty.
Model number
Serial number
Date of purchase
getore you call tor service,
there are a/ew things you
c_l_ do to help ;`;`s s{'rve volt
better.
Read this manual.
It (Ollt_lil;`S illstrtlctiOl;`S to
help you use and lnaintain
VO/lr ;`Ili(Tow;-Ive prot;`erly.
If you received a damaged
oven..,imllle(liatel'}' {Ol;`t_l(t
the dealer (or t)uiMer)
tl;`at sold veil tl;`e ovel;`.
Save time and money.
(]t;`e{k the se(tio;`l titled
"1t Sometl;`il;`g (;oes
Wrong" t)e/i)re calling.
This section helps you
solve common problems
t];`at might ()cell;'2
If VO/I (to need service,
you can relax knowing
help is only a t}hone call
away. A list of toll-fiPee
customer servi( e munbers
is included i;`;`the back ot
this mamml.
READ ALL SAPETY
INFORMATION BEFORE USING
This microwave oven is
IlL listed for installation
over electric and gas
ranges.
This microwave oven is
not approved or tested
for marine use.
• Read and lbllow the
specific "Precamions to
A\oid Possible Exposure
to l_2xcessive Microwave
Energy" on 1)_ge 2.
• This _ppliml(e must be
gr(mnd_ d. C(mnect only
to properly gr(mnded
omlet. See (;r(mnding
Inslrll(|ions s('(tlon on
t)_ge 10.
• l)o not momH this
_q)l)liam e over _ sink.
• Install or lo(_te this
_l)plian(e only in
_ccor(tan(e with the
provided Installation
I1 IS[1711('[ions.
• This ove_=the-range oven
was designed/or use over
ranges no wider dmn 36."
It may be installed o_er
bod_ gas and elecu:ic
cooking equipment.
• I)o not operaw this
appliance if it has a
damaged power cord or
plug, i/it is not working
properl}, or if it has 1)een
damaged or dropped.
I! the power (ord is
damaged, it must be
replaced by General
Ele(tric Servi(e or an
m_thorized service agent
using a power cord/i'om
(',enerM Ele( u:ic.
• I)o not cover or block
any openings on the
appliance.
• Llse this applimwe only
/br its imended use _s
described in this mmmal.
Do not IISC €orrosive
chemicals or vapors in
this appliance. This
microwave o_en is
specifically designed to
heat, dl_ r OF ('ook/hod,
and is not intended
/or laboratory or
industrial use.
I!1
• l)o not store this applimace
outdoors.
• Do not use this product
11('_117 W;+It(T ]()17 UX_ll//pl(',
in _ wet basement,
nero: _ swimming pool,
nero: _1sink or in similm:
locations.
• Keep power cord :_wm
tt'om heated stn:tilces.
• Do not immerse power
cord or ph N in water.
• To reduce the risk of fire
in the oven cavity:
-- I)o not overtook/ood.
Carcflfllv attend _lpplian( e
when paper, pla_,tic or
other ( ombustiMe
materials are placed
inside the oven while
cooking.
-- Remove wire twist-ties
m_d metal hmldles
fi'om p_q)er or plastic
containers betore placing
thelll ill the O\ell,
-- Do Dot use the ()_,_+I1
ti)r storage puq)oses.
Do not le_l\ e t)aper
ptx)ducts, cooking
utensils or tDod in the
o\'cn when not in use.
-- lJ materials inside oven
ignite, keep the oxen
door closed, turn the
OV('n ()]t and disconnect
the power cord, or shut
off power at the fi_se or
(ircuit t)reaker 1)ariel.
//the door is opened,
the lit',.' lm_y spread.
• See door sttrtilce cleaning
instructions in the Cat'('
and Cleaning section (s)
of this gtfide.
• This appliance must only
be serviced by qualified
ser\'ice pers(mnel+ Comact
nearest mlthorized ser\'ice
/itcility t6r exmnination,
l'(+p_liF Or _t(!i/IStI//('l/t+
• As wifll any appliance,
close supelMsion is
necessary when used
bv children.
• I)o not store m_ything
directly on top of the
mi(rowa\'c o_en surJi_ce
when the mi(rowa\'c oven
is in operation.
SA THt 2SE INS TR UC TIONS

SPECIAL N07 2S ABOUF MICRO WAVING
Ariing is the l//i( FO+V+r_++x+e
term t_>l"st/arks in the
o+,en. Ariing is ( aused by:
• Metal or foil tou(hing
the side of the o'_ell.
• Foil not molded to ti)od
(Utmlrned edges a(t like
amelmaS).
• Metal, such as twist-ties,
t)oultry pins, or gold-
tin/reed dishes, in the
nil( rowa_ e.
• Recycled l/al/er towels
containing sn/all metal
pieces being used in
the llliCl+OW_4ve+
• Do not poll l/Ol/COrn in
your microwave ()veil
mlless in a special
lnicrowave t)ot/corn
accessory or unless you
use l/Ot_(orn labeled t_)r
use in microwave ovens.
• Sol//e t)lTo(hlctS Stlch as
whole eggs and sealed
containers ti)r exan/ple,
closed jars--are able to
ext)lode and should not
be heated in this
lilicrow_ve ovel/. Stletl/Ise
of the lllierow;+_+e ovel/
(ould result in i_j/lry.
• 1)0 not boil eggs in a
microwave oven. Pressure
will build u t) inside egg
yolk and will cause it to
burst, t/ossibly resuhing
in il+jury.
• ()t/erating the n/ierowa_e
with no ti)od inside for
n/ore than a n/inute or
tWO lIl;+l_ ' C;+l[lSe d_tl//Hge
to the o_en and could
st_++rta [ire. It illcreases
the heat aromld the
n/agnetron and can
shorten the li/i' of
the ()Veil.
• Foods with mlbroken
outer "skin" su(h as
t)ot_toes, hot dog.',,
S_I/IS_Iges, t OlIl_tt oes,
apples, chicken li_ers
and other giblets, and
egg yolks should be
pierced to allow steam
to escape dm:ing
cooking.

I'.1
SAFETYFACT
SUPERHEATED WATER
Liquids, such as water,
coffee or tea, are able to
he overheated beyond
the boiling point without
appearing to he boiling.
Visible bubbling or boiling
when the container is
removed from the microwave
oven is not always present.
THIS COULD RESULT
IN VERY HOT LIQUIDS
SUDDENLY BOILING OVER
WHEN THE CONTAINER IS
DISTURBED OR A SPOON
OR OTHER UTENSIL IS
INSERTED INTO THE LIQUID.
To 1",_'(1me the risk o/il_j/lry
to persons:
-- I)o not overheat tile
liquid.
-- Stir the liqukl bodl
be/ore and hall\ray
through heating it.
-- Do not use straighbsided
containers with narrow
necks.
-- ,\lier heating, Mlow
the container to stand
ill the microw_v oven
/or a short time belore
rel//O\'illg the contailleE
-- Use extrelile care whell
inserting a Sl)OOn or
other utensil into tile
containec
• A_oid heating baby/ood
ill glass jars, e_en with tile
lid o/E Make sure all
in/m/t/ood is thoroughly
looked. Stir/ood to
distribute die heat e_vnlv.
Be careflfl to prevem
scalding when warming
tbrmula or breast milk.
The container Inavtcel
cooler than the milk really
is. Alwms test the milk
betore tbeding tile baby.
• I)on't det_'ost t_'ozen
beverages ill narrow-
necked bottles (especially
carbonated beverages).
Even if the container is
opened, t)ress/lre Call
build Ul/. This can cause
tile container to burst,
t)ossibly resulting in
i,_juv}.
• t tot toods and steam
call cause burns. Be
careflll when ot)ening
an\' containers of hot
tood, inchlding poll( orn
bags, cooking i/ouches
and boxes. To prevem
t/ossible il_im:}, direct
stean/ awa\'/i'om hands
and/ace.
• I)o not overcook
potatoes. They could
dehydrate and catch
fire, causing damage
to your o_en.
• Cook nleat and poultv}
thoroughl}--meat to
at least all INTERNAI_
temperature of 160°F
and t)oHltrv to at least all
INTERNAI, temperature
of 180°E Cooking to
these tenlperat ures
usually protects against
/oodborne ilh/ess.

SPECIAL N07 2S ABOU£ MICRO WAVING
Make sure all cookware
used ill Your microwave
oven is suitable tor
n/icrowaving. Most glass
casseroles, cooking dishes,
l//easllring CllllS , Cllstar(t
Clll/S , potter} or china
dinnerware which does not
have metallic u:im or glaze
with a metallic sheen Call
be/lsed. Sol//e cook'_,are
is labeled "suitaMe [ilr
microwm'ing."
HOW tO tesl for a microwave
safe dish
• [J _,ou m'e not sure Jl
a dish is lnicrowa,e-sa/c,
use thia test: P|;_ce ill the
ovcu both the dish you
are testing m_d ;1 glass
ule;_euril_g cup filled with
1 Clip ofw;ttor--e('t the
f/le;tMIril/g ell l) eit]ler
ill or next to the dish.
Microwave 30-45 seconds
at high. /f the dish heats.
it should not be uaed/or
l/licrowavillg.
If the dish relnains cool
and only tile water ill tile
cup heats, then the dish
is microwa_ e-sati'.
• If VO/l /ISe a l//eat the_
monleter while cooking,
make sm:e it is sati'/or
use ill lnicrowave o_ens.
• Do not use recycled
paper products. Recycled
paper towels, nallkins
and waxed paper Call
contain metal flecks
which n/w_' cause arcing
or ignite. Paper products
containing nylon or
nylon filaments should
be avoided, as they him
also ignite.
• _Ol//e stvro/oal// tlT_l'_is
(like tl/ose that meat is
packaged on) ha\e a tl/in
strip of n/etal embedded
ill tile bottom. When
lilicro'_,_l_,e(I, the metal can
burn the/loor of the oven
or ignite a paper towel.
• Do not use the
microwave to dry
• Not all plastic wrap is
suitable £)r/lse ill lllicro-
wave ovens. Check the
pa(kage/or t)roper use.
• Paper towels, waxed
paper and plastic wrap
Call tie used to cover
dishes ill order to retain
l//oistllre and prevellt
spattering, ge sure to
vent plastic wrap so stealll
Call escape.
• Cookware lilav becollle
hot because of heat
transti'rred/i'om the
heated/ood. Pot holders
n/m be needed to handle
tile (ookware.
• "Boilable" cooking
t)ouches and tightly
closed plastic bags should
be slit, pierced or vented
as directed by package.
If they are not, plastic
could burst during or
immediately _dter
looking, possibly resulting
ill il_iur }. Also, plasti(
storage (omainers should
be at le_lst pm:tially
uncovered because they
/orm a tight seal. When
cooking with containers
tightly covered with
plastic wrap, ren/ove
co_ering carefllllv and
direct steal// aW_lV /i'Ol//
hands and {ilce.
[!1.
• Use/oil only as dire(ted in
this n/m/ual. TV dinners
may be n/i/rowa_'d in toil
trays less than 3/4" high;
renlo_e tile top toil lover
_ll/(I ret/lrl/ the tr_l} t/) tile
box. When using toil in
till' l//i('rowa\ e ()veil, kee t)
tile/oil at leasi 1" away
ti'on/ tile sides of il/e oven.
• Plastic cookware--Plastic
cookware designed tot
nlicro_a_ e cooking is very'
usetill, bm should be used
(aretillh. E_en n/icrowa_'-
sale' t/lasfic may not be as
toleram of o_ercooking
COllditiOllS as are glass or
ceralIliC materials and
may soften or char if
subjected to short periods
of o_er/ooking, hi longer
exl)os[Ires to o_a_r/ookil/g,
tile tood and cookware
couM ignite.
Follow these guidelines:
I Use n/icrowa\e-sa/_'
plasti/s only and use
theln in stfi/t /on/plim//e
with tile cookware
l//_ll//lt_tl | liter's
recol//lIlel/d a|iol/s.
2 [)o I/or II/icrowave eli/lily'
COl/tail lets.
3 Do not permit children
to use plastic cookware
without / on/plete
sut/el-vision.
The/ml will operate
automatically under
certain conditions (see
Amon/atic Fan teamre).
"I:dke (are to prevent the
starting and spreading of
accidental cooking fires
while file _ellt tml is in use.
• Clean tile mlderside of
the l//icrowa_.e o/lell.
Do n()t allow grease
to build till on tile
nlicrowave or tile
tml tihers.
• Ill tile event of a grease
tire Oll till' S/lr/il('e Ill/its
below the n/icrowave
oven, smother a {]anling
pall OIl the s/lr]i_ce HI/it
lg covering the t)an
con/pletely with a lid, a
(ookie sheet or a [lat tray.
• Use care when cleaning
the veto/hn tihers.
Corrosive cleaning
agents, such as lye-based
()Veil cleal/ers, l//_l}
danlage the tihers.
• When prel/aring
flaming toods raider the
n/icrowa_e, turn tile vent
]_tl/ 01/.
• Never lea_e surtace m/its
beneath your microwave
oven unattended at high
heat settings. Boilovers
cause smoking and
greasy st)illo_ers that may
ignite and spread if the
l//icrowa_e Vellt ]_tl/ is
operating. "lb minimize
automati/ tan operation,
use adequate sized
cook_,are and use high
heal Ol/ siirl_lce [lllitS
OlllV whell I/ecessaFL
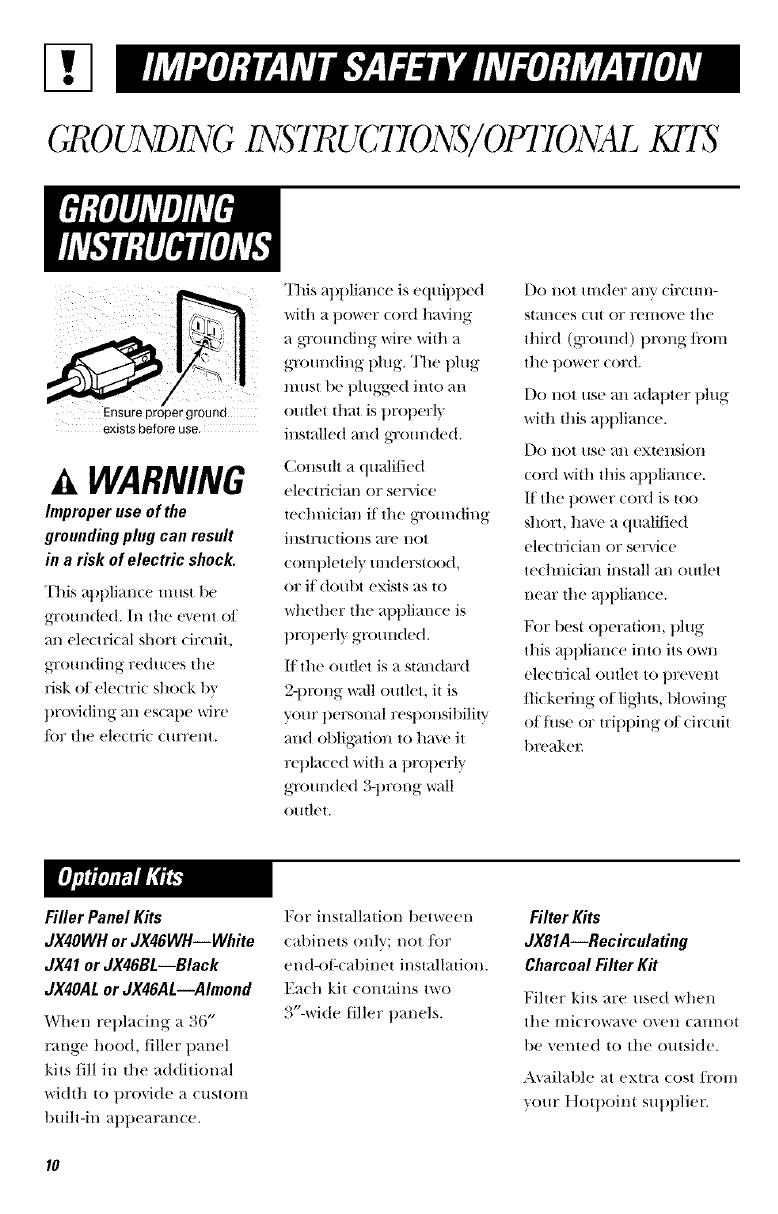
GR0 UNDING INSTRUC770NS/ OfflTONALKI'IS
Ensure proper ground
exists before use.
WARNING
Improper use of the
grounding plug can result
in a risk of electric shock.
This appliance nlust be
gr(mnded. Ill tile e_'nt of
an electrical short circuit,
gTounding reduces tile
risk of electric shock 1_
providing all escape wire
/_)r tile electric current.
This appliance is equipped
with a power cord having
a gT(mnding wire with a
gromlding plug. The plug
must be phlgged into an
O/ltlet that is properl}
installed and gT(mnded.
Consuh a qualified
electrician or service
technician if tile gr(mnding
instructions are not
completely understood,
or if doubt exists as to
whether tile appliance is
properly grounded.
If the outlet is a standard
2-prong wall outlet, it is
your personal responsibilit_
and obligmion to hmv it
repla(ed with a properly
grotmded 3-prong wall
outlet.
1)O llOt /lnder ;41iv cirCtll/l-
stan('es ('tit or rel//o\e the
third (gTotmd) prong/i'om
tile power cord.
Do not use an adapter plug
with this appliance.
Do not use an extension
cord with this appliance.
If tile power cord is too
short, hm e a qualilied
electrician or service
technician install an outlet
near tile applian(e.
For best operation, plug
this appliance into its ()_rt_
electri(al outlet to prevent
flickedng of lights, blowing
offllse or tripping of circuit
breaker.
Filler Panel Kits
JX4OWH or JX46WH--White
JX41 or JX46BL--Black
JX4OAL or JX46AL--Almond
When repladng a 36"
range hood, Hiller panel
kits Hillin tile additional
width to provide a custom
btdh-in appearance.
For installation between
(abinets only; not/or
end-ot_cabinet installation.
Ea(h kit contains two
._4%wi(te filler panels.
Filter Kits
dX81A--Recirculating
Charcoal Filter Kit
Filter kits are used when
tile microwave oven cannot
be vented to tile outside.
A\ailable at extra cost/ir)m
your t]otpoint supplier.
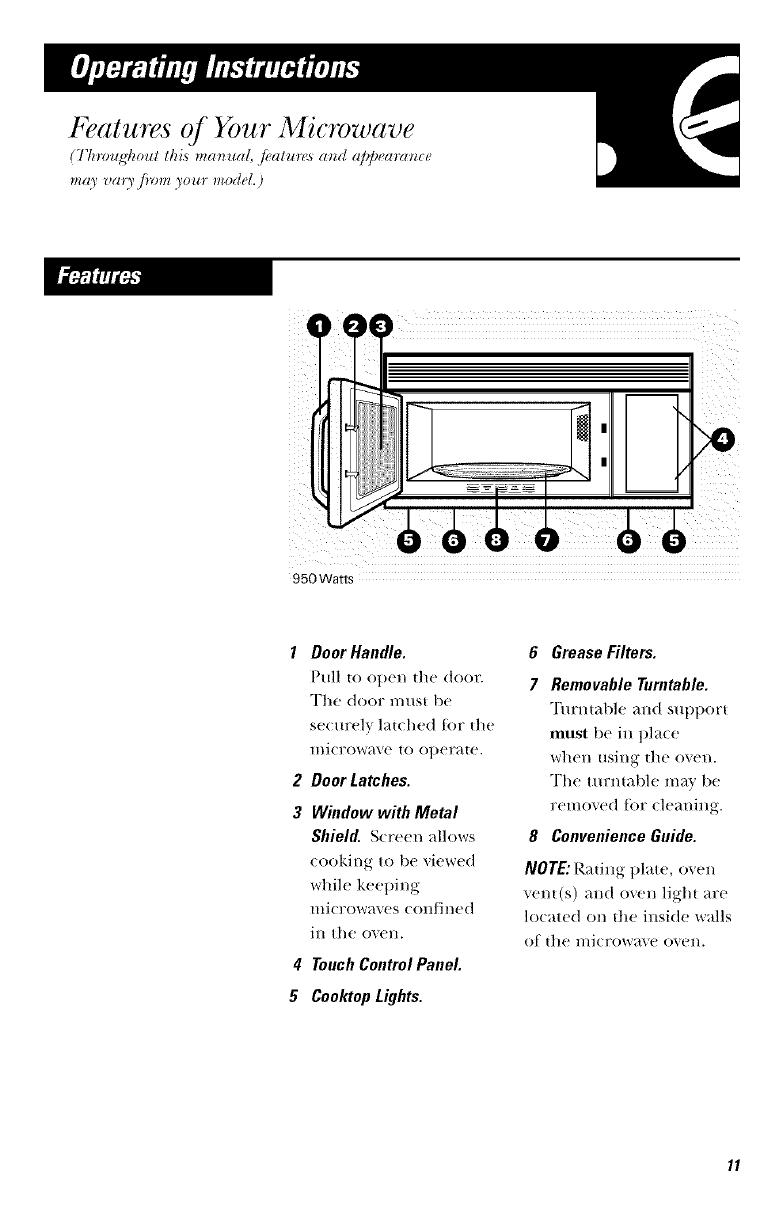
950Watts
1 Door Handle.
Pull to open the (|oo_':
The door must be
se(urelv latched [or the
mi(To_ave to ot)erate.
2 Door Latches.
3 Window with Metal
Shield. Screen alh)ws
cooking to be viewed
while keel)|rig
microwaves confined
in the oven.
# Touch Control Panel
5 Cooktop Lights.
6 Grease Filters.
7 Removable Turntable.
"I'ur_,t:_lbh, a_,d supl)ort
must be in t)la(e
when using the oven.
The ttllTntable may be
removed h)r cleaning.
8 Convenience Guide.
NOTE:Rating t)late, oven
ven|(s) and oven light are
located on the inside walls
of the microwave oven.

The Controls on Your Microwave Oven
(Tlnvugq_oul this ma_ua[, fi_alurc_5m_d al)l)ectranc_ma) vm3 j}_)m3our modeL)
Youcan microwave
by time,
temperature,
( TIME " DEROST "_
or with the AUTO / TIMEJ
convenience _
featnres, minute cook - 1 - 6
TimeFeatures
TimeCooking
Press Enter
TIME COOKI & II (Press onceOrtwice) Amount of (ookhlg dmc.
DEFROSTAUTO/TIME(Presstwice) Amount of defi'osting time.
MINUTE COOK Starts Jll_,ll_,(!(lJatelv!
POWERLEVEL Power lexel 1-I O.
ADD 30 SEC Starts Jll_,ll_,e(lJat(_lv!
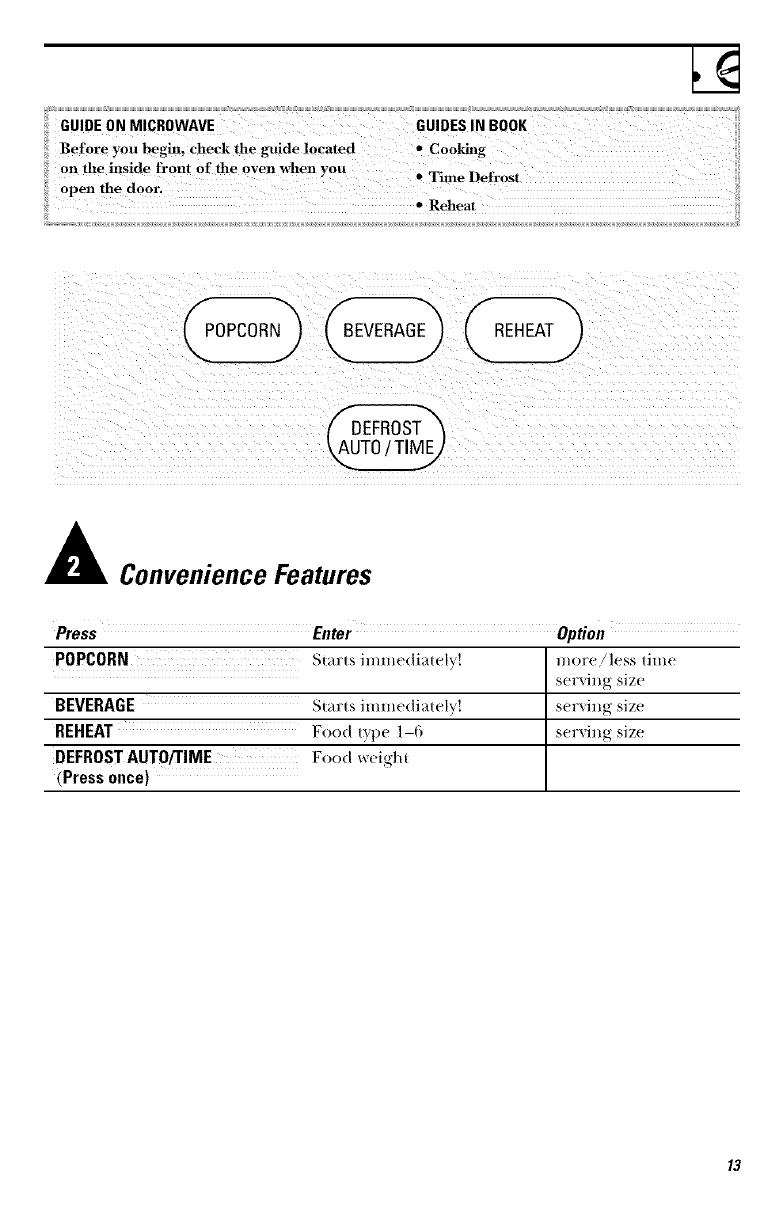
i GUIDE ON MICROWAVE GUIDES IN BOOK
: Before yon beginl Check the guide iocated 'PCoo_
on the inside i¥ont Of the Oven when you
Tmle Defrost
POPCORN
BEVERAGE)
DEFROST
,,AUTO/ TIME]
ConvenienceFeatures
Press Enter Option
POPCORN Starts immediately! more!less time
serxing size
BEVERAGE Starts immediately! serxing size
REHEAT Food type 1-6 serving size
DEFROST AUTO/TIME Food weight
(Press once)

Power Level
iiThe po_er!ewlm_v be
}::emered or cha,_ged
+
immediateb after
ii enteri!_g tile _'ature
::time tor TIME C,OOK,
TIME DEFROST or
changed during time
select Time Defrost.
2 E, cook .gor
ii defrosting time.
ii4 Se!ect desired power
Varial)le power levels add
flexibility to microwave
cooking. The power levels
on the l//icr()w_e oven
can be coral)areal to the
surlhce milts on a range.
ttigh (power level 10) or
full t)ower is tlle/astest
way to cook and gives you
100% 1lower. Each power
level gives you microwave
energ-} a certain percent of
die time. Power level 7 is
microwave energ-y 70% of
die time. Power level 3 is
energy 30% of the time.
A high setting (10) will
cook/aster Lint toed ma_.
nee(t lIlore ti'e(tuelH
stirring, rotating or turlfing
()vet_ Most cooking will Lie
done on t ]igh (power level
10). A lower setting will
cook more evenh' and need
less stirring or rotating of
the/oo(I.
Sol//e t()ods ill,iv have
belier [laver textllre or
al)l)earance if one of die
h)wer seuings is used. Use
a h)wer power level when
looking/oo(ts that have a
tendency to boil o_er, such
_,s s(Mlol)ed t)ot_toes.
Rest periods (when tlle
lili(row_lve energy (v(les
el1) give time tor the toed
to "equMize" or lralJ, sler
heat to the inside ol tile
loo(|.An eXallll)le ol this is
shown with t)ower level 3
the de/i'os| (vole. [f micro-
w_,_e energy did not cxcle
off, the outside of the/ood
Wollld (ook ])e/iJre the
inside _r_SdeIi'oswd.
/lere are SOlll(' CX_tl/l|)|_ '_,
el IlSeS l()r V_lrioIIS ])owe[
levels:
PowerLevel BestUses
High 10 FM_. b_,con.
vcget_,bles,
boilimz liquids.
Med-High 7 Gcmlc
cookiP.g (n
llle;41 ;lnd
pouhry;
b_king
(_sscroles
and rehcming.
Medium 5 Slow cooking
and lcnderizing
S[/( h _ls SleWS
alld less _cll(lcr
CIILS el llle;_ll,
Low2or3 Delrostiu_,
witholll
cooking:
simmcriP.g:
delicate smites.
Warm I Kc, epiJug lood
_.VD I'lI_ _viT|I( _[/1
OV,_'I'C ookill _
sotlenillg
butter.
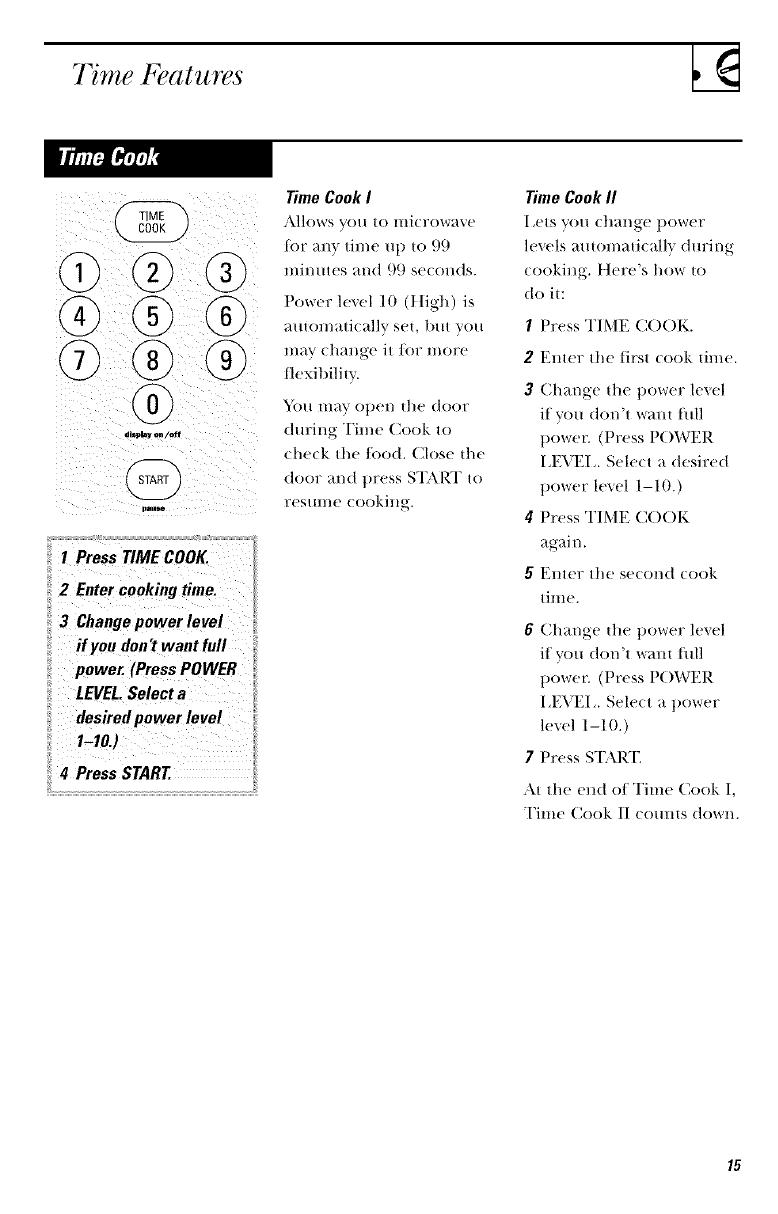
Time Features
1 Press TIME COOK.
2 Enter cookiug time.
3 Change power level
if you don't want full
power. (Press POWER
LEVEL.Select a
desired power level
1-10J
4 Press START.
Time Cook I
Jkllows VO/I tO lIli(row;tve
[or any time up to 99
mimm's and 9(.)se(on(Is.
Power level 10 (t[igh) is
automatically set, but you
may change it/i)r more
flexibilitv.
You may ot)en the door
during Time Cook to
che(k the/ood. Close the
door and t)ress START to
res/ll//e (ookil lg.
TimeCookII
Ix'ts you (hange 1)ower
levels automatically during
cooking. Here's how to
do it:
1 Press TIME C()()K.
2 Enter the tirst cook time.
3 Change tile power level
if you don't want full
t)owe_: (Press P()WER
I J_;VH. Select a desired
power level 1-10.)
4 Press TIME COOK
again.
5 Enter the se(ond cook
time.
6 Change tile power level
if you don't want full
t)owe_: (Press P()WER
I,EVEI. Sele(t a power
level 1-10.)
7 Press STkR'E
At the end ot Time Cook I,
Time Cook/l/ounts do/_'l/.

Cooking Guide for 7 me Cook I & 11
NOTE:Usepowerlevel High(10)unlessotherwise noted.
Vegetable Amount Time Comments
Asparagus
(liest! spears)
(ti'ozen spears)
Beans
(ii'esh green)
(Ii-ozen green)
(ti'ozen lima)
Beets
(ti'esh, _ hole)
Broccoli
(fi-esl! Ctlt)
(fiest! spears)
(ii'ozen,
chopped)
(li-ozen spears)
Cabbage
(n-es!_)
(wedges)
I lb.
1O-oz. package
I lb. cut in half
1 O-oz. package
1O-oz. package
1 1)reich
I t)tmch
(lV_ to l___lbs.)
1 tmn(h
(lY_ to 1__,lbs.)
1 O-oz. package
1 O-oz. package
I medimn head
(about 2 lbs.)
6 to 9 mi_,.,
Med-Iligh (7)
5 to 7 min.
9 to 11 min.
6 to 8 min.
6 to 8 min.
17 to 21 min.
7 to 10 min.
9 to 13 min.
5 to 7 min.
5 to 7 m,i_,.
8to ll mi]}.
7 to 10 min.
In 1V.)-(V. oblong glass baking dish,
])]_'t(e 1/4 (Ill) +v+r21teF.
In t-(It. (asserole.
In 1t/_(tt. (asserole, place 1+/2 {up water.
S •
hi 1-(It. (_lsL_er()le, t)la(e 2 tablespoons
W;-I t er.
In 1-(IL ( asserole, t)la( e 1/4 (u t) _ater.
Carrots
(Ii'esl], sliced) 1 lb.
(li'ozen) 1 O-oz. package
Cauliflower
(tto_erets) I medimn head
(Ii'esh, :'.t!ole) l me(tium head
(fi'ozen) 1 O-oz. pa( kage
7 to 9 min.
5 to 7 min.
9 to 14 mim
10 to 17 min.
5 to 7 mi,].
In 2-qt. (asserole, pla(e 1/2 (tq) water.
In 2-qt. casserole, place 1/2 cup water.
In 2-qt. oblong glass baking dish, place
1/4 cup water.
In 1-qt. casserole.
In 1-qt. casserole, place 3 tablespoons
water.
In 1V_)-or 2-qt. (asserole, pla(e 1/4 (u t)
W;-I t er.
h] 2- or 3-qt. (asserole, pla(e 1/4 (u t)
water.
In 2-qt. (asserole, 1)la(e 1/2 (tq) water.
In 2-qt. (asserole, pla(e 1/2 (tq) TV_Iter.
In 1-qt. (asserole, pla(e 2 tal)lespoons
W;-I t er.
In l V2-qt. (asserole, pla(e 1/4 {up water.
In 1-qt. (asserole, pla(e 2 tablespoons
water.

Corn
I l-I'(._Zell kernel
Corn on the cob
(li'esh
( ] ro[eIl }
Mixed
vegetables
( lrozell )
Peas
(lresh. shelled)
(fi'ozen)
Potatoes
tJ resh. cubed.
_llite,
ti'esll, whole.
sweet or white,
Spinach
(li'esh I
tlrozeIl.
chopped
mid leal,
Squash
t[:resll. Sllilll/lel"
>llld '_ellow
I WillIef. a('orl'
bLIlIeFIILI[ }
] O-oz. package
] 10 % e_lrs
] O-oz. package
2 |bs. unshe|led
] O-oz. package
zt t)Ol;llOeS
] t_ 1o _ OZ.)
10 to 16 oz.
l O-oz. t)ackage
1 lt). sliced
] to 2 squash
N)ottl 1 1|). each)
5 to 7 lnin.
3 to 4 rain.
)er e_lr
5 to 6 rain.
3 to 4 rain.
)er e_lr
5 to 7 lnin.
9 to 12 rain.
5 to 7 lnin.
9 to 12 rain.
3 to 4 nlin.
5 to 7 lnin.
5 to 7 lnin.
5 to 7 nlin.
Sto 11 nlin.
h/ 1-qt. casserole, t)lace 2 tal)lesl)oons
water.
h/ 2-qt. oblong glass baking dish, t)lace
corn. If corn is in husk, use no water;
if corn has been husked, add l/4 cu 11
water. Rearrange a/ler half of time.
Place in 2-qt. ol/long glass baking dish.
Cover with vented t)lastic wrat).
Rearrange alter half of time.
h/ 1-(tt. casserole, t)lace 3 tal/lesl)oons
water.
h/ 1-(it. casserole, t)lace l/4 cup water.
h/ 1-qt. casserole, t)lace 2 tal)lesl)oons
water.
Peel and cut into 1 inch cubes. Place
ill 2-qt. casserole with 1/2 cup water.
Stir alter half of time.
Pierce with cooking tork. Place in
center of the ()veil. Iet stalld D l//in/l|es.
hi 2-qt. casserole, tilace washed sl)inach.
h/ 1-(it. casserole, t)lace 3 tal)lesl)oons
water.
hi 1½-qt. casserole, place 1/4 cu l) wateI_
Cut in half and ren/ove fibrous
n/elnbranes. In 2-qt. oblong glass
baking dish, place squash cut-side-
down. "Ihrn cut-side-ut) alter 4 minutes.
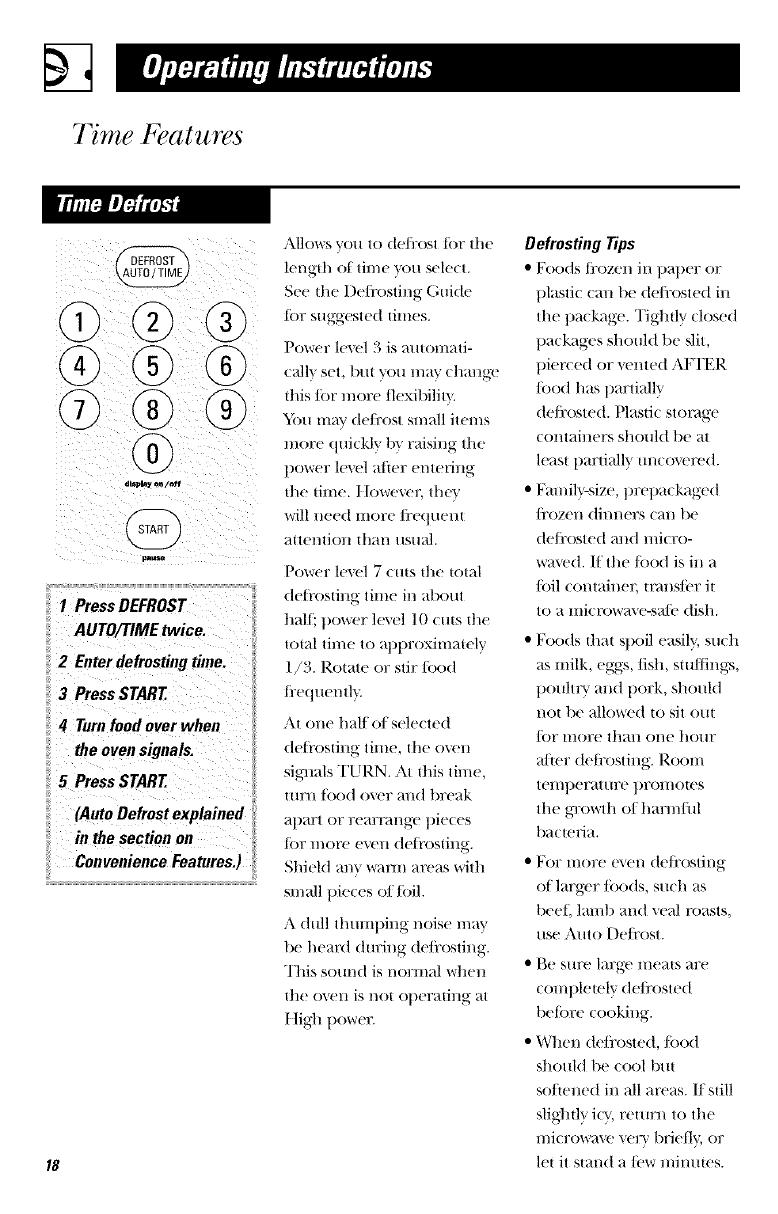
Time Features
1 Press DEFROST
AUTO/TIME twice.
2 Enter defrosting time.
3 Press START
4 Turufood over when
the oven signals.
5 Press START
(Auto Defrost explained
in the section on
Convenience Features.)
,_'xllows VO[l tO deflx)st tot tile
lenglh of time xxm select.
See the De/i'osting Guide
tor suggested times.
Power level 3 is automati-
c_flly set, but you m_ff change
this R)r more/lexibilitv
_bu lna'_ de/i:ost small items
more quickly 1)y raising the
power level alier entering
tile lime. tlowev{q; they
will need more/i'equenl
attent]Oll than/iStlal,
Power le_vl 7 cms die {otal
deti'osting time in about
hal{:, t)ower le\el 10 {uts the
total time to allllroximaiely
1/3. Rotate or stir R)od
fl}equentl}.
At one hall of selected
deti'osting time, the oven
sigl]als TURN. At this time,
turn tood over and break
apart or real}l'_lnge t)ieces
R)r I//Ol'e e\'en deli'osiing.
ShieM any _mt'm areas with
slmOl pieces of Rill.
A dull thumping noise may
be heard dm}ing de/resting.
This sound is normal when
Ill{} OVell is no[ Oller_lling _lt
t ]igll t/ower.
Defrosting Tips
• Foods ti'ozen in t)at/er or
t)lastic can be (teDosted ill
the package. Tightly closed
packages shouM tie .slit,
t)ierced or vented AKI'ER
/ood has l/artially
defl:osted. Plastic storage
containers should be at
leasi partially m]co_vt'ed.
• Famil}_size, tn}epackaged
/l'ozen dinners call be
defl}osted and micro-
waved. If tile/ood is in a
loll container, tmns/i:r it
tO a lllict'owa\ e-sa]i: dish.
• Foods lhai spoil easily, such
as milk, eggs, fish, stuffings,
t)ouluT and pork, shouM
not be allowed to sit out
for more than one hour
a/ier del]'osting. Room
temt)erat ure t)romotes
tile gTowth of ham]tiff
ha{ {ella.
• For more e\ en (te/i'osting
of larger/oods, such as
beet; lamb and veal masts,
use Auto De/i'ost.
• }_e Stll'e large llleals are
c()mllleiely de/i'osted
belore cooking.
• When defl:osted,/ood
should be cool but
so/tened in all areas. If still
slighdy iQ', return to tile
microwave very brieIly, or
lei it stand a/i:w mi]mies.

D rosting Guide
Food Time Comments
| mhl.
3 Io _ mill.
Breads,Cakes
Bread,bunsor rolls _1 piece)
Sweetrolls appro×. 12 oz..
Fishand Seafood
Fillets, frozen_1 lb..
Shellfish,smallpieces (1 lb.)
Fruit
Plastic pouch--1 to 2
(lO-oz, package J
Meat
Bacon 1 lb..
Franks (] lb.)
Groundmeat I lb.,
Roast:beef,lamb,veal,pork
Steaks, chops and cutlets
Poultry
Chicken, broiler-fryer
cutup (2K, m 3 lbs.
Chicken,whole
(2½ to 3 lb_,
Cornish hen
Turkey breast (4 lo 6 lbs.,
5 |o 7 lni//.
12 Io 16mi|/.
per lb
5 to 7 min.
per lb
15 1o 19 min.
17 to 21 min.
Pla(e blo(k ill (asserole, Till?i/ o'_er alld
break ut) after half lhe time.
Place mml)ened package in oven.
Iet stand 5 mimues ariel: deflx)siing.
Place mmpened package in oven.
Microwave just m_til/i'anks can be
setlaramd. I,et stand 5 millutes,
if necessaw, to comtllew (tefl:osting.
Turn meat over alter half the time.
Use power level 1.
Place m_wral)l)ed meat in cooking dish.
Turn o_er a/ler half llle lime and shield
warm areas wiitl toil. When tinished,
setlaraw l)ieces and Met stand to comtllete
de/i'osting.
Place wrapt)ed chicken in dish. Unwrap
and turn over a/let half die time. When
finished, setlarate 1)ie(es and mi(rowa\ e
2-4 minutes more, if lle(essarv.
I,et stall(t to tinish del_'osdng.
Place wrapped chicken in (lish. Aller half
ihe time, /ll/Wl?}t]) }tl/(t tllrll ctlickell ovec
Shield warm areas wiitl toil. Finish
de/i'osting. If necessat), rim cold water in
tl_e cavity mull giblets can be removed.
Place m_wrat)l)ed hen in the oven t)reast-
side-up. Tm:n over atter half the time.
Rm_ cool wawr in the cavity muil giblets
(an Lie removed.
Pla(e m_wrat)l)ed breast in dish breast-
side-down. After half the time, tm:n over
and shield warm areas widl/oil. Iqnish
deli'osting. I,et stand 1-2 hom:s in
refi'igerator to (omtlleie (te/i'osting.
Time Features
z
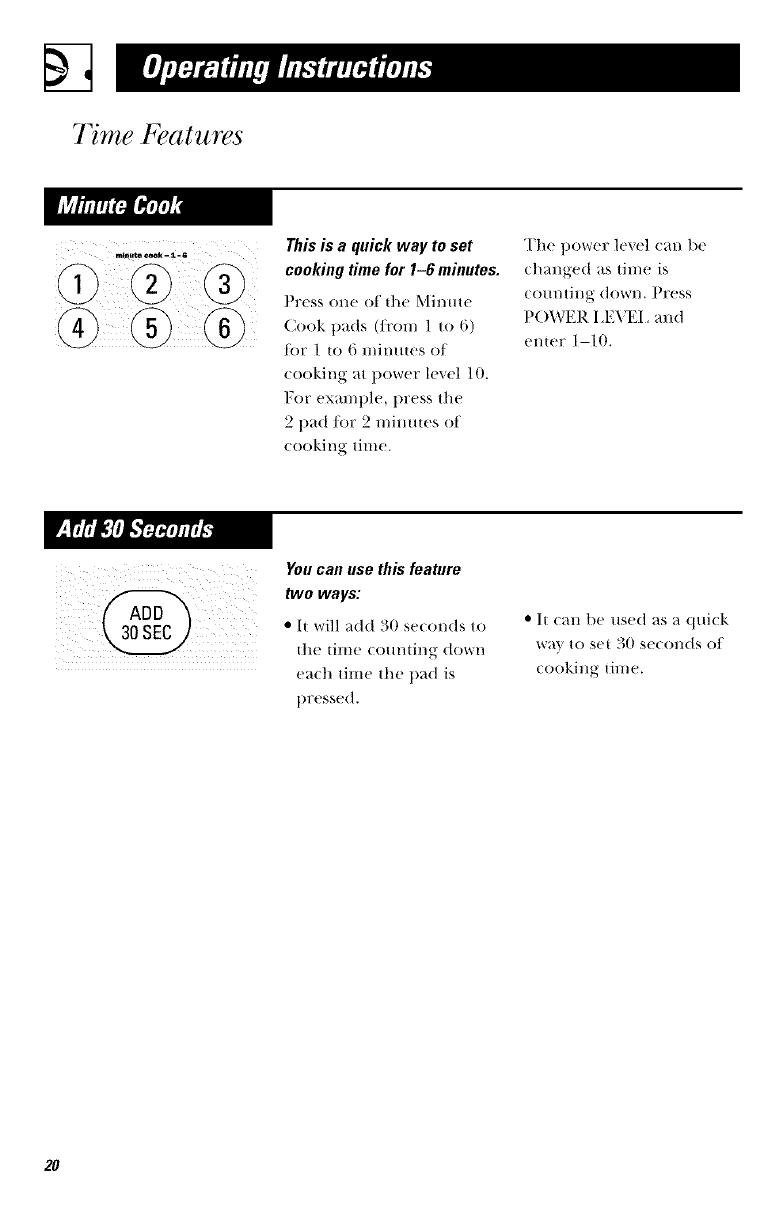
This is a quick way to set
cooking time for 1-6 minutes.
Press one of the Minute
Cook pads (from 1 to 6)
tor 1 to 6 minutes of
cooking at power level 10.
For examl}le, press the
2 1)ad/or 2 minmes of
cooking time.
The t)ower level can be
changed as time is
CO/ll/tJllg dOWI/. PFess
POWER I ,E'_2I _and
emer 1-10.
You can use this feature
two ways:
•/t will add 30 se(onds to
tlle tilIle (OHIHiI/_ dowI/
ea(h time the pad is
pressed.
• h (an 1)e used as a (lui(k
(ooking time.
20
/