OV M41 PRODUCT DESCRIPTION SHEET
GB DE FR IT CH
5019 610 01065
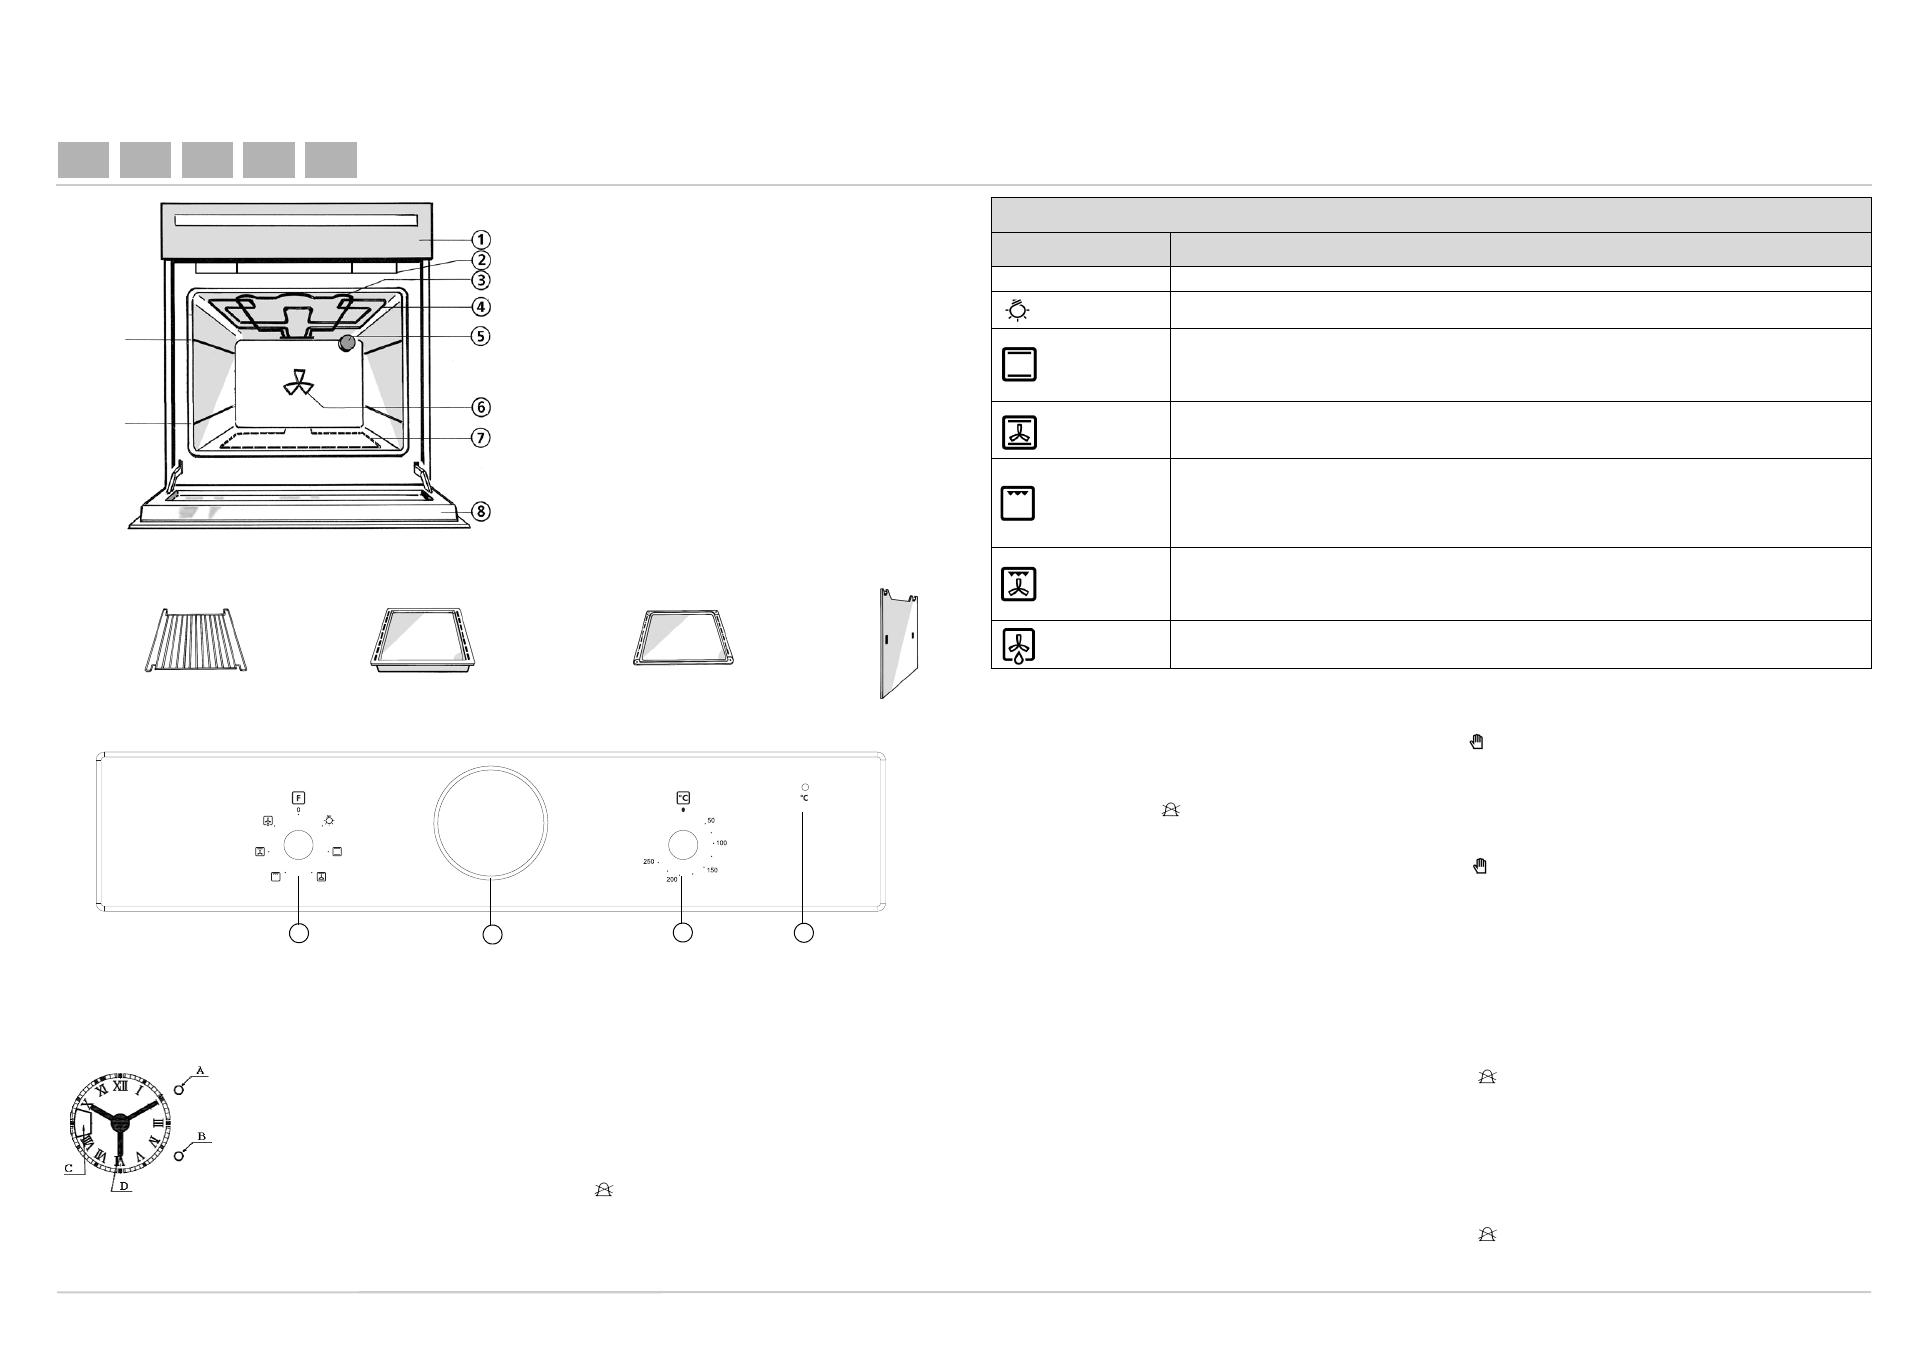
1. Control panel
2. Cooling fan (not visible)
3. Top heating element
4. Grill element (can be lowered)
5. Rear oven lamp
6. Fan
7. Bottom heating element (not visible)
8. Oven cool door
ACCESSORIES
CONTROL PANEL
1. Function selector knob
2. Analog clock
3. Thermostat knob
4. Thermostat indicator light (red)
ANALOG CLOCK
The analog clock allows:
1)Viewing the time of the day. To adjust the time of the day, pull the button (B) and turn it clockwise to
set the time.
2)Programming the cooking start time. The maximum programmed cooking start time is 12 hours.
3)Programming the cooking time. Select the cooking time (available with any function) to turn the oven
on for a specified period of time. At the end of the specified time the oven will switch off automatically.
The maximum programmed cooking time is 180 minutes.
Make sure that the window (C) displays symbol 0 or (OFF) at the start of cooking.
First
Highest
level
level
1 Wire
Shelf:
1 Drip tray:
1 Baking tray:
1 Side
catalytic
panels:
1
2
3
4
SWITCHING ON THE OVEN
MANUAL COOKING (without cooking start time or cooking duration)
1) Pull the button (A) and turn it until the hand (D) points to the time shown on the clock (hour hand).
2) Turn the button (A) clockwise (without pulling), until the symbol | or is displayed in the window (C).
3) Turn the selector knob to the required symbol. The oven light switches on.
4) Turn the thermostat knob clockwise to the required temperature. The red thermostat indicator light switches on.
5) At the end of cooking, turn the knobs (function selector and thermostat) to OFF-0 or • (depending on model).
6) For going back to 0 or (OFF position), turn the button A clockwise.
MANUAL COOKING (with cooking start time but without cooking duration)
1) Pull the button (A) and turn it until the hand (D) points to the time at which cooking is to start. (e.g. in the figure: hours 6.00).
2) Turn the button (A) clockwise (without pulling), until the symbol | or is displayed in the window (C).
3. Turn the selector knob to the required symbol. The oven light will not switch on until the hands point to the same time as hand D.
4. Turn the thermostat knob clockwise to the required temperature. The red thermostat indicator light will not switch on until the hands
point to the same time as hand D.
5) At the end of cooking, turn the knobs (function selector and thermostat) to OFF-0 or • (depending on model).
PROGRAMMED COOKING (with cooking start time and cooking duration)
1) Pull the button (A) and turn it until the hand (D) points to the time at which cooking is to start. (e.g. in the figure: hours 6.00).
2) Turn the button (A) clockwise (without pulling) until the required cooking duration is displayed in the window (C) (1 - 180 min.).
3) Turn the selector knob to the required symbol. The oven light will not switch on until the hands point to the same time as hand D.
4) Turn the thermostat knob clockwise to the required temperature. The red thermostat indicator light will not switch on until the
hands point to the same time as hand D.
5) At the end of the set cooking time an acoustic signal will sound and the oven will switch off automatically. To exclude the acoustic
signal, turn button (A) clockwise (without pulling) until the symbol 0 or is displayed in the window.
6) At the end of the set cooking time, cooking may be prolonged by following the instructions given above, or by using the
manual cooking procedure.
PROGRAMMED COOKING (with cooking duration but without cooking start time)
1) Pull the button (A) and turn it until the hand (D) points to the time shown on the clock (hour hand).
2) Turn the button (A) clockwise (without pulling) until the required cooking duration is displayed in the window (C) (1 - 180 min.).
3) Turn the selector knob to the required symbol. The oven light switches on.
4) Turn the thermostat knob clockwise to the required temperature. The red thermostat indicator light switches on.
5) At the end of the set cooking time an acoustic signal will sound and the oven will switch off automatically. To exclude the acoustic
signal, turn button (A) clockwise (without pulling) until the symbol 0 or is displayed in the window.
6) At the end of the set cooking time, cooking may be prolonged by following the instructions given above, or by using the
manual cooking procedure.
Oven functions table
Function Description of function
-Oven OFF 0
LAMP
• To switch on the oven light.
STATIC
• To cook meat, fish and poultry in the oven.
• Preheat the oven to the required cooking temperature and place the food inside as soon as the red
thermostat light turns off.
• It is advisable to use the second or third level.
PASTRY/FAN
• To cook on max. two levels.
• If necessary, switch the position of the dishes in the oven for optimum cooking performance.
• It is not necessary to preheat the oven (except for pizzas and focaccias).
GRILL
• Use the grill function to cook sirloin steaks, kebabs, sausages, vegetables au gratin and for making toast.
• Preheat the oven for 3/5 min.
• During cooking the door must remain closed.
• When cooking meat, to avoid spatters of fat and smoke, pour a little water into the drip tray.
• It is advisable to turn the food during cooking.
TURBOGRILL
• This function is ideal for cooking large pieces of meat (roast beef, roast joints).
• During cooking the door must remain closed.
• When cooking meat, to avoid spatters of fat and smoke, pour a little water into the drip tray.
• Turn the meat during grilling.
DEFROST
• Ideal for thawing frozen food at room temperature.
• The food should be placed in the oven in its wrapping to prevent it from drying out.

