Operation Network
function
Troubleshooting Specifications
PC
Application
Thank you for purchasing this DENON product. To ensure
proper operation, please read these owner’s manual carefully
before using the product.
After reading them, be sure to keep them for future
reference.
Getting Started
Accessories
Check that the following parts are supplied with the product.
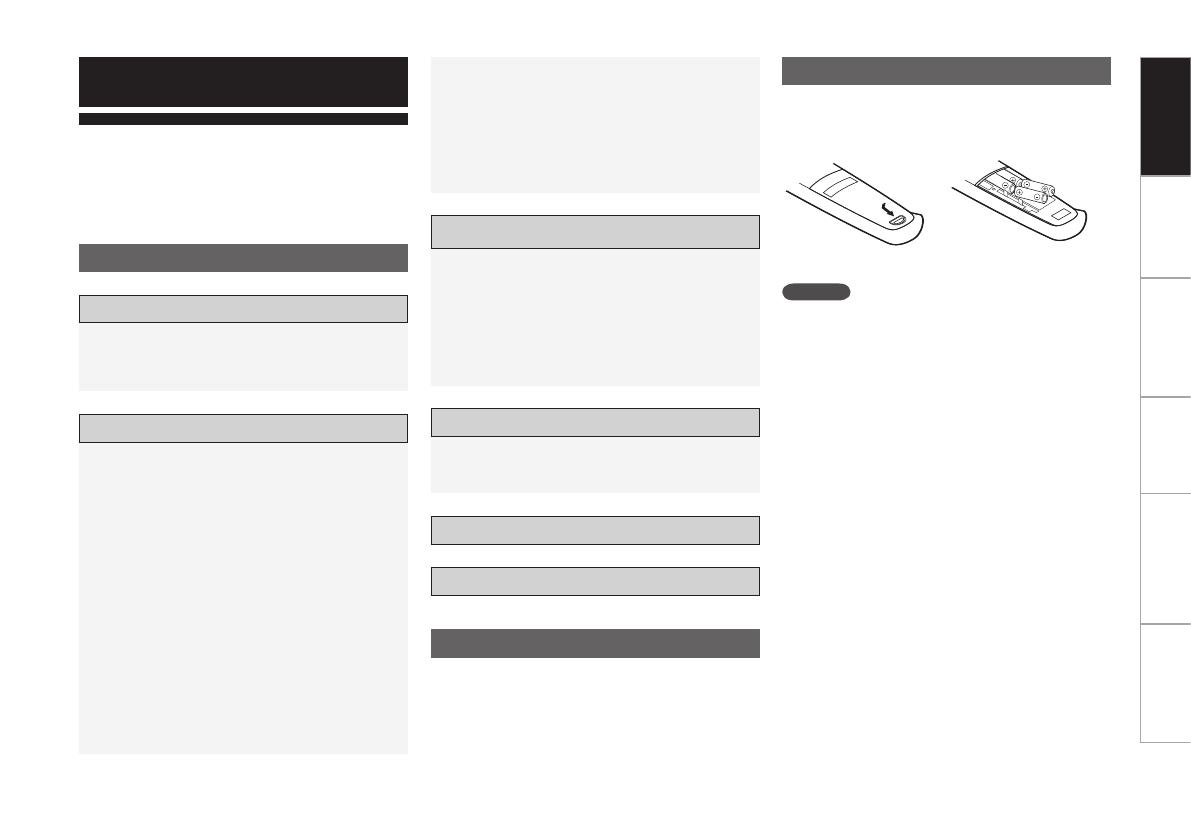
Inserting the batteries
q Lift the clasp and remove
the rear lid.
w Load the four batteries
properly as indicated by
the marks in the battery
compartment.
e Put the rear cover back on.
NOTE
• Use a LR03/AAA battery for the remote control unit.
• If you try to operate the RC-7000CI / 7001RCI near the
device you want to operate but the device does not operate,
replace the batteries with new ones. (The included batteries
are only meant for verifying operation. Replace them with
new batteries soon.)
• When inserting the batteries, be sure to do so in the proper
direction, following the “q” and “w” marks in the battery
compartment.
• To prevent damage or leakage of battery fluid:
• Do
not use a new battery together with an old one.
• Do
not use two different types of batteries.
• Do
not attempt to charge dry batteries.
• Do
not short-circuit, disassemble, heat or dispose of
batteries in flames.
• If the battery fluid should leak, carefully wipe the fluid off the
inside of the battery compartment and insert new batteries.
• Remove the batteries from the
remote control unit if it will
not be in use for long periods.
• When replacing the batteries, have the new batteries ready
and insert them as quickly as possible.
•
“LOW BATTERY”appears on the LCD when the remaining
battery power decreases. When this happens, replace the
battery as soon as possible.
q Owner’s Manual .............................................................. 1
w Remote control ................................................................ 1
e LR03/AAA batteries ......................................................... 4
r CD-ROM .......................................................................... 1
t USB cable (Cord length: Approx. 3.3 ft / 1 m) .................. 1
Accessories ········································································ 1
Inserting the batteries ······················································
1
Operating range of the
remote control unit ··················· 2
Part names and functions ················································
2
Getting Started
Contents
Introduction ······································································· 3
Settings menu map ··························································
4
Operation the
LCD button ················································ 5
Settings
Setting the screen display time ·······································
5
Setting the
backlight on time ··········································· 6
Adjusting the
contrast ····················································· 6
Completing the setting ····················································
6
Various settings
Using the preset memory function ·································
7
Using the
learning function ·········································· 7, 8
Using the Macro function ············································
8, 9
Using the delay time function
·········································· 9
Using the
code search function ······································· 9
Favorites settings ····················································· 10, 11
Using the punch through function ··································
11
Editing pages ····························································11, 12
Editing devices ······················································ 12 ~ 15
Editing buttons ······················································ 15 ~ 18
Operation
Deleting signals registered with the learning function ···18
Deleting signals registered with the macro function ······
19
Deleting
favorites ···························································19
Deleting the registered punch-thru function ···················
19
Operational reset ···························································
20
User reset ······································································ 20
Lock function ································································· 21
Unlock function ······························································ 21
Network function ..................................................22
Operations using nodes
Adding nodes (1)···························································· 23
Adding nodes (2)···························································· 23
Deleting
nodes ······························································ 24
Viewing
nodes ······························································· 24
Changing
node labels ···················································· 25
Setting the receiver
display mode (RDM) ······················ 25
Checking the remote control unit version······················ 25
Troubleshooting .....................................................27
Specifications ..........................................................27
Getting Started
PC Application
RC-7000CI Editor function ·············································· 26
RC-7000CI Editor installation ········································· 26
Using RC-7000CI Editor ·················································
26


