Sony DAV-FR1 User manual

Category
DVD players
Type
User manual
©2004 Sony Corporation
4-255-434-13(2)
DVD Home Theatre
System
Operating Instructions
DAV-FR1/FR8/FR9
2
US
3
To prevent fire or shock hazard, do not
expose the unit to rain or moisture.
Caution – The use of optical instruments with this
product will increase eye hazard.
For the customers in the U.S.A
This symbol is intended to alert the user to
the presence of uninsulated “dangerous
voltage” within the product’s enclosure
that may be of sufficient magnitude to
constitute a risk of electric shock to
persons.
This symbol is intended to alert the user to
the presence of important operating and
maintenance (servicing) instructions in the
literature accompanying the appliance.
Owner’s Record
The model and serial numbers are located at the bottom
of the unit. Record the serial number in the space
provided below. Refer to them whenever you call upon
your Sony dealer regarding this product.
Model No. DAV-FR1/FR8/FR9
Serial No.______________
WARNING
This equipment has been tested and found to comply
with the limits for a Class B digital device, pursuant to
Part 15 of the FCC Rules. These limits are designed to
provide reasonable protection against harmful
interference in a residential installation. This
equipment generates, uses, and can radiate radio
frequency energy and, if not installed and used in
accordance with the instructions, may cause harmful
interference to radio communications. However, there
is no guarantee that interference will not occur in a
particular installation. If this equipment does cause
harmful interference to radio or television reception,
which can be determined by turning the equipment off
and on, the user is encouraged to try to correct the
interference by one or more of the following measures:
– Reorient or relocate the receiving antenna.
– Increase the separation between the equipment and
system.
– Connect the equipment into an outlet on a circuit
different from that to which the system is connected.
– Consult the dealer or an experienced radio/TV
technician for help.
CAUTION
You are cautioned that any changes or modifications
not expressly approved in this manual could void your
authority to operate this equipment.
Note to CATV system installer:
This reminder is provided to call the CATV system
installer’s attention to Article 820-40 of the NEC that
provides guidelines for proper grounding and, in
particular, specifies that the cable ground shall be
connected to the grounding system of the building, as
close to the point of cable entry as practical.
For the customers in Canada
CAUTION
TO PREVENT ELECTRIC SHOCK, MATCH WIDE
BLADE OF PLUG TO WIDE SLOT, FULLY
INSERT.
WARNING
3
US
Precautions
Safety
• If anything falls into the cabinet, unplug the unit and
have it checked by qualified personnel before
operating it any further.
The unit is not disconnected from the AC power
source (mains) as long as it is connected to the mains
outlet, even if the unit itself has been turned off.
Unplug the unit from the wall outlet if you do not
intend to use it for an extended period of time. To
disconnect the cord, pull it out by the plug, never by
the cord.
Installing
Allow adequate air circulation to prevent internal
heat buildup.
• Do not place the unit on surfaces (rugs, blankets, etc.)
or near materials (curtains, draperies) that may block
the ventilation slots.
Do not install the unit near heat sources such as
radiators, or air ducts, or in a place subject to direct
sunlight, excessive dust, mechanical vibration, or
shock.
Do not install the unit in an inclined position. It is
designed to be operated in a horizontal position only.
Keep the unit and discs away from equipment with
strong magnets, such as microwave ovens, or large
loudspeakers.
Do not place heavy objects on the unit.
• If the unit is brought directly from a cold to a warm
location, moisture may condense inside the DVD
Home Theatre System and cause damage to the
lenses. When you first install the unit, or when you
move it from a cold to a warm location, wait for about
30 minutes before operating the unit.
ENERGY STAR
®
is a U.S.
registered mark.
As an ENERGY STAR
®
partner,
Sony Corporation has determined
that this product meets the
ENERGY STAR
®
guidelines for
energy efficiency.
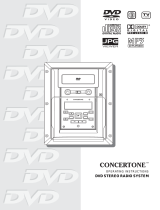
Thank you for purchasing Sony DVD Home
Theatre System. Before operating this system,
please read this manual thoroughly and retain it
for future reference.
On power sources
AC power cord must be changed only at the qualified
service shop.
On placement
• Place the system in a location with adequate
ventilation to prevent heat build-up in the system.
At high volume, over long periods of time, the cabinet
becomes hot to the touch. This is not a malfunction.
However, touching the cabinet should be avoided. Do
not place the unit in a confined space where
ventilation is poor as this may cause overheating.
• Do not block the cooling fan or ventilation slots by
putting anything on the system. Also, do not place the
system on a soft surface such as a rug that might block
the ventilation holes on the bottom. The system is
equipped with a high power amplifier. If the cooling
fan or ventilation slots are blocked, the unit can
overheat and malfunction.
• Do not place the system in a location near heat
sources, or in a place subject to direct sunlight,
excessive dust, or mechanical shock.
On operation
If the system is brought directly from a cold to a warm
location, or is placed in a very damp room, moisture
may condense on the lenses inside the system. Should
this occur, the system may not operate properly. In
this case, remove the disc and leave the system turned
on for about half an hour until the moisture
evaporates.
• When you move the system, take out any disc. If you
don’t, the disc may be damaged.
• For power saving purposes, set the system to standby
mode by pressing the "/1 button (the STANDBY
indicator lights up). To turn off the system
completely, remove the AC power cord (mains lead)
from the wall outlet (mains).
On adjusting volume
Do not turn up the volume while listening to a section
with very low level inputs or no audio signals. If you
do, the speakers may be damaged when a peak level
section is suddenly played.
Welcome!
Precautions
4
US
On cleaning
Clean the cabinet, panel, and controls with a soft cloth
slightly moistened with a mild detergent solution. Do
not use any type of abrasive pad, scouring powder or
solvent such as alcohol or benzine.
If you have any questions or problems concerning your
system, please consult your nearest Sony dealer.
On cleaning discs
Do not use a commercially available CD/DVD
cleaning disc. It may cause a malfunction.
On your TV’s color
If the speakers should cause the TV screen to have
color irregularity, turn off the TV at once then turn it
on after 15 to 30 minutes. If color irregularity should
persist, place the speakers farther away from the set.
The nameplate is located on the bottom exterior of the
unit.
On moving the system
When you carry the system, use the following
procedure to protect the inner mechanism.
1 Make sure that a disc is removed from the
system.
2 Press FUNCTION repeatedly to select
“DVD.”
3 Press ., >, and DISC1 Z
simultaneously.
The front panel display is changed to
“MECHA LOCK.”
To cancel, press "/1.
4 Remove the AC power cord (mains lead)
from the wall outlet (mains).
IMPORTANT NOTICE
Caution: This system is capable of holding a still
video image or on-screen display image on your
television screen indefinitely. If you leave the still
video image or on-screen display image displayed
on your TV for an extended period of time you risk
permanent damage to your television screen.
Projection televisions are especially susceptible to
this.
5
US
Welcome!................................................3
Precautions..............................................3
6
US
Settings and Adjustments
Using the Setup Display........................77
Setting the Display or Sound Track
Language ........................................78
(LANGUAGE SETUP)
Settings for the Display.........................78
(SCREEN SETUP)
Custom Settings....................................80
(CUSTOM SETUP)
Settings for the Speakers.......................81
(SPEAKER SETUP)
Quick Setup and Resetting
the System.......................................87
(SETUP)
Additional Information
Troubleshooting....................................88
Specifications........................................91
Glossary ................................................93
Index to Parts and Controls...................97
Language Code List............................102
DVD Setup Menu List........................103
AMP Menu List..................................105
Index ...................................................106
Quick Reference for Remote
Commander ......................Back cover
7
US
The instructions in this manual describe the
controls on the remote. You can also use the
controls on the system if they have the same or
similar names as those on the remote.
The instructions in this manual are for DAV-
FR1, DAV-FR8, and DAV-FR9. DAV-FR1 is
the model used for illustration purposes only.
Any difference in operation is clearly indicated
in the text, for example, “DAV-FR9 only.”
The following symbols are used in this
manual.
* MP3 (MPEG1 Audio Layer 3) is a standard format
defined by ISO/MPEG which compresses audio data.
The “DVD VIDEO” logo is a trademark.
Title
The longest section of a picture or music
feature on a DVD, movie, etc., in video
software, or the entire album in audio
software.
Chapter
Section of a picture or a music piece that is
smaller than titles. A title is composed of
several chapters. Depending on the disc, no
chapters may be recorded.
Album
Section of a music piece or an image on a data
CD containing MP3 audio tracks or JPEG
files.
Track
Section of a picture or a music piece on a
VIDEO CD, Super Audio CD, CD, or MP3.
Index (Super Audio CD, CD) / Video
Index (VIDEO CD)
A number that divides a track into sections to
easily locate the point you want on a VIDEO
CD, Super Audio CD, or CD. Depending on
the disc, no indexes may be recorded.
Scene
On a VIDEO CD with PBC functions
(page 33), the menu screens, moving pictures
and still pictures are divided into sections
called “scenes.”
File
Section of a picture on a data CD containing
JPEG image files.
About This Manual
Symbol Meaning
Functions available for DVD
VIDEOs, DVD-Rs/DVD-RWs in
video mode, and DVD+Rs/
DVD+RWs
Functions available in VIDEO CD
mode
Functions available in CD mode
Functions available in Super Audio
CD and Audio CD mode
Functions available for MP3* audio
tracks
Functions available for JPEG files
This System Can Play the
Following Discs
Format of
discs
Disc logo
DVD VIDEO
Super Audio
CD
VIDEO CD
8
US
Note on PBC (Playback Control)
(VIDEO CDs)
This system conforms to Ver. 1.1 and Ver. 2.0 of
VIDEO CD standards. You can enjoy two kinds
of playback depending on the disc type.
About Multi Session CD
This system can play Multi Session CDs when
an MP3 audio track is contained in the first
session. Any subsequent MP3 audio tracks
recorded in later sessions can also be played
back.
This system can play Multi Session CDs when
a JPEG image file is contained in the first
session. Any subsequent JPEG image files
recorded in later sessions can also be played
back.
If audio tracks and images in music CD format
or video CD format are recorded in the first
session, only the first session will be played
back.
Region code
Your system has a region code printed on the
back of the unit and will only play DVDs labeled
with the same region code.
DVDs labeled will also play on this system.
If you try to play any other DVD, the message
[Playback prohibited by area limitations.] will
appear on the TV screen. Depending on the
DVD, no region code indication may be given
even though playing the DVD is prohibited by
area restrictions.
Examples of discs that the
system cannot play
The system cannot play the following discs:
CD-ROMs (except for extension “.MP3,
“.JPG,” or “.JPEG”)
CD-Rs/CD-RWs other than those recorded in
the following formats:
audio CD format
video CD format
MP3/JPEG format that conforms to
ISO9660* Level 1/Level 2, or its extended
format, Joliet
Data part of CD-Extras
DVD-ROMs
DVD Audio discs
DVD-RAMs
DVD-RWs in VR (Video Recording) mode
Progressive JPEG file
* A logical format of files and folders on CD-ROMs,
defined by ISO (International Organization for
standardization)
Do not load the following discs:
A DVD with a different region code (page 8,
95).
A disc that is neither standard nor circular
(e.g., card, heart, or star shape).
A disc with paper or stickers on it.
A disc that has adhesive or cellophane tape still
left on it.
Disc type You can
VIDEO CDs
without PBC
functions
(Ver. 1.1 discs)
Enjoy video playback (moving
pictures) as well as music.
VIDEO CDs
with PBC
functions
(Ver. 2.0 discs)
Play interactive software using
menu screens displayed on the
TV screen (PBC Playback), in
addition to the video playback
functions of Ver. 1.1 discs.
Moreover, you can play high-
resolution still pictures, if they
are included on the disc.
DVD
structure
VIDEO
CD, Super
Audio CD,
or CD
structure
MP3
structure
Disc
Disc
Disc
Title
Chapter
Track
Index
Album
Track
JPEG
structure
Disc
Album
File
ALL
9
US
Notes about CD-R/CD-RW/DVD-R/DVD-RW (Video
mode)/DVD+R/DVD+RW
In some cases, CD-R/CD-RW/DVD-R/DVD-RW
(Video mode)/DVD+R/DVD+RW cannot be played
on this player due to the recording quality or physical
condition of the disc, or the characteristics of the
recording device and authoring software.
The disc will not play if it has not been correctly
finalized. For more information, see the operating
instructions for the recording device.
Note that discs created in the Packet Write format
cannot be played.
Music discs encoded with copyright protection
technologies
This product is designed to play back discs that
conform to the Compact Disc (CD) standard.
Recently, various music discs encoded with copyright
protection technologies are marketed by some record
companies. Please be aware that among those discs,
there are some that do not conform to the CD standard
and may not be playable by this product.
Note on playback operations
of DVDs and VIDEO CDs
Some playback operations of DVDs and VIDEO
CDs may be intentionally set by software
producers. Since this system plays DVDs and
VIDEO CDs according to the disc contents the
software producers designed, some playback
features may not be available. Also, refer to the
instructions supplied with the DVDs or VIDEO
CDs.
Copyrights
This product incorporates copyright protection
technology that is protected by U.S. patents and
other intellectual property rights. Use of this
copyright protection technology must be
authorized by Macrovision, and is intended for
home and other limited viewing uses only unless
otherwise authorized by Macrovision. Reverse
engineering or disassembly is prohibited.
This system incorporates with Dolby* Digital
10
US
Disc changer system
The disc changer consists of a playing unit and a
stocker which transports the discs to the disc slot
and the playing unit.
For example, if you press DISC 3, the stocker
moves until the DISC 3 comes to the position of
the playing unit and then moves the DISC 3 over
the playing unit.
Notes
• Do not insert or eject discs while playing.
• Noise may come from the disc changer when
changing discs or turning the system on and off.
However, this is just noise produced by the operation
of the internal mechanisms and does not indicate a
malfunction.
• 8 cm (3-inch) CDs or DVDs cannot be stored in the
stocker.
Do not insert an 8 cm (3-inch) CD with an 8 cm (3-
inch) adapter. It may damage the system and disc.
Note on DVD 5-DISC
changer
DISC 1
DISC 2
DISC 3 DISC 4
DISC 5
Stocker
Playing unit
Disc
11
US
Use the Control Menu to select a function that you would like to use. The Control Menu display appears
when the DVD DISPLAY button is pressed. For details, refer to the page in parentheses.
List of Control Menu Items
Guide to the Control Menu Display
DISC Displays the disc name or the disc type inserted into the system.
TITLE (DVD only) (page 44)/
SCENE (only VIDEO CD in PBC playback) /
TRACK (VIDEO CD only) (page 44)
Selects the title (DVD), or the track (VIDEO CD) to be
played.
Displays the scene (VIDEO CD in PBC playback).
CHAPTER (DVD only) (page 45)/
INDEX (VIDEO CD only) (page 45)
Selects the chapter (DVD) or the index (VIDEO CD) to be
played.
ALBUM (MP3 only) (page 35, 44) Selects the album (MP3) to be played.
TRACK (Super Audio CD/CD/
MP3 only) (page 35, 44)
Selects the track (Super Audio CD/CD/MP3) to be played.
INDEX (Super Audio CD/CD only)
(page 45)
Displays the index and selects the index (Super Audio CD) to
be played.
TIME (page 46) Checks the elapsed time and the remaining playback time.
Inputs the time code for picture and music searching.
AUDIO (DVD/VIDEO CD/Super
Audio CD/CD/MP3 only) (page 51)
Changes the audio setting.
SUBTITLE (DVD only) (page 61) Displays the subtitles.
Changes the subtitle language.
ALBUM (JPEG only) (page 36) Selects the album (JPEG) to be played.
2: FRENCH
3: SPANISH
1: ENGLISH
Select:
SUBTITLE
DVD
1:DVD
1 2
(
2 7
)
TITLE 12
1 8
(
3 4
)
T
1 : 3 2 : 5 5
ENTER
Currently playing title number (VIDEO
CD/Super Audio CD/CD: track number)
Playing time
Currently playing chapter
number (VIDEO CD/Super
Audio CD/CD: index number)
Icon of selected
Control Menu item
Control Menu items
Function name of selected
Control Menu item
Operation message
Total number of
titles or tracks
recorded
Currently playing
title name
Total number of chapters or indexes recorded
Playback status
(NPlayback, XPause, xStop, etc.)
Type of disc being
played back
Current setting
Options
Disc number and
name or disc type
continued
12
US
Tips
• Each time you press DVD DISPLAY, the Control Menu display changes as follows:
The Control Menu items vary, depending on the disc.
• The Control Menu icon indicator lights up in green t unless you set the [REPEAT] setting to
[OFF].
• The [ANGLE] indicator lights up in green only when multiple angles are recorded on the disc.
FILE (JPEG only) (page 36) Selects the file (JPEG) to be played.
DATE (JPEG only) (page 50) Displays the date information.
ANGLE (DVD only) (page 60) Changes the angle.
PLAYMODE (VIDEO CD/Super
Audio CD/CD/MP3/JPEG only) (page 38, 41)
Selects the play mode.
REPEAT (page 42) Plays the entire disc (all titles/all tracks), one title/chapter/
track/album, or contents of program repeatedly.
CUSTOM PARENTAL
CONTROL (page 62)
Sets the disc to prohibit playing.
Control Menu display
Control Menu display off
m
Getting Started
13
US
Check that you have the following items:
•Speakers (5)
Subwoofer (1)
AM loop antenna (aerial) (1)
FM wire antenna (aerial) (1)
Speaker cords (3.5m × 3, 10m × 2) (12ft. × 3,
34ft. × 2)
•Video cord (1)
Remote Commander (remote) RM-SP350 (1)
Size AAA (R03) batteries (2)
Operating Instructions
Speakers - Connection and Installation (card)
(1)
You can control the system using the supplied
remote. Insert two size AAA (R03) batteries by
matching the 3 and # ends on the batteries to
the markings inside the compartment. When
using the remote, point it at the remote sensor
on the system.
Notes
• Do not leave the remote in an extremely hot or humid
place.
• Do not use a new battery with an old one.
Do not drop any foreign object into the remote casing,
particularly when replacing the batteries.
• Do not expose the remote sensor to direct light from
the sun or lighting apparatus. Doing so may cause a
malfunction.
If you do not use the remote for an extended period of
time, remove the batteries to avoid possible damage
from battery leakage and corrosion.
Getting Started
Unpacking
Inserting Batteries into
the Remote
Remove the cover.
14
US
Connect the supplied speaker system using the supplied speaker cords by matching the colors of the
jacks to those of the cords. Do not connect any speakers other than those supplied with this system.
To obtain the best possible surround sound, specify the speaker parameters (distance, level, etc.) on
page 29.
Required cords
Speaker cords
The connector and the color tube of the speaker cords are the same color as the label of the jacks to be
connected.
Step 1: Speaker System Hookup
(–)
(+)
color tube
(+)
(–)
Getting Started
15
US
Terminals for connecting the speakers
DAV-FR1
Connect the To the
Front speakers SPEAKER FRONT L (white) and R (red) jacks
Surround speakers SPEAKER SURR L (blue) and R (gray) jacks
Center speaker SPEAKER CENTER (green) jack
Subwoofer SPEAKER WOOFER (purple) jacks
AUDIO IN
VIDEO
COMPOMEMT VIDEO OUT
MONITOR
SAT
SURROUND
BACK
SPEAKER
AUDIO IN
S VIDEO
(DVD ONLY)
VIDEO
RL
YP
B
/C
B
P
R
/C
R
RL
CENTER FRONT LFRONT R
SURR L
WOOFER
WOOFERSURR R
Front speaker (R)
Center speaker
Front speaker (L)
Surround speaker (R)
Subwoofer
Surround speaker (L)
continued
16
US
DAV-FR8
AUDIO IN
VIDEO
COMPOMEMT VIDEO OUT
MONITOR
SAT
SURROUND
BACK
SPEAKER
AUDIO IN
S VIDEO
(DVD ONLY)
VIDEO
RL
YP
B
/C
B
P
R
/C
R
RL
CENTER FRONT LFRONT R
SURR L
WOOFER
WOOFERSURR R
Getting Started
17
US
DAV-FR9
AUDIO IN
VIDEO
COMPOMEMT VIDEO OUT
MONITOR
SAT
SURROUND
BACK
SPEAKER
AUDIO IN
S VIDEO
(DVD ONLY)
VIDEO
RL
YP
B
/C
B
P
R
/C
R
RL
CENTER FRONT LFRONT R
SURR L
WOOFER
WOOFERSURR R
18
US
Note on placing speakers
• Do not set the speakers in an inclined position.
Do not place the speakers in locations that are:
Extremely hot or cold
Dusty or dirty
Very humid
Subject to vibrations
Subject to direct sunlight
• Use caution when placing the speakers and/or speaker stands (not supplied) that are attached with the speakers on
a specially treated (waxed, oiled, polished, etc.) floor, as staining or discoloration may result.
• Do not lean or hang on the speaker, as the speaker may fall down.
Note
Do not catch the speaker cable insulation in the SPEAKER jack.
Tip
Connect the speaker cable after bending the speaker wire at the end of the insulation. This prevents the speaker cable
from being caught in the SPEAKER jack.
Getting Started
19
US
To connect the surround back speaker
This system is compatible with the 6.1 surround system. When you enjoy a DVD that is compatible
with the 6.1 surround system such as a DTS-ES disc, connect the surround back speaker (not supplied)
and set its parameters (see “Settings for the Speakers” on page 81).
Tip
You can also enjoy the 6.1 surround sound when you play a 2 or 5.1 channel source by using the surround back
decoding function (see “Selecting the Surround Back Decoding Mode” on page 57).
To avoid short-circuiting the speakers
Short-circuiting of the speakers may damage the system. To prevent this, be sure to follow these
precautions when connecting the speakers. Make sure the bare wire of each speaker cord does not touch
another speaker jack or the bare wire of another speaker cord.
Examples of poor conditions of the speaker cord
After connecting all the components, speakers, and AC power cord (mains lead), output a test tone to
check that all the speakers are connected correctly. For details on outputting a test tone, see page 83.
If no sound is heard from a speaker while outputting a test tone, or a test tone is output from a speaker
other than the one currently displayed in the front panel display, the speaker may be short-circuited. If
this happens, check the speaker connection again.
Notes
• Be sure to match the speaker cord to the appropriate terminal on the components: 3 to 3, and # to #. If the cords
are reversed, the sound will lack bass and may be distorted.
• If you connect the speaker cord incorrectly or turn up the volume in a state of a short circuit, “PROTECT” appears
in the front panel display and the system enters standby mode. In this case, disconnect and then reconnect the AC
power cord (mains lead) from the wall outlet (mains), and then turn the system on.
AUDIO IN
VIDEO
COMPOMEMT VIDEO OUT
MONITOR OUT
SAT
SURROUND
BACK
SAT
SPEAKER
AUDIO IN
S VIDEO
(DVD ONLY)
VIDEO
OPTICAL
DIGITAL IN
RL
YP
B
/C
B
P
R
/C
R
RL
CENTER FRONT LFRONT R
SURR L
WOOFER
WOOFERSURR R
COAXIAL
AM
FM 75
AUDIO
IN
Amplifier
Surround back speaker
Stripped speaker cord is
touching another speaker
terminal.
Stripped cords are touching
each other due to excessive
removal of insulation.
20
US
To change the speaker cables
If you want to use a different speaker cable, you can detach the plug for attachment to another cable.
Detaching
With the catcher facing down, press and hold the plug down against a flat surface and remove the cords
from plug.
Attaching
While pressing the plug down against a flat surface, insert the new speaker cords.
Note that the cord marked with a line should be attached to the minus (-) side of the plug.
Notes
• Be careful not to damage the surface you use (desk, etc.) when attaching/detaching the speaker cords.
• When using the subwoofer cord, note that the two outside black cords or the cords marked with letters are negative.
• If you connect the subwoofer cord incorrectly or turn up the volume in a state of a short circuit, “PROTECT”
appears in the front panel display and the system enters standby mode. In this case, disconnect and then reconnect
the AC power cord (mains lead) from the wall outlet (mains), and then turn the system on.
Tips
• You can use any commercially sold speaker cable of gauge cord AWG #18 - AWG #22.
• Before attaching a new cable, strip off 10 mm (13/32 in.) of its insulation and twist the bare wires of both cords.
Catcher
(–)
(+)
(–)
(–)
(+)
(–)
10 mm
  • Page 1 1
  • Page 2 2
  • Page 3 3
  • Page 4 4
  • Page 5 5
  • Page 6 6
  • Page 7 7
  • Page 8 8
  • Page 9 9
  • Page 10 10
  • Page 11 11
  • Page 12 12
  • Page 13 13
  • Page 14 14
  • Page 15 15
  • Page 16 16
  • Page 17 17
  • Page 18 18
  • Page 19 19
  • Page 20 20
  • Page 21 21
  • Page 22 22
  • Page 23 23
  • Page 24 24
  • Page 25 25
  • Page 26 26
  • Page 27 27
  • Page 28 28
  • Page 29 29
  • Page 30 30
  • Page 31 31
  • Page 32 32
  • Page 33 33
  • Page 34 34
  • Page 35 35
  • Page 36 36
  • Page 37 37
  • Page 38 38
  • Page 39 39
  • Page 40 40
  • Page 41 41
  • Page 42 42
  • Page 43 43
  • Page 44 44
  • Page 45 45
  • Page 46 46
  • Page 47 47
  • Page 48 48
  • Page 49 49
  • Page 50 50
  • Page 51 51
  • Page 52 52
  • Page 53 53
  • Page 54 54
  • Page 55 55
  • Page 56 56
  • Page 57 57
  • Page 58 58
  • Page 59 59
  • Page 60 60
  • Page 61 61
  • Page 62 62
  • Page 63 63
  • Page 64 64
  • Page 65 65
  • Page 66 66
  • Page 67 67
  • Page 68 68
  • Page 69 69
  • Page 70 70
  • Page 71 71
  • Page 72 72
  • Page 73 73
  • Page 74 74
  • Page 75 75
  • Page 76 76
  • Page 77 77
  • Page 78 78
  • Page 79 79
  • Page 80 80
  • Page 81 81
  • Page 82 82
  • Page 83 83
  • Page 84 84
  • Page 85 85
  • Page 86 86
  • Page 87 87
  • Page 88 88
  • Page 89 89
  • Page 90 90
  • Page 91 91
  • Page 92 92
  • Page 93 93
  • Page 94 94
  • Page 95 95
  • Page 96 96
  • Page 97 97
  • Page 98 98
  • Page 99 99
  • Page 100 100
  • Page 101 101
  • Page 102 102
  • Page 103 103
  • Page 104 104
  • Page 105 105
  • Page 106 106
  • Page 107 107
  • Page 108 108

Sony DAV-FR1 User manual

Category
DVD players
Type
User manual

Ask a question and I''ll find the answer in the document

Finding information in a document is now easier with AI