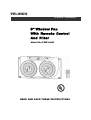
Pelonis FW23-A4R is a 9-inch window fan with a remote control and a filter. It is designed to fit double-hung, slider, and casement windows with minimum openings of 25.35 inches wide and 12.7 inches high. The fan has two reversible motors, each with three-speed settings (low, medium, and high) and two airflow directions (intake and exhaust). The fan can also be set to automatically turn on and off at a specific temperature between 65°F and 90°F. The remote control allows you to operate the fan from anywhere in the room, and the filter helps to remove dust and allergens from the air.
Pelonis FW23-A4R is a 9-inch window fan with a remote control and a filter. It is designed to fit double-hung, slider, and casement windows with minimum openings of 25.35 inches wide and 12.7 inches high. The fan has two reversible motors, each with three-speed settings (low, medium, and high) and two airflow directions (intake and exhaust). The fan can also be set to automatically turn on and off at a specific temperature between 65°F and 90°F. The remote control allows you to operate the fan from anywhere in the room, and the filter helps to remove dust and allergens from the air.


-
 1
1
-
 2
2
-
 3
3
-
 4
4
-
 5
5
-
 6
6


Pelonis FW23-A4R is a 9-inch window fan with a remote control and a filter. It is designed to fit double-hung, slider, and casement windows with minimum openings of 25.35 inches wide and 12.7 inches high. The fan has two reversible motors, each with three-speed settings (low, medium, and high) and two airflow directions (intake and exhaust). The fan can also be set to automatically turn on and off at a specific temperature between 65°F and 90°F. The remote control allows you to operate the fan from anywhere in the room, and the filter helps to remove dust and allergens from the air.
Ask a question and I''ll find the answer in the document
Finding information in a document is now easier with AI
Related papers
-
World Marketing of America Disc Furnace III HC-451 Owner's manual
-
 Pelonis PSH700 Owner's manual
-
 Pelonis HR-0031 User manual
-
 Pelonis HC-451 Disc Furnace III User manual
-
 Pelonis FT30-A4 User manual
-
 Pelonis FT30-A4 User manual
-
-
-
-
 Pelonis HF-0023 User manual


Other documents
-
-
-
 CoolBot How to Set Up Your Cooler for the Winter Season Owner's manual
-
Canon iR5075 User manual
-
HP MFP S965 series Quick start guide
-
Canon IMAGERUNNER 7086 User manual
-
-
-
-
