Page is loading ...

For male faucets with outside threads:
For female faucets with inside threads:
Remove thick
washer
Leave thick
washer in place
Snap fitting
sold separately
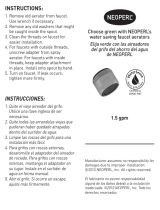
INSTRUCTIONS:
1. Remove aerator from faucet before attaching
large fitting. If a wrench is necessary, place cloth
over aerator to prevent damage.
2. Attach large fitting (sold separately) to faucet by
hand. For faucets with outside threads, remove
thicker washer. For faucets with inside threads,
leave thicker in place.
3. Thread coupler onto hose in a clockwise rotation.
4. Attach coupler onto fitting by pressing down on
white plastic ring of coupler and slide on to fitting.
5. Once connected, release plastic ring. Make sure
there is a click when securing coupler onto fitting.
6. Turn on faucet. If leak occurs, tighten fitting more
securely or repeat step 4 and 5.
7. Disconnect coupler from snap fitting after each
use leaving coupler attached to the hose.
8. Remove fitting from faucet and reattach the
aerator for normal faucet usage.
INSTRUCCIONES:
1. Quite el aireador del grifo antes de conectar el
ajuste. Si una llave es necesaria, coloque un paño
sobre el aireador para evitar daños.
2. Colocar el acoplador grande (vendido por separado)
al grifo con la mano. Para grifos con rosca exterior,
quite la arandela gruesa. Para grifos con rosca
interior, deje arandela en su lugar.
3. Enrosque el acoplador a la manguera girando en
sentido del reloj o a la derecha.
4. Para conectar el acoplador al ajuste, presione
el anillo de plastico blanco hacia abajo y deslice
sobre el ajuste.
5. Una vez conectado, suelte el anillo de plástico
blanco. Asegúrese de que haya un clic cuando
conecte el acoplador al ajuste.
6. Abrir grifo. Si ocurre un escape, apriete la
conexión más firme o repita el paso 4 y 5.
7. Desconecte el acoplador del ajuste a presión
después de cada uso dejando el acoplador
conectado a la manguera.
8. Quite la conexión del grifo y vuelva a colocar el
aireador para el uso normal del grifo.
*Lead free as defined by the Reduction of Lead in Drinking
Water Act (S 3874, 111th Congress (2009-2010).
*Libre de plomo, según lo definido por la Reducción de Plomo
en la Ley de Agua Potable (S 3874, número 111 del Congreso
(2009-2010).
Visit www.faucetaerator.com for manufacturer warranty
information ©December 2014 NEOPERL, Inc. All rights
reserved. Para la información de garantia de fabricante visite
www.faucetaerator.com ©Diciembre 2014 NEOPERL, Inc. Todo
los derechos reservados.
/

