
HP Photosmart R507/R607 digital camera
with HP Instant Share
User's Manual


Copyright and Trademark Information
© 2004 Copyright Hewlett-Packard Development Company, LP
Reproduction, adaptation, or translation without prior written
permission is prohibited, except as allowed under the copyright laws.
The information contained in this document is subject to change
without notice. Hewlett-Packard shall not be liable for errors contained
herein or for consequential damages in connection with the furnishing,
performance, or use of this material.
Microsoft® and Windows® are U.S. registered trademarks of
Microsoft Corporation.
Apple®, Macintosh®, and Mac® are registered trademarks of Apple
Computer, Inc.
ArcSoft® is a registered trademark of ArcSoft, Inc.
Panorama Maker
TM
is a trademark of ArcSoft, Inc.
PENTAX® is a registered trademark of PENTAX Corporation.
MultiMediaCard
TM
is a trademark of Infineon Technologies AG.
SD logo is a trademark.


Table of Contents
Chapter 1:
Getting Started . . . . . . . . . . . . . . . . . . . . . . . . . . .11
Setup . . . . . . . . . . . . . . . . . . . . . . . . . . . . . . . . . . . 12
Installing the Camera Dock Insert (Optional) . . . 12
Attaching the Wrist Strap . . . . . . . . . . . . . . . . . 12
Installing a Memory Card (Optional) . . . . . . . . . 13
Installing the Battery . . . . . . . . . . . . . . . . . . . . . 14
Attaching the Ferrite to the AC Adapter Cord . . 15
Charging the Battery . . . . . . . . . . . . . . . . . . . . 16
Turning on Power . . . . . . . . . . . . . . . . . . . . . . 17
Choosing the Language . . . . . . . . . . . . . . . . . . 17
Setting the Date and Time . . . . . . . . . . . . . . . . 18
Installing the Software . . . . . . . . . . . . . . . . . . . 19
Windows . . . . . . . . . . . . . . . . . . . . . . . . . 19
Macintosh . . . . . . . . . . . . . . . . . . . . . . . . 20
User Manual on the CD . . . . . . . . . . . . . . . 20
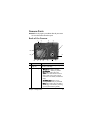
Camera Parts . . . . . . . . . . . . . . . . . . . . . . . . . . . . . 21
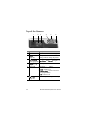
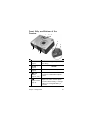
Back of the Camera . . . . . . . . . . . . . . . . . . . . . 21
Top of the Camera . . . . . . . . . . . . . . . . . . . . . . 24
Front, Side, and Bottom of the Camera . . . . . . . 25
Camera States . . . . . . . . . . . . . . . . . . . . . . . . . . . . 26
Camera Menus . . . . . . . . . . . . . . . . . . . . . . . . . . . 27
Using the Help Menu . . . . . . . . . . . . . . . . . . . . 29
Camera Status Screen . . . . . . . . . . . . . . . . . . . . . . . 29
Chapter 2:
Taking Pictures and Recording Video Clips . . .31
Taking Still Pictures . . . . . . . . . . . . . . . . . . . . . . . . . 31
Recording Audio with Still Pictures . . . . . . . . . . 32
Orientation Sensor . . . . . . . . . . . . . . . . . . . . . 33
Recording Video Clips . . . . . . . . . . . . . . . . . . . . . . 34
Using Live View . . . . . . . . . . . . . . . . . . . . . . . . . . . 35

HP Photosmart R507/R607 User’s Manual
Focusing the Camera . . . . . . . . . . . . . . . . . . . . . . . .36
Using Auto Focus . . . . . . . . . . . . . . . . . . . . . . .36
Using Focus Lock . . . . . . . . . . . . . . . . . . . . . . .38
Using the Focus Range Settings . . . . . . . . . . . . . . . . .38
Understanding the Focus Search Priority . . . . . . .39
Using Zoom . . . . . . . . . . . . . . . . . . . . . . . . . . . . . .40
Optical Zoom . . . . . . . . . . . . . . . . . . . . . . . . . .40
Digital Zoom . . . . . . . . . . . . . . . . . . . . . . . . . .40
Setting the Flash . . . . . . . . . . . . . . . . . . . . . . . . . . .41
Using the Self-Timer Settings . . . . . . . . . . . . . . . . . .43
Using the Burst Setting . . . . . . . . . . . . . . . . . . . . . . .45
Using the Shooting Modes . . . . . . . . . . . . . . . . . . . .45
Picture Quality for Long Exposures . . . . . . . . . . .47
Using Panorama Mode . . . . . . . . . . . . . . . . . . .48
Taking a Panoramic Sequence of Pictures . .49
Using the Capture Menu . . . . . . . . . . . . . . . . . . . . .50
Help for the Menu Options . . . . . . . . . . . . . . . .51
EV Compensation . . . . . . . . . . . . . . . . . . . . . . .51
Image Quality . . . . . . . . . . . . . . . . . . . . . . . . .52
Custom Image Quality . . . . . . . . . . . . . . . .55
White Balance . . . . . . . . . . . . . . . . . . . . . . . . .57
Manual White Balance . . . . . . . . . . . . . . .58
ISO Speed . . . . . . . . . . . . . . . . . . . . . . . . . . . .59
AE Metering . . . . . . . . . . . . . . . . . . . . . . . . . .60
Adaptive Lighting . . . . . . . . . . . . . . . . . . . . . . .62
Color . . . . . . . . . . . . . . . . . . . . . . . . . . . . . . . .64
Saturation . . . . . . . . . . . . . . . . . . . . . . . . . . . .65
Sharpness . . . . . . . . . . . . . . . . . . . . . . . . . . . .66
Date & Time Imprint . . . . . . . . . . . . . . . . . . . . .67
Chapter 3:
Reviewing Images and Video Clips . . . . . . . . . 69
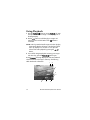
Using Playback . . . . . . . . . . . . . . . . . . . . . . . . . . . .70
Total Images Summary Screen . . . . . . . . . . . . . .72
Selecting Images for Printing . . . . . . . . . . . . . . .72

Viewing Thumbnails . . . . . . . . . . . . . . . . . . . . 73
Magnifying Images . . . . . . . . . . . . . . . . . . . . . 74
Using the Playback Menu . . . . . . . . . . . . . . . . . . . . 75
Delete . . . . . . . . . . . . . . . . . . . . . . . . . . . . . . . 79
Remove Red Eyes . . . . . . . . . . . . . . . . . . . . . . 80
Image Advice . . . . . . . . . . . . . . . . . . . . . . . . . 81
Image Info . . . . . . . . . . . . . . . . . . . . . . . . . . . 81
Record Audio . . . . . . . . . . . . . . . . . . . . . . . . . 83
Rotate . . . . . . . . . . . . . . . . . . . . . . . . . . . . . . . 84
Preview Panorama . . . . . . . . . . . . . . . . . . . . . . 84
Chapter 4:
Using HP Instant Share . . . . . . . . . . . . . . . . . . . .85
Setting Up the HP Instant Share Menu
on the Camera . . . . . . . . . . . . . . . . . . . . . . . . . . . . 86
Setting Up Destinations on a
Windows Computer . . . . . . . . . . . . . . . . . . . . . 88
Setting Up Destinations on a
Macintosh Computer . . . . . . . . . . . . . . . . . . . . 89
Using the HP Instant Share Menu . . . . . . . . . . . . . . . 90
Selecting All Images for
HP Instant Share Destinations . . . . . . . . . . . . . . 92
Selecting Individual Images for
HP Instant Share Destinations . . . . . . . . . . . . . . 93
How HP Instant Share E-mails Images . . . . . . . . 94
Chapter 5:
Transferring and Printing Images . . . . . . . . . . .97
Transferring Images to a Computer . . . . . . . . . . . . . 97
Printing Panoramas . . . . . . . . . . . . . . . . . . . . . . . . 99
Printing Panoramas from Panorama Maker . . . . 99
Printing Panoramas from HP Image Zone . . . . 100
Printing Images Directly from the Camera . . . . . . . . 100

HP Photosmart R507/R607 User’s Manual
Chapter 6:
Using the Setup Menu . . . . . . . . . . . . . . . . . . . 103
Camera Sounds . . . . . . . . . . . . . . . . . . . . . . . . . .104
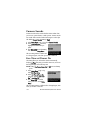
Live View at Power On . . . . . . . . . . . . . . . . . . . . . .104
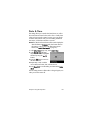
Date & Time . . . . . . . . . . . . . . . . . . . . . . . . . . . . .105
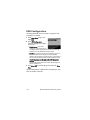
USB Configuration . . . . . . . . . . . . . . . . . . . . . . . . .106
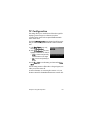
TV Configuration . . . . . . . . . . . . . . . . . . . . . . . . . .107
Language . . . . . . . . . . . . . . . . . . . . . . . . . . . . . . .108
Move Images to Card . . . . . . . . . . . . . . . . . . . . . .108
Reset Settings . . . . . . . . . . . . . . . . . . . . . . . . . . . .109
Chapter 7:
Troubleshooting and Support . . . . . . . . . . . . . .111
Resetting the Camera . . . . . . . . . . . . . . . . . . . . . . .112
Using Your Camera without Installing the
HP Image Zone Software . . . . . . . . . . . . . . . . . . . .113
Transferring Images to a Computer without
HP Image Zone Software . . . . . . . . . . . . . . . . .114
Using a Memory Card Reader . . . . . . . . .114
Configuring the Camera as a Disk Drive . .117
Problems and Solutions . . . . . . . . . . . . . . . . . . . . .119
Error Messages on the Camera . . . . . . . . . . . . . . .130
Error Messages on the Computer . . . . . . . . . . . . . .140
Camera Self-diagnostic Tests . . . . . . . . . . . . . . . . .143
Getting Assistance . . . . . . . . . . . . . . . . . . . . . . . . .144
HP Accessibility Website . . . . . . . . . . . . . . . . .144
HP Photosmart Website . . . . . . . . . . . . . . . . . .144
Support Process . . . . . . . . . . . . . . . . . . . . . . .144
Phone Support in the United States . . . . . . . . . .146
Phone Support in Europe, the Middle East,
and Africa . . . . . . . . . . . . . . . . . . . . . . . . . . .147
Other Phone Support Worldwide . . . . . . . . . . .149

Appendix A:
Managing Batteries . . . . . . . . . . . . . . . . . . . . . .151
Top Points About Batteries . . . . . . . . . . . . . . . . . . . 151
Extending Battery Life . . . . . . . . . . . . . . . . . . . 152
Safety Precautions for Using
Lithium Ion Batteries . . . . . . . . . . . . . . . . . . . . 153
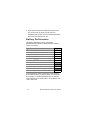
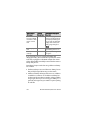
Battery Performance . . . . . . . . . . . . . . . . . . . . . . . 154
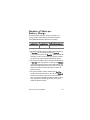
Number of Shots per
Battery Charge . . . . . . . . . . . . . . . . . . . . . . . . . . . 155
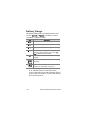
Battery Gauge . . . . . . . . . . . . . . . . . . . . . . . . . . . 156
Recharging the Lithium Ion Battery . . . . . . . . . . . . . 157
Safety Precautions for Recharging
Lithium Ion Batteries . . . . . . . . . . . . . . . . . . . . 159
Sleep Time-out for Power Conservation . . . . . . . . . 160
Appendix B:
Purchasing Camera Accessories . . . . . . . . . . .161
Appendix C:
Specifications . . . . . . . . . . . . . . . . . . . . . . . . . .165
Memory Capacity . . . . . . . . . . . . . . . . . . . . . . . . . 171

HP Photosmart R507/R607 User’s Manual

Chapter 1: Getting Started 11
Chapter 1:
Getting Started
Congratulations on your purchase of this HP Photosmart digital
camera! This camera has many features to enhance your
picture-taking experience, including HP Adaptive Lighting
Technology, in-camera red-eye removal, 8 shooting modes
(including Panorama), HP Image Advice, HP Instant Share
TM
,
direct printing capability, manual and automatic controls, on-
camera Help, and an optional camera dock.
With HP Instant Share, you can easily select images in your
camera to be automatically sent to your favorite destinations
(such as e-mail addresses and online albums) the next time you
connect the camera to your computer. Your friends and family
can easily receive and view your pictures in e-mail without
being burdened by large file attachments. And with the direct
printing capability, you can easily select images in your
camera to be automatically printed the next time you connect
the camera to your computer or directly to any HP Photosmart
printer or PictBridge-compatible printer without ever connecting
to your computer.
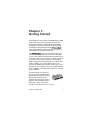
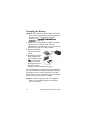
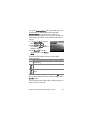
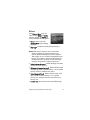
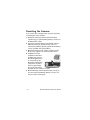
To further enhance your experience,
you may purchase an HP Photosmart
R-series dock. The camera dock allows
you to easily transfer images to a
computer, send images to a printer or
television, and recharge the camera’s
battery plus a spare. The dock also
provides a convenient home for your camera.

12 HP Photosmart R507/R607 User’s Manual
Setup
NOTE To locate a part on your camera (such as a button or a
light) while following the instructions in this section, see
Camera Parts on page 21.
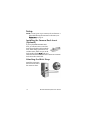
Installing the Camera Dock Insert
(Optional)
If you buy the HP Photosmart R-series
dock, you will notice one or more clear
dock inserts included in the box with the
dock. When setting up the dock for use
with this camera, make sure you use the
dock insert that has the BLUE sticker on it.
Follow the instructions in the dock User’s Manual to connect the
dock insert to the camera dock.
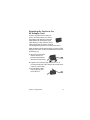
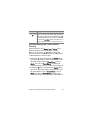
Attaching the Wrist Strap
Attach the wrist strap to
the mount on the side of
the camera as shown.

Chapter 1: Getting Started 13
Installing a Memory Card (Optional)
NOTE If you do not have a memory card, skip this section and
go on to the next section, Installing the Battery on
page 14.
Your camera contains internal memory that allows you to store
images and video clips. However, you can use a memory card
(purchased separately) instead to store images and video clips.
For more information about supported memory cards, see
Storage on page 167.
When you install a memory card in the camera, all new
images and video clips are stored on the card. The camera’s
internal memory is only used when there is no memory card in
the camera.
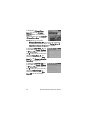
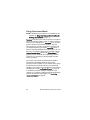
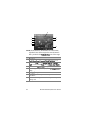
1 Hold the camera with the bottom facing
up, as shown, and slide the Battery/
Memory card door latch to open the
Battery/Memory card door.
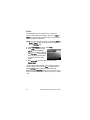
2 With the back of the camera
facing up, insert the memory card
in the smaller slot with the notched
side of the card going in first, as
shown. Make sure the memory
card snaps into place.
3 Leave the Battery/Memory card
door open and go on to the next section, Installing the
Battery on page 14.
To remove the memory card from the camera, first turn the
camera off. Then open the Battery/Memory card door, press
down on the top edge of the memory card, and it will spring
outward from the slot.

14 HP Photosmart R507/R607 User’s Manual
Installing the Battery
Your camera uses a rechargeable HP Photosmart R07 lithium
ion battery (L1812A).
NOTE The battery that was shipped with your camera is
partially charged, but you should fully charge it before
using it the first time. You can charge the battery while it is
in the camera. See Charging the Battery on page 16.
1 If the Battery/Memory card door is already open, skip this
step and go on to step 2.
Hold the camera with the bottom facing
up, as shown, and slide the Battery/
Memory card door latch to open the
Battery/Memory card door.
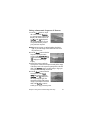
2 Insert the battery in the larger slot
as shown, and push it in until the
latch catches.
3 Close the Battery/Memory card
door on the bottom of the camera
by pushing the door down until it
snaps closed.
To remove the battery from the camera, first turn the camera
off. Then open the Battery/Memory card door, release the
battery latch, tilt the camera, and the battery will slide out of
its slot.

Chapter 1: Getting Started 15
Attaching the Ferrite to the
AC Adapter Cord
A ferrite is included in the box with your
camera. This ferrite prevents your camera
from emitting radio frequency energy that
might interfere with the reception of your
radio, television, or other electronic devices
which might be near the camera. The ferrite
will not degrade the performance or safety of the camera.
Attach the ferrite to the thin HP AC adapter cord (the cord that
attaches to the camera, not the cord that attaches to the wall) in
the following way:
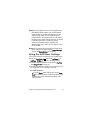
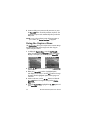
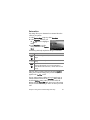
1 Wrap the cord around the
ferrite so that the cord
passes through the ferrite
three times (as shown here).
2 Adjust the cord so that the edge of the ferrite is 10 cm
(4 inches) from the end of the connector that connects to the
camera (or camera dock).
3 Close the ferrite so that it
snaps snugly into place
around the cord.

16 HP Photosmart R507/R607 User’s Manual
Charging the Battery
NOTE This section tells how to charge a battery in the camera.
You can also charge the battery in the extra battery bay of
the camera dock or in the HP Photosmart Quick
Recharger (see Appendix B: Purchasing Camera
Accessories on page 161).
1 Plug the power cord into the HP AC adapter. If more than
one power cord is in the box, use the cord that is
appropriate for power outlets in your country. Plug the other
end of the power cord into an electrical outlet.
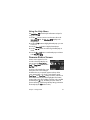
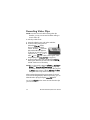
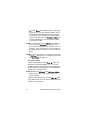
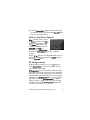
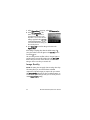
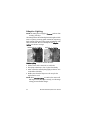
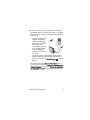
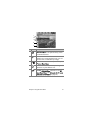
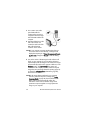
2 Open the small rubber
door on the side of the
camera.
3 Attach the thin cord from
the AC adapter to the
power adapter connector
on the side of the
camera as shown.The
Power light on the top of
the camera will start
blinking to show that the battery is charging.
The rechargeable lithium ion battery will usually charge fully in
4-6 hours. When the Power light stops blinking, the battery is
fully charged, and you can then unplug the power adapter
from the camera. You can continue to use the camera while the
battery is being charged by the power adapter.
NOTE The camera may get warm while it is charging the
battery, as well as after prolonged use under battery
power. This is normal.

Chapter 1: Getting Started 17
NOTE Digital cameras use batteries at a much faster rate than
film cameras. Battery life in digital cameras can be
measured in hours and minutes of use rather than the
years more typical of film cameras. Battery life may also
vary dramatically from one user to another, depending on
what modes the camera is being used in most frequently.
For hints on optimizing battery performance, see
Appendix A: Managing Batteries on page 151.
Turning on Power
Turn the camera on by sliding the ON/OFF switch to the
right and then releasing it.
The lens extends and the Power light on the top of the camera
turns on solid green.
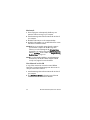
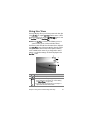
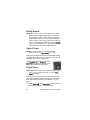
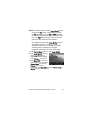
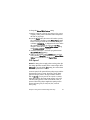
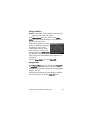
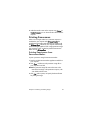
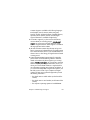
Choosing the Language
The first time you turn the camera on, the following screen
appears and prompts you to choose a language.
1 Scroll to the language that you
want by using the
buttons on the Controller .
2 Press the Menu/OK button to
select the highlighted language.
NOTE If you need to change the
language later, you can do this
with the Language setting in the Setup menu. See Chapter
6: Using the Setup Menu on page 103.

18 HP Photosmart R507/R607 User’s Manual
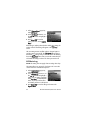
Setting the Date and Time
The camera has a clock that records the date and time at which
you take each picture. This information is recorded in the
image properties, which you can see when viewing the image
in the Image Info screen (page 81), in the Playback menu
screen (page 75), or on your computer. You can also choose to
have the date and time imprinted on the visible image (see
Date & Time Imprint on page 67).
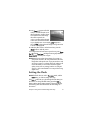
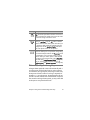
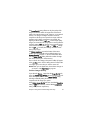
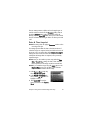
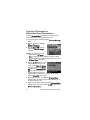
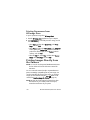
The first time you turn the camera on, a
Date & Time screen appears after you
choose the language, prompting you
to set the date and time.
1 Adjust the value of the highlighted
selection using the buttons.
2 Press the buttons to move to the other selections.
3 Repeat steps 1 and 2 until the correct date/time format,
date, and time are set.
4 Press the Menu/OK button when you have entered the
proper values for the date and time. A confirmation screen
appears, asking if the correct date and time have been set.
5 If the date and time are correct, press the Menu/OK button
to select Yes.
If the date and time are incorrect, press the button to
highlight No, and then press the Menu/OK button. The
Date & Time screen appears again. Repeat steps 1 through
5 to set the correct date and time.
NOTE If you need to change the date and time settings later,
you can do this with the Date & Time setting in the Setup
menu. See Chapter 6: Using the Setup Menu on
page 103.

Chapter 1: Getting Started 19
Installing the Software
The HP Image Zone software allows you to transfer images
from the camera, and then view, edit, print, or e-mail them. It
also allows you to configure the HP Instant Share menu on
the camera.
NOTE If you do not install the HP Image Zone software, you
can still use the camera, but certain features will be
affected. For details, see Using Your Camera without
Installing the HP Image Zone Software on page 113.
Windows
In order for the HP Image Zone software to install successfully
on your Windows computer, you must have installed at least
Internet Explorer 5.01 on Windows 2000 or XP, or Internet
Explorer 5.01 Service Pack 2 on Windows 98, 98 SE, or Me.
1 Close all programs and temporarily disable any virus
protection software running on your computer.
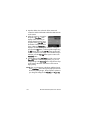
2 Insert the HP Image Zone software CD into the CD drive of
your computer. Follow the instructions in the installation
screen that automatically appears.
NOTE If the installation screen does not appear, click Start,
click Run, type X:\Setup.exe, where X
is the letter of your
CD drive, then click OK.
NOTE If you have trouble installing or using the HP Image
Zone software, see the HP Customer Support website:
www.hp.com/support for more information.

20 HP Photosmart R507/R607 User’s Manual
Macintosh
1 Close all programs and temporarily disable any virus
protection software running on your computer.
2 Insert the HP Image Zone software CD into the CD drive of
your computer.
3 Double-click the CD icon on the computer desktop.
4 Double-click the installer icon, and then follow the on-screen
instructions to install the software.
NOTE Before you can transfer images from the camera to
your Macintosh computer with the HP Image Zone
software, or to take advantage of the HP Instant Share
functionality, you must first change the USB Configuration
setting to Disk Drive on the camera. See Chapter 6: Using
the Setup Menu on page 103.
NOTE If you have trouble installing or using the HP Image
Zone software, see the HP Customer Support website:
www.hp.com/support for more information.
User Manual on the CD
A copy of this camera User’s Manual in several different
languages is located on the HP Image Zone software CD. To
view your camera User’s Manual:
1 Insert the HP Image Zone software CD into the CD drive of
your computer.
2 Click View User’s Manual on the Main page of the CD
installation screen to view the User’s Manual.
Page is loading ...
Page is loading ...
Page is loading ...
Page is loading ...
Page is loading ...
Page is loading ...
Page is loading ...
Page is loading ...
Page is loading ...
Page is loading ...
Page is loading ...
Page is loading ...
Page is loading ...
Page is loading ...
Page is loading ...
Page is loading ...
Page is loading ...
Page is loading ...
Page is loading ...
Page is loading ...
Page is loading ...
Page is loading ...
Page is loading ...
Page is loading ...
Page is loading ...
Page is loading ...
Page is loading ...
Page is loading ...
Page is loading ...
Page is loading ...
Page is loading ...
Page is loading ...
Page is loading ...
Page is loading ...
Page is loading ...
Page is loading ...
Page is loading ...
Page is loading ...
Page is loading ...
Page is loading ...
Page is loading ...
Page is loading ...
Page is loading ...
Page is loading ...
Page is loading ...
Page is loading ...
Page is loading ...
Page is loading ...
Page is loading ...
Page is loading ...
Page is loading ...
Page is loading ...
Page is loading ...
Page is loading ...
Page is loading ...
Page is loading ...
Page is loading ...
Page is loading ...
Page is loading ...
Page is loading ...
Page is loading ...
Page is loading ...
Page is loading ...
Page is loading ...
Page is loading ...
Page is loading ...
Page is loading ...
Page is loading ...
Page is loading ...
Page is loading ...
Page is loading ...
Page is loading ...
Page is loading ...
Page is loading ...
Page is loading ...
Page is loading ...
Page is loading ...
Page is loading ...
Page is loading ...
Page is loading ...
Page is loading ...
Page is loading ...
Page is loading ...
Page is loading ...
Page is loading ...
Page is loading ...
Page is loading ...
Page is loading ...
Page is loading ...
Page is loading ...
Page is loading ...
Page is loading ...
Page is loading ...
Page is loading ...
Page is loading ...
Page is loading ...
Page is loading ...
Page is loading ...
Page is loading ...
Page is loading ...
Page is loading ...
Page is loading ...
Page is loading ...
Page is loading ...
Page is loading ...
Page is loading ...
Page is loading ...
Page is loading ...
Page is loading ...
Page is loading ...
Page is loading ...
Page is loading ...
Page is loading ...
Page is loading ...
Page is loading ...
Page is loading ...
Page is loading ...
Page is loading ...
Page is loading ...
Page is loading ...
Page is loading ...
Page is loading ...
Page is loading ...
Page is loading ...
Page is loading ...
Page is loading ...
Page is loading ...
Page is loading ...
Page is loading ...
Page is loading ...
Page is loading ...
Page is loading ...
Page is loading ...
Page is loading ...
Page is loading ...
Page is loading ...
Page is loading ...
Page is loading ...
Page is loading ...
Page is loading ...
Page is loading ...
Page is loading ...
Page is loading ...
Page is loading ...
Page is loading ...
Page is loading ...
Page is loading ...
Page is loading ...
Page is loading ...
Page is loading ...
Page is loading ...
Page is loading ...
Page is loading ...
Page is loading ...
Page is loading ...
Page is loading ...
Page is loading ...
Page is loading ...
Page is loading ...
-
 1
1
-
 2
2
-
 3
3
-
 4
4
-
 5
5
-
 6
6
-
 7
7
-
 8
8
-
 9
9
-
 10
10
-
 11
11
-
 12
12
-
 13
13
-
 14
14
-
 15
15
-
 16
16
-
 17
17
-
 18
18
-
 19
19
-
 20
20
-
 21
21
-
 22
22
-
 23
23
-
 24
24
-
 25
25
-
 26
26
-
 27
27
-
 28
28
-
 29
29
-
 30
30
-
 31
31
-
 32
32
-
 33
33
-
 34
34
-
 35
35
-
 36
36
-
 37
37
-
 38
38
-
 39
39
-
 40
40
-
 41
41
-
 42
42
-
 43
43
-
 44
44
-
 45
45
-
 46
46
-
 47
47
-
 48
48
-
 49
49
-
 50
50
-
 51
51
-
 52
52
-
 53
53
-
 54
54
-
 55
55
-
 56
56
-
 57
57
-
 58
58
-
 59
59
-
 60
60
-
 61
61
-
 62
62
-
 63
63
-
 64
64
-
 65
65
-
 66
66
-
 67
67
-
 68
68
-
 69
69
-
 70
70
-
 71
71
-
 72
72
-
 73
73
-
 74
74
-
 75
75
-
 76
76
-
 77
77
-
 78
78
-
 79
79
-
 80
80
-
 81
81
-
 82
82
-
 83
83
-
 84
84
-
 85
85
-
 86
86
-
 87
87
-
 88
88
-
 89
89
-
 90
90
-
 91
91
-
 92
92
-
 93
93
-
 94
94
-
 95
95
-
 96
96
-
 97
97
-
 98
98
-
 99
99
-
 100
100
-
 101
101
-
 102
102
-
 103
103
-
 104
104
-
 105
105
-
 106
106
-
 107
107
-
 108
108
-
 109
109
-
 110
110
-
 111
111
-
 112
112
-
 113
113
-
 114
114
-
 115
115
-
 116
116
-
 117
117
-
 118
118
-
 119
119
-
 120
120
-
 121
121
-
 122
122
-
 123
123
-
 124
124
-
 125
125
-
 126
126
-
 127
127
-
 128
128
-
 129
129
-
 130
130
-
 131
131
-
 132
132
-
 133
133
-
 134
134
-
 135
135
-
 136
136
-
 137
137
-
 138
138
-
 139
139
-
 140
140
-
 141
141
-
 142
142
-
 143
143
-
 144
144
-
 145
145
-
 146
146
-
 147
147
-
 148
148
-
 149
149
-
 150
150
-
 151
151
-
 152
152
-
 153
153
-
 154
154
-
 155
155
-
 156
156
-
 157
157
-
 158
158
-
 159
159
-
 160
160
-
 161
161
-
 162
162
-
 163
163
-
 164
164
-
 165
165
-
 166
166
-
 167
167
-
 168
168
-
 169
169
-
 170
170
-
 171
171
-
 172
172
-
 173
173
-
 174
174
-
 175
175
-
 176
176
-
 177
177
-
 178
178
-
 179
179


