Page is loading ...

1
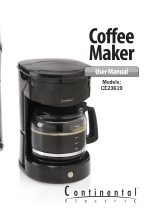
INSTRUCTION BOOKLET
READ ALL INSTRUCTIONS
BEFORE USE.
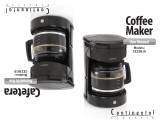
4-CUP SWITCH COFFEE MAKER
RJ14-4-M
For your safety and continued enjoyment of this product, always read the instruction manual before using.

2
888IMPORTANT SAFEGUARDS888
- FOR HOUSEHOLD USE ONLY -
WARNING: When using electrical appliances especially when children are
present, basic safety precautions should always be followed to reduce the risk of
fire, electric shock, and/or injury to persons, including the following:
1. To protect against electrical shock, do not place cord, plug or power head
in water or other liquid.
2. Close supervision is necessary when any appliance is used by or near
children.
3. Do not leave appliance unattended while in use.
4. Unplug from outlet when not in use, before putting on or taking off parts,
and before cleaning.
5. Do not touch hot surfaces. Use handle or knobs
.
6. Do not operate any electrical appliance with a damaged cord or plug or
after appliance malfunctions or has been dropped or damaged in any
manner. Return appliance to nearest authorized service facility for
examination, repair or adjustment.
7. The use of accessory attachments not recommended by the appliance
manufacturer, may result in fire, electrical shock or injury to persons.
8. Do not use outdoors or for commercial purposes.
9. Do not let cord hang over edge of table or counter, or touch hot surfaces
including stove.
10. Do not place appliance or carafe on or near a hot gas or electric burner, or
in a heated oven or microwave.
11. Always keep the lid on the carafe when in
use.
12. The carafe is designed for use with the appliance. It must never be
used on a range top.
13. Do not clean the carafe with abrasive cleansers, steel wool, or other
abrasives material.
14. Do not set a hot carafe down on a wet or cold surface.
15. Do not use the carafe if the glass is cracked or has a loose or weakened
handle.
16. Do not use the appliance for other than its intended use.
SAVE THESE INSTRUCTIONS
This appliance is for HOUSEHOLD USE ONLY. It may be plugged into an AC
electrical outlet (ordinary household current). Do not use any other electrical
outlet.

3
WARNING: This appliance has a polarized plug (one blade is
wider than the other). To reduce the risk of electric shock, this
plug is intended to fit into a polarized outlet only one way. If the
plug does not fit fully into the outlet, reverse the plug. If it still does not fit,
contact a qualified electrician. Do not attempt to modify the plug in any way.
SHORT CORD INSTRUCTIONS
A short power supply cord is provided to reduce the hazards resulting from
entanglement or tripping over a longer cord. Longer detachable power-supply
cords or extension cords are available and may be used if care is exercised
in their use. If a longer detachable power-supply extension cord is used:
1) The marked electrical rating of the cord set or extension cord should
be at least as great as the electrical rating of the appliance, and:
2) The cord should be arranged so that it will not drape over the
countertop or tabletop where it can be pulled on by children or
tripped over unintentionally.
LINE CORD SAFETY TIPS
1. Never pull or yank on cord or the appliance.
2. To insert plug, grasp it firmly and guide it into outlet.
3. To disconnect appliance, grasp plug and remove it from outlet.
4. Before each use, inspect the line cord for cuts and/or abrasion marks. If
any are found, this indicates that the appliance should be serviced and the
line cord replaced.
5. Never wrap the cord tightly around the appliance, as this could place
undue stress on the cord where it enters the appliance and cause it to fray
and break.
1) DO NOT OPERATE APPLIANCE IF THE LINE CORD SHOWS ANY DAMAGE,
OR IF:
2) APPLIANCE WORKS INTERMITTENTLY OR STOPS WORKING ENTIRELY.
IMPORTANT
During the first few minutes of initial use, you may notice smoke and/or a slight
odor. This is normal and should quickly disappear. It will not recur after
appliance has been used a few more times.
This appliance is not intended for use by persons (including children) with
reduced physical, sensory or mental capabilities, or lack of experience and
knowledge, unless they have been given supervision or instruction concerning
use of the appliance by a person responsible for their safety.

4
GETTING
STARTED
1. Remove all stickers, packing material, and literature
.
2. Wash the carafe, carafe lid and brew basket in warm
water. rinse
thoroughly. The carafe is top rack, dishwasher safe
.
CLEANING BEFORE FIRST
USE
Cycle the unit once with water to help remove any sediment build up.
1. Open lid and pour cold water into the water reservoir. Do not fill passed the
4-cup level mark.
2. Close the reservoir
lid.
3. Insert the brew basket pivoting hinge into brew basket holder.
4. Optional: Place a standard paper filter into the brew basket (do not add coffee
grounds).
5. Grasp brew basket by small handle and use it to swing the brew basket
closed.
6. Plug in the coffeemaker.
7. Place the carafe into the coffeemaker and push the "ON" switch/button.
8. When cycle is finished, turn the coffeemaker off and discard used paper filter
(if paper filter was used) and the water from the carafe.
BREWING
COFFEE
1. Open water reservoir lid.
2. Use the carafe to fill the water reservoir with cold water.
Close the reservoir lid.
3. Grasp brew basket by small handle and swing open. Insert the permanent
filter included into the brew basket, add ground coffee into filter (we
recommend one heaping tablespoon for every two cups).
4. Grasp small handle and swing the brew basket closed
.
5. Place the carafe into the coffeemaker.
6. Plug in the coffeemaker
.
7. Push switch/button to "ON "position and the light will turn on.
8. Place the carafe on the "Keep Hot" plate when not serving to keep coffee
hot.
Important: Do not swing open brew basket while brewing
.
9.
Switch the control to "OFF" when finished brewing
.
CLEANING
INSTRUCTIONS
1. Be sure the unit is unplugged and cooled
.
2. Grasp the small handle on the brew basket and swing basket completely open
.
3. Remove the brew basket by lifting the basket straight up and off of pivot hinge
.
4. Discard the paper filter (if paper filter was used) with the grounds
.
5. Clean parts as follows
:

5
• Brew basket, carafe and lid are all top rack dishwasher safe; or they may be
hand washed in warm
water
.
• Wipe the exterior and the "Keep Hot" plate with a soft damp cloth. Do not
use abrasive cleansers or scouring pads. Never immerse the coffeemaker in
water
.
6. Insert brew basket onto pivot hinge and swing closed
.
CARING FOR YOUR
CARAFE
A damaged or broken Carafe may result in possible burns from a
hot liquid. To
avoid breaking
:
• Do not allow the carafe to be placed on the "Keep Hot"
plate when no water or
liquid is in the carafe. This will cause the carafe to break.
• Discard the carafe if damaged in any manner. A chip or crack could
result
in
breakage and cause serious harm.
• Never use abrasive scouring pads or cleansers, they will scratch and
weaken
the
glass
.
• Do not place the carafe on or near a hot gas or electric burner, in a heated
oven,
or
in a microwave
oven
.
MINERAL DEPOSITS AND
CLOGGING
Mineral deposits left by hard water can clog your coffeemaker. Excessive
steaming
or a prolonged brewing cycle are signs that a cleaning is needed.
Cleaning
is
recommended
at least once a
month
.
1. Pour white vinegar into the water reservoir. Fill up to the 3-cup
level mark.
If using water fill up to the 4-cup line, and close the
reservoir
lid.
2. Grasp brew basket by small handle and swing
open.
3. Put a new paper filter in the brew basket, swing the basket closed and be
sure
it latches. Set the empty carafe on the "Keep Hot"
plate.
4. Turn the coffeemaker on and let half the cleaning solution brew into the
carafe.
Turn the coffeemaker off and let it soak for at least 15
minutes to soften
the deposits.
5. Turn the coffeemaker on and brew the remaining cleaning
solution into
the carafe
.
6. When the cleaning solution has finished brewing, discard the paper filter
empty
the carafe and rinse with clean
water.
7. Refill the reservoir with cold water to the 4-cup line, replace the empty
carafe
,
put a paper filter in the brew basket, then turn on the coffeemaker
and run
another
brew cycle to flush out the remaining cleaning
solution.
1
/