Page is loading ...

Pg 1 of 32
www.zennahome.com IS072D2-I
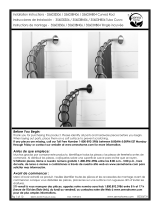
Assembly Instructions
72D2ALBNL
(
Dual Mount Curved Rod
)
Before You Begin:
Thank you for purchasing this product. Please identify all parts and hardware
pieces before you begin. When laying out parts, place them on a soft surface
to prevent scratching.
If any pieces are missing, call our Toll Free Number 1-800-892-3986 between
8:00AM-5:00PM EST Monday through Friday.
For Spanish and French instructions, start on page 17.
Para instrucciones en español y francés, comience en la página 17.
Pour les instructions espagnoles et françaises, commencez à la page 17.
MCS 10/16/2019

Pg 2 of 32
www.zennahome.com IS072D2-I
Cleaning Note:
Cleaning with a dry cloth may be sufficient, but for other stains or marks wipe
gently with a damp cloth.
DO NOT use strong detergents or abrasive cleaners, they may damage the
surface of this product.
NeverRust Guaranteed for Life Warranty:
The manufacturer warrants to the original purchaser that NeverRust aluminum shower rods,
caddies and accessories will be free from red rust during its lifetime. This warranty only covers
the proper and intended use of this product. Any alteration of this product or use of this
product in any manner other than its intended use shall automatically void this warranty.
In the event of a bona fide warranty claim relating to this product, the manufacturer will,
at its election and sole discretion provide a replacement product or a substantially similar
product. This replacement is the sole and exclusive remedy with respect to any warranty
claim relating to this product. Under no circumstances will manufacturer’s liability exceed
the purchase price of this product.
THE MANUFACTURER SHALL NOT BE LIABLE FOR ANY SPECIAL, INCIDENTAL, AND/OR
CONSEQUENTIAL DAMAGES.
To obtain warranty service, please contact (302) 326-8203. No warranty claim will be
processed without a copy of the receipt showing the retailer name, purchase price and
photographs of the defective product.
®
®
Tools Needed - not included

Pg 3 of 32
www.zennahome.com IS072D2-I
List of Parts
Before assembling,
make sure that the tube assemblies (C)
is at the shortest position
by twisting the end of the tube in the
OPPOSITE DIRECTION of the arrow stickers.
A
1 in. Mounting Bracket
1
B
7/8 in. Mounting Bracket
1
C
7/8 in. Diameter Tube assembly
2
D
1 in. Diameter Tube
2
E
End Cap
2
A
D
E
B
C
E
C
D

Pg 4 of 32
www.zennahome.com IS072D2-I
List of Hardware
Plastic Ring
Drywall Anchor
Mounting Bracket Screw
Rod Set Screw
Large Hex Wrench
Small Hex Wrench
x 2
x 4
x 2
x 2
x 1
x 4
Threaded Insert
x 4
Mounting Screw
x 4
1
3
2
4
5
6
7
8

Pg 5 of 32
www.zennahome.com IS072D2-I
• With the arrows on the mounting bracket for the 7/8 in. diameter tube (C) pointing UP and DOWN, fasten the
7/8 in. diameter tube assemblies (C) to the mounting bracket for the 7/8 in. diameter tube (B) using the
mounting bracket screw (2) and threaded insert (3). NOTE: The flat side of the 7/8 in. diameter tube assembly (C)
should be facing DOWN.
• Tighten the mounting bracket screw (2) and threaded insert (3) using the large allen wrenches (5).
• Repeat this step for the 1 in. diameter tubes (D).
Step 1 - Attaching the Mounting Brackets.
3
2
REAR tube assembly (C)
FRONT tube assembly (C)
B
C
C
Permanent Installation - For Tension Mount Installation go to page (12)

Pg 6 of 32
www.zennahome.com IS072D2-I
• Position mounting bracket (B) with arrows pointing upwards and downwards, as shown.
• Slide the end cap (E) onto the tubes (C). NOTE: Do not attach the end cap to the mounting bracket.
• Repeat this step for the 1 in. diameter tubes (D). NOTE: Do not attach the end cap to the mounting bracket.
make sure end cap dimples
line up with the notches in mounting bracket
dimples on end cap
dimples on end cap
Step 2 - Installing the End Caps.
E
B
Permanent Mount

Pg 7 of 32
www.zennahome.com IS072D2-I
Step 3 - Installing the Plastic Ring.
D
D
C
flat side
facing DOWN
Fig. 2
• NOTE: ASSEMBLE ON A SMOOTH FLAT SURFACE.
• Insert plastic ring (1) into the end of the 1 in. diameter tube (D), fig 1.
• Repeat for the other 1 in. diameter tube (D).
• Now, insert the end of the 7/8 in. diameter tube assemblies (C) into the end of the 1 in. diameter tubes (D), fig 2.
Fig. 1
1
plastic ring (1)
flat side
facing DOWN
C
D
Permanent Mount

Pg 8 of 32
www.zennahome.com IS072D2-I
Permanent Mount
• Measure the space between the walls of the bathtub or shower where your rod assembly will be installed.
• NOTE: Please write down your measurement below, you will need this later.
• NOTE: ASSEMBLE ON A SMOOTH FLAT SURFACE.
• On the 7/8 in. diameter tube assemblies (C), twist the tube in the direction of the arrow sticker by 2 turns,
making the assembly longer, fig 1.
• Now, extend the rod assembly to the measurement from step 4 and lock the length of the assembly
with the rod set screws (4) using the small hex wrench (6). NOTE: Tighten the rod set screws (4) until it is
flush with the rods, fig 2.
Step 4 - Measure the space between the walls.
Measurement
between walls:
Step 5 - Extending the 7/8 in. Rod and installing the Set Screw.
rod assembly
C
Fig. 1
Fig. 2
twist the tubes
in the direction of the
ARROW STICKER
D
4
D

Pg 9 of 32
www.zennahome.com IS072D2-I
Permanent Mount
Step 6 - Installing the Rod Assembly in its final location.
• Secure the shower rod to the walls by twisting the end of the 7/8 in. diameter tube assemblies
(C)
away from you, until snug
.
•
Make sure rod is level and adjust as needed.
•
Mark locations on the wall through the mounting brackets (A) and (B) mounting holes, as shown.
• Remove the shower rod from the walls by twisting the end of the 7/8 in. diameter tube assemblies
(C)
towards you, until loose
.
mounting holes
twist the tube away from you until snug
B
C
C

Pg 10 of 32
www.zennahome.com IS072D2-I
Permanent Mount
• Drill the 2 marked spots for each mounting bracket (A) and (B) .
• Insert drywall anchors (7) into wall, as shown. NOTE: If needed, using a hammer, lightly tap drywall
anchors (7) into wall.
• NOTE: Do not use a wall anchor if mounting screw will be going into a stud.
NOTE: Use a 1/4 in. (6mm) drill bit for drywall anchor installation. Use a 1/8 in. (3mm) drill bit for direct
stud installation. If installing into a material other than drywall or into stud,
consult a professional for proper installation.
Step 7 - Installing Wall Anchors.
NOT SHOWN TO SCALE

Pg 11 of 32
www.zennahome.com IS072D2-I
Permanent Mount
• Secure the shower rod to the walls by twisting the end of the REAR tube assembly (C) away from you,
until snug.
• Repeat for the FRONT tube assembly (C), as shown. NOTE: Make sure rod is level.
• Once the rod assembly is secure, twist the tubes until tight.
• Complete mounting by tightening mounting screws (8) into th wall anchors (7) or studs.
• Align the
dimples
on
the end caps (E) with the
notches
on the mounting brackets (A) and (B) and snap together,
as shown.
B
notch
E
B
dimples
notch
Step 8 - Installing the Rod Assembly in its final location.
twist the REAR TUBE AWAY from you until tight
twist the FRONT TUBE AWAY from you until tight
8
8

Pg 12 of 32
www.zennahome.com IS072D2-I
• With the arrows on the mounting bracket for the 7/8 in. diameter tube (C) pointing UP and DOWN, fasten the
7/8 in. diameter tube assemblies (C) to the mounting bracket for the 7/8 in. diameter tube (B) using the
mounting bracket screw (2) and threaded insert (3). NOTE: The flat side of the 7/8 in. diameter tube assembly (C)
should be facing DOWN.
• Tighten the mounting bracket screw (2) and threaded insert (3) using the large allen wrenches (5).
• Repeat this step for the 1 in. diameter tubes (D).
Step 1 - Attaching the Mounting Brackets.
3
2
REAR tube assembly (C)
FRONT tube assembly (C)
B
C
C
Tension Mount Installation - For Permanent Mount Installation go to page (5)

Pg 13 of 32
www.zennahome.com IS072D2-I
• Slide the end cap (E) onto the 7/8 in. diameter tube assemblies (C).
• Snap the end cap (E) to the mounting bracket for the 7/8 in. diameter tubes (B).
• Repeat this step for the 1 in. diameter tubes (D).
make sure end cap dimples
line up with the notches in mounting bracket
dimples on end cap
dimples on end cap
Step 2 - Installing the End Caps.
E
B
Tension Mount Installation

Pg 14 of 32
www.zennahome.com IS072D2-I
Step 3 - Installing the Plastic Ring.
D
D
C
flat side
facing DOWN
Fig. 2
• NOTE: ASSEMBLE ON A SMOOTH FLAT SURFACE.
• Insert plastic ring (1) into the end of the 1 in. diameter tube (D), fig 1.
• Repeat for the other 1 in. diameter tube (D).
• Now, insert the end of the 7/8 in. diameter tube assemblies (C) into the end of the 1 in. diameter tubes (D), fig 2.
Fig. 1
1
plastic ring (1)
flat side
facing DOWN
C
D
Tension Mount Installation

Pg 15 of 32
www.zennahome.com IS072D2-I
Tension Mount Installation
• Measure the space between the walls of the bathtub or shower where your rod assembly will be installed.
• NOTE: Please write down your measurement below, you will need this later.
• NOTE: ASSEMBLE ON A SMOOTH FLAT SURFACE.
• On the 7/8 in. diameter tube assemblies (C), twist the tube in the direction of the arrow sticker by 2 turns,
making the assembly longer, fig 1.
• Now, extend the rod assembly to the measurement from step 4 and lock the length of the assembly
with the rod set screws (4) using the small hex wrench (6). NOTE: Tighten the rod set screws (4) until it is
flush with the rods, fig 2.
Step 4 - Measure the space between the walls.
Measurement
between walls:
Step 5 - Extending the 7/8 in. Rod and installing the Set Screw.
rod assembly
C
Fig. 1
Fig. 2
twist the tubes
in the direction of the
ARROW STICKER
D
4
D

Pg 16 of 32
www.zennahome.com IS072D2-I
twist the REAR TUBE AWAY from you until tight
• Secure the shower rod to the walls by twisting the end of the REAR tube assembly (C) away from you,
until snug.
• Repeat for the FRONT tube assembly (C), as shown. NOTE: Make sure rod is level.
• Once the rod assembly is secure, twist the tubes until tight.
twist the FRONT TUBE AWAY from you until tight
C
C
Step 6 - Installing the Rod Assembly in its final location.
Tension Mount Installation
/