Page is loading ...

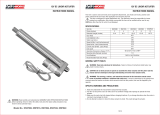
ELECTROMECHANICAL
Linear Actuators
Installation, Operation &
Maintenance Instructions
XT Series
450 - 1250 lbs Capacity
Publication Part No. SK-2391
CAUTION
This manual contains important information for the correct installation, operation and maintenance of the equipment
described herein. All persons involved in such installation, operation, and maintenance should be thoroughly familiar
with the contents. To safeguard against the possibility of personal injury or property damage, follow the recommenda-
tions and instructions of this manual and keep it for further reference.
WARNING
The equipment shown in this manual is intended for industrial use only and should not be used to lift, support, or other-
wise transport people.
I
S
O
9
0
0
1
:
2
0
1
5
1
0
0
0
0
6
7
7
Q
M
1
5
D
u
f
f
-
N
o
r
t
o
n
®

2
Contents
Glossary
Section I General Information
1-1. General 3
1-2. Applications 3
1-3. Specications 3
Table 1-1. SpecicationsforXTSeriesLinearActuators 3
1-4. Important Precautions 3
1-5. Operation 4
1-6. Equipment Power Off 4
1-8. Temperature 4
1-9. Warranty and Warranty Repair 4
Section II Installation
2-1. Mechanical Installation 4
Figure 2-1-1. Use Mounting Pins of Correct Dimensions 4
Figure 2-1-2. OffCenterorSideLoadsMayCauseBending 5
Figure 2-1-3. Mounting Pins Must be Parallel to Each Other 5
2-2. Manual Drive Operation 5
Figure 2-1-1. Torque Required Within 1.7 Nm 5
2.3. Electrical Installation 5
2-4. Cable 6
Figure 2-4-1. Cable Without Signal 6
Figure 2-4-2. Cable With Signal 6
2-5. Inrush Current 6
2-6. WiringDenition 6
Table 2-6-1. TwoLimitSwitchestoCutTheCurrent 6
Figure 2-6-1. TwoLimitSwitches 6
Table 2-6-2. TwoLimitSwitchesandPOT 6
Figure 2-6-2. TwoLimitSwitchesandPOT 6
Section III Product Specications
3-1. Dimensional Drawing 7
Figure 3-1-1. XTSeriesLinearActuatorDimensionalDrawing 7
Section IV Trouble Shooting
4-1. Troubleshooting 7
Table 4-1-1. Symptoms, Possible Cause and Recommended Actions 7
Vm+: The positive pole of power input.
Vm-: The negative pole of power input.
RPM: Number of turns per minute.
AWG: American wiring gauge.
LS: Limitswitchinstalledinsidetheoutertube.
Up LS: Upper limit switch is installed in
fully extended end of stroke.
Low LS: Lowerlimitswitchisinstalledin
fully retracted end of stroke.
N.C.: It is the pin of the limit switch which is
normally short circuit and changed to
open when the switch is triggered.
N.O.: It is the pin of limit switch which is
normally open and changed to short
circuit when the switch is triggered.
C.: It is the common pin of limit switch when
the circuit is either open or short.
Vp: The reference voltage input to POT signal.
Vout: The POT signal wire output value.

3
Section I
General Information
Table 1-1. Specications for XT Series Linear Actuators
1-1. General
This manual provides instructions for the installation,
operation and maintenance of the Duff-Norton XT Series
linear actuator. It includes proper procedures for the
disassembly, cleaning, inspection, rebuilding and assembly
oftheactuator.Toensureecient,long,satisfactoryuseof
this unit, these instructions should be followed closely.
1-2. Applications
The actuators described and illustrated in this manual are
intended for industrial use only and should not be used to
lift, support or otherwise transport people unless you have
a written statement from Duff-Norton which authorizes
thespecicactuatorunit,asusedinyourapplication,as
suitable for moving people.
1-3. Specications
Every effort has been made to deliver this unit in its factory-
approved state. You should, however, carefully inspect the
actuator for damage that may have occurred during transit.
If you have questions or need additional help, please
contact Duff-Norton at (800) 477-5002.
Part
Number
Series Voltage
Dynamic
Rated
Load
Available
Stroke
Length
Speed
at Rated
Load
Current
Draw at
Rated
Load
Temp.
Range
Re-
straining
Torque
Duty
Cycle at
Rated
Load
Screw
Limit
Switches
# Prex VDC
lbs
(N)
in
(mm)
in/s
(mm/s)
A °F (°C) % Type
XT450-2
XT
24
450
(2000)
5.9 (150)
11.8 (300)
17.7 (450)
23.6 (600)*
.88
(22.3)
7.5
-13 to 150
(-25 to 65)
Keyed 25 ACME Included
XT750-2 24
750
(3300)
.44
(11.1)
8.0
-13 to 150
(-25 to 65)
Keyed 25 ACME Included
XT1250-2 24
1250
(5500)
.24
(6.1)
6.8
-13 to 150
(-25 to 65)
Keyed 25 ACME Included
*Stroke length on 600mm with POT is 570mm (22.4 in)
1-4. Important Precautions
In order to ensure that Duff-Norton actuators provide good
service over a period of years, the following precautions
should be taken:
1. Please read through this user manual before working
on the equipment that the actuator will be a part of.
2. Adhere to the information contained in this user
manual and on the product label. Never exceed the
performance limits stated herein.
3. Besuretheactuatorisnotinoperation.
4. Ensure the actuator is free from loads that could be
released during mounting or dismounting
5. Refrain from unplugging any cables or connectors
during operation or with power on.
6. Immediately stop using the actuator if it seems faulty
or damaged . Notify Duff-Norton Customer Service so
corrective actions can be taken.
7. Never disassemble the actuator as that will
compromise the sealing and could impact the function
of the actuator. Disassembly will void warranty.
8. Grease may be present on the extension tube. Contact
with the grease is non hazardous. Please refrain from
removingthelm
CAUTION
Failure to follow the above listed Precautions may result
in serious bodily harm, injury, or death.

4
Section II
Installation
2-1. Mechanical Installation
Use solid mounting pins with the proper dimension and
support them at both ends.
NOTE
Mount the actuator with the mounting pins of correct
dimension and without threads at both ends of the
attachments.
Correct Wrong
Figure 2-1-1. Use Mounting Pins
of Correct Dimension.
NOTE
Do not mount the actuator with the pins in different
rotated angles, this could cause stress on the nut during
operation.
The load should act along the stroke axis of the actuator
from the front attachment, inner tube to the rear
attachment. Off center or side loads may cause bending
and lead to failure.
1-5. Operation
1. Besuretheactuatoriscorrectlymountedasindicated
in the user instructions.
2. Besuretheequipmentcanbemovedeasilyoverthe
actuator’s whole working area.
3. Besuretheactuatorisconnectedtoamainelectricity
supply/transformerwiththecorrectvoltage,specied
on the actuator label.
4. Besurethattheconnectionboltsaresecuredsafely
and can withstand the wear.
5. Stop the actuator immediately if anything unusual is
observed.
6. Ensure there is no side load present on the actuator
7. Onlyusetheactuatorwithinthespeciedworking
limits.
8. Refrain from having any contact with the actuator.
1-6. Equipment Power Off
1. Switch off the main supply to prevent any unintentional
operation.
2. Regularly check for extraordinary wear
1-7. Duty Cycle
1. The standard duty cycle is 25%.
2. If the product is customized, please refer to the
approval drawings
1-8. Temperature
1. The operating temperature range is -25°C to +65°C
2. The operational temperature range at full performance
is +5°C to +45°C
1-9. Warranty and Warranty Repair
Subject to the conditions stated herein, Duff-Norton will
repair or replace, without charge, any parts proven to
Duff-Norton’s satisfaction to have been defective in material
or workmanship. Claims must be made within one year
after date of shipment. Duff-Norton will not repair or replace
any parts that become inoperative because of improper
maintenance, eccentric loading, overloading, chemical or
abrasive action, excessive heat, or other abuse.
Equipment and accessories not of Duff-Norton’s
manufacture are warranted only to the extent that they are
warranted by the manufacturer, and only if the claimed
defect arose during normal use, applications and service.
Equipmentwhichhasbeenalteredormodiedbyanyone
without Duff-Norton’s authorization is not warranted by
Duff-Norton. EXCEPT AS STATED HEREIN, DUFF-NORTON
MAKESNOOTHERWARRANTIES,EXPRESSORIMPLIED,
INCLUDINGWARRANTIESOFMERCHANTABILITYAND
FITNESSFORAPARTICULARPURPOSE.
If you have any questions concerning warranty repair,
please contact Duff-Norton Customer Service. Authorization
for return must be received from the Duff-Norton before
returning any equipment for inspection or warranty repair.

5
NOTE
Besurethemountingpinsmustbeparalleltoeachother.
If the pins are not parallel to each other the actuator
might be bend and could be damaged.
Correct Wrong
X X
X
Y
Figure 2-1-3. Mounting Pins Must
Be Parallel To Each Other.
2-2. Manual Drive Operation
1 In case of a power failure a manual hand crank
can be used.
2 Beforeperforming,thepowersupplyneedsto
be disconnected.
3 When mounting the actuator, ensure there is enough
space between the rear adapter and any objects. This
will allow the user override to be operated.
Correct Wrong
Figure 2-1-2. Off Center or Side
Loads May Cause Bending
M8
The torque required to manually move the extension tube is
within 1.7 Nm, maximum 65 RPM.
Please do not run the outer tube to the end of stroke as that
may damage the actuator.
Figure 2-2-1. Manual Hand Crank
Figure 2-2-1. Torque Required Within 1.7Nm
4. Use M8 Allen key for both the IP protection screw
and the manual drive shaft inside
2-3. Electrical Installation
1. Make sure the leads/cables leading to the motor are
rated to handle the maximum current.
2. To reduce the chance of a crushing hazard, we
recommend an emergency stop
3. If you are not using soft stop on a DC motor, a short
peak of high voltage will be sent towards the power
supply. When selecting the power supply , please ensure
it is able to withstand the peak of high voltage.
4. To reduce the chance of interference, refrain from
placing signal cables along power cables
5. Use a two wire system to prevent ground loop.
6. Please use shielded signal cables with applications that
can be sensitive or if there is interference risk.
7. Please note, using long cables in combination with
small lead cross sections and low voltages could lead
to a malfunction due to voltage drop.
8. Use spark protection on relays and other coil operated
devices
9. Please be sure the power to the actuator is off before
working on the actuator and the wiring.

6
Figure 2-4-1. Cable Without Signal
Figure 2-4-2. Cable With Signal
Figure 2-6-1. Two Limit Switches
2-4. Cable
1. The actuator is supplied with a power cable (with/
without signal wire). The standard cable for industrial
applicationshas/haveyingleadsintheendforthe
user’s equipment connections.
2-5. Inrush Current
1. When the actuator starts to work there is an inrush
current to the motor that will be less than 0.2 seconds
(up to four times the rated current)
2. Please select a power supply that is able to withstand
the inrush current. Also, all contacts including switches
and relay, should be selected with caution.
2-6. Wiring Denition
Table 2-6-1. Two Limit Switches To Cut
The Current (Without Signal Output)
Wire AWG Description Spec
Green 14
- Connect to Vm+ to
extend the actuator
- Connect to Vm- to
retract the actuator
- 24V version: Input
voltage 19~32V DC
- 12V version: Input
voltage 9~19V DC
Yellow 14
- Connect to Vm- to
retract the actuator
- Connect to Vm+ to
extend the actuator
The actuator is equipped with two limit switches to cut the current
of the motor when the actuator moves to the end of each stroke
and without any output signal.
ø7.5 mm
ø7.5 mm
Power cable:
14AWG
ø2.7 mm
ø1.8 mm
Power cable:
14AWG
Signal cable:
20AWG
ø8.5 mm
Table 2-6-2. Two Limit Switches and POT
Wire AWG Description Spec
Green 14
- Connect to Vm+ to
retract the actuator
- Connect to Vm- to
extend the actuator
- 24V version:
Input voltage
19~32V DC
- 12V version:
Input voltage
9~19V DC
Yellow 14
- Connect to Vm- to
retract the actuator
- Connect to Vm+ to
extend the actuator
White 20 POT signal ground - POT output
signal type is
the voltage in
proportion to the
reference voltage
input, which is
relative to the
position of the
actuator
Vp
Pos.
Vout
- The
recommended
power of the POT
input is <2W
- The brand and
spec of the
potentiometer
embedded
isBourns,
0~10Kohm, 10
turns
Red 20
POT signal output Vout
Fully
Retracted
Fully
Extended
0V Vp
Black 20
POT reference voltage
input Vp, 5~32V DC
(Recommended 10V)
The actuator is equipped with two limit switches to cut the
current of the motor when the actuator moves to the end of
each stroke, and with POT position signal output.
Yellow
UP LS LOW LS
Motor
Cut Current Module
Green
Yellow
Green
White
Red
Black
UP LS LOW LS
Motor
Cut Current
Cut Current
Cut Current
POT
Figure 2-6-2. Two Limit Switches and POT

7
Black
Red
ø12.8"
Retracted Length
151.5"
500±20"
15.1"
50"
37.5"
145.5"
27.5"
79"
20.5"
15"
8.2"
25.4"
ø12.8"
Section III
Product Specications
Section IV
Troubleshooting
3-1. Dimensional Drawing
Figure 3-1-1. Dimensional Drawing
Table 4-1-1. Symptoms, Possible Cause and Recommended Actions
4-1. Troubleshooting
Symptom Possible Cause Action
Motor runs but spindle does not
move
Gearing system or spindle damaged Please contact Duff Norton Customer Service
No motor sound or movement
The actuator is not properly connected to
the power supply
Check the connection to the power supply or the
external control unit
Customer fuse burned Check the fuse
Cable damaged Please contact Duff Norton Customer Service
Excessive power consumption
Misalignment or overload in the
application
Align or reduce the load. Try running the actuator
without load
Actuator cannot lift full load or
motor runs too slowly
Insucientpowersupply Check the power supply is properly plugged in
Loadishigherthanspecied Reduce the load
No signal or incorrect feedback
output
Cable damaged Please contact Duff Norton Customer Service
Wrongly connected Check the wiring
Signal is constantly high/low
Run the actuator to full extension & retraction
Reconnect the cables and set parallel
congurationagain

SK-2391
12/15/20
2020 © Duff-Norton
®
- A Columbus McKinnon Company.
All rights reserved.
9415 Pioneer Avenue, Suite 100, Charlotte NC 28273
800-477-5002 • www.duffnorton.com • duffnor[email protected]
/