Page is loading ...

• Remote Control _"
I
!
i
i
I
I
!
Color Televnsnon
I I
Owner's Manual
Model DS25230
I
I

CAUTION
CAUTION: TO REDUCE THE RISK OF ELECTRIC SHOCK, DO NOT
REMOVE COVER (OR BACK). NO USER-SERVICEABLE PARTS INSIDE.
REFER SERVICING TO QUALIFIED SERVICE PERSONNEL.
_1 THIS SYMBOL INDICATES THAT DANGER-
OUS VOLTAGE CONSTITUTING A RISK OF
ELECTRIC SHOCK IS PRESENT WITHIN THIS
UNIT.
THIS SYMBOL INDICATES THAT THERE ARE
IMPORTANT OPERATING AND MAIN-
TENANCE INSTRUCTIONS IN THE LITERA-
TURE ACCOMPANYING THIS UNIT.
WARNING:
TO REDUCE THE RISK OF FIRE OR ELECTRIC SHOCK, DO NOT EXPOSE
THIS APPLIANCE TO RAIN OR MOISTURE.
CAUTION:
When using video games with this television, do not use too much bright-
ness and/or contrast. Too much brightness or contrast used for a long
•time may permanently put an image on the picture tube.
A deteriorating effect on color purity may be caused if this "iV is used in an
audio/video system using conventional speakers. Conventional speakers must
be placed at a minimum distance of 2 feet from the edge of the "IV.
READ AND KEEP THIS LITERATURE
,€
2

IMPORTANT SAFEGUARDS
CAUTION: PLEASE READ AND OBSERVE ALL WARNINGS AND INSTRUC-
TIONS CONTAINED HEREIN AND THOSE ON YOUR APPLIANCE. RETAIN
THIS UTERATURE FOR REFERENCE.
Electrical energy can perform many useful functions. This unit has been
engineered and manufactured to assure your personal safety. However,
improper use can result in potential electrical shock or fire hazards. In order not
to defeat the safeguards incorporated in this unit, observe the following basic
rules for its installation, use and servicing. Your appliance is fully transistorized
and does not contain any user serviceable components.
Removal of the cabinet cover may expose you to dangerous voltages.
Refer all servicing to qualified service personnel.
o
After unpacking the appliance, examine it carefully for possible damage. If
any damage is detected, do not plug the appliance into outlet. Contact your
salesperson or technician.
.
This appliance should be operated only from the type of power source indi-
cated on the unit or as indicated in this Owner's Manual. If you are not sure
of the type of power supply in your home, consult your salesperson or your
local power company. For appliances designed to operate from battery
power, refer to the operating instructions.
3. The design of many appliances does not require a polarized AC line plug
(one blade wider than the other). However, if your appliance is equipped with
a polarized AC line plug, it is a safety feature which prevents the plug being
inserted incorrectly. If you have difficulty inserting the plug, try reversing it. If
the plug still does not fit fully into the outlet, contact your electrician to
replace your obsolete outlet. Do not defeat the safety purpose of this
polarized plug.
4.
.
Slots and openings in the cabinet and in the back or bottom are provided for
ventilation. To ensure reliable operation of the appliance and to protect it from
overheating, these openings must not be blocked or covered. The openings
should never be covered with a cloth or other material, and the bottom open-
ings should not be blocked by placing the unit on a bed, sofa, rug, or other
similar surface. This appliance should never be placed near or over a radiator
or heat register. This appliance should not be placed in a built-in installation
such as a bookcase unless proper ventilation is provided.
Do not drop or push objects into cabinet slots or openings. Some internal
parts carry hazardous voltages and contact may result in electrical shock
hazard. Never spill liquid of any kind on the appliance.
3

LIGHTNING PROTECTION FOR YOUR ANTENNA AND SET AS PER
NATIONAL ELECTRICAL CODE INSTRUCTIONS.
6. If an outside antenna is connected to the receiver, be sure the antenna sys-
tem is grounded so as to provide some protection against voltage surges and
built up static charges. Section 810 of the National Electrical Code, NFPA
70-1984, provides information with respect to proper grounding of the mast
and supporting structure, grounding of the lead-in wire to an antenna
discharge unit, size of grounding conductors, location of antenna discharge
unit, connection to grounding electrodes, and requirements for the grounding
electrode.
EXAMPLE OF ANTENNA GROUNDING ACCORDING TO NATIONAL
ELECTRICAL CODE
// o.oo.o_AL%
"t-.rr 3),J-,,,I
POWER SEFIV_E GROUNOING / :" GROUNO CtJUUP$
ELECTROOE S¥$tT=M
(NEC ART 250. PART H)
NEC - NA_ONALSUECTmCALCOOS
"Note to CATV system installer:
This reminder is provided to call the CATV system installer's attention to Article 820-40 of the
NEC that provides guidelines for proper grounding and, in particular, specifies that the cable
ground shall be connected to the grounding system of the building, as close to the point of
cable entry as practical."
7. Do not expose the appliance to rain or use near water...for example, near a
bathtub, swimming pool, kitchen sink, in a wet basement, etc. Before clean-
ing, unplug the unit from the wall outlet. Do not apply liquid cleaners or
aerosol cleaners directly to the unit. Use a damp cloth for clearing.
8. An outside antenna system should not be located in the vicinity of overhead
power lines or other electric light or power circuits, or where it can fall int0
such power lines or circuits. When installing an outside antenna system ex-
treme care should be taken to keep from touching such power lines or circuits
as contact with them might be fatal.
9. If an indoor antenna is used (built into the set, or installed separately) never
let any part of the antenna touch other electrical equipment, such as metal
parts of a lamp, audio equipment, etc.
4

10. For added protection during a lightning storm, or when the set is left unat-
tended and unused for long periods of time, unplug it from the wall outlet
and disconnect the antenna. This will prevent damage to the set due to
lightning or power line surges.
11. Do not place your appliance on an unstable cart, stand, shelf or table.
Serious injury to an individual, and damage to the appliance, may result if it
should fall. Your sales person can recommend approved carts and stands or
shelf and wall mounting instructions.
An appliance and cart combina-
tion should be moved with care.
Quick stops, excessive force, and
uneven surfaces may cause the
appliance and cart combination to
overturn.
12. Never add accessories that have not been specifically designed for use with
this appliance.
13. Do not allow anything to rest on the power cord. Do not locate the appliance
where the cord will be abused by persons walking on it.
14. Do not overload wall outlets and extension cords as this can result in fire or
electric shock.
15. Unplug the appliance from the wall outlet and refer servicing to qualified
service personnel under the following conditions:
A. if the power cord or plug is damaged or frayed.
B. If liquid has been spilled into the appliance.
C. If the appliance has been exposed to rainor Water.
. D. If the appliance has been dropped or the cabinet has been damaged.
E. If the appliance exhibits a distinct change in performance.
F. If the appliance does not operate normally by following the operating
instructions, adjust only those controls that are covered in the operating
instructions. Improper adjustment of other controls may result in damage
and will often require extensive work by a qualified technician to restore
the appliance to normal operation.
16. Upon completion of any service or repair, request the service technician's
assurance that only Factory Authorized Replacement Parts that have the
same characteristics as the original parts were used, and that routine safety
checks have been performed to determine that the appliance is in safe
operating condition. Unauthorized substitutions may result in fire, electrical
shock, or other h_.ards.
5

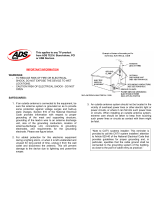
TO THE OWNER
As the owner of a Sanyo Remote Control Color Television, you are probably
eager to try out your television. Before you do, we suggest that you spend a
little time reading this manual to familiarize yourself with the operating proce-
dures, so that you will receive maximum enjoyment from the many features
included on your television.
This owner's manual is to acquaint you with your television's features. Reading
it will help us, too. Through the years, we have found that many service
requests were not caused by problems with our televisions. Theywere caused
by problems that could have been prevented if the owner had followed the
instructions in the manual.
You can often correct operating problems yourself. If your television fails to
work properly, locate the operating problem in the Helpful Hints Chart on
pages 19 and 20, then try the solutions marked for each problem.
UNPACKING AND POSITIONING THE TV
After you have carefully removed the television and owner's manual package
from the shipping carton, save the carton until you are sure that the television is
not damaged. Report any damage, to the store from which it was purchased.
In the owner's manual package, you should find the following items:
- Remote Control - Antenna Adapter _:
Position your television where direct light from lamps or windows does not fall
on the screen. Soft, indirect room lighting is best. Viewing in a room that is too
bright or too dark can cause eye strain. A comfortable viewing distance, usually
six feet or more, is recommended.
Do not place your television too close to the wall or in a confined area. The
electronic parts need normal air circulation for reliable long life.
6

TABLE OF CONTENTS
Connecting Antennas ........................................ 8
Front Control Panel ........................................ 10
Using the Remote Control ................................... 11
Setup and Initial Operation ................................... 14
Adjusting the Picture ....................................... 16
Setting the Sleep Timer Feature .............................. 17
Cable Operation ............................................ 18
Helpful Hints - Problems/Solutions ............................ 19
Warranty and Service ........................................ 21
Maintenance ....................................... Back Cover
CONNECTING THE POWER
Plug the power cord into a convenient wall outlet that has standard house
power (120 volts AC, 60 Hz). As a safety feature, the plug has one blade wider
than the other and fits only one way into a standard electrical outlet. If it does
not fit, try turning it over. if the plug will not fit either way, the outlet is probably
,old and nonstandard. In that event, a new outlet should be installed by a
qualified electrician. Do not defeat the safety feature of the plug.
If the television is not going to be
used for a long period of time, it is
advisable to unplug it from the power
outlet.
WIDE BLADE
7

CONNECTING ANTENNAS
The proper type of antenna is required to obtain the best possible picture on
this television. If you plan to install your own outdoor antenna, see pages 3-5
"Important Safeguards." If you are using an existing outdoor antenna, inspect
the antenna and the lead-in wire for weathering effects. Weathering can greatly
reduce the efficiency of an outdoor antenna.
NOTE...
The television is designed to switch off automatically after 15 minutes if a signal
is not being received. ..,
CONNECTING ANTENNA SIGNALS (UHF/VHF/CATV)
Your TV is equipped with a 75.0. (Ohm) combination UHF/VHF/CATV antenna
input terminal. Many different antenna signal systems can be connected to your
TV using various antenna equipment.
CATV SYSTEM
UHFNHF ANTENNA
75_. LEAD-IN CABLE
75 (n)
UHF/VHF
/ANTENNA /
l CONVERTER BOX
I ;; Ill==
BACK OF TV
@
ANTENNA [[_
UHF/VHF
300Q TWIN-LEAD SIGNAL MIXER
WIRE (Not Supplied)
UHF AI_TENNA
8

Cable Television (CATV)
Connect the cable system's 75.Q cable directly to the 75_ antenna input jack on
back of the "IV. A Converter Box may be required to descramble the signals.
UHF/VHF Combination Antenna with 75_ Lead-in Cable
Connect the antenna's 75_ lead-in cable directly to the 75_ antenna input jack
on back of the TV.
UHF/VHF Combination Antenna with 300_ Twin-lead Wire
• Connect the twin-lead wire from the combination UHF/VHF antenna to the
terminals on the antenna adapter (supplied).
• Slide the antenna adapter onto the 75_ antenna input jack on the back of
the TV.
Separate UHF and VHF Antennas with 300Q Twin-lead Wires
• Connect the twin-lead wires from the UHF antenna and the VHF antenna to
a UHF/VHF signal mixer (300_ input/75_ output, not supplied).
• Slide the UHF/VHF signal mixer onto the 75.(2antenna input jack on the back
of the TV.
POOR SIGNAL RECEPTION
Faulty antenna systems, antenna systems not suited for the area, or antennas
not directed toward the station selected can cause poor signal reception.
NOTE: If you are using a Cable TV system, contact your local Cable Company.
"Snow" or weak picture is the result of either a weak signal or a poor antenna.
"Interference" may be caused by electrical appliances, auto ignitions, CB
radios, etc. Interference of this type is normally temporary.
"Ghosts" or multiple images are signals reflected off mountains or high
buildings.
SNOW INTERFERENCE GHOSTS
9

FRONT CONTROL PANEL
Channel Scanning Keys
Press the A (up) key to scan
programmed channels larger in
numerical value than the current
channel. Press the • (down) key to
scan programmed channels smaller
in numerical value than the current
channel.
Power Key
Press Once to switch on the TV;
press again to switch off the "IV.
Setup Key
Use this key with the Volume A
(up/+) and • (down/-) keys to
select and adjust the features of
the on-screen menu system. (Refer
to pages 14 and 15.)
Volume Keys
Press the • (up/+) key to increase
the volume. Press the • (down/-)
key to decrease the volume. The
volume level 0-64 (maximum) will
be displayed on the screen.
i IIIIIIIIII...... 32
10

USING THE REMOTE CONTROL
The Remote Control allows you to
control the TV from as far away as
thirty feet, The remote control unit
must be pointed directly at the front of
the TV without any objects between
the unit and the TV that could block
the invisible (infrared) light beam.
INSTALLING BATTERIES
The remote control requires two "AA"
(penlight size) batteries (not supplied).
• Press the battery cover down and
slide itbackwards.
• Install the batteries so the "+" and
"-" marks on the batteries match
the "+" and "-" marks inside the
unit. If the batteries are not
installed correctly, the remote con-
trol will not operate and damage
may result.
• To replace the cover, place it on
the unit and slide it forward until it
locks into place.
NOTE: Remove the batteries from the
unit if it is not going to be used for a
month or more. Weak or discharged
batteries may leak and damage the
unit. The normal life of batteries is
roughly six mor'*h'_.
i lel I
11

REMOTE CONTROL KEYS
Channel Selection Keys
Two keys must be pressed to
select a channel.
For channels numbered between
1 and 9, press 0 first. (For
example, to select channel 6: Press
0, then 6.)
For channels numbered between
10 and 99, press the keys that cor-
respond to the channel number.
For channels numbered between
100 and 125, press and hold the 1
key until the 1-- display appears on
the screen. Then press the keys
that correspond to the remaining
channel numbers.
Volume Keys
Press the A (up) key to increase
the volume. Press the • (down)
key to decrease the volume.
J I!!1111111...... 32 i
Auto Key
Use this key to adjust the picture
color, tint, contrast, brightness and
sharpness levels automatically.
(Refer to page 16.)
Power Key
Press once to switch on the TV;
press again to switch off the TV.
_
I
I
I
I
I
Digicon Key
Use this key to Select the various
picture control displays when
making manual adjustments to the
picture. (Refer to page 16.)
12
-and + Keys
Use these keys to adjust the
features of the on-screen menu
system. (Refer to pages 14 and 15.)
Use these keys with the Digicon
key to make manual adjustments
to the picture control levels. (Refer
to page 16.)

Sleep Key
Use this key with the "0" key to set
the Sleep Timer feature to switch
off the TV automatically. (Refer to
page 17.)
Channel Scanning Keys
Press the A (up) key to scan
programmed channels larger in
numerical value than the current
channel. Press the V (down) key
to scan programmed channels
smaller in numerical value than the
current channel.
Press once to turn off the volume, _ _
:_eeM!l eT!ieS!!Y ':_ 'kPPi:rmi:il ii , '_--=__
t escee u t" the ey" p _ __¢.._._\_i
again to restore the volume. _ _ _ _ i
MUTE 1
lll.l........ 32 i ---_ "---IT" I
,
Setup Key
Use this key to select the features
of the on-screen menu system.
(Refer to pages 14 and 15.)
Display Key
Press once to recall the Channel
Number and Time display on the
screen for five seconds. Press this
key twice to display the channel
number on the screen con-
tinuously. To remove the display,
press the key again.
I
i i
i i
l i
Ch-Recall Key
Provided to alternate between two
channels, such as twa bailgames
or a movie and a ballgame. Select
the first channel, then select the
next channel Using the Channel
Selection keys. Press this key to
alternate between the channels.
13

SETUP AND INITIAL OPERATION
This "iV is designed with an on-screen menu system to select and adjust certain
features. In order to properly set up the "iV and enjoy these features you
should proceed through the menu system.
Press the Power key. After a few
seconds, the picture will appear
and the volume will be set at a low
level. Also, you should notice the
on-screen Channel Number/Time
Display.
03
0 • 00
I
SELECTING THE NORMAL/CATV CHANNEL TUNING MODE
Set this feature to match your TV signal hook-up. (Refer to pages 8 and 9.)
In the Normal mode, you can select VHF channels 2-13
and UHF channels 14-69.
In the CATV mode, the Cable Channel Indicator "C" will appear and you can
select Cable channels 1-94 and 98-125 (if available).
Press and release the Setup key
once. The antenna (ANT) tuning
mode selection display will appear
on the screen.
ANT: NORMAL
USE + KEY
• Use the + key to select the Normal
mode or CATV mode.
ANT: CATV
USE + KEY
AUTOMATIC CHANNEL PROGRAM OPERATION
Press and release the Setup key until the automatic channel program display
appears on-screen.
Press the + key, the TV will begin to preset all active channels into the
tuning system memory. When the process is complete the screen will return
to normal TV viewing.
AUTO PROGRAM: I C 34
USE + KEY _ 0 : 00
i
AFTER ACTIVE CHANNELS
ARE PROGRAMMED
NOTE: If the TV is moved to a different signal reception area or if additional
channels are available later, the tuning system memory must be reset.
,t
14

CHANGING THE CHANNEL TUNING MEMORY
Use these procedures to add desired channels to the channel tuning system or
delete unwanted channels from the channel tuning system.
• Select the channel.
NOTE: When adding new channels, use the Channel Selection keys on the
Remote Control to enter the desired channel number.
• Press and release the Setup key until the channel memory display appears
on-screen.
I
CH MEMORY: C 34
- DELETE. + ADO
i
CH MEMORY: C 34
DELETE
I CH MEMORY: C 34
ADD
i
DELETING CHANNELS ADDING CHANNELS
• Press the + key to add the channel to the tuning sy._,'n memo,-y', "ADD" will
appear. Press the - key to delete the unwanted channel from the tuning
system memory, "DELETE" will appear.
• Select the next desired channel and repeat the steps to add or delete any
additional channels.
SE'i-i'ING THE CLOCK
Press and release the Setup key
until the clock time set display
appears on-screen.
Press and hold the - key to set the
clock hour display; then release
the key. Press and hold the + key
to set the clock minute display;
then release the key.
I TIME SET:
- HR, + MIN
i i
0:00
I TIME SET: 12:47
- HR, + MIN
ii L I
NOTE: if the TV is unplugged or a power failure occurs, the clock will be
cleared and must be reset.
15

ADJUSTING THE PICTURE
Your TV is designed with an on-screen control system for adjusting the picture
quality. Use the Menu Contro/keys, on the Remote Control, to easily adjust the
picture to your personal preference. The on-screen displays will remain for a
few seconds after any adjustments are made.
AUTO KEY OPERATION
Use the Auto key to switch on and off
the automatic picture control system.
If "AUTO ON" is selected, the color,
tint, contrast, brightness and sharp-
ness levels will reset to the factory
settings automatically.
If "AUTO OFF" is selected, the picture
control levels will adjust to the pre-
vious manual settings.
AUTO ON
i
AUTOMATIC PICTURE
CONTROL DISPLAY
MANUAL ADJUSTMENTS
These adjustments are not required if
the picture is satisfactory.
Press and release the Digicon key
once. The Adjustment Display for
a picture control level will appear
on the screen.
Continue to press and release the
Digicon key until the desired
control appears on the screen.
Use the - and + keys to make
adjustments. Refer to the picture
control adjustment chart below.
!
COLOR
TINT
CONT
BRIGHT
SHARP
!1111"....
I
CONTROL LEVEL DISPLAY
PICTURE CONTROL ADJUSTMENT
COLOR
TINT
CONT
BRIGHT
SHARP
To adjust color intensity
To adjust flesh tone tints
To adjust picture contrast
To adjust picture brightness
To adjust picture detail
16
- KEY
Lighten
Greenish
Lighter
Darker
Softer
I + KEY
Deepen
Purplish
Deeper
Brighter
Crisper

SETTING THE SLEEP TIMER FEATURE
Use the Sleep key and the Channel Selection "0" key, on the Remote Control,
to set the Sleep Timer feature to switch off the TV automatically. This feature
can switch off the TV after 30 minutes, 1 hour, 1 hour and 30 minutes, or
2 hours.
Q
Press and release the Sleep key.
The Sleep Timer Display will
appear.
Press and release the Channel
Selection "0" key repeatedly until
the desired delay setting appears.
The on-screen display will disap-
pear after five seconds to activate
the Sleep Timer feature. (Note the
on-screen "SLEEP" Indicator.)
SLEEP: 0 •00
USE 0 KEY
SLEEP: 0 •30
SLEEP: 1 "00
SLEEP: 1 "30
SLEEP: 2"00
USE 0 KEY
i
SLEEP
INDICATOR _ SLEEP
C 34
12 "47
NOTES:
Once the Sleep Timer is set, you can check the time remaining by pressing the
Sleep key.
To cancel the Sleep Timer: Press the Sleep key once; then press and release
the "0" key until "0:00" appears in the display.
If t_he TV is switched off or a power failure occurs, the Sleep Timer feature will
be cancelled.
17

CABLE OPERATION
Ask your Cable Company about any special adapters that are required and the
channels available in your area. Use the chart below for channel identification.
(The numbers may vary between cable companies.) The TV is designed to
receive a total of 178 channels (including cable channels). To receive cable
channels, refer to page 14 "Selecting the Normal/CATV Channel Tuning Mode."
in the CATV mode, the Cable Chan-
nel Indicator "C" will appear and you
can select Cable channels. 1-94 and
98-125 (if available).
CABLE CHANNEl
INDICATOR
C 34
12:47
NOTE: All VHF channels (2-13) may
be tuned in either mode.
However, this feature must be in the
normal mode to receive regular UHF
channels (14-69).
CATV FRANCHISE NOTE
Cable companies, like public utilities, are
franchised by local government authorities.
To receive cable programs, even with cable-
compatible equipment, the consumer must
subscribe to the cable company's service.
CATV CHANNEL CHART
Channel Select Channel Select Channel Select Channel Select Channel Select Channel Select
Number Channel Number Channel Number Channel Number Channel Number Channel Number Channel
MIDBAND SUPERBAND HYPERBAND
A 14 S 32 W+14 50
B 15 T 33 W+15 51
C 16 U 34 W+16 52
D 17 V 35 W+17 53
E 18 W 36 W+18 54
F 19 W÷19 55
G 20 W÷20 56
H 21 W+21 57
I 22 HYPERBAND W+22 58
W÷I 37 W+23 59
W+2 38 W÷24 60
W+3 39 W+25 61
SUPERBAND W+4 40 W+26 62
J 23 W+5 41 W+27 63
K 24 W+6 42 W+2B 64
L 25 W+7 43
M 26 W+8 44
N 27 W+9 45
0 28 W+10 46 ULTRABAND
P 29 W+11 47 W+29 65
Q 30 W+12 48 W+30 66
R 31 W+13 49 W+31 67
ULTRABAND ULTRABAND ULTRABAND
W+32 68 W+54 90 W+76 117
W+33 69 W+55 91 W÷77 118
W+34 70 W÷56 92 W+78 119
W+35 71 W+57 93 W+79 120
W+36 72 W÷58 94 W+80 121
W+37 73 W+59 100 W+81 122
W+38 74 W+60 101 W+82 123
W+39 75 W+61 102- - W+83 124
W+40 76 W+62 103 W+84 125
W+41 77 W+63 104
W_ 2 78 W+64 105
W+43 79 W+65 106
W+44 80 W+66 107 VHFLOWBAND
W+45 81 W+67 108 4A • Q1 ]
W+46 82 W+68 109 1
W+47 83 W+69 110
W+48 84 W-_70 111
W÷49 85 W+71 112 MIDLOWBANDi
W+50 86 W+72 113 A-2 98 I
W÷51 87 W+73 114 A-1 99 I
W+52 88 W÷74 115 i
W+53 ' 89 W+75 116 I
!
Numbers 95-97 may be selected, however, these channels cannot be received.
,€
18

HELPFUL HINTS- Problems/Solutions
BEFORE REQUESTING SERVICE CHECK THE FOLLOWING CHART.
Problem: Check these Conditions: Try these Solutions:
"IV turns off
automatically.
No picture,
poor sound,
no sound.
Sound OK,
Poor picture,
Blurred picture,
Double image,
Lines in picture,
Distorted picture.
Poor color
or no color.
• TV will automatically switch off.
(Refer to pages 8 and 17.)
• Power surge protection feature.
• Check if "IV set is plugged in.
• Check antenna connections.
• May be station trouble.
• Check antenna connections.
• May be station trouble.
• Possible signal interference from a
household appliance.
• Check if program is in color.
• Check antenna connections.
• May be station trouble.
• Possible signal interference from a
household appliance.
• Press Power key.
• Unplug TV momentarily.
• Press Power key.
• Adjust Volume.
• Try a different channel.
• Try a different channel.
• Reorient antenna(s).
• Adjust Brightness.
• Adjust Contrast.
• Adjust Sharpness.
• Try a different channel.
• Reorient antenna(s).
• Press Auto key.
• Adjust Color.
• Adjust Tint.'
For more HELPFUL HINTS - Problems/Solutions see page 20.
19

HELPFUL HINTS - Problems/Solutions (Continued)
BEFORE REQUESTING SERVICE CHECK THE FOLLOWING CHART.
Problem: Check these Conditions: Try these Solutions:
Cannot select
or scan some
channels.
No CATV (cable)
• channels above
number 13.
No UHF channels,
VHF channels
OK.
Channel Number
Display remains
on-screen.
Remote Control
will not work.
• Check antenna connections.
• Channel may be deleted from
memory.
• Cable Channel Indicator "C" should
appear next to channel number.
• Cable Channel Indicator "C" should
not appear next to channel number.
• Continuous display has been
selected.
• Reset channel memory.
(Refer to page 14.)
• Select CATV channel
tuning mode and reset
channel memory.
(Refer to page 14.)
• Select NORMAL channel
tuning mode and reset
channel memory.
(Refer to page 14.)
• Press Display key.
• Check if TV set is plugged in.
• Check batteries.
• Point remote control
unit towards "IV.
For more HELPFUL HINTS - Problems/Solutions see page 19.
20
/