Nilfisk-Advance America IVB 7-H User manual

Category
Vacuum cleaner supplies
Type
User manual

This manual is also suitable for

a
u
to
auto
a
u
to
auto
auto
IVB 3-H/5-H/7-H
Operating Instructions
Betriebsanleitung
Notice d’utilisation
Gebruiksaanwijzing
Istruzioni sull’uso
Driftsinstruks
Bruksanvisning
Driftsvejledning
Käyttöohje
Navodilo za uporabo
Uputstvo za rad
Prevádzkový návod
Provozní návod
Instrukcja obsługi
Kezelési utasítás
Ðóêîâîäñòâî ïî ýêñïëóàòàöèè
Instrucciones de manejo
Instruções de operação
Οδηγίες λειτουργίας
Ýþletme kýlavuzu
302002027 C
IVB 3-H
IVB 5-H
IVB 7-H
auto
1
4
3
5
6
7
3
11
9
8
10
IVB 3-H
14
a
u
to
9
8
3
5
6
7
IVB 5-H
1
4
auto
14
IVB 7-H
2
3
4
1
5
5
6
8
10
12
12
13
10
9
14
a
u
to
auto
01
english
IVB 3-H
IVB 5-H
IVB 7-H
Contents
1 Important safety
instructions
2 Description
3 Before start-up
4 Operation
5 Applications and
techniques
6 After finishing work
7 Maintenance
8 Troubleshooting
9 Further information
............................................................................................2
2.1 Purpose ................................................................................5
2.2 Operating elements ..............................................................5
3.1 Assembling the cleaner ........................................................6
4.1 Connections .........................................................................6
4.1.1 Connecting the suction hose ................................................6
4.1.2 Electrical connection ............................................................6
4.1.3 Connecting electrical appliances ..........................................7
4.2 Switching on the vacuum cleaner .........................................7
4.2.1 Switch position “I” .................................................................7
4.2.2 Switch position „auto“ ...........................................................7
4.2.3 Suction power control ...........................................................7
4.3 Check volume flow monitor ..................................................7
4.4 Acoustic warning ..................................................................8
4.5 Cleaning the filter element (IVB 3-H) ....................................8
4.6 Cleaning the filter element (IVB 5-H/7-H) .............................8
5.1 Techniques ...........................................................................9
5.1.1 Picking up dry substances....................................................9
5.1.2 Picking up liquids ..................................................................9
6.1 Switching the vacuum cleaner off and storage ...................10
7.1 Maintenance plan ...............................................................10
7.2 Maintenance work ..............................................................11
7.2.1 Replacing the waste bag ....................................................11
7.2.2 Replacing the filter bag .......................................................11
7.2.3 Replacing filter element „H“ (IVB 3-H) ................................12
7.2.4 Replacing filter element „H“ (IVB 5-H/7-H) .........................12
7.2.5 Emptying dirt tank (IVB 3-H/5-H) ........................................13
7.2.6 Emptying dirt tank (IVB 7-H) ..............................................13
..........................................................................................14
9.1 Recycling the vacuum cleaner ...........................................15
9.2 Guarantee ..........................................................................15
9.3 Tests and approvals............................................................15
9.4 Technical data ....................................................................16
9.5 Accessories ........................................................................16
9.6 EC declaration of conformity ..............................................16
02
english
IVB 3-H
IVB 5-H
IVB 7-H
1 Important safety instructions
Symbols used to mark
instructions
Before using the
vacuum cleaner,
always read the
operating in-
structions and
keep them read-
ily available.
This symbol is
used to mark
safety instruc-
tions that must
be observed to
prevent damage
to the vacuum cleaner and its
performance.
This symbol is
used to mark
safety instructions
that must be ob-
served to prevent
damage to persons.
This symbol in-
dicates tips and
instructions to
simplify work and to ensure safe
operation.
For your own safety
Only allow the vacuum cleaner
to be used by persons who have
been trained in its use and who
have been explicitly authorized
to use it.
Despite its simple handling the
vacuum cleaner is not suitable
for children.
The use of the vacuum cleaner
is subject to valid national regu-
lations. Besides the operating
instructions and the binding
accident prevention regulations
valid in the country of use, ob-
serve recognized regulations for
safety and proper use.
Do not use any unsafe work
techniques.
Purpose and intended use
The vacuum cleaners described
in this operating manual are
suitable for
commercial use, e.g. in
hotels, schools, hospitals,
factories, shops, offices and
rental businesses.
for separation of any kind
of dust with exposure limits,
including carcinogenic dust
and hazardous dust (dust
class H).
Permanent filters should be
replaced by a specialist only in
suitable rooms (e.g. contamina-
tion stations).
The following materials should
not be picked up by the vacuum
cleaner:
- hot materials (burning ciga-
rettes, hot ash, etc.)
- flammable, explosive, ag-
gressive liquids (e.g. petrol,
solvents, acids, alkalis, etc.)
- flammable, explosive dust
(e.g. magnesium or alumini-
um dust, etc.)
When dust removers are used,
the rate at which air is ex-
changed in the room must be
adequate if the exhaust air from
the vacuum cleaner is blown into
the room (please observe regu-
lations valid in your country).
Before starting work, the operat-
ing staff must be informed on
- use of the vacuum cleaner
- risks associated with the ma-
terial to be picked up
- safe disposal of the picked
up material.
03
english
IVB 3-H
IVB 5-H
IVB 7-H
Dust Class H (high). The
dusts which belong to
this class are: dusts with
OEL values, all carcinogenic
dusts and dusts which are mixed
with pathogenic agents. Vacu-
ums for Dust Class H are tested
in their entirety and have a max-
imum degree of permeability of
0.005%. The disposal must be
dust free.
Precautions and safety
regulations when using the
vacuum cleaner
Before start-up
Inspect power cord regularly
to detect signs of damage, e.g.
cracks or ageing.
If the power cord is damaged, it
must be replaced by Nilfisk-Ad-
vance-Service or an electrician
to avoid danger before use of
the vacuum cleaner is contin-
ued.
Use only the type of power
cord specified in the operating
manual.
Do not damage the power cord
(e.g. by moving over it or pulling
or crushing it).
Disconnect the power cord by
pulling the plug only (do not pull
or tug the power cord).
Inspect the vacuum cleaners to
ensure that they are in proper
condition. Plugs and couplings
in power cords must at least
have splash protection.
Never use the vacuum cleaner if
the filter element is damaged.
Picking up liquids
If foam develops or liquid
emerges, stop work immediately
and empty the dirt tank.
Regularly clean the built in float
(IVB 3-H) and level indicator
hose (IVB 5-H/7-H) to limit the
water level and check that they
are not damaged.
See section 5 for information on
handling liquids and (hazard-
ous) dust.
Electrical components
Check the rated voltage of the
vacuum cleaner before con-
necting it to the mains supply
system. Ensure that the voltage
shown on the rating plate cor-
responds to the voltage of the
local mains power supply.
If you are using an extension
cord, use only those specified
by the manufacturer or higher
quality ones (see section 9.4
„Technical data“).
It is recommended that the
vacuum cleaner should be con-
nected via a residual current
circuit breaker. This stops the
supply of electricity if the leak-
age current to earth exceeds 30
mA for 30 ms or it has an earth
tester circuit.
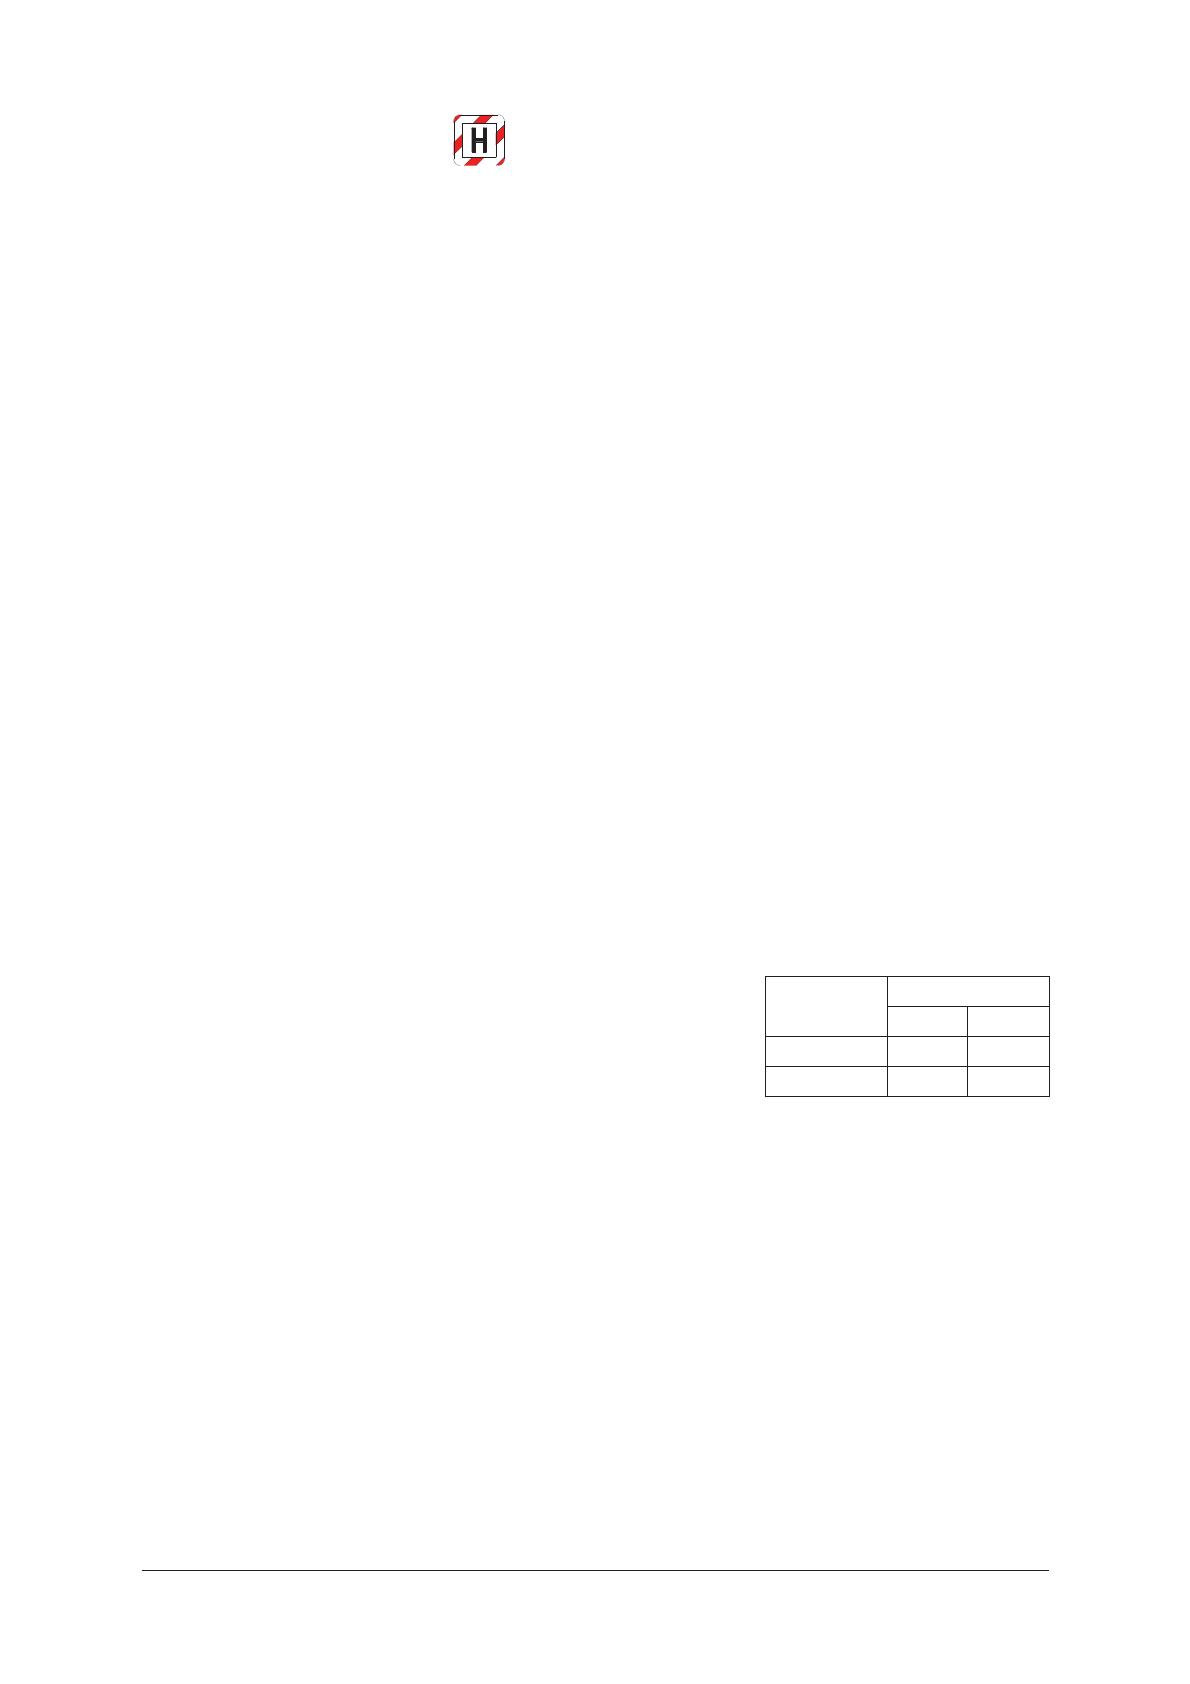
When using an extension lead,
check the minimum cross-sec-
tions of the cable:
Cable length
m
Cross section
<16 A <25 A
up to 20 m
ø1.5mm² ø2.5mm²
20 to 50 m
ø2.5mm² ø4.0mm²
Arrange the electrical parts
(sockets, plugs and couplings)
and lay down the extension lead
so that the protection class is
maintained.
Never spray water on to the
upper section of the vacuum
cleaner. Danger for persons,
risk or short-circuiting.
Observe the latest edition of the
IEC regulations.
04
english
IVB 3-H
IVB 5-H
IVB 7-H
Tool socket
Use the socket on the vacuum
cleaner for the purpose defined
in the operating instructions
only.
Before plugging an appliance
into the appliance socket:
1. Switch off the vacuum clean-
er
2. Switch off the appliance to
be connected.
CAUTION!
Follow the operating instructions
and safety instructions for appli-
ances connected to the power
tool socket.
Maintenance, cleaning and
repair
Only carry out maintenance
work described in the operating
instructions.
Always pull out the mains plug
before cleaning and mainte-
nance of the vacuum cleaner.
During maintenance and clean-
ing, handle the vacuum cleaner
in such a manner that there is
no danger for maintenance staff
or other persons.
In the maintenance area
use filtered compulsory ven-
tilation
wear protective clothing
clean the maintenance area
so that no harmful substanc-
es get into the surroundings.
Before removing the vacuum
cleaner from the area contami-
nated with harmful substances:
clean the outside of the vac-
uum cleaner, wipe it clean or
pack the vacuum cleaner in
well sealed packaging
– and avoid spreading depos-
ited harmful dust.
During maintenance and repair
work all contaminated parts that
could not be cleaned satisfacto-
rily must be:
packed in well sealed bags
disposed of in a manner that
complies with valid regula-
tions for such waste remov-
al.
A dust test must be performed at
least once every year by Nilfisk-
Advance service or a trained
person. This test includes, for
example, whether there is dam-
age to the filter, the vacuum
cleaner is sealed to the air and
the control equipment works
properly.
Accessories and spare parts
Use only the brushes supplied
with the vacuum cleaner or
specified in the operating manu-
al. The use of other brushes can
adversely affect safety.
Use only original Nilfisk-Ad-
vance accessories and spare
parts (see section 9.5). The use
of other parts can adversely af-
fect safety.
05
english
IVB 3-H
IVB 5-H
IVB 7-H
2 Description
2.1 Purpose
The vacuum cleaners IVB 3-H/
IVB 5-H/IVB 7-H are suitable to
pick up dry, nonflammable dust,
nonflammbale liquids, saw-
dust and hazardous dusts with
maximum room concentration
values, carcinogenic dusts and
other dusts containing germs
(dust class H).
To pick up dust with maximum
room concentration values use
the filter bag.
To pick up harmless dust use
the waste bag. See section
9.5 “Accessories” for ordering
number.
2.2 Operating elements
See fold-out page at the front of
these operating instructions.
1 Handle
2 Suction pipe support
3 Accessory holder
4 Applicance switch with suc-
tion power control
5 Retaining clamp
6 Dirt tank
7 Grip to empty tank
1)
8 Inlet fitting
9 Appliance socket
10 Cable hook
11 Operating knob for filter
cleaning
1)
12 Tank locks
13 Castor with brake
14 Hose diameter setting
1)
Option depending on model
06
english
IVB 3-H
IVB 5-H
IVB 7-H
3 Before start-up
3.1 Assembling the cleaner
1. Open the retaining clamps
and lift off the upper section
of the cleaner.
2. Take the accessories out of
the dirt tank and the packag-
ing.
3. To pick up dust with maxi-
mum room concentration
values:
Insert the filter bag into the
dirt tank according to the
instructions (instructions in-
cluded).
To pick up harmless dust:
Insert the disposal bag (in-
structions included) into the
tank.
IMPORTANT: Press
the filter bag connection
firmly on to the inlet fitting.
4. Fit the upper section of the
vacuum cleaner and close
the retaining clamps.
NOTE: Ensure that the
retaining clamps fit properly.
4 Operation
4.1 Connections
4.1.1 Connecting the suction
hose
1. Connect the suction hose.
The suction hose diameter must
suit the position of the switch in
order to pick up dry, nonflam-
mable dust with maximum room
concentration values.
CAUTION!
On delivery some of the accesso-
ries are lying in the tank and must
be removed before the vacuum
cleaner is used for the first time.
Remove the upper section of the
vacuum cleaner:
The mains plug should not be in-
serted into a socket.
4.1.2 Electrical connection
The operating voltage shown on the
rating plate must correspond to the
voltage of the mains power supply.
1. Ensure that the vacuum
cleaner is switched off.
2. Insert the power cord into a
properly installed and fused
socket with an earthing con-
tact.
07
english
IVB 3-H
IVB 5-H
IVB 7-H
4.2 Switching on the
vacuum cleaner
4.2.1 Switch position “I”
1. Turn the switch to position
„I“.
The vacuum cleaner motor
starts.
4.2.2 Switch position „auto“
Before switching the switch to position
„auto“, ensure that the tool connected
to the appliance socket is switched off.
1. Turn the switch to position
„auto“. The vacuum cleaner mo-
tor starts when the connected
appliance is switched on.
2. When the power tool is switched
off the vacuum cleaner contin-
ues to run for a short moment
so that any dust in the suction
hose is conveyed to the safety
filter bag.
4.1.3 Connecting electrical
appliances
1. Ensure that the electrical
appliance is switched off.
2. Connect the electrical appli-
ance to the appliance socket
on the control panel.
To comply with regulations, only ap-
proved dust producing tools should
be connected.
The maximum power consumption
of the connected power tool is stat-
ed in section 9.4 “Technical data”.
The hose diameter and the setting
for the suction hose diameter must
be the same.
Hose
ø
Hose diameter
setting
ø27 ø27
ø32 ø32
ø38 ø38
ø50 ø50
0
0
0
0
0
3
3
6
5
2
2
7
0
0
0
0
0
3
3
5
2
2
7
The hose diameter and the setting
for the suction hose diameter must
be the same.
Hose
ø
Hose diameter
setting
ø27 ø27
ø32 ø32
ø38 ø38
ø50 ø50
4.2.3 Suction power control
The motor speed and the suc-
tion power can be varied with
the suction power control. This
allows precise adaptation of
the suction power for different
cleaning tasks.
0
0
0
0
0
3
3
6
5
2
2
7
4.3 Check volume flow
monitor
Before picking up dust with maxi-
mum room concentration values:
1. Check that all the filters are
present and properly fitted.
2. When the motor is running,
hold the suction hose shut.
An acoustic warning sounds
after approx. 1 second.
08
english
IVB 3-H
IVB 5-H
IVB 7-H
4.4 Acoustic warning
For safety reasons, an acoustic
warning sounds if the air speed
in the suction hose drops to be-
low 20 m/s. See section “Trou-
bleshooting”.
4.5 Cleaning the filter
element (IVB 3-H)
Only after picking up harmless dust
using the waste bag.
If suction performance drops:
1. Set the suction power to
maximum.
2. Close the nozzles or suction
hose opening with the palm
of your hand.
3. Press the button to start filter
cleaning three times. The re-
sulting stream of air removes
attached dust from the slats
of the filter elements.
To ensure that suction performance
is always at its best, the filter ele-
ment is automatically cleaned dur-
ing operation. We recommend com-
plete cleaning if the filter element
becomes extremely dirty.
NOTE:
If the acoustic signal sounds again
after repeated cleaning, replace the
filter element (see section 7.2.4).
Only after picking up harmless dust
using the waste bag.
1. Switch off the vacuum clean-
er
2. Close the nozzles or suction
hose opening with the palm
of your hand.
NOTE:
If the acoustic signal sounds again
after repeated cleaning, replace the
filter element (see section 7.2.3).
1
2
x3
Push & Clean
Filter Cleaning System
0
Iauto
4.6 Cleaning the filter
element (IVB 5-H/
IVB 7-H)
3. Turn the switch to position „I“
and let the cleaner operate
for approx. 10 seconds with
the suction hose opening
closed.
09
english
IVB 3-H
IVB 5-H
IVB 7-H
5 Applications and techniques
5.1 Techniques
If used correctly, additional ac-
cessories, suction nozzles and
suction hoses can enhance the
cleaning action and reduce the
cleaning effort.
Effective cleaning is achieved if
you follow just a few guidelines
in combination with your own
practical experience in special
fields.
Here are some basic tips.
5.1.1 Picking up dry
substances
CAUTION:
Do not pick up flammable
substances.
The suction hose diameter must
suit the position of the switch in
order to pick up dry, nonflam-
mable dust with maximum room
concentration values.
There must always be a safety
filter bag in the tank before dry
substances with maximum room
concentration values are picked
up. See section 9.5 “Accesso-
ries” for ordering number.
To pick up harmless dust we
recommend the use of a waste
bag. See section 9.5 “Accesso-
ries” for ordering number. Dis-
posal of the picked up material
is then simple and hygienic.
After picking up liquids, the filter
element is wet. A damp filter el-
ement clogs more quickly when
dry substances are picked up.
For this reason the filter element
should be washed and dried or
replaced by a dry element be-
fore dry substances are picked
up.
5.1.2 Picking up liquids CAUTION:
Do not pick up flammable
substances.
Before liquids are picked up, al-
ways remove the filter bag/waste
bag and check that the float (IVB
3-H) or the water level limit (IVB
5-H/7-H) works properly. (See
section 7.2.3 and 7.2.4 “Replac-
ing the filter element“.)
The use of a separate filter ele-
ment or filter screen is recom-
mended.
If foam appears, stop work im-
mediately and empty the tank.
To reduce the amount of foam,
use foam killer Nilfisk-Advance
Foam Stop (see section 9.5
„Optional Accessories“ for order
number).
10
english
IVB 3-H
IVB 5-H
IVB 7-H
6 After finishing work
6.1 Switching the vacuum
cleaner off and storage
1. After picking up hazardous
dust, vacuum clean the out-
side of the cleaner.
2. Switch off the vacuum clean-
er and pull the mains plug
out of the socket.
3. Remove the suction hose
form the vacuum cleaner and
close the inlet fitting (1) with
the plug (2).
4. Wind up the power cord and
hang it on the handle.
5. Empty the tank and clean the
vacuum cleaner.
6. After picking up liquids: Store
the upper section of the
cleaner separately so that
the filter element can dry.
7. Store the vacuum cleaner
in a dry room where it is
protected from unauthorized
use.
7 Maintenance
7.1 Maintenance plan
After finishing work As required
7.2.1 Replacing the waste bag
7.2.2 Replacing the safety filter bag
7.2.3 Replacing filter element „H“ (IVB 3-H)
7.2.4 Replacing filter element „H“ (IVB 5-H/7-H)
7.2.5 Emptying dirt tank (IVB 3-H/IVB 5-H)
7.2.6 Emptying dirt tank (IVB 7-H)
7.2 Maintenance work
7.2.1 Replacing the waste
bag
IVB 3-H/IVB 5-H:
1. Open the retaining clamps
and remove the upper sec-
tion of the cleaner from the
dirt tank.
2. Carefully remove the waste
bag connection (1) from the
inlet fitting.
3. Close the waste bag connec-
tion with the slide (2).
4. Close the waste bag using
the cable binder (3).
Only after picking up harmless dust.
IVB 3-H
IVB 5-H
IVB 7-H
1
2
2
1
11
english
IVB 3-H
IVB 5-H
IVB 7-H
7.2.2 Replacing the safety
filter bag
1. Clean the filter element (see
4.5 and 4.6).
2. Switch off the vacuum clean-
er and wait approx. 5 minutes
so that the dust can settle in
the tank.
3. Open the retaining clamps
and remove the upper sec-
tion of the cleaner from the
dirt tank.
4. Remove the filter bag con-
nection (1) from the inlet fit-
ting.
5. Close the safety filter bag
connection (2) with the slide.
6. Remove the plastic sleeve
from the tank rim and close it
using a cable binder (3).
7. Remove the safety filter bag
from the tank and dispose
of it in accordance with legal
regulations.
8. Insert a new safety filter bag
into the tank according to the
instructions (in the filter bag
packaging).
IMPORTANT:
Press the filter bag connection
on the inlet fitting as far as pos-
sible.
During the following work, en-
sure that dust is not unnecessarily
spread around. Wear a P2 breath-
ing mask.
3
1
2
3
3
1
1
1
1
2
2
5. Dispose of the dirt in accord-
ance with legal regulations.
6. Insert a new filter bag into the
cleaned tank as described in
the instructions enclosed.
IMPORTANT:
Press the filter bag connection
firmly on to the inlet fitting.
IVB 7-H:
1. Remove the upper section of
cleaner from the dirt tank.
2. Open the retaining clamps
(1) and remove the interme-
diate ring (2) from the tank.
3. Close the waste bag using
the cable binder (3).
4. Dispose of the dirt in accord-
ance with legal regulations.
5. Insert a new filter bag into the
cleaned tank as described in
the instructions enclosed.
IMPORTANT: Press the filter
bag connection firmly on to
the inlet fitting.
12
english
IVB 3-H
IVB 5-H
IVB 7-H
7.2.3 Replacing filter element
„H“ (IVB 3-H)
3. Open the retaining clamps and
remove the upper section of the
cleaner from the dirt tank. Lay
the upper section of the cleaner
down with the filter element fac-
ing upwards.
4. Using the enclosed tool (2), turn
the filter holder (1) anticlockwise
and remove it.
5. Place the protective filter bag
over the filter element (3).
6. Carefully remove the filter ele-
ment and close the protective
filter bag with a knot.
7. Clean the filter seal (4). Check it
for damage and replace it if nec-
essary.
8. Check the antistatic clamp (5)
for damage and have it replaced
by Nilfisk-Advance Service if
necessary.
9. Fit a new filter element.
10. Check that the float (6) works
properly. When the filter holder
is turned, the float inside must
move about easily.
11. Using the enclosed tool, attach
the filter holder and turn it clock-
wise to lock it.
12. Dispose of the used filter ele-
ment in accordance with legal
regulations.
7.2.4 Replacing filter element
„H“ (IVB 5-H/7-H)
During the following
work, ensure that dust
is not unnecessarily
spread around. Wear a
cleaner down with the filter ele-
ment facing upwards. Do not
place the upper section of the
cleaner on the guard (1) and do
not damage the filter element.
2. Unscrew the screw (2), open the
bar handle and remove it.
3. Remove the filter holder (3).
4. Place the protective filter bag
over the filter element.
5. Carefully remove the filter ele-
ment and close the protective
filter bag with a knot.
6. Clean the filter seal (4). Check it
for damage and replace it if nec-
essary.
7. Check the antistatic clamp (5)
for damage and have it replaced
by Nilfisk-Advance Service if
necessary.
During the following work,
ensure that dust is not
unnecessarily spread
around. Wear a P2
breathing mask.
P2 breathing mask.
Never use the vacuum cleaner with-
out a filter.
1. Remove the upper section
of cleaner from the dirt tank.
Lay the upper section of the
4
1
3
2
Never use the vacuum cleaner with-
out a filter.
1. Clean the filter element (see
4.5).
2. Switch off the vacuum clean-
er and wait approx. 5 minutes
so that the dust can settle in
the tank.
1
2
3
6
5
4
13
english
IVB 3-H
IVB 5-H
IVB 7-H
7.2.5 Emptying dirt tank
(IVB 3-H/IVB 5-H)
1. Remove the upper section of
cleaner from the dirt tank.
2. Using one hand, take hold of the
dirt tank underneath and tip out
the dirt.
3. Dispose of the dirt in accordance
with legal regulations.
4. Clean the rim of the tank before
fitting the upper section of clean-
er.
Before reinserting the suction hose:
5. Clean the inlet fitting and hose
collar.
Only after picking up harmless dust
without a filter bag.
8. Check that the control flap (6)
for filter cleaning works properly.
The control flap should move
back and forwards easily.
9. Clean the level hose (7).
10. Fit a new filter element.
11. Fit the filter holder. Ensure that it
is in the correct position.
12. Fit bar and close bar handle.
13. Dispose of the used filter ele-
ment in accordance with legal
regulations.
5
6
7
7.2.6 Emptying the dirt tank (IVB 7-H)
1. Remove the upper section of
cleaner from the dirt tank.
2. Open the retaining clamps
(1) and remove the interme-
diate ring (2) from the tank.
3. Pull the lever in the handle
(3) upwards and tilt the tank.
4. Tip out the collected dirt.
5. Dispose of the dirt in accord-
ance with legal regulations.
or:
3. Open the tank locks (4).
4. Use the handles (5) to lift the
tank out of the frame.
5. Tip out the collected dirt.
6. Place the empty tank in the
frame and close the locks
(4).
7. Dispose of the dirt in accord-
ance with legal regulations.
1
1
3
3
1
1
Only after picking up
harmless dust with-
out a filter bag.
To empty the dirt
tank after picking
up liquids: remove
the intermediate ring as a proper
seal is only ensured during suction.
After emptying the tank: clean the
rim of the tank and the seals in the
intermediate ring and the upper
section of cleaner before refitting
them.
If the seal or groove is dirty or dam-
aged, the suction performance will
5
5
5
5
4
4
4
4
2
2
be reduced.
Before reinserting the suction hose:
clean the inlet fitting and hose collar.
14
english
IVB 3-H
IVB 5-H
IVB 7-H
8 Troubleshooting
Fault Cause Remedy
Motor does not start > Fuse of the mains socket has
blown.
Connect mains fuse.
> Overload protection switch
has tripped.
Switch off the vacuum cleaner
and allow it to cool for approx.
5 minutes. If the cleaner can-
not be started again, contact
the Nilfisk-Advance service
department.
> Self-acting carbon brush is
worn.
Have carbon brushes changed
by Nilfisk-Advance Service.
Motor does not run in auto-
matic mode
> Power tool is defective or not
connected properly.
Check that the power tool
works or that the plug is inser-
ted correctly.
> The power rating of the elec-
trical tool is too low.
Note that minimum power ra-
ting is P>40W
The acoustic warning
sounds. (Reduced suction
power)
> Suction power selected with
suction power control is too
low.
Set suction power in accor-
dance with section 4.2.3. „Set-
ting suction power“.
> Hose diameter is not right for
switch position.
Set correct switch position for
hose diameter.
> Clogged suction hose/nozzle. Clean suction hose/nozzle
> The safety filter bag is full. See section 7.2.2 „Replacing
filter bag“.
> Filter element is clogged. See section 4.5 „Cleaning filter
element“ and 7.2.3 „Replacing
filter element“.
> Defective cleaning mecha-
nism
Contact Nilfisk-Advance Serv-
ice
No suction power during
wet cleaning
> Tank is full. (Float is blocking
the suction opening).
Switch off the cleaner. Empty
the tank.
The vacuum cleaner swit-
ches off during wet clea-
ning
> Tank is full. Switch off the cleaner. Empty
the tank.
Voltage fluctuations > Impedance of power supply is
too high.
Connect the cleaner to another
socket closer to the fuse box.
Voltage fluctuations over 7%
should not occur if the impe-
dance at the transfer point is
0.15 Ω .
15
english
IVB 3-H
IVB 5-H
IVB 7-H
9 Further information
9.2 Guarantee
Our general conditions of busi-
ness are applicable with regard
to the guarantee. Subject to
change as a result of technical
advances.
9.3 Tests and approvals
The vacuum cleaners have been
tested as specified in IEC/EN
60335-2-69 including appendix
AA. All the requirements were
fulfilled for equipment in dust
class H.
The vacuum cleaners must be
inspected regularly in accord-
ance with national accident pre-
vention regulations (in Germany
as specified in VBG 4 and DIN
VDE 0701 Part 1 and Part 3, at
regular intervals and after re-
pairs or modifications).
A dust test must be performed
at least once every year by the
manufacturer or a trained per-
son. This test covers, for exam-
ple, whether there is damage to
the filter, the vacuum cleaner is
sealed to the air and the control
equipment works properly.
9.1 Recycling the vacuum
cleaner
Make the old cleaner unusable
immediately.
1. Unplug the cleaner and cut
the power cord.
Do not discard of electrical ap-
pliances with household waste.
As specified in European Direc-
tive 2002/96/EC on old electrical
and electronic appliances, used
electrical goods must be col-
lected separately and recycled
ecologically.
Contact your local authorities or
your nearest dealer for further
information.
16
english
IVB 3-H
IVB 5-H
IVB 7-H
9.4 Technical data
9.5 Optional accessories
Description Order No.
IVB 3-H IVB 5-H IVB 7-H
Safety filter bag
(5 pcs.)
302001910 302001143 302001912
Waste bag (5 pcs.) 302001310 302001311 302001480
Filter element „H“ 302000462 302001137
Protective filter bag
(10 pcs.)
30082
Filter screen 15475
Cloth insert filter 302001370 302001371
Nilfisk-Alto-Foam-Stop
(6 x 1 l)
8469
EC declaration of conformity
NILFISK-ADVANCE A/S
Sognevej 25
DK-2605 Brøndby
Product:
Model:
Description:
The design of the appliance
corresponds to the following
pertinent regulations:
Applied harmonized standards:
Applied national standards and
technical specifications:
rgen Jensen
Vacuum cleaner for wet and dry operation
IVB 3-H/5-H/7-H
110/230-240 V~, 50/60 Hz, 1200 W, Dust class H
EC Machine Directive 98/37/EC
EC Low Voltage Directive 73/23/EC
EC EMC Directive 2004/108/EC
EN 12100-1, EN 12100-2
EN 60335-1
EN 60335-2-69
EN 55014-1, EN 55014-2, EN 61000-3-2
DIN EN 60335-1
DIN EN 60335-2-69
Brøndby, 04.07.2005
9.6 EC declaration of conformity
IVB
3-H 5-H 7-H
EU
GB
230/240V
GB
110V
EU
GB
230/240V
GB
110V
EU
GB
230/240V
GB
110V
Voltage V 230 230/240 110 230 230/240 110 230 230/240 110
Mains frequency Hz 50/60
Fuse A 16 13 16 13 16 13 16
Power consumption W 1200
Connected load for
appliance socket
W 2400 1800 560 2400 1800 560 2400 1800 560
Total connected load W 3600 3000 1760 3600 3000 1760 3600 3000 1760
Air flow rate l/min 3600
Vacuum mbar/kPa 230/23
Measurement area sound
pressure level at a distance of 1
m, EN 60704-1
dB(A) 62 60
Sound level dB(A) 59 57
Power cord: Length m 7.5
Power cord: Type H05RR- F3G1.5
H07BQ-
F3G1.5
H05RR- F3G1.5
H07BQ-
F3G1.5
H05RR- F3G1.5
H07BQ-
F3G1.5
Protection class I
Type of protection
(splash water protec-
ted)
IP X4
Radio interference level EN 55014-1
Tank volume l 27 45 70
Width mm 380 476 580
Depth mm 390 506 605
Height mm 570 655 970
Weight kg 10 14 27
Suction hose diameter
mm
Minimum air flow volume
l/min
Associated negative pressure
between suction hose/tool
Pa
27 690 16300
32 970 15700
38 1360 13900
50 2360 7800
Nilfi sk-Advance A/S
Sognevej 25
DK-2605 Brøndby
Denmark
Tel.: +45 43 23 81 00
Fax: +45 43 43 77 00
www.nilfi sk-advance.com
  • Page 1 1
  • Page 2 2
  • Page 3 3
  • Page 4 4
  • Page 5 5
  • Page 6 6
  • Page 7 7
  • Page 8 8
  • Page 9 9
  • Page 10 10
  • Page 11 11
  • Page 12 12
  • Page 13 13
  • Page 14 14
  • Page 15 15
  • Page 16 16
  • Page 17 17
  • Page 18 18
  • Page 19 19

Nilfisk-Advance America IVB 7-H User manual

Category
Vacuum cleaner supplies
Type
User manual
This manual is also suitable for

Ask a question and I''ll find the answer in the document

Finding information in a document is now easier with AI