Page is loading ...

Please read these instructions carefully
and retain for future reference.
Snack Heroes
™
Chocolate Fountain
Instruction Booklet
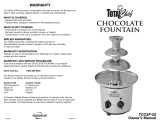
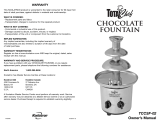
CF4200

Contents
Sunbeam’s Safety Precautions 1
Features of your Snack Heroes
™
Chocolate Fountain 2
Assembly Instructions 4
Using your Snack Heroes
™
Chocolate Fountain 6
Chocolate Measurements and Melting Tips 7
Care and Cleaning 8
Troubleshooting 9
Serving Suggestions 10
Recipes 11
Important instructions – retain for
future use.

1
If you have any concerns regarding the performance and use of your appliance,
please visit www.sunbeam.com.au or contact the Sunbeam Consumer Service Line.
Ensure the above safety precautions are understood.
Sunbeam’s Safety Precautions
Sunbeam is very safety conscious when
designing and manufacturing consumer products,
but it is essential that the product user also
exercise care when using an electrical appliance.
Listed below are precautions which are essential
for the safe use of an electrical appliance:
• Readcarefullyandsavealltheinstructions
provided with an appliance.
• Alwaysturnthepoweroffatthepoweroutlet
beforeyouinsertorremoveaplug.Remove
by grasping the plug - do not pull on the cord.
• Turnthepoweroffandremovetheplug
when the appliance is not in use and
before cleaning.
• Donotuseyourappliancewithanextension
cord unless this cord has been checked
and tested by a qualified technician or
service person.
• Alwaysuseyourappliancefromapower
outletofthevoltage(A.C.only)marked
on the appliance.
• Thisapplianceisnotintendedforuseby
persons(includingchildren)withreduced
physical, sensory or mental capabilities, or
lackofexperienceandknowledge,unlessthey
have been given supervision or instruction
concerning use of the appliance by a person
responsible for their safety.
• Childrenshouldbesupervisedtoensurethat
they do not play with the appliance.
• Thetemperatureofaccessiblesurfacesmaybe
high when the appliance is operating.
• Neverleaveanapplianceunattendedwhile
in use.
• Donotuseanapplianceforanypurpose
other than its intended use.
• Donotplaceanapplianceonornearahotgas
flame, electric element or on a heated oven.
• Donotplaceontopofanyotherappliance.
• Donotletthepowercordofanappliancehang
over the edge of a table or bench top or touch
any hot surface.
• Donotoperateanyelectricalappliancewith
a damaged cord or after the appliance has
been damaged in any manner. If damage is
suspected, return the appliance to the nearest
SunbeamAppointedServiceCentre
forexamination,repairoradjustment.
• Foradditionalprotection,Sunbeam
recommend the use of a residual current
device(RCD)withatrippingcurrentnot
exceeding30mAintheelectricalcircuit
supplying power to your appliances.
• Donotimmersetheapplianceinwater
or any other liquid unless recommended.
•Appliancesarenotintendedtobeoperated
bymeansofanexternaltimerorseparate
remote control system.
•Thisapplianceisintendedtobeusedin
household and similar applications such
as: staff kitchen areas in shops, offices and
other working environments; farm houses; by
clients in hotels, motels and other residential
type environments; bed and breakfast type
environments.
SAFETYPRECAUTIONSFORTHESNACK
HEROES
™
CHOCOLATEFOUNTAIN.
• Thisapplianceisnotatoy.
• Donotleavechildrenunsupervisedwiththe
chocolate fountain.
• Operatethechocolatefountainonaflatand
stable surface.
• Donotleaveyourchocolatefountain
unattended.
• Donotturnoffforlongerthan10minutesif
planning to turn on again.

Features of your Snack Heroes
™
Chocolate Fountain
2
Plastic screw
Theplasticscrewrotatesinsidethetowerto
distribute the chocolate flow. Chocolate is
moved from the base and cycled through the
screw, then distributed back at the top of the
fountain.
3 tier chocolate tower
Thechocolatefountainhasbeenspecially
designedfor3levelsofchocolateflow.Turn
thedialto'chocflow'fora3tieredchocolate
fountain flow.
Indicator light
Thelightwillglowonwhenthedialis
switched to the heat and the choc flow
function.

3
Control settings
Warm Up
Turnthe'warmup'settingonpriortoadding
theliquidchocolate.Thiswarmsthebase
ensuring that warm chocolate does not 'set'
to the base.
Choc Flow
Turnto'chocflow'toseeadecadent,
deliciousflowofchocolateflowover3levels.

1.Beforeusingthechocolatefountainfor
the first time, ensure that all packaging
material are removed.
2. Wipe the metal base with a damp cloth
and wash the plastic screw and tower in
warm soapy water; dry all parts well before
use.
3.Constructthetowerbyplacingthelargest
disc onto the tower facing downwards and
align the grooves on the tower with the
spacesonthedisc.Placethemiddlesized
disc onto the tower, also facing downwards,
aligning the grooves with the spaces on the
disc.Finallyplacethesmallestdisc,facing
upwards, onto the top of the tower and
twist clockwise to lock into place.
Seefigure1.
4.Placethebaseontoalevelbenchtopand
place the plastic screw firmly onto the
drive shaft. See figure 2.
4
Assembly Instructions
Figure1
Figure2

5
Assembly Instructions (continued)
5.Placethechocolatetowerovertheplastic
screw and into the middle of the base of
the chocolate fountain – ensuring that it
alignswiththe3pointsonthebaseandis
fittedsecurely.Seefigure3.
Figure3

6
Using your Snack Heroes
™
Chocolate Fountain
1.Turnthechocolatefountaintothe‘off’dial
setting.
2.Plugtheunitintoa230-240voltAC
power outlet and switch the power on.
Note: Placethechocolatefountainonaflat
level bench.
3.Turnthedialtothe‘warmup’functionto
allow the base to warm up for 5 minutes.
4. Melt chocolate according to directions on
page 7.
5.Pourthemeltedchocolatemixtureinto
the base of the fountain and switch the
dialto‘chocflow’tostartthechocolate
fountain flow. See figure 4.
Note: Tooperatethechocolatefountain,the
chocolate must always be in liquid form.
6.Allowthechocolatefountaintoflowforat
least5minutesbeforeaddingextraoil.
Note:Ifthemixtureisnotflowingcorrectly
see troubleshooting on page 9.
Donotleavechocolateinthefountain
overnightinthe‘warmup’setting.This
setting is not a high enough temperature to
keep the chocolate from hardening.
Figure4

7
Chocolate Measurements and
Melting Tips
Recommended quantities for the chocolate
fountain are as follows:
750gchocolatemeltsand¾cupcanolaoil.
We recommend using good quality chocolate
melts.Otherchocolatesthatarehighin
cocoa solids work well also.
Note: Chocolate varies in quality; the
recommended oil quantities may need to be
adjustedtomakethechocolateflowcorrectly.
Canolaoilquantitiescanvaryfrom100mlto
225ml.
Microwave melting method
Note: Pleaseallowforextrachocolatetopups
if using with lots of people.
Combine chocolate and oil in a heat proof
bowl.Heatinmicrowaveonmedium/lowfor3
minutes.Stirchocolatemixtureandheatfor
afurther1minute.Repeat,untilchocolate
mixturehascompletelymeltedandissmooth
and warm.
Note: DONOToverheatchocolate.Thiswill
causethechocolatetoseizeandharden.If
this occurs chocolate must be thrown away.
Stove top melting method
Combine chocolate and oil in a heat proof
bowl.Placebowloverasaucepanof
simmering water.
Note: Water should not touch base of bowl.
Stirchocolateandoiluntilchocolatemixture
has completely melted and is smooth and
warm.

8
To clean the chocolate tower and screw
1.Ensurethatthechocolatefountainis
positionedtothe‘off’positionandremove
the plug from the power point.
2.Removethechocolatetowerandscrew
from the centre of the chocolate fountain.
Draintheexcesschocolatebyholding
over the base until the parts have stopped
dripping.
Note: Donotthrowexcesschocolatedown
drains.Packageanddisposeinrubbish
bin.
Note: Forfoodsafetyreasonsitisnot
recommended to keep any remaining
chocolate after it has been eaten from.
3.Placethescrewandchocolatetowerin
warm soapy water before the chocolate sets
on to the parts. Screw and tower are top
shelf dishwasher safe.
4.Rinsechocolatetowerandscrewinhot
water and dry parts thoroughly.
To clean the base
1.Pourthechocolatefromthebaseofthe
chocolate fountain into a disposable
container.
Note: Donotthrowexcesschocolatedown
drains.Packageanddisposeinrubbish
bin.
2. Wipe out the base of the fountain with a
warmcloth.Donotuseabrasivesponges.
Care and Cleaning

9
Problem Possible cause Suggested solution
Thechocolatedoes
not cover the tiers
completely
Thefountainisnot
level
Ensure that the fountain and tiers
are level.
Notenoughchocolate Makesurethatthereis750gof
chocolateand¾cupCanolaoil.
Thechocolateisnot
hot enough
Make sure that chocolate and oil are
warm enough. Chocolate should be
approximately60°C.
Notenoughoil Make sure that the oil has been added.
Ifstillthickaddanother1tablespoon
oil at a time until chocolate has
thinned.
Chocolate is flowing
unevenly and is not
sheeting
Thechocolateisnot
hot enough
Turnthedialbackto‘warmup’for5
minutesthenturnbackto‘chocflow’.
Thereisadraft
hitting the chocolate
Fountainmustbeindoorsandaway
fromanybreeze.Closewindows.
Chocolate has stopped
flowing
Foodstuckinbase
of fountain
Turnmachineoffandunplug.Pour
excesschocolateintoabowlandcheck
for lumps of food. Separate parts and
removefood.Reassembleunitand
replace chocolate.
Chocolate has gone very
hard during melting
Chocolate has
burnt/seized
Ifchocolatehasseizedduringthe
melting,ithasbecometoohot.The
chocolate will become grainy and firm
up. It will look like a dull, thick paste.
Chocolate must be thrown away and
start again.
Thereisawhitefilm
around the base of the
chocolate
Thereisnothingwrongwiththe
chocolate,itisjustfromthechurning
process that happens when the
chocolate is cycled through the unit.
Troubleshooting

10
Therearemanydifferentfoodstoservewith
the chocolate fountain. Make sure that all
pieces are quite large and serve with skewers.
Here are some suggestions:
• Strawberries(washanddrywell)
• Slicedbananas
• Applewedges
• Minicakes(seerecipes)
• Marshmallows
• Wafersticks
• Biscotti
• Dryfruitssuchasdates,figsandpineapple
• Kiwifruit
• Liquorice
• Minimeringues
Serving Suggestions

Chocolate Fudge Sauce Makes 1 litre
400gdarkchocolate,chopped
100gmarshmallow,chopped
600mlcream
1.Placeallingredientsinmediumsaucepan;
stir over low heat without boiling, until
combined.
2.Assemblethechocolatefountainas
directedonpage4.Pourfudgesauceinto
preheated base and turn unit on.
Note: Werecommendthatthismixturedoes
not run in the chocolate fountain for longer
than1hour.
Caramel Sauce Makes 1.25 litres
400gbutter,chopped
2 cups firmly packed brown sugar
500mlcream
1.Meltbutterinsmallsaucepan,addsugar
and cream, stirring over low heat, until
combined.Allowmixturetocoolfor20
minutes.
2.Assemblethechocolatefountainas
directedonpage4.Pour1litreofthe
caramel sauce into preheated base and
turn unit on.
3.Useremainingcaramelsaucetotopup
unit when needed.
Chocolate and Orange Sauce Makes
approximately 1 litre
1kgdarkchocolate,chopped
¾cupvegetableoil
¼ cup Conitreau
1.Placechocolateinmediumheatproofbowl,
over medium saucepan of simmering water.
Cook, stirring, until chocolate has melted,
stir in oil and liquor.
2.Assemblethechocolatefountainas
directedonpage4.Pourchocolatesauce
into preheated base and turn unit on.
Note: Otherliqueurscanbesubstituted.
Donotexceedtherecommendedquantities
asthiswillcausethechocolatetoseize
(harden).
Nibbles for Dipping
White Chocolate Blondie Makes 24
125gbutter
¾cupfirmlypackedbrownsugar
1cupplainflour
½ teaspoon baking powder
2 eggs, beaten lightly
100gwhitechocolate,choppedcoarsely
1.Preheatoven180ºCfanforced.Grease
12holeminimuffinpan.
2. Combine butter and sugar in small
saucepan, cook, stirring, until combined.
Transfertomediumbowlwithflour,baking
powder and eggs, stirring, until combined.
Stir in chocolate.
3.Dividemixtureamongpreparedholes.
Bake,inoven,about15minutesoruntil
cooked through. Stand in pan 5 minutes,
turn onto wire rack to cool.
Note:Use1leveltablespoonofmixtureper
muffin hole.
Recipes
11

12
Chocolate Brownies Makes 24
60gbutter
200gdarkchocolate,chopped
1cupfirmlypackedbrownsugar
2 eggs, beaten lightly
½ cup plain flour
1.Preheatoven180ºCfanforced.Grease
12holeminimuffinpan.
2. Combine butter, chocolate and sugar in
small saucepan, cook, stirring over low
heat,untilcombined.Transfertomedium
bowl with flour and eggs, stirring, until
combined.
3.Dividemixtureamongpreparedholes.
Bake,inoven,about15minutesoruntil
cooked through. Stand in pan 5 minutes,
turn onto wire rack to cool.
Note: Use1leveltablespoonofmixtureper
muffin hole.
Sticky Date Mini Cakes Makes 36
Thisrecipeisexcellentwiththecaramel
sauce recipe on the previous page.
¾cupseedlessdates,choppedcoarsely
¾cuphotwater
½ teaspoon bicarbonate of soda
60gbutter,chopped
¾cupfirmlypackedbrownsugar
2 eggs
1cupselfraisingflour
1.Preheatoven180ºCfanforced.Grease
12-holeminimuffinpan.
2. Combine dates, water and bicarbonate of
sodainmediumbowl,stand10minutes.
Blendorprocessdatemixtureuntil
smooth.
3.Meanwhile,beatbutter,sugarandegguntil
combined.Foldthroughflouranddate
mixture.
4.Placeleveltablespoonsofbatterineachof
thepreparedholes.Bakeinovenabout15
minutes or until cooked through. Stand in
cake pan 5 minutes before turning onto a
wire rack to cool.
White Chocolate Mini Cakes Makes 32
125gbutter
100gwhitechocolate,chopped
¾cupcastersugar
¹⁄
³
cup milk
¾cupplainflour
¼ cup self raising flour
1egg,beatenlightly
1.Preheatoven180ºCfanforced.Lightly
grease12holeminimuffinpan.
2. Combine butter, chocolate, sugar and milk
in small saucepan stirring over low heat,
until combined.
3.Placesiftedfloursinmediumbowl,add
cooledchocolatemixtureandeggs,stirring,
until combined.
4.Dropleveltablespoonsofthebatterinto
prepared cake pan, bake, uncovered, in
ovenabout20minutesoruntilcooked
through. Stand cakes in pan 5 minutes,
before turning onto wire rack to cool.
Recipes (continued)

Shouldyouexperienceanydifficultieswith
your appliance, please phone our customer
servicelineforadviceon1300881861in
Australia,or0800786232inNewZealand.
Alternatively,youcansendawrittenclaim
to Sunbeam at the address listed below.
Onreceiptofyourclaim,Sunbeamwill
seek to resolve your difficulties or, if the
appliance is defective, advise you on how
to obtain a replacement or refund.
YourSunbeam12MonthReplacement
Guaranteenaturallydoesnotcovermisuse
or negligent handling and normal wear and
tear.
Similarlyyour12MonthReplacement
Guaranteedoesnotcoverfreightoranyother
costsincurredinmakingaclaim.Please
retain your receipt as proof of purchase.
Thebenefitsgiventoyoubythisguarantee
are in addition to your other rights and
remedies under any laws which relate to the
appliance.
Ourgoodscomewithguaranteesthatcannot
beexcludedundertheAustralianConsumer
LawandundertheNewZealandConsumer
GuaranteesAct.
InAustraliayouareentitledtoa
replacementorrefundforamajorfailureand
for compensation for any other reasonably
foreseeablelossordamage.Youarealso
entitled to have the goods repaired or
replaced if the goods fail to be of acceptable
quality and the failure does not amount to
amajorfailure.
Should your appliance require repair or
service after the guarantee period, contact
your nearest Sunbeam service centre.
ForacompletelistofSunbeam’sauthorised
service centres visit our website or call:
Australia
www.sunbeam.com.au
1300881861
Units5&6,13LordStreet
BotanyNSW2019Australia
New Zealand
www.sunbeam.co.nz
0800786232
26VesteyDrive,MtWellington
Auckland,NewZealand
In the unlikely event that this appliance develops any malfunction
within 12 months of purchase (3 months commercial use) due to
faulty materials or manufacture, we will replace it for you
free of charge.
12 Month Replacement Guarantee

is a registered trademark.
Need help with your appliance?
Contact our customer service team or visit
our website for information and tips on
getting the most from your appliance.
In Australia
Visit www.sunbeam.com.au
Or call 1300 881 861
In New Zealand
Visit www.sunbeam.co.nz
Or call 0800 786 232
‘Snack Heroes’ is a trademark of Sunbeam Corporation.
Made in China.
Due to minor changes in design or otherwise,
the product may differ from the one shown in this leaflet.
© Copyright.
Sunbeam Corporation Limited 2012.
ABN 45 000 006 771
Units 5 & 6, 13 Lord Street
Botany NSW 2019 Australia
Unit 3, Building D
26 Vestey Drive
Mt Wellington Auckland
New Zealand
Sunbeam Corporation is a division of GUD Holdings Ltd.
8/12
/