Sony DSC-S40 User manual

Category
Bridge cameras
Type
User manual

This manual is also suitable for

Additional information on this product and answers
to frequently asked questions can be found at our
Customer Support Website.
2-590-506-11 (1)
© 2005 Sony Corporation
Printed in China
Printed on 100% recycled paper using
VOC (Volatile Organic Compound)-free
vegetable oil based ink.
Digital Still Camera
User’s Guide/
Troubleshooting
Operating Instructions
Before operating the unit, please read this manual and
“Read This First” (separate volume) thoroughly, and retain
it for future reference.
Owner’s Record
The model and serial numbers are located on the bottom.
Record the serial number in the space provided below.
Refer to these numbers whenever you call upon your Sony
dealer regarding this product.
Model No. DSC-S40
Serial No. ___________________________
DSC-S40
“Read This First” (separate volume)
Explains the set-up and basic operations
for shooting/playback with your camera.
Enjoying the
camera
Using the menu
Using the Setup screen
Using your computer
Printing still images
Troubleshooting
Others
Index
2
To prevent fire or shock hazard, do
not expose the unit to rain or
moisture.
If you have any questions about this product, you
may call:
Sony Customer Information Services Center
1-800-222-SONY (7669)
The number below is for the FCC related matters
only.
Regulatory Information
CAUTION
You are cautioned that any changes or
modifications not expressly approved in this
manual could void your authority to operate this
equipment.
WARNING
For Customers in the U.S.A.
This symbol is intended to
alert the user to the presence
of uninsulated “dangerous
voltage” within the product's
enclosure that may be of
sufficient magnitude to
constitute a risk of electric
shock to persons.
This symbol is intended to
alert the user to the presence
of important operating and
maintenance (servicing)
instructions in the literature
accompanying the appliance.
Declaration of Conformity
Trade Name: SONY
Model No.: DSC-S40
Responsible Party: Sony Electronics Inc.
Address: 16450 W. Bernardo Dr,
San Diego, CA 92127U.S.A.
Telephone No.: 858-942-2230
This device complies with Part 15 of the FCC
Rules. Operation is subject to the following
two conditions: (1) This device may not cause
harmful interference, and (2) this device must
accept any interference received, including
interference that may cause undesired
operation.
3
Note:
This equipment has been tested and found to
comply with the limits for a Class B digital
device, pursuant to Part 15 of the FCC Rules.
These limits are designed to provide reasonable
protection against harmful interference in a
residential installation. This equipment generates,
uses, and can radiate radio frequency energy and,
if not installed and used in accordance with the
instructions, may cause harmful interference to
radio communications. However, there is no
guarantee that interference will not occur in a
particular installation. If this equipment does
cause harmful interference to radio or television
reception, which can be determined by turning the
equipment off and on, the user is encouraged to
try to correct the interference by one or more of
the following measures:
Reorient or relocate the receiving antenna.
Increase the separation between the
equipment and receiver.
Connect the equipment into an outlet on a
circuit different from that to which the
receiver is connected.
Consult the dealer or an experienced radio/TV
technician for help.
The supplied interface cable must be used with the
equipment in order to comply with the limits for a
digital device pursuant to Subpart B of Part 15 of
FCC Rules.
This product has been tested and found compliant
with the limits set out in the EMC Directive for
using connection cables shorter than 3 meters (9.8
feet).
Attention
The electromagnetic fields at the specific
frequencies may influence the picture and sound
of this camera.
Notice
If static electricity or electromagnetism causes
data transfer to discontinue midway (fail), restart
the application or disconnect and connect the
communication cable (USB, etc.) again.
Use a commercially available AC plug adaptor
[a], if necessary depending on the design of the
wall outlet (wall socket) [b].
The set is not disconnected from the AC power
source (mains) as long as it is connected to the
wall outlet (wall socket) even if the set itself has
been turned off.
For Customers in Europe
Caution on using the AC Adaptor
AC-LS5K (not supplied)
AC-LS5K
4
Notes on using your camera
Types of “Memory Stick” that can be
used (not supplied)
The IC recording medium used by this
camera is a “Memory Stick”. There are two
types of “Memory Stick”.
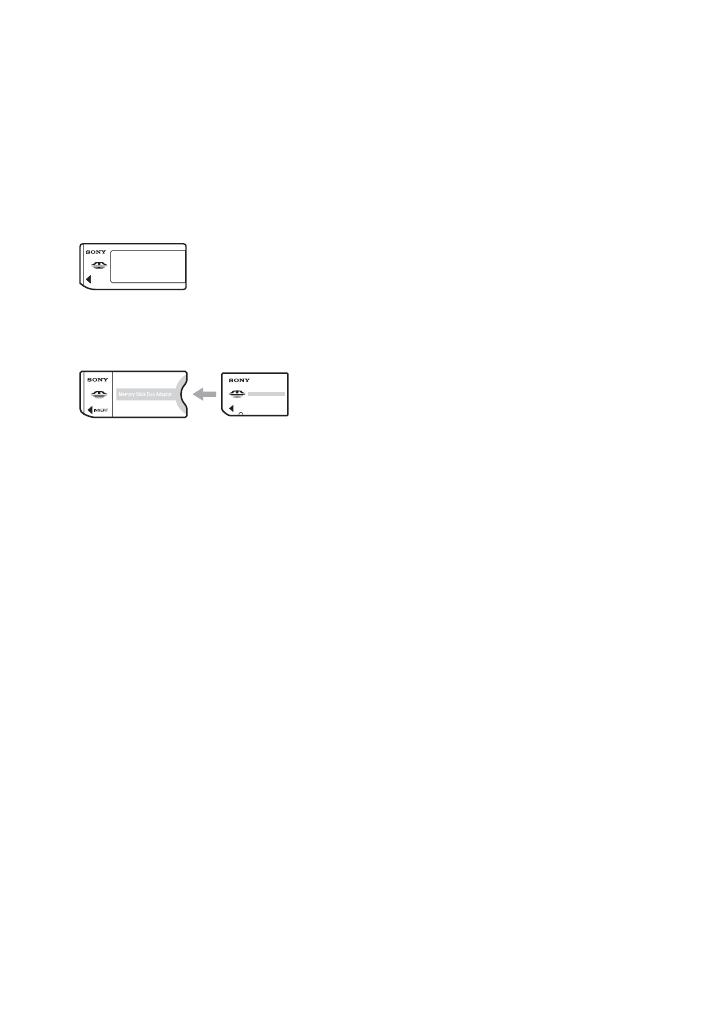
“Memory Stick”: you can use a “Memory Stick”
with your camera.
“Memory Stick Duo”: you can use a “Memory
Stick Duo” by inserting it into a Memory Stick
Duo Adaptor.
Memory Stick Duo Adaptor
For details on “Memory Stick”, see page 83.
Carl Zeiss lens
This camera is equipped with a Carl Zeiss lens
which is capable of reproducing sharp images
with excellent contrast.
The lens for this camera has been produced under
a quality assurance system certified by Carl Zeiss
in accordance with the quality standards of Carl
Zeiss in Germany.
No compensation for contents of the
recording
The contents of the recording cannot be
compensated for if recording or playback is not
possible due to a malfunction of your camera or
recording media, etc.
Back up of the internal memory or
“Memory Stick”
If you turn off the power or open the battery
cover or “Memory Stick” cover, etc. during the
access lamp is lit, the data in the internal
memory or “Memory Stick” may be corrupted.
Be sure to back up the data to avoid the potential
risk of data loss. See pages 22, 53 on how to
back up the data.
Notes on recording/playback
This camera is neither dust-proof, nor splash-
proof, nor water-proof. Read “Precautions”
(page 86) before operating the camera.
Before you record one-time events, make a trial
recording to make sure that the camera is
working correctly.
Be careful not to get the camera wet. Water
entering the inside of the camera may cause
malfunctions which in some cases may not be
repairable.
Do not aim the camera at the sun or other bright
light. This may cause irrecoverable damage to
your eyes. Or it may cause the malfunction of
your camera.
Do not use the camera near a location that
generates strong radio waves or emits radiation,
or a location with a strong magnetic field. The
camera may not be able to record or play back
properly.
Using the camera in sandy or dusty locations
may cause malfunctions.
If moisture condensation occurs, remove it
before using the camera (page 86).
Do not shake or strike the camera. In addition to
malfunctions and an inability to record images,
this may render the recording medium unusable,
or cause image data breakdown, damage or loss.
Clean the flash surface before use. The heat of
flash emission may cause dirt on the flash
surface to become discolored or to stick to the
flash surface, resulting in insufficient light
emission.
5
Notes on the LCD screen, LCD finder
(for models with an LCD finder) and
lens
The LCD screen and the LCD finder are
manufactured using extremely high-precision
technology so over 99.99% of the pixels are
operational for effective use. However, there
may be some tiny black points and/or bright
points (white, red, blue, or green in color) that
constantly appear on the LCD screen and the
LCD finder. These points are normal in the
manufacturing process and do not affect the
recording in any way.
Exposing the LCD screen, the finder, or the lens
to direct sunlight for long periods may cause
malfunctions. Be careful when placing the
camera near a window or outdoors.
Do not press against the LCD screen. The screen
may be discolored and that may cause a
malfunction.
Images may trail across on the LCD screen in a
cold location. This is not a malfunction.
This camera is equipped with a power zoom
lens. Be careful not to bump the lens, and be
careful not to apply force to it.
On image data compatibility
This camera conforms with DCF (Design rule
for Camera File system universal standard)
established by JEITA (Japan Electronics and
Information Technology Industries
Association).
Playback of images recorded with your camera
on other equipment and playback of images
recorded or edited with other equipment on your
camera are not guaranteed.
Warning on copyright
Television programs, films, videotapes, and other
materials may be copyrighted. Unauthorized
recording of such materials may be contrary to the
provisions of the copyright laws.
The pictures used in this manual
The photographs used as examples of pictures in
this manual are reproduced images, and are not
actual images shot using this camera.
6
For full use of the digital still camera
Prepare the camera and shoot in auto adjustment mode
“Read This First” (separate volume)
1 Prepare the battery
2 Turn the camera on/set the clock
3 Insert a “Memory Stick” (not supplied)
4 Select the image size for use
5 Shoot images easily (Auto adjustment mode)
Shoot still images (Scene Selection)
6 View/Delete images
Get more friendly with your camera
This manual
Shoot with your favorite settings (Program auto shooting) t
page 24
Enjoy various shooting/playback using the menu t page 26
Change the default settings t page 41
Connect your camera to a PC or a printer
This manual
Copy your images to a computer and enjoy editing them in
various ways t page 51
Print images by connecting your camera directly to a printer
(PictBridge compliant printers only) t page 64
2
1
2
1
7
Table of contents
Notes on using your camera .....................................................................4
Basic techniques for better images .........................................................10
Focus – Focusing on a subject successfully................................................... 10
Exposure – Adjusting the light intensity .......................................................... 11
Color – On the effects of lighting ..................................................................... 12
Quality – On “image quality” and “image size” ............................................... 12
Identifying parts.......................................................................................14
Indicators on the screen ..........................................................................16
Changing the screen display ...................................................................20
Number of still images and recording time of movies..............................21
When you do not have a “Memory Stick” (Recording with the internal
memory) ..................................................................................................22
Battery life and number of images that can be recorded/viewed ............23
Using the mode switch ............................................................................24
Using menu items ..............................................................................26
Menu items ..........................................................................................27
Shooting menu ........................................................................................28
(Camera)
(EV)
9 (Focus)
WB (White Bal)
ISO
(P.Quality)
Mode (REC Mode)
(Interval)
(Flash Level)
PFX (P.Effect)
(Saturation)
(Contrast)
(Sharpness)
(Setup)
Enjoying the camera
Using the menu
M
8
Viewing menu ......................................................................................... 34
(Folder)
- (Protect)
DPOF
(Print)
(Slide)
(Resize)
(Rotate)
(Divide)
(Setup)
Trimming
Using Setup items.............................................................................. 41
Camera 1........................................................................................... 42
AF Mode
Digital Zoom
Date/Time
Red Eye Reduction
AF Illuminator
Auto Review
Camera 2........................................................................................... 45
Enlarged Icon
Internal Memory Tool ........................................................................ 46
Format
Memory Stick Tool.............................................................................47
Format
Create REC. Folder
Change REC. Folder
Copy
Setup 1............................................................................................... 49
Beep
Language
Initialize
Setup 2............................................................................................... 50
File Number
USB Connect
Clock Set
Using the Setup screen
1
2
1
2
9
Enjoying your Windows computer ...........................................................51
Copying images to your computer...........................................................53
Viewing image files stored on a computer with your camera (using a
“Memory Stick”).......................................................................................59
Using the supplied software ....................................................................60
Using your Macintosh computer..............................................................62
How to print still images ..........................................................................64
Printing images directly using a PictBridge compliant printer .................65
Printing at a shop ....................................................................................68
Troubleshooting .......................................................................................70
Warning indicators and messages ..........................................................80
On the “Memory Stick” ............................................................................83
On the batteries.......................................................................................85
Precautions .............................................................................................86
Specifications ..........................................................................................87
Using your computer
Printing still images
Troubleshooting
Others
Index
......................................................................................................88
10
Enjoying the camera
Basic techniques for better images
When you press the shutter button halfway down, the camera adjusts the focus automatically
(Auto Focus). Remember to press the shutter button only halfway down.
To shoot a still image difficult to focus on
t 9 (Focus) (page 28)
If the image looks blurred even after focusing, it may be because of camera shake.
t See
“Hints for preventing blur” (below).
Focus
Focusing on a subject successfully
Press fully down
straight away
Press halfway
down, then Flashing,lit/beeps Press fully down
Hints for preventing blur
Hold the camera steadily, keeping your arms at your side. Also, you can stabilize the
camera by leaning against a tree or a building beside you. Using a tripod, and using the
flash in dark places are also recommended.
Focus Exposure Color Quality
This section describes the basics so you can
enjoy your camera. It tells you how to use
various camera functions such as the mode
switch (page 24), the menus (page 26), and
so on.
96
VGA
FINE
30
S
AF
F3.5
11
Enjoying the camera
You can create various images by adjusting the exposure and the ISO sensitivity. Exposure is
the amount of light that the camera will receive when you release the shutter.
Adjusting the ISO sensitivity
ISO is unit of measurement (sensitivity), estimating how much light an image pickup device
(equivalent to photo films) receives. Even when the exposure is the same, images differ
depending on the ISO sensitivity.
[ISO] adjusts the sensitivity t page 30
Exposure
Adjusting the light intensity
Overexposure
= too much light
Whitish image
The exposure is automatically set to the
proper value in the auto adjustment mode.
However, you can adjust it manually using
the functions below.
[EV]:
Allows you to adjust the exposure that has
been determined by the camera.
t
page 28
[Metering Mode]:
Allows you to change the part of the
subject to be measured to determine the
exposure (t step 5 in “Read This First”).
Correct exposure
Underexposure
= too little light
Darker image
High ISO sensitivity
Records a bright image even when shooting in a dark location. However, the
image tends to become noisy.
Low ISO sensitivity
Records a smoother image.
However, the image may become darker.
Shutter speed = Length of time the camera receives
light
Aperture = Size of the opening allowing light to pass
through
ISO =
Recording sensitivity
Exposure:
12
The apparent color of the subject is affected by the lighting conditions.
Example: The color of an image affected by light sources
The color tones are adjusted automatically in the auto adjustment mode.
However, you can adjust color tones manually with [White Bal] (page 30).
A digital image is made up of a collection of small dots called pixels.
If it contains a large number of pixels, the picture becomes large, it takes up more memory,
and the image is displayed in fine detail. “Image size” is shown by the number of pixels.
Although you cannot see the differences on the screen of the camera, the fine detail and data
processing time differ when the image is printed or displayed on a computer screen.
Description of the pixels and the image size
Color
On the effects of lighting
Weather/lighting
Daylight Cloudy Fluorescent Incandescent
Characteristics of
light
White (standard) Bluish Blue-tinged Reddish
Quality
On “image quality” and “image size”
1 Image size: 4M
2304 pixels×1728 pixels = 3,981,312 pixels
2 Image size: VGA(E-Mail)
640 pixels×480 pixels = 307,200 pixels
640
480
2304
1728
Pixels
13
Enjoying the camera
Selecting the image size for use (t step 4 in “Read This First”)
The default settings are marked with .
* Images are recorded in the same 3:2 aspect ratio as photograph printing paper or postcards, etc.
Selecting the image quality (compression ratio) in combination (page 30)
You can select the compression ratio when digital images are saved. When you select a high
compression ratio, the image lacks the fineness of detail, but has a smaller file size.
Pixel
Many (Fine image
quality and large file
size)
Example: Printing in up to A4
size
Few (Rough image
quality but small file
size)
Example: An attached image
to be sent by e-mail
Image size Usage guidelines
4M (2304×1728) Larger
Smaller
For printing high density images in A4 or A5 size
3:2 (2304×1536)*
3M (2048×1536)
1M (1280×960) For printing in postcard size
For recording a large number of images
For attaching images to e-mail or creating web pages
VGA(E-Mail)
(640×480)
14
Identifying parts
See the pages in parentheses for details of
operation.
A POWER button (
t step 2 in “Read
This First”)
B Shutter button (
t step 5 in “Read This
First)
C Tripod receptacle (bottom)
Use a tripod with a screw length of less than
5.5 mm (7/32 inch). You will be unable to
firmly secure the camera to tripods having
longer screws, and may damage the camera.
D Speaker (bottom)
E POWER lamp (
t step 2 in “Read This
First)
F Microphone
G Lens
H Finder window
I (USB) jack (54)
J (USB) jack cover
K “Memory Stick” cover (
t step 3 in
“Read This First”)
L Self-timer lamp (
t step 5 in “Read
This First”)/AF illuminator (44)
M Flash (
t step 5 in “Read This First”)
A AE/AF lock lamp/self-timer lamp
(green) (
t step 5 in “Read This First”)
B Flash charge lamp/Record lamp
(orange) (
t step 5 in “Read This
First)
C Finder (
t step 5 in “Read This First”)
D Mode switch (24)
E LCD screen (16)
F MENU button (26)
G (Display/LCD on/off) button (20)
H (Image Size/Delete) button
(
t step 4 and 6 in “Read This First”)
I Control button
Menu on: v/V/b/B/
z (t step 2 in
“Read This First”)
Menu off: / / / (
t step 5 in
“Read This First”)
J For shooting: Zoom (W/T) button
(
t step 5 in “Read This First”)
For viewing: / (Playback zoom)
button/ (Index) button (
t step 6 in
“Read This First”)
K Hook for wrist strap (
t “Read This
First)
L Battery cover (
t step 1 in “Read This
First)
M OPEN button (
t step 1 in “Read This
First)
1
2
3
4
5
6
7
8
q;
9
qa
qs
qd
1
2
3
4
5
6
7
8
9
q;
qa
qs
qd
qf
qg
15
Enjoying the camera
N AC Adaptor cord cover
To use the AC-LS5K AC Adaptor (not
supplied)
O Access lamp (
t step 4 in “Read This
First
4
3
5
1
2
Do not pinch the cord when you close the
cover.
16
Indicators on the screen
See the pages in parentheses for details of
operation.
When shooting still images
When shooting movies
A
B
+2.0
EV
C:32:00
F3.5125
1/30”
101
S
AF
+
VGA
C:32:00
101
+
[
00:28:25
]
00:00:00
STBY
STD
6 40
+2.0
EV
Display Indication
Battery remaining (t step
1 in “Read This First)
z AE/AF lock (
t step 5 in
“Read This First”)
Recording mode (24, 31)
White balance (30)
STBY
REC
Standby/Recording a movie
(
t step 5 in “Read This
First)
Camera mode (Scene
Selection) (
t step 5 in
“Read This First”)
Camera mode (Program)
(24)
Flash mode (
t step 5 in
“Read This First”)
Zoom scaling (42,
t step
5 in “Read This First)
Red-eye reduction (43)
Sharpness (33)
5 Saturation (33)
6 Contrast (33)
AF illuminator (44)
Metering mode
(t step 5
in “Read This First”)
Picture effect (33)
Display Indication
AF mode (42)
AF range finder frame
indicator (28)
M
SL
1.3
ON
S AF M A F
17
Enjoying the camera
CD
E
Display Indication
Image size (t step 4 in
“Read This First”)
FINE STD Image quality (30)
Recording folder (47)
This does not appear when
using the internal memory.
Remaining internal
memory capacity (21)
Remaining “Memory
Stick” capacity (21)
00:00:00
[00:28:05]
Recording time [maximum
recordable time] (21)
1/30" Multi Burst interval (32)
400 Remaining number of
recordable images (21)
Self-timer (
t step 5 in
“Read This First”)
C:32:00 Self-diagnosis display (80)
Date/Time (43)
ISO number (30)
3:2
4M
3M 1M VGA
FINE
6 40
STD
6 40
160
101
Display Indication
Vibration warning (10)
Indicates vibration will
prevent you from shooting
clear images. Even if the
vibration warning appears,
you can still shoot images.
However, we recommend
using the flash or a tripod to
increase the amount of
light.
E Low battery warning (23,
80)
+ Spot metering cross hair
(
t step 5 in “Read This
First”)
AF range finder frame (28)
Display Indication
NR slow shutter
When the shutter speed is
1/6 second or slower, the
camera activates the NR
slow shutter function to
reduce noise.
125 Shutter speed
F3.5 Aperture value
+2.0EV EV level value (28)
(not displayed
on the screen
on the previous
page)
Menu/Guide menu (26)
DPOF
18
When playing back still images
When playing back movies
A
B
C
C:32:00
101
VGA
1.3
M
101
12/12
+2.0EV
F3.5500
VOLUMEBACK/NEXT
101
DPOF
00:00:12
8/8
101
160
VOL.
Display Indication
Battery remaining (t step
1 in “Read This First)
Image size (
t step 4 in
“Read This First”)
Recording mode (24, 31)
N Playback (
t step 6 in
“Read This First”)
Vo l u m e (
t step 6 in
“Read This First”)
- Protect (35)
Print order (DPOF) mark
(68)
Change folder (34)
This does not appear when
using the internal memory.
Zoom scaling (t step 6 in
“Read This First”)
Step
12/16
Frame by frame playback
(31)
Display Indication
101-0012 Folder-file number (34)
Playback bar (
t step 6 in
“Read This First”)
Display Indication
PictBridge connecting (66)
Recording folder (47)
This does not appear when
using the internal memory.
Playback folder (34)
This does not appear when
using the internal memory.
Remaining internal
memory capacity (21)
Remaining “Memory
Stick” capacity (21)
3:2
3M
4M
1M VGA
FINE
6 40
STD
6 40
160
M
1.3
101
101
19
Enjoying the camera
D
E
8/8 12/12 Image number/Number of
images recorded in selected
folder (34)
C:32:00 Self-diagnosis display (80)
00:00:12 Counter (
t step 6 in
“Read This First”)
Display Indication
Do not disconnect the USB
cable (67)
+2.0EV EV level value (28)
ISO number (30)
Metering mode (
t step 5
in “Read This First”)
Flash
White balance (30)
500 Shutter speed
F3.5 Aperture value
Playback image (
t step 6
in “Read This First”)
Display Indication
2005 1 1
Recording date/time of the
playback image (43)
Menu/Guide menu (26)
BACK/
NEXT
Select images
VOLUME
Adjust volume
Display Indication
DPOF
20
Changing the screen display
Each time you press the (Display/LCD
on/off) button, the display changes as
follows.
When you set the LCD screen to Off, the digital
zoom does not function (page 42) and [AF
Mode] is set to [Single] (page 42). When you
select (flash)/ (self-timer)/ (metering),
the image is displayed for about two seconds.
S AF
VGA
96
S AF
Indicators off
LCD screen off
Indicators on
Image information is
displayed during
playback.
  • Page 1 1
  • Page 2 2
  • Page 3 3
  • Page 4 4
  • Page 5 5
  • Page 6 6
  • Page 7 7
  • Page 8 8
  • Page 9 9
  • Page 10 10
  • Page 11 11
  • Page 12 12
  • Page 13 13
  • Page 14 14
  • Page 15 15
  • Page 16 16
  • Page 17 17
  • Page 18 18
  • Page 19 19
  • Page 20 20
  • Page 21 21
  • Page 22 22
  • Page 23 23
  • Page 24 24
  • Page 25 25
  • Page 26 26
  • Page 27 27
  • Page 28 28
  • Page 29 29
  • Page 30 30
  • Page 31 31
  • Page 32 32
  • Page 33 33
  • Page 34 34
  • Page 35 35
  • Page 36 36
  • Page 37 37
  • Page 38 38
  • Page 39 39
  • Page 40 40
  • Page 41 41
  • Page 42 42
  • Page 43 43
  • Page 44 44
  • Page 45 45
  • Page 46 46
  • Page 47 47
  • Page 48 48
  • Page 49 49
  • Page 50 50
  • Page 51 51
  • Page 52 52
  • Page 53 53
  • Page 54 54
  • Page 55 55
  • Page 56 56
  • Page 57 57
  • Page 58 58
  • Page 59 59
  • Page 60 60
  • Page 61 61
  • Page 62 62
  • Page 63 63
  • Page 64 64
  • Page 65 65
  • Page 66 66
  • Page 67 67
  • Page 68 68
  • Page 69 69
  • Page 70 70
  • Page 71 71
  • Page 72 72
  • Page 73 73
  • Page 74 74
  • Page 75 75
  • Page 76 76
  • Page 77 77
  • Page 78 78
  • Page 79 79
  • Page 80 80
  • Page 81 81
  • Page 82 82
  • Page 83 83
  • Page 84 84
  • Page 85 85
  • Page 86 86
  • Page 87 87
  • Page 88 88
  • Page 89 89
  • Page 90 90
  • Page 91 91

Sony DSC-S40 User manual

Category
Bridge cameras
Type
User manual
This manual is also suitable for

Ask a question and I''ll find the answer in the document

Finding information in a document is now easier with AI