©2020 Atlas Sound LP. The Atlas “Circle A”, Soundolier, and Atlas Sound are trademarks of Atlas Sound L.P. IED is a Registered Trademark of Innovative Electronic Designs LLC. All rights reserved.
All other Trademarks are property of their respective owners. No endorsement is implied. Due to continual product development, specifications are subject to change without notice. ATS006109 4/20
AtlasIED.com
TELEPHONE: (800) 876-3333
SUPPORT@ATLASIED.COM
1601 JACK MCKAY BLVD.
ENNIS, TEXAS 75119 U.S.A.
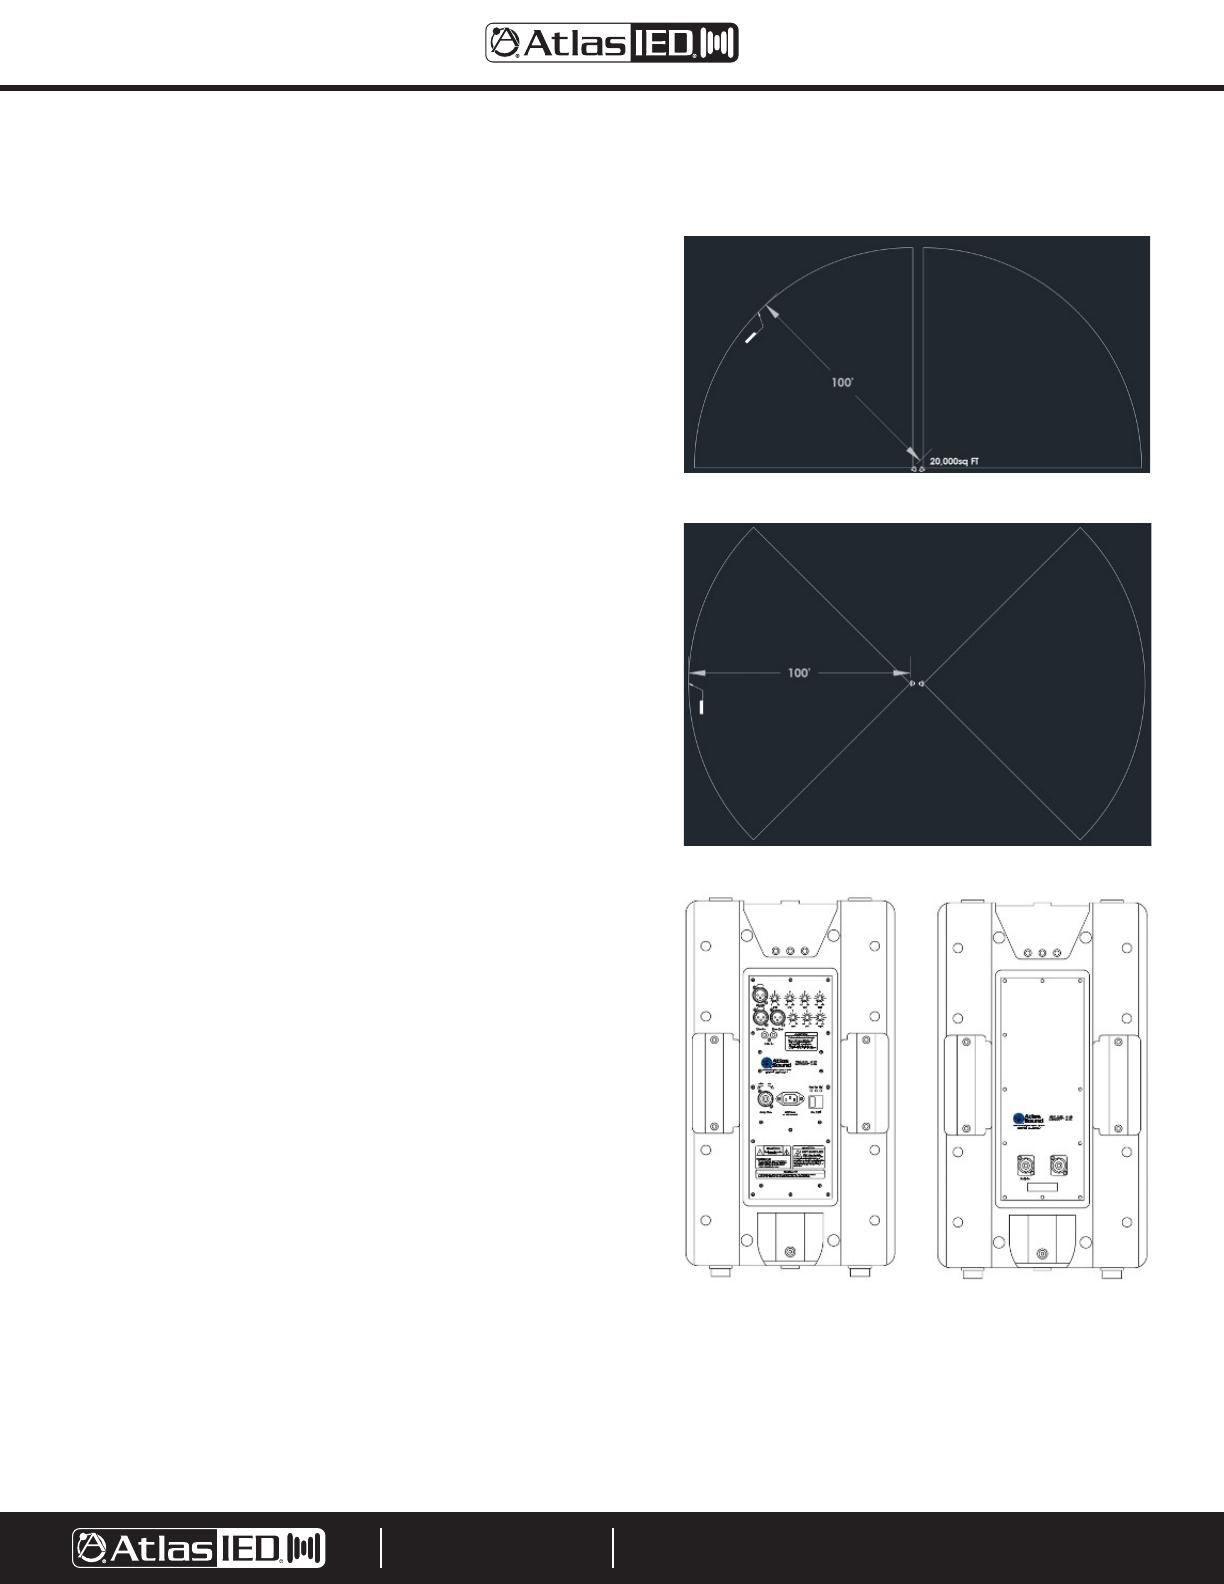
Speaker Placement
The first step is to determine the required area the speakers
need to cover. The 2 speakers can be placed close together
and angled at 45 deg to cover a 180 deg area. Figure 1.
They can also be placed close together and angled 180 deg to
facilitate a long line i.e. a roadway. Figure 2.
Once the speaker placement has been determined the SS500E
speakers stands can be positioned.
CAUTION: The speaker stands MUST be positioned on a firm
flat surface and the pole must be perpendicular to the ground.
NOTE: In windy areas AtlasIED strongly recommends placing
sandbags on the legs of the stand. (Supplied by others)
1. Loosen the leg clamp knob and slide the clamp down the
pole to extend the legs to their maximum extent.
2. Loosen the top pole clamp and raise the inner tube until the
first pin hole is visible, insert the pin, lower the inner tube
until the pin contacts the outer tube then retighten the clamp.
3. Place the SMA-12 on the inner pole of the first stand and
tighten the clamp screw on the back of the speaker. Repeat
this process for the SMP-12 on the second stand.
4. Setup the microphone stand at least 10' to one side of the
speakers, connect the microphone cable to the microphone
and the “Mic In” connector on the SMA-12 speaker.
5. Connect one end of the AS2NL4-8M speaker cable to the
“Amp Out” connector on the SMA-12 speaker, then connect
the other end to “Amp In” on the SMP-12 speaker.
6. Confirm that both the “Gain” controls are turned all the way
down (counterclockwise), and the power switch is in the off
position on the SMA-12 speaker.
7. Connect one end of the supplied power cord to the “AC Inlet”
of the SMA-12 and the other end to a suitable 120V AC outlet.
8. On the SMA-12 speaker turn the power switch on.
9. Slide the switch on the M300-HH microphone to the up
position, start talking into the microphone while slowly turning
the microphone “Gain” control up (clockwise) until suitable
sound levels can be heard from the speakers.
10. Confirm sound can be heard from both speakers.
It is best practice to slide the mic switch to the off (down) position
after announcements are made, and to turn the power switch to
the off position on the SMA-12 if the system will not be used for
an extended amount of time.
Please refer to Figure 3 for connector and controls location
Figure 1
Figure 2
Figure 3


