Samsung PL43D490A1M Quick start guide

Category
LCD TVs
Type
Quick start guide

This manual is also suitable for

imagine the possibilities
Thank you for purchasing this Samsung product.
To receive more complete service, please register
your product at
www.samsung.com/register
Model _____________ Serial No. _____________
E-MANUAL
Contact SAMSUNG WORLDWIDE
If you have any questions or comments relating to Samsung products, please contact the SAMSUNG customer care center.
Comuníquese con SAMSUNG WORLD WIDE
Si desea formular alguna pregunta o comentario en relación con los productos de Samsung, comuníquese con el centro de
atención al cliente de SAMSUNG.
Country
Customer Care Center
Web Site
ARGENTINA 0800-333-3733 www.samsung.com
BRAZIL 0800-124-421
4004-0000
www.samsung.com
CHILE 800-SAMSUNG(726-7864) www.samsung.com
NICARAGUA 00-1800-5077267 www.samsung.com
HONDURAS 800-7919267 www.samsung.com
COSTA RICA 0-800-507-7267 www.samsung.com
ECUADOR 1-800-10-7267 www.samsung.com
EL SALVADOR 800-6225 www.samsung.com
GUATEMALA 1-800-299-0013 www.samsung.com
JAMAICA 1-800-234-7267 www.samsung.com
PANAMA 800-7267 www.samsung.com
PUERTO RICO 1-800-682-3180 www.samsung.com
REP. DOMINICA 1-800-751-2676 www.samsung.com
TRINIDAD & TOBAGO 1-800-SAMSUNG(726-7864) www.samsung.com
VENEZUELA 0-800-100-5303 www.samsung.com
COLOMBIA 01-8000112112 www.samsung.com
Plasma TV
user manual
© 2011 Samsung Electronics Co., Ltd. All rights reserved.
BN68-03500C-01
[PD490-ZL]BN68-03500C-01L02.indb 1 2011-02-24 오후 7:11:43
English - 2
For more information on how to use e-Manual
Figures and illustrations in this User Manual are provided for reference only and may differ from actual product appearance.
Product design and specifications may be changed without notice.
User Instructions
Screen Image retention
Do not display a still image (such as on a video game) on the plasma display panel for more than several minutes as it can cause screen image
retention. This image retention is also known as ‘screen burn’. To avoid such image retention, reduce the degree of brightness and contrast of the
screen when displaying a still image.
Heat on the top of the Plasma TV
The top side of the product may be hot after long periods of use as heat dissipates from the panel through the vent hole in the upper part of the
product.
This is normal and does not indicate any defect or operation failure of the product.
However, children should be prevented from touching the upper part of the product.
The product is making a ‘cracking’ noise.
A ‘cracking’ noise may occur when the product contracts or expands due to a change in the surrounding environment such as temperature or
humidity. This is normal and not a defect of the unit.
Cell Defects
The PDP uses a panel consisting of 2,360,000(HD-level) to 6,221,000(FHD-level) pixels which require sophisticated technology to produce. However,
there may be a few bright or dark pixels on the screen. These pixels will have no impact on the performance of the product.
Avoid operating the TV at temperatures below 41°F (5°C)
A still image displayed too long may cause permanent damage to the PDP Panel.
Watching the Plasma TV in 4:3 format for a long period of time may leave traces of borders displayed on the left, right and center of
the screen caused by the difference of light emission on the screen. Playing a DVD or a game console may cause similar effects to
the screen.
Damages caused by the above effect are not covered by the Warranty.
After-images on the Screen.
Displaying still images from Video games and PC for longer than a certain period of time may produce partial after-images.
To prevent this effect, reduce the ‘brightness’ and ‘contrast’ when displaying still images for a long time.
Warranty
Warranty does not cover any damage caused by image retention.
Burn-in is not covered by the warranty.
Securing the Installation Space
Keep the required distances between the product and other objects (e.g. walls) to ensure proper ventilation.
Failing to do so may result in fire or a problem with the product due to an increase in the internal temperature of the product.
When using a stand or wall-mount, use parts provided by Samsung Electronics only.
If you use parts provided by another manufacturer, it may result in a problem with the product or an injury due to the product falling.
The appearance may differ depending on the product.
Be careful when you contact the TV because some parts can be somewhat hot.
Installation with a stand. Installation with a wall-mount.
4 inches
4 inches
4 inches
4 inches
4 inches
4 inches
4 inches
[PD490-ZL]BN68-03500C-01L02.indb 2 2011-02-24 오후 7:11:43
English - 3
Accessories
Please make sure the following items are included with your TV. If any items are missing, contact your dealer.
The items’ colors and shapes may vary depending on the models.
Check that there is no accessory hidden behind packing materials when you open the box.
y Remote Control & Batteries (AAA x 2)
y Owner’s Instructions
y Warranty Card / Safety Guide
(Not available in some locations)
y Cleaning-Cloth
y Power Cord
51 inches model
Ferrite Core (1EA)
Ferrite Core: The ferrite cores are used to shield the cables from interference. When
connecting a cable, open the ferrite core and clip it around the cable near the plug as
shown in the figure.
Antenna Cable /
Component Cable
(sold separately)
Input Cables (Sold Separately)
Audio HDMI HDMI-DVI Component
Composite (AV) Coaxial (RF) VGA
[PD490-ZL]BN68-03500C-01L02.indb 3 2011-02-24 오후 7:11:44
English - 4
Viewing the Control Panel
The product color and shape may vary depending on the model.
Remote control sensor Aim the remote control towards this spot on the TV.
Power Indicator Blinks and turns off when the power is on and lights up in standby mode.
SOURCE
E
Toggles between all the available input sources. In the on-screen menu, use this
button as you would use the ENTER
E
button on the remote control.
MENU Displays an on-screen menu, the OSD (on screen display) of your TV’s features.
y
Adjusts the volume. In the OSD, use the
y
buttons as you would use the
and buttons on the remote control.
z
Changes the channels. In the OSD, use the
z
buttons as you would use the
and buttons on the remote control.
P
(Power)
Turns the TV on or off.
Standby mode
Do not leave your TV in standby mode for long periods of time (when you are away on a holiday, for example). A small amount
of electric power is still consumed even when the power button is turned off. It is best to unplug the power cord.
Control Panel
[PD490-ZL]BN68-03500C-01L02.indb 4 2011-02-24 오후 7:11:44
English - 5
Viewing the Remote Control
This is a special remote control for the visually impaired and has Braille points on the Power, Channel and Volume
buttons.
Installing batteries (Battery size: AAA)
NOTE
x
Use the remote control within 23 feet from the TV.
x
Bright light may affect the performance of the remote control.
Avoid using nearby special fluorescent light or neon signs.
x
The Color and shape may vary depending on the model.
GUIDE
MTS
CC
Turns the TV on and off.
Displays and selects the available video
sources.
Returns to the prevlous channel.
Cuts off the sound temporarily.
Changes channels.
Displays channel lists on the screen.
Displays the EPG (Electronic Program
Guide)
Displays information on the TV screen.
Exits the menu.
Have direct access to channels.
Adjusts the volume.
Not available.
Opens the OSD.
Displays the Content Home, which
include Watch TV, My Content and
Source.
Quickly select frequently used functions.
Returns to the previous menu.
Selects the on-screen menu items and
changes the values seen on the menu.
These buttons are for the Channel List
and My Contents menu, etc.
Use these buttons in My Contents and
Anynet+(HDMI-CEC) modes.
E-MANUAL: Displays the e-Manual.
SRS: Selects the Sound Mode.
X: Turns the 3D image on or off.
MTS: Press to choose stereo,
mono or Separate Audio Program
(SAPbroadcast).
CC: Displays digital subtitles.
P.SIZE: Selects the Picture Size.
[PD490-ZL]BN68-03500C-01L02.indb 5 2011-02-24 오후 7:11:44
English - 6
How to Navigate Menus
Before using the TV, follow the steps below to learn how to
navigate the menu and select and adjust different functions.
1 MENU button: Displays the main on-screen menu.
2 ENTER
E
/ Direction button: Move the cursor and
select an item. Confirm the setting.
3 RETURN button: Returns to the previous menu.
4 EXIT button: Exits the on-screen menu.
How to Operate the OSD (On Screen Display)
The access step may differ depending on the selected menu.
1
MENU The main menu options appear on
the screen:
Picture, Sound, Channel, System,
Support.
2
/ Select an icon with the or
button.
3
ENTER
E
Press ENTER
E
to access the
sub-menu.
4
/
Select the desired submenu with
the or button.
5
/
Adjust the value of an item with the
or button. The adjustment in
the OSD may differ depending on
the selected menu.
6
ENTER
E
Press ENTER
E
to confirm the
selection.
7
EXIT
e
Press EXIT.
Connecting to an Antenna
When the TV is initially powered on, basic settings proceed automatically.
Connecting the power cord and antenna.
The PDP device may interfere with an amateur radio or AM radio.
When using two-way radio mobile and portable units or amateur radio or AM radio near by your TV, this may cause the
TV to malfunction.
ANT OUT
VHF/UHF Antenna
Power Input
or
Cable
[PD490-ZL]BN68-03500C-01L02.indb 6 2011-02-24 오후 7:11:45
English - 7
Plug & Play (Initial Setup)
When the TV is initially powered on, a sequence of on-screen prompts will assist in configuring basic settings. Press the
POWER
P
button. Plug & Play is available only when the Source is set to TV.
Before turning on the TV, make sure the antenna cable is connected (p. 6).
To return to the previous step, press the Red button.
1
Selecting a language
Press the or button, then press the ENTER
E
button.
Select the desired OSD (On Screen Display) language.
2
Selecting Store Demo
or Home Use
Press the or button, then press the ENTER
E
button.
Select the Home Use mode. Store Demo mode is for retail
environments.
To return the unit’s settings from Store Demo to Home Use (standard):
Press the volume button on the TV. When you see the volume OSD, press
and hold MENU for 5 sec.
Store Demo is only for shop display. If you select it, several functions are
not able to use. Please select Home Use when you watch at home.
3
Setting the Clock
Mode
Set the Clock Mode automatically or manually.
y Auto: Set the Clock Mode automatically.
y Manual: Allows you to manually set the current date and time.
4
Selecting an antenna
Press the or button, then press the ENTER
E
button. Select Air or Cable.
5
Selecting a channel The channel search will start and end automatically.
Press the ENTER
E
button at any time to interrupt the memorization process.
6
Enjoy your TV.
Press the ENTER
E
button.
If You Want to Reset This Feature...
O
MENU System Plug & Play ENTER
E
Select System - Plug & Play (Initial Setup). Enter your 4 digit PIN number. The default PIN number is “0-0-0-0.” If you want to
change the PIN number, use the Change PIN function.
You should do Plug & Play again at home although you did in shop.
P
POWER
INFO GUIDE
[PD490-ZL]BN68-03500C-01L02.indb 7 2011-02-24 오후 7:11:45
English - 8
Connecting to an AV Device
Using an HDMI or an HDMI to DVI Cable: HD connection (up to 1080i)
Available devices: DVD, Blu-ray player, HD cable box, HD STB (Set-Top-Box) satellite receiver
HDMI IN 1 (DVI), 2, 3 / PC/DVI AUDIO IN
x
For better picture and audio quality, connect to a digital device using an HDMI cable.
x
An HDMI cable supports digital video and audio signals, and does not require an audio cable.
To connect the TV to a digital device that does not support HDMI output, use an HDMI/DVI and audio cables.
x
The picture may not display normally (if at all) or the audio may not work if an external device that uses an older
version of HDMI mode is connected to the TV. If such a problem occurs, ask the manufacturer of the external
device about the HDMI version and, if out of date, request an upgrade.
x
Be sure to purchase a certified HDMI cable. Otherwise, the picture may not display or a connection error may
occur.
x
A basic high-speed HDMI cable or one with ethernet is recommended. This product does not support the
ethernet function via HDMI.
Using a Component (up to 1080i) or an Audio/Video (480i only) Cable
Available devices: DVD, Blu-ray player, cable box, STB satellite receiver, VCR
When connecting to AV IN, the color of the AV IN [Y/VIDEO] jack (green) will not match the video cable (yellow).
For better picture quality, the Component connection is recommended over the A/V connection.
WR
DVI OUT
HDMI OUT
Device
Device
WhiteRed
DeviceDevice
Red
Red
White
White Yellow
Red Blue Green
[PD490-ZL]BN68-03500C-01L02.indb 8 2011-02-24 오후 7:11:46
English - 9
Connecting to an Audio Device
Using an Optical (Digital) or an Audio (Analog) Cable Connection
Available devices: Digital Audio System, Amplifier, DVD home theater
DIGITAL AUDIO OUT (OPTICAL)
x
When a Digital Audio System is connected to the DIGITAL AUDIO OUT (OPTICAL) jack, decrease the volume
of both the TV and the system.
x
5.1 CH (channel) audio is available when the TV is connected to an external device supporting 5.1 CH.
x
When the receiver (home theater) is set to on, you can hear sound output from the TVs optical jack. When the
TV is receiving a DTV signal, the TV will send 5.1 CH sound to the home theater receiver. When the source is
a digital component such as a DVD / Blu-ray player / cable box / STB (Set-Top-Box) satellite receiver and is
connected to the TV via HDMI, only 2 CH audio will be heard from the home theater receiver. If you want to
hear 5.1 CH audio, connect the digital audio out jack from your DVD / Blu-ray player / cable box / STB satellite
receiver directly to an amplifier or home theater.
AUDIO OUT: Connects to the audio input jacks on your amplifier/DVD home theater.
x
When connecting, use the appropriate connector.
x
When an audio amplifier is connected to the AUDIO OUT jacks: Decrease the volume of the TV and adjust the
volume level with the amplifier’s volume control.
Connecting to a PC
Using an HDMI cable or an HDMI to DVI cable or a D-sub cable
Connecting through the HDMI cable may not be supported depending on the PC.
AUDIO OUT
PC OUT
HDMI OUT
DVI OUT
AUDIO OUT
OPTICAL
AUDIO IN
R-AUDIO-L
W R
Digital Audio System
Device
[PD490-ZL]BN68-03500C-01L02.indb 9 2011-02-24 오후 7:11:47
English - 10
Display Modes (D-Sub and HDMI to DVI Input)
y PL43D490/PL43D491: 1024 X 768 @ 60Hz
y PL51D490/PL51D491: 1360 X 768 @ 60Hz
Mode Resolution
Horizontal
Frequency
(KHz)
Vertical
Frequency
(Hz)
Pixel Clock
Frequency
(MHz)
Sync Polarity
(H / V)
PL43D490
PL43D491
PL51D490
PL51D491
IBM
640 x 350
720 x 400
31.469
31.469
70.086
70.087
25.175
28.322
+/-
-/+
>
>
>
>
MAC
640 x 480
832 x 624
35.000
49.726
66.667
74.551
30.240
57.284
-/-
-/-
>
>
>
>
VESA DMT
640 x 480
640 x 480
640 x 480
800 x 600
800 x 600
800 x 600
1024 x 768
1024 x 768
1024 x 768
1360 x 768
31.469
37.500
37.861
37.879
46.875
48.077
48.363
56.476
60.023
47.712
59.940
75.000
72.809
60.317
75.000
72.188
60.004
70.069
75.029
60.015
25.175
31.500
31.500
40.000
49.500
50.000
65.000
75.000
78.750
85.500
-/-
-/-
-/-
+/+
+/+
+/+
-/-
-/-
+/+
+/+
>
>
>
>
>
>
>
>
>
>
>
>
>
>
>
>
>
>
>
NOTE
x
For HDMI/DVI cable connection, you must use the HDMI IN 1 (DVI) jack.
x
The interlace mode is not supported.
x
The set may operate abnormally if a non-standard video format is selected.
x
Separate and Composite modes are supported. SOG(Sync On Green) is not supported.
Changing the Input Source
Source
Use to select TV or an external input
source such as a DVD / Blu-ray player /
cable box / STB satellite receiver.
TV / PC / AV / Component1 /
Component2 / HDMI1/DVI / HDMI2 /
HDMI3 / USB
You can only choose external devices
that are connected to the TV. In the
Source, connected inputs will be highlighted.
In the Source, PC is always activated.
If the connected external devices are not highlighted,
press the red button. The TV will search for connected
devices.
Edit Name
In the Source, press the TOOLS button, and then you can
set an external input sources name you want.
VCR / DVD / Cable STB / Satellite STB / PVR STB /
AV Receiver / Game / Camcorder / PC / DVI PC / DVI
Devices / TV / IPTV / Blu-ray / HD DVD / DMA: Name
the device connected to the input jacks to make your
input source selection easier.
When connecting a PC to the HDMI IN 1 (DVI) port
with HDMI cable, you should set the TV to PC under
Edit Name.
When connecting a PC to the HDMI IN 1 (DVI) port
with HDMI to DVI cable, you should set the TV to DVI
PC under Edit Name.
When connecting an AV devices to the HDMI IN 1
(DVI) port with HDMI to DVI cable, you should set the
TV to DVI Devices under Edit Name.
Information
You can see detailed information about the selected
external device.
[PD490-ZL]BN68-03500C-01L02.indb 10 2011-02-24 오후 7:11:47
English - 11
How to view the e-Manual
Screen Display
How to toggle between the e-Manual and the corresponding menu(s).
This function is not enabled in some menus.
Method 1 Method 2
1. Press the red button to select Try Now, if you want to
execute the corresponding menu(s).
2. To return to the e-Manual screen, press the E-MANUAL
button.
1. Press the ENTER
E
button when selecting Contents
Area. The “Do you want to execute this?” is displayed.
Select Yes and then press the ENTER
E
button. The
OSD window will be displayed.
2. To return to the e-Manual screen, press the E-MANUAL
button.
E-MANUAL
You can read the introduction and instructions about the TV features stored in your
TV.
O
MENU
m
Support e-Manual ENTER
E
If you want to return to e-Manual, press E-MANUAL button on remote.
You cannot use Try Now directly if the TV is set to an external input source.
Basic Features
Changing the Preset Picture Mode
Adjusting Picture Settings
Changing the Picture Size
Changing the Picture Options
Using the TV with Your PC
}
Index
E
Enter
e
Exit
TV Screen: Displays the current input
source screen.
Change the category. Press
l
or
r
button to select category you want.
Displays the sub-menu list. Press
ENTER
E
button to select sub-
menu you want.
Operation Buttons:
}
Blue (Index): Displays index screen.
E
Enter: Select a category or sub-menu.
e
Exit: Exit the e-Manual.
Picture
E-MANUAL
Try Now
a
Try Now
b
Home
{
Zoom
}
Index
L
Page
e
Exit
Basic Features > Changing the Preset Picture Mode (1/1)
Changing the Preset Picture Mode
O MENU
m
Picture Picture Mode ENTER
E
Picture Mode
Select your preferred picture type.
N In PC mode, you can only select Entertain and Standard.
Dynamic: Suitable for a bright room.
Standard: Suitable for a normal environment.
Movie: Suitable for watching movies in a dark room.
Entertain (In PC mode only): Suitable for watching movies and games.
Picture Mode : Standard
r
Cell Light : 10
Contrast : 100
Brightness : 45
Sharpness : 50
Color : 50
Tint (G/R) : G50/R50
Screen Adjustment
[PD490-ZL]BN68-03500C-01L02.indb 11 2011-02-24 오후 7:11:50
English - 12
Viewing the Contents
Using the Zoom mode
When you view the e-Manual instruction, press the yellow
button to magnify the screen. You can scroll through the
magnified screen by using the
u
or
d
buttons.
To return to the previous screen, press the RETURN
button.
How to search a keyword by using index page
This function may not be supported depending on the language.
1. If you want to search a keyword, press the blue button to open the Index screen.
2. Press the
l
or
r
button to select a character order you want, and then press the ENTER
E
button.
3. Press the
u
or
d
button to select a keyword you want to see, and then press the ENTER
E
button.
4. You can view the corresponding e-Manual instruction screen.
To close the Index screen, press the RETURN button.
a
Try Now
b
Home
{
Zoom
}
Index
L
Page
e
Exit
Basic Features > Changing the Preset Picture Mode (1/1)
Contents Area: You can view the corresponding
contents, if you selected a sub-menu. To move
previous or next page, press the
l
or
r
button.
Operation Buttons:
a
Red (Try Now): Displays the corresponding menu(s).
b
Green (Home): Moves to the e-Manual home screen.
{
Yellow (Zoom): Magnifies a screen.
}
Blue (Index): Displays index screen.
L
(Page): Moves to previous or next page.
R
Return
Changing the Preset Picture Mode
O MENU
m
Picture Picture Mode ENTER
E
Picture Mode
Select your preferred picture type.
N In PC mode, you can only select Entertain and Standard.
Dynamic: Suitable for a bright room.
Standard: Suitable for a normal environment.
Movie: Suitable for watching movies in a dark room.
Entertain (In PC mode only): Suitable for watching movies
and games.
Changing the Preset Picture Mode
O MENU
m
Picture Picture Mode ENTER
E
Picture Mode
Select your preferred picture type.
N In PC mode, you can only select Entertain and Standard.
Dynamic: Suitable for a bright room.
Standard: Suitable for a normal environment.
Movie: Suitable for watching movies in a dark room.
Entertain (In PC mode only): Suitable for watching movies and games.
[PD490-ZL]BN68-03500C-01L02.indb 12 2011-02-24 오후 7:11:51
English - 13
Troubleshooting
If you have any questions about the TV, first refer to this list. If none of these troubleshooting tips apply, please visit “www.
samsung.com,” and then click on Support, or contact the call centre listed on the back-cover of this manual.
Issues Solutions and Explanations
The TV won’t turn on. Make sure the AC power cord is securely plugged in to the wall outlet and the TV.
Make sure the wall outlet is working.
Try pressing the POWER button on the TV to make sure the problem is not the remote. If the TV turns
on, refer to “Remote control does not work” below.
There is no picture/video. Check cable connections (remove and reconnect all cables connected to the TV and external
devices).
Set your external device’s (Cable/Sat Box, DVD, Blu-ray etc) video outputs to match the connections
to the TV input. For example, if an external device’s output is HDMI, it should be connected to an
HDMI input on the TV.
Make sure your connected devices are powered on.
Be sure to select the TV’s correct source by pressing the SOURCE button on the remote control.
Reboot the connected device by reconnecting the device’s power cable.
The remote control does not work. Replace the remote control batteries with the poles (+/–) in the right direction.
Clean the sensor’s transmission window on the remote.
Try pointing the remote directly at the TV from 5~6 feet away.
The cable/set top box remote control
doesn’t turn the TV on or off, or adjust the
volume.
Program the Cable/Set remote control to operate the TV. Refer to the Cable/Set user manual for the
SAMSUNG TV code.
Some of above pictures and functions are available at specific models only.
You can keep your TV as optimum condition to upgrade the latest firmware on web site (samsung.com Support
Downloads) by USB.
License
List of Features
Excellent Digital Interface & Networking: With a built-in HD digital tuner, nonsubscription HD broadcasts can be viewed without
a cable box / STB (Set-Top-Box) satellite receiver.
3D
This exciting new feature enables you to view 3D content.
Anynet+(HDMI-CEC)
Allows you to control all connected Samsung devices that support anynet+ with your Samsung TV’s remote.
My Contents
Allows you to play music files, pictures, and movies saved on a USB device.
[PD490-ZL]BN68-03500C-01L02.indb 13 2011-02-24 오후 7:11:51
English - 14
Installing the Wall Mount
Installing the Wall Mount Kit
The wall mount kit (sold separately) allows you to mount the TV on the wall.
For detailed information on installing the wall mount, see the instructions provided with the wall mount. Contact a technician for
assistance when installing the wall mount bracket. Samsung Electronics is not responsible for any damage to the product or
injury to yourself or others if you elect to install the TV on your own.
Wall Mount Kit Specifications (VESA)
The wall mount kit is not supplied, but sold separately.
Install your wall mount on a solid wall perpendicular to the floor. When attaching to other building materials, please contact
your nearest dealer. If installed on a ceiling or slanted wall, it may fall and result in severe personal injury.
NOTE
x
Standard dimensions for wall mount kits are shown in the table below.
x
When purchasing our wall mount kit, a detailed installation manual and all parts necessary for assembly are provided.
x
Do not use screws that do not comply with the VESA standard screw specifications.
x
Do not use screws that are longer than the standard dimension or do not comply with the VESA standard screw
specifications. Screws that are too long may cause damage to the inside of the TV set.
x
For wall mounts that do not comply with the VESA standard screw specifications, the length of the screws may differ
depending on the wall mount specifications.
x
Do not fasten the screws too strongly; this may damage the product or cause the product to fall, leading to personal
injury. Samsung is not liable for these kinds of accidents.
x
Samsung is not liable for product damage or personal injury when a non-VESA or non-specified wall mount is used or
the consumer fails to follow the product installation instructions.
x
Do not mount the TV at more than a 15 degree tilt.
x
Always use two people to mount the TV to a wall.
Product Family
TV size in
inches
VESA screw hole specs
(A * B) in millimeters
Standard
Screw
Quantity
PDP-TV
43~51 400 X 400
M8 4
59~64 600 X 400
Unscrew the hole around before installing Wall-Mount on the wall.
Do not install your Wall Mount Kit while your TV is turned on. It may result in personal injury due to
electric shock.
[PD490-ZL]BN68-03500C-01L02.indb 14 2011-02-24 오후 7:11:52
English - 15
Securing the TV to the Wall
Caution: Pulling, pushing, or climbing on the TV may cause the TV to fall. In particular, ensure your
children do not hang over or destabilize the TV; doing so may cause the TV to tip over, causing serious
injuries or death. Follow all safety precautions provided on the included Safety Flyer. For added stability,
install the anti-fall device for safety purposes, as follows.
To Avoid the TV from Falling
1. Put the screws into the clamps and firmly fasten them onto the wall.
Confirm that the screws have been firmly installed onto the wall.
You may need additional material such as an anchor depending
on the type of wall.
Since the necessary clamps, screws, and string are not supplied,
please purchase these additionally.
2. Remove the screws from the back center of the TV, put the screws into
the clamps, and then fasten the screws onto the TV again.
Screws may not be supplied with the product. In this case, please
purchase the screws of the following specifications.
3 Connect the clamps fixed onto the TV and the clamps fixed onto the wall
with a strong cable and then tie the string tightly.
NOTE
Install the TV near to the wall so that it does not fall backwards.
It is safe to connect the string so that the clamps fixed on the
wall are equal to or lower than the clamps fixed on the TV.
Untie the string before moving the TV.
4 Verify all connections are properly secured. Periodically check
connections for any sign of fatigue for failure. If you have any doubt
about the security of your connections, contact a professional installer.
Storage and Maintenance
If you attached some stickers on the TV screen, it remains some debris after removing the sticker. Please clean it to
watch TV.
Do not spray water or a cleaning agent directly onto the
product. Any liquid that goes into the product may cause a
failure, fire, or electric shock.
Clean the product with a soft cloth dapped in a small amount
of water.
wall
[PD490-ZL]BN68-03500C-01L02.indb 15 2011-02-24 오후 7:11:52
English - 16
Specifications
Environmental Considerations
Operating Temperature
Operating Humidity
Storage Temperature
Storage Humidity
50°F to 104°F (10°C to 40°C)
10% to 80%, non-condensing
-4°F to 113°F (-20°C to 45°C)
5% to 95%, non-condensing
Stand Swivel (Left / Right) -20˚ ~ 20˚
Model Name PL43D490
PL43D491
PL51D490
PL51D491
Screen Size
(Diagonal)
43˝ Class
(43.0˝ measured diagonally)
51˝ Class
(50.7˝ measured diagonally)
Sound
(Output)
10 W X 2
Dimensions (WxDxH)
Body
With stand
39.8 X 2.2 X 24.5 inches
(1011.8 X 56.0 X 622.4 mm)
39.8 X 12 X 27.5 inches
(1011.8 X 305.0 X 698.7 mm)
46.7 X 2.2 X 27.8 inches
(1187.8 X 56.0 X 706.6 mm)
46.7 X 12.0 X 30.8 inches
(1187.8 X 305.0 X 782.9 mm)
Weight
Without Stand
With Stand
35.2 Ibs (16.0 kg)
44.7 Ibs (20.3 kg)
49.6 Ibs (22.5 kg)
59.0 Ibs (26.8 kg)
Display Resolution 1024 X 768 1360 X 768
Design and specifications are subject to change without prior notice.
For information about power supply, and more about power consumption, refer to the label attached to the product.
[PD490-ZL]BN68-03500C-01L02.indb 16 2011-02-24 오후 7:11:52
This page is intentionally
left blank.
[PD490-ZL]BN68-03500C-01L02.indb 17 2011-02-24 오후 7:11:52
Español - 2
Para obtener más información sobre cómo utilizar el e-Manual
Las figuras y las ilustraciones de este Manual del usuario se proporcionan como referencia solamente y pueden ser diferentes
del aspecto real del producto. El diseño y las especificaciones del producto están sujetos a cambios sin previo aviso.
Antes de usar el equipo lea este manual para evitar fallas y guarde para futuras referencias.
Instrucciones para el usuario
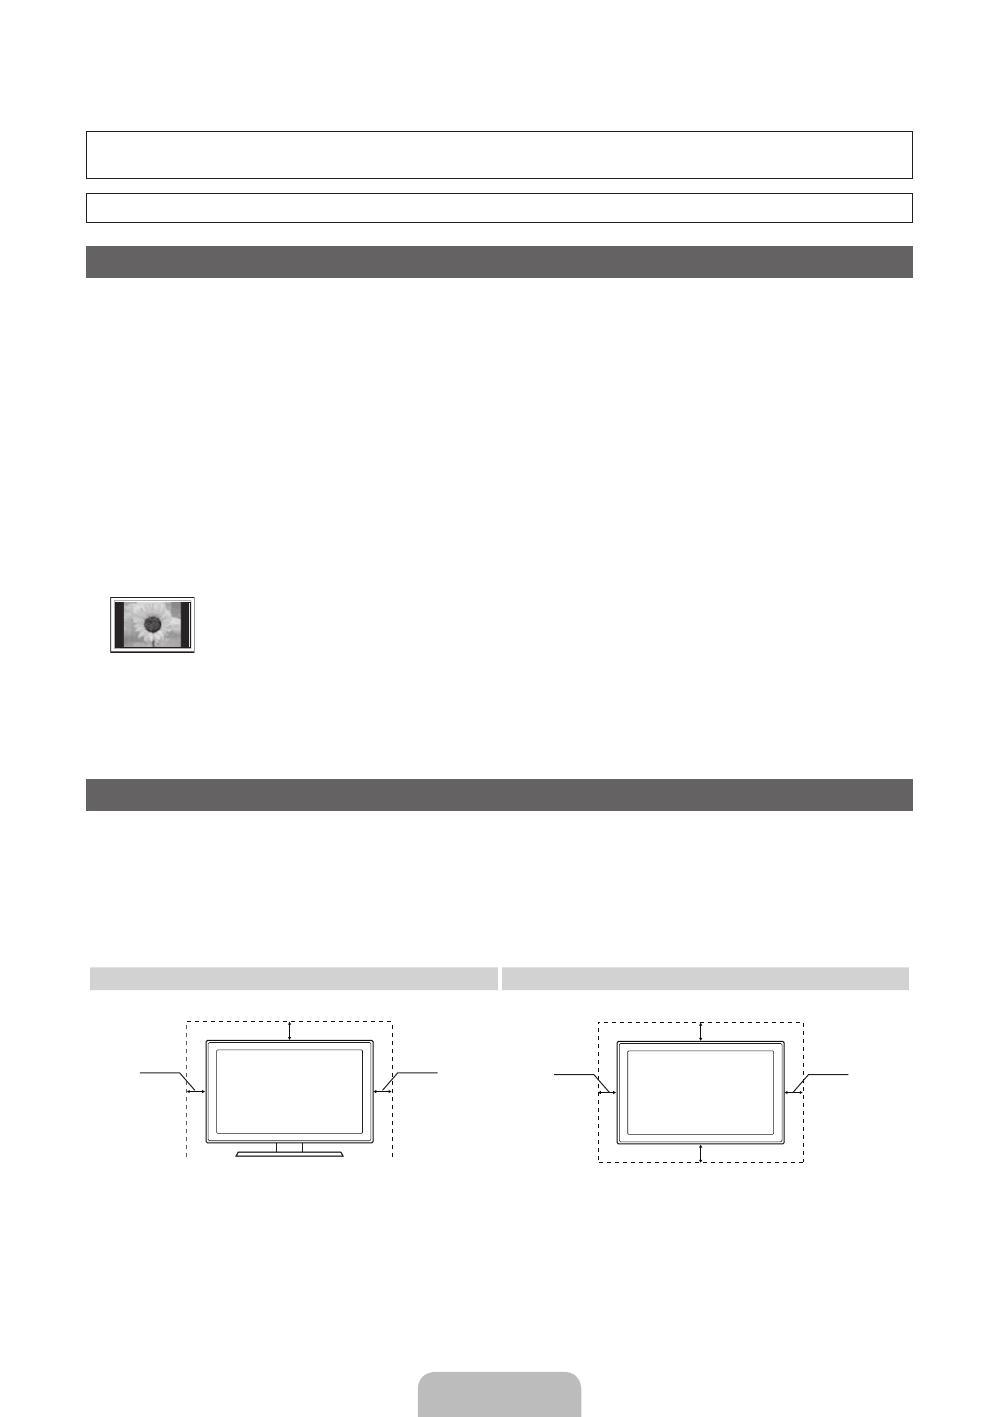
Retención de imágenes en la pantalla
No deje imágenes fijas visibles (como las de un videojuego) en el panel de la pantalla de plasma durante mucho tiempo, ya que se podría producir
la retención de la imagen en la misma. Este fenómeno de retención de imágenes también se denomina ‘quemadura de pantalla’. Para evitar que se
produzca esa persistencia de la imagen, reduzca el nivel de brillo y de contraste de la pantalla cuando muestre imágenes fijas.
Calor en la parte superior del TV de plasma
La parte superior del aparato puede calentarse tras un uso prolongado ya que el calor se disipa desde el panel a través de los orificios de ventilación
de la parte superior del aparato.
Esto es normal y no indica ningún defecto ni fallo de funcionamiento del aparato.
No obstante, debe evitarse que los niños toquen la parte superior del aparato.
El aparato emite una especie de ‘crujido’.
El ruido similar a un crujido puede producirse cuando el aparato se contrae o se expande debido a un cambio ambiental de temperatura o humedad.
Este hecho es normal y no se trata de ningún defecto en la unidad.
Defectos de celda
La PDP utiliza un panel compuesto de 2.360.000 (nivel HD) a 6.221.000 (nivel FHD) píxeles que requieren una sofisticada tecnología para su
producción. No obstante, puede que existan algunos píxeles brillantes u oscuros en la pantalla. Estos píxeles no influirán en el rendimiento del
aparato.
Evite que el televisor funcione a temperaturas por debajo de 41 °F (5 °C)
La imagen fija visualizada durante demasiado tiempo puede causar daños permanentes en el panel de la PDP.
Ver el TV de plasma en formato 4:3 durante un tiempo prolongado puede dejar rastros de bordes en la izquierda, derecha o centro
de la pantalla causados por la diferencia de emisión de luz en la pantalla. La reproducción de un DVD o el uso de una consola de
videojuegos pueden provocar un efecto similar en la pantalla.
Los daños provocados por los efectos mencionados no quedan cubiertos por la garantía.
Imágenes fantasma en la pantalla.
Ver imágenes fijas de videojuegos y PC durante más tiempo del indicado puede producir imágenes fantasma parciales.
Para evitar este efecto, reduzca el ‘brillo’ y el ‘contraste’ al mostrar imágenes fijas durante tiempo prolongado.
Garantía
La garantía no cubre ningún daño causado por la retención de imágenes.
La garantía no cubre el desgaste de la pantalla.
Seguridad en el espacio de instalación
Mantenga la distancia requerida entre el producto y otros objetos (por ejemplo, paredes) para asegurar la ventilación adecuada.
En caso contrario, se podría producir un incendio por un incremento de la temperatura interna del producto.
Cuando utilice un soporte o un montaje mural, use sólo las piezas proporcionadas por Samsung Electronics.
Si utiliza piezas proporcionadas por otros fabricantes, podría tener problemas con el producto o éste se podría caer con el riesgo de causar
lesiones personales.
El aspecto puede variar según el producto.
Tanga cuidado al tocar el televisor porque algunas partes pueden estar calientes.
Instalación con un soporte Instalación con un montaje mural
4 pulgadas
4 pulgadas
4 pulgadas
4 pulgadas
4 pulgadas
4 pulgadas
4 pulgadas
[PD490-ZL]BN68-03500C-01L02.indb 2 2011-02-24 오후 7:11:53
Español - 3
Accesorios
Compruebe que los artículos siguientes vengan incluidos con su televisor. Si falta alguno, póngase en contacto con su
distribuidor.
El color y la forma de los componentes pueden variar según los modelos.
Cuando abra la caja compruebe que no haya accesorios ocultos tras los materiales del embalaje.
y Mando a distancia y 2 pilas AAA
y Manual del usuario
y Tarjeta de garantía / Guía de seguridad
(no disponible en algunos lugares)
y Paño de limpieza
y Cable de alimentación
modelo de 51 pulgadas
Núcleo de ferrita (1 unid.)
Núcleo de ferrita: El núcleo de ferrita se utiliza para proteger los cables de las
interferencias. Cuando conecte un cable, abra el núcleo de ferrita y sujételo al cable cerca
del enchufe, tal como se muestra en la ilustración.
Cable de antena /
cable de componentes
(se vende por separado)
Cables de entrada (se venden por separado)
Audio HDMI HDMI/DVI Componente
Compuesto (AV) Coaxial (RF) VGA
[PD490-ZL]BN68-03500C-01L02.indb 3 2011-02-24 오후 7:11:53
Español - 4
Aspecto general del panel de control
El color y la forma del producto pueden variar según el modelo.
Sensor del mando a distancia El mando a distancia debe dirigirse hacia este punto del televisor.
Indicador de encendido Parpadea y se apaga cuando se enciende el aparato y se ilumina en el modo en
espera.
SOURCE
E
Cambia entre todas las fuentes de entrada disponibles. En el menú de la pantalla,
utilice este botón de igual modo que el botón ENTER
E
del mando a distancia.
MENU Muestra un menú en pantalla, la OSD (visualización en pantalla), de las funciones del
TV.
y
Ajusta el volumen. En la OSD, utilice los botones
y
de igual modo que los
botones y del mando a distancia.
z
Cambian los canales. En la OSD, utilice los botones
z
de igual modo que los
botones y del mando a distancia.
P
(Encendido)
Enciende o apaga el televisor.
Modo de espera
No deje el televisor en modo de espera durante períodos largos de tiempo (cuando esté de vacaciones, por ejemplo). Aunque
esté apagado continúa consumiendo una pequeña cantidad de energía. Se recomienda desenchufar el cable de alimentación.
Panel de control
[PD490-ZL]BN68-03500C-01L02.indb 4 2011-02-24 오후 7:11:54
  • Page 1 1
  • Page 2 2
  • Page 3 3
  • Page 4 4
  • Page 5 5
  • Page 6 6
  • Page 7 7
  • Page 8 8
  • Page 9 9
  • Page 10 10
  • Page 11 11
  • Page 12 12
  • Page 13 13
  • Page 14 14
  • Page 15 15
  • Page 16 16
  • Page 17 17
  • Page 18 18
  • Page 19 19
  • Page 20 20
  • Page 21 21
  • Page 22 22
  • Page 23 23
  • Page 24 24
  • Page 25 25
  • Page 26 26
  • Page 27 27
  • Page 28 28
  • Page 29 29
  • Page 30 30
  • Page 31 31
  • Page 32 32

Samsung PL43D490A1M Quick start guide

Category
LCD TVs
Type
Quick start guide
This manual is also suitable for

Ask a question and I''ll find the answer in the document

Finding information in a document is now easier with AI

in other languages

Other documents