Midland Micro Mobile MXT105 Owner's manual
- Category
- Radios
- Type
- Owner's manual
This manual is also suitable for
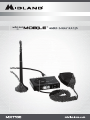
Midland Micro Mobile MXT105 is a compact and feature-packed mobile two-way radio designed for reliable and convenient communication on the go. It operates on General Mobile Radio Service (GMRS) frequencies, providing you with a range of up to 36 miles in optimal conditions. With its 15 GMRS channels, you can easily communicate with other GMRS users, making it ideal for outdoor enthusiasts, work crews, and anyone who needs to stay connected in remote areas.
Midland Micro Mobile MXT105 is a compact and feature-packed mobile two-way radio designed for reliable and convenient communication on the go. It operates on General Mobile Radio Service (GMRS) frequencies, providing you with a range of up to 36 miles in optimal conditions. With its 15 GMRS channels, you can easily communicate with other GMRS users, making it ideal for outdoor enthusiasts, work crews, and anyone who needs to stay connected in remote areas.


-
 1
1
-
 2
2
-
 3
3
-
 4
4
-
 5
5
-
 6
6
-
 7
7
-
 8
8
-
 9
9
-
 10
10
-
 11
11
-
 12
12
-
 13
13
-
 14
14
-
 15
15
-
 16
16
-
 17
17
-
 18
18
-
 19
19
-
 20
20
-
 21
21
-
 22
22
-
 23
23
-
 24
24


Midland Micro Mobile MXT105 Owner's manual
- Category
- Radios
- Type
- Owner's manual
- This manual is also suitable for
Midland Micro Mobile MXT105 is a compact and feature-packed mobile two-way radio designed for reliable and convenient communication on the go. It operates on General Mobile Radio Service (GMRS) frequencies, providing you with a range of up to 36 miles in optimal conditions. With its 15 GMRS channels, you can easily communicate with other GMRS users, making it ideal for outdoor enthusiasts, work crews, and anyone who needs to stay connected in remote areas.
Ask a question and I''ll find the answer in the document
Finding information in a document is now easier with AI
Related papers
-
Midland MXT105B User manual
-
Midland MXT275 Owner's manual
-
Midland MXT115 Owner's manual
-
-
-
Midland GXT1000VP4 User guide
-
Midland Radio MMAMXT400 User manual
-
Midland Radio 77-092 CB Radio User manual
-
Midland BR 180 User manual
-
Other documents
-
-
-
-
Rugged Radios GMR45 User guide
-
-
-
 Rugged Radios GMR2 User manual
-
-
-
Baofeng MP31 User manual
