Page is loading ...

3 421
344
Product prone to shade variations. The colour of the supplied material might not be exactly the same as the sample.
NOOHN STONE MOSAICS / TECHNICAL INFORMATION
NOOHN MOSAICS
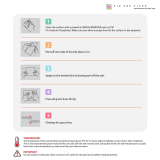
1. PREPARING THE SUBSTRATE
Surfaces where the material is to be laid must be smooth and consistent,
and dry and clean. They should be levelled to create a white background,
using specic products for levelling layers thicker than 2mm. To keep the
levelling material in good condition, the environmental temperature must
be between 5ºC and 30ºC.
2. LAYING THE MOSAICS
To ensure that the mosaics are correctly laid, we recommend the use
of white One-Flex, a high-performance cement-based adhesive which
is specially designed for laying terracotta mosaics, stone mosaics, glass
mosaics and porcelain tiles. Use the smooth side of a notched trowel to
spread the adhesive evenly over the wall and then “comb” it with the
notched side (minimum notch size 3mm). The adhesive should not be
spread all at one go over large surfaces to prevent it from drying before
the mosaics are laid.
To lay the mosaic sheets, press them down evenly with a rubber trowel
and make sure that the distance between each sheet is the same as
the joint between the mosaic chips to ensure a uniform appearance
and joints of the same width. If there is a particularly big joint between
the sheets, separate some chips from the mesh backing with a sharp
instrument and rotate them to ensure more subtle gaps and an optimum
random pattern. Before grouting them, leave the adhesive to dry for at
least 24-48 hours. After this drying time has elapsed, clean the surface
with a moist cloth and leave to dry before grouting.
3. GROUTING (only applicable to mosaics with joint)
We recommend the use of Colorstuk Rapid, a fast setting grouting
mortar available in different colours, with an excellent mechanical
resistance, low water absorption and anti-fungal qualities. Colorstuk in
black or anthracite should not be used, as it may be difcult to clean
the tile joints. For polished surfaces prone to scratching, we recommend
Colorstuck especial n.
Application: Use a rubber trowel to spread the grout, making sure that
the joints are lled completely. Use the same trowel to remove any
surplus grout.
4. CLEANING
Use a sponge or cloth to remove any traces of adhesive before it sets.
It is important that the grout does not dry too hard as this may make it
difcult to clean the mosaic tiles. This operation should be repeated at
least two or three times until the mosaic tiles are thoroughly clean. Clean
the surface of the tiles well using a sponge or cloth.
The use of detergents or abrasives as cleaning agents may cause
irreversible damage. If you are not sure, please contact the manufacturer.

3 4521
345
Product prone to shade variations. The colour of the supplied material might not be exactly the same as the sample.
TECHNICAL INFORMATION / NOOHN GLASS MOSAICS
NOOHN MOSAICS
1. PREPARING THE SUBSTRATE
Surfaces where the material is to be laid must be smooth and consistent,
and dry and clean. They should be levelled to create a white background,
using specific products for levelling layers thicker than 2mm. To keep
the levelling material in good condition, the environmental temperature
must be between 5ºC and 30ºC.
2. LAYING THE TILES
2.1 General Laying Instructions.
To ensure laying the mosaic correctly, we recommend using white One-
Flex, a high-performance cement-based adhesive which is specially
designed for installing glass mosaics and porcelain tiles. Use the smooth
side of a notched trowel to spread the adhesive over the wall, and then
“comb” the adhesive with the notched side (minimum notch size 3mm).
The adhesive must not be spread over large surfaces, to prevent it from
drying before laying the material.
NOTE: L’Antic specifically recommends for installations in which the
material is going to be in contact (direct or indirect) with water, the use
of a type R2 T high-tech two-component polyurethane-based adhesive,
in accordance with EN 12004. Politech by Butech is recommended as the
attaching material and Epotech by Butech for the grouting. These should
always be applied in accordance with the manufacturer’s instructions.
Both materials are made up of a polyurethane base (component A) and
a specific hardener (component B). Hardening occurs by means of a
chemical reaction, creating an elastic film that is completely waterproof.
For exterior installations, protect from rain and frost for the first 8 hours.
2.2.a Instructions for laying film-faced mosaics.
Lay the mosaic sheets so that the side with the film is facing the tile layer.
After laying the sheet, the surface must be pressed down evenly, using a
rubber trowel, making sure that the distance between each sheet is the
same as between each chip, so that the final result is uniform and all of
the joints are the same distance apart.
When the adhesive is dry enough, remove the protective film from the
surface and clean any remnants of paper with a damp sponge. Then
remove the film by holding one corner, slowly pulling it off diagonally
and in line with the substrate, taking care not to detach the pieces.
Correct any misalignments using a small spatula. Repeat all of the steps
until completing the surface to be tiled. Before grouting the adhesive
must be left to dry for at least 24-48 hours. Once the adhesive is dry,
clean off any remnants from the mosaic chips using a nylon brush and
water, then cleaning with a damp cloth. Allow to dry before grouting. If
necessary, a stronger cleaning product can be used, testing the surface
beforehand to make sure it does not damage the material.
2.2.b Instructions for laying mesh-mounted mosaics.
After laying the sheet, the surface must be pressed down evenly, using
a rubber trowel, making sure that the distance between each sheet is
the same as between each chip, so that the final result is uniform and
all of the joints are the same distance apart. Before grouting, leave the
adhesive to dry for at least 24-48 hours. Once dry, clean the surface with
a damp cloth and leave to dry before grouting.
2.3. Laying mosaics in swimming pools.
Apart from following the General Laying instructions, a capacity
test must be carried out on the pool shell to check for leaks, if any
waterproofing treatment is required, and a static test of the structure.
Remember that the products used for levelling are not waterproof.
The working area must be protected from rain and direct sunlight, taking
special care to avoid water pooling on the surfaces where tiles have been
laid for at least 20 days after work is completed. The covering should
also be used to maintain the temperature of the substrate between 5ºC
and 30ºC from the start of the laying process until at least 10 days after
work is completed.
To ensure that the adhesive bonds correctly, any remnants of the product
should be removed with a cement remover or similar product.
Important: The pool must not be filled until at least 20 days after
completing work on laying the mosaic.
3. GROUTING
We recommend the use of Colorstuk Rapid, a fast setting grouting
mortar available in different colours, with an excellent mechanical
resistance, low water absorption and anti-fungal qualities.
Application: Use a rubber trowel to spread the grout, making sure that
the joints are filled completely. Use the same trowel to remove any
surplus grout.
Cleaning after grouting: Before the mortar sets, any remnants must be
removed with a sponge or cloth. This operation must be carried out
at least twice, rinsing the surface thoroughly and then removing any
remnants of mortar the following day in the same way.
4. INSTRUCTIONS FOR CUTTING GLASS
Follow the instructions given below in order to work with the glass
correctly.
The following tools are recommended, depending on the type of work
to be carried out:
-For small cuts and clippings, we recommend using the special Butech
clippers for glass mosaics.
-Dry cuts should be made using a SIGMA machine, specially designed for
cutting glass mosaics.
-Cuts made on whole sections should be made using a water-cooled
Butech diamond disc cutter, specially designed for glass mosaics with
a continuous crown; after marking the required cuts on the mosaic or
glass section with a pencil, cut the section using a series of increasingly
deeper radial cuts to prevent it from breaking.
-To drill holes in glass sections to hang mirrors, countertops, lamps etc.,
a FLEX BHW 1549 VR drill with water supply and Butech diamond bits
should be used. These bits must be water-cooled, and are available in
6, 8, 10 and 12mm diameters.
Important: Rubber washers must be used to ensure a secure fit and to
prevent the glass from breaking.
5. CLEANING
For daily cleaning we recommend using glass cleaner and neutral soaps,
then drying with a soft clean cloth to prevent scratches and flaking. For
perfect maintenance we recommend applying a marble repairer or polish
to the glass surface once a year.
Comments:
-When laying sections with a matt finish, take special care not to stain
the front part with adhesive or grouting in order to maintain a perfect
appearance.
-The use of detergents or abrasives as cleaning agents may cause
irreversible damage. If you are not sure, please contact the manufacturer.

1 2
3
4
5
5ºC-30ºC
346
Product prone to shade variations. The colour of the supplied material might not be exactly the same as the sample.
GLASS TILES / TECHNICAL INFORMATION
NOOHN MOSAICS
IMPORTANT
These instructions offer a general guide for the installation of L’Antic
Colonial products. Some installations may require different or more detailed
specifications. The product may be laid by a professional installer, who is
familiar with the procedures described below.
We recommend ordering 10-15% more than the calculated amount of the
product, to cover losses during cutting, and to keep some material available
for future repairs. If the order is to be used with pieces purchased some
time ago, please indicate the date of purchase, the amount purchased, the
description, code and control digit shown on the boxes, in order to try to
supply material from the same batch, or from a batch as similar as possible
to the product already installed. We recommend you keep the product in its
original box, with the purchase invoices.
1. PREPARING THE SUBSTRATE
Surfaces where the material is to be laid must be smooth and consistent, and
dry and clean. They should be levelled to create a white background, using
specific products for levelling layers thicker than 2mm. To keep the levelling
material in good condition, the environmental temperature must be between
5ºC and 30ºC
2. RECEPTION OF THE MATERIAL
Open and check each box before installation, as CLAIMS FOR THE COST OF
LIFTING OR LAYING THE PRODUCT WILL, IN NO EVENT, BE ACCEPTED. If
there is a problem due to a defect in the pieces, this must be detected PRIOR
TO INSTALLATION, Therefore it is essential to inspect the material prior to
starting the work.
3. INSTRUCTIONS FOR LAYING
To correctly lay the product, we recommend the use of one-flex white high-
performance cement-based adhesive, especially designed for laying glass
mosaic. Use the flat side of a notched trowel to spread the cement – glue
evenly across the wall, then “comb“ it with the notched side (minimum notch
size). 3mm). Do not spread the cement-glue over large areas in one go to
prevent it from drying before the tiles are laid.
a) Cladding walls
After the laying surface has been cleaned, dried and levelled, mark the
movement joints.
Next, prepare the adhesive, following the manufacturer’s instructions, and
apply it to the laying surface (and to the back of the pieces if using the
double gluing system). Work on small areas at a time, applying the adhesive
and coming it with a notched trowel, in accordance with the manufacturer’s
instructions.
Do not immerse the pieces in water prior to laying. Lay the pieces, using
spacers to leave the necessary joints between each one, pressing down evenly
with a gentle rocking movement to ensure the back of the tiles is thoroughly
covered with adhesive. Next, place a stiff rubber board over the tiles and tap
the pieces into place using a rubber mallet.
For interior cladding, perimeter joints should also be left at any point where
the tiles meet a restraining surface or especially on unstable supports
(plasterboard, wood, etc.). For large surfaces, intermediate joints should be
placed every 8 m. These joints will have a minimum width of 6 mm. Excess
adhesive that collects in the spaces for the joints when laying the pieces
should be wiped away before it hardens, to enable the correct completion of
the grouting. It is also important to remove the spacers between the pieces
before the adhesive hardens.
a.1) Offset Layout
For a better aesthetic finish, we recommend laying the pieces alternately so
that one by one, pieces with the joints in vertical position are alternated with
pieces with the joints in horizontal position.
Do not allow traces of grouting to dry hard after laying and grouting, as this
will make subsequent cleaning more difficult.
a.2) Metro Layout
In the offset layouts, for the vertical finishes, due to the bevelling of
the pieces, we recommend the use of square pieces rather than cutting
rectangular pieces. If, due to the dimensions of the wall to be covered, it is
necessary to cut the pieces, we recommend cutting those that form interior
corners rather than exterior corners.
a.3) Basic Layout
It is not necessary to grout the pieces after laying.
b) Laying in Pools.
Apart from following the General Laying instructions, a capacity test must
be carried out on the pool shell to check for leaks, if any waterproofing
treatment is required, and a static test of the structure. Remember that the
products used for levelling are not waterproof.
The working area must be protected from rain and direct sunlight, taking
special care to avoid water pooling on the surfaces where tiles have been laid
for at least 20 days after work is completed. The covering should also be used
to maintain the temperature of the substrate between 5ºC and 30ºC from
the start of the laying process until at least 10 days after work is completed.
Important: The pool must not be filled until at least 20 days after completing
work or laying the pieces.
NOTE: L’Antic specifically recommends for installations in which the material
is going to be in contact (direct or indirect) with water, the use of a type R2
T high-tech two-component polyurethane-based adhesive, in accordance
with EN 12004. Politech by Butech is recommended as the attaching material
and Epotech by Butech for the grouting. These should always be applied in
accordance with the manufacturer’s instructions. Both materials are made up
of a polyurethane base (component A) and a specific hardener (component
B). Hardening occurs by means of a chemical reaction, creating an elastic film
that is completely waterproof. For exterior installations, protect from rain and
frost for the first 8 hours.
4. INSTRUCTIONS FOR GROUTING
The grouting operation requires as much care and attention as the laying of
the pieces. The durability of the covering and the aesthetic quality depend on
the quality of the grouting.
We recommend using Colorstuk Rapid, a fast setting grouting mortar which
is available in different colours, with excellent mechanical resistance, low
water absorption and anti-fungal qualities. Application: Use a rubber trowel
to spread the grout, making sure that the joints are filled completely. Use the
same trowel to remove any surplus grout. Cleaning after grouting: Before
the mortar sets, any remnants must be removed with a sponge or cloth. This
operation must be carried out at least twice, rinsing the surface thoroughly
and then removing any remnants of mortar the following day in the same
way.
5. INSTRUCTIONS FOR CUTTING GLASS
Follow the instructions given below in order to work with the glass correctly.
The following tools are recommended, depending on the type of work to be
carried out:
-For small cuts and clippings, we recommend using the special Butech clippers
for glass mosaics.
-Dry cuts should be made using a SIGMA machine, specially designed for
cutting glass mosaics.
-Cuts made on whole sections should be made using a water-cooled Butech
diamond disc cutter, specially designed for glass mosaics with a continuous
crown; after marking the required cuts on the mosaic or glass section with
a pencil, cut the section using a series of increasingly deeper radial cuts to
prevent it from breaking.
-To drill holes in glass sections to hang mirrors, countertops, lamps etc., a
FLEX BHW 1549 VR drill with water supply and Butech diamond bits should
be used. These bits must be water-cooled, and are available in 6, 8, 10 and
12mm diameters.
Important: Rubber washers must be used to ensure a secure fit and to
prevent the glass from breaking.
6. MAINTENANCE
For daily cleaning we recommend using glass cleaner and neutral soaps,
then drying with soft cloth to prevent scratches and flaking. For perfect
maintenance we recommend applying a repairer or polish to the glass surface
once a year.

347
Product prone to shade variations. The colour of the supplied material might not be exactly the same as the sample.
TECHNICAL INFORMATION / NOOHN HEXCUBE MOSAICS
NOOHN MOSAICS
The following instructions are intended to guarantee the correct
installation of glass and mosaic sections. All installation work must
be carried out by a qualified professional. Please read the following
installation instructions carefully. Safety goggles and gloves should be
worn when handling glass to reduce the risk of injury. Minor variations
in size and colour are inherent features of handmade glass. Please check
the sections before laying.
1. PREPARING THE SUBSTRATE
Surfaces where the material is to be laid must be smooth and consistent,
and dry and clean. They should be levelled to create a white background,
using specific products for levelling layers thicker than 2mm. To keep
the levelling material in good condition, the environmental temperature
must be between 5ºC and 30ºC.
2. LAYING THE TILES
2.1 General Laying Instructions.
To lay the mosaic correctly, we recommend the use of fr-one, a single-
part, technologically advanced adhesive, easy-to-apply and suitable for
use with all types of glass mosaics. Its excellent degree of deformation
capacity and high bonding strength make it suitable for use in
environments requiring extra strength: laying over existing ceramic tiles,
walls and swimming pools. Water- and frost-resistant.
It complies to European legislation. Thickness up to 15 mm.
Use the flat side of a notched trowel to spread the cement – glue evenly
across the wall, then “comb“ it with the notched side (minimum notch
size). 8 mm). Do not spread the cement-glue over large areas in one go
to prevent it from drying before the tiles are laid.
1.Lay the mesh sheets, starting at the bottom and working upwards.
Take note of the direction in which each mesh is laid. Continue until
the entire surface has been covered. Leave the corners and internal
angles.
2.Mark out the straight line on the surface of the mesh to obtain the
straight cut required to finish internal angles.
3.Remove each piece that requires cutting.
4.Cut each piece using a wet-cutting diamond saw. To avoid cutting too
much or incorrectly, do not cut more than 2 meshes at once.
5.Stick the cut pieces back on the mesh.
2.2 Instructions for laying mesh-mounted mosaics.
After laying the sheet, the surface must be pressed down evenly, using
a rubber trowel, making sure that the distance between each sheet is
the same as between each chip, so that the final result is uniform and
all of the joints are the same distance apart. Before grouting, leave the
adhesive to dry for at least 24-48 hours. Once dry, clean the surface with
a damp cloth and leave to dry before grouting.
2.3. Laying mosaics in swimming pools.
Apart from following the General Laying instructions, a capacity
test must be carried out on the pool shell to check for leaks, if any
waterproofing treatment is required, and a static test of the structure.
Remember that the products used for levelling are not waterproof.
The working area must be protected from rain and direct sunlight, taking
special care to avoid water pooling on the surfaces where tiles have been
laid for at least 20 days after work is completed. The covering should
also be used to maintain the temperature of the substrate between 5ºC
and 30ºC from the start of the laying process until at least 10 days after
work is completed.
To ensure that the adhesive bonds correctly, any remnants of the product
should be removed with a cement remover or similar product.
Important: The pool must not be filled until at least 20 days after
completing work on laying the mosaic.
3. GROUTING
We recommend using Epotech aqua, a high performance, two-
component epoxy system, easy-to-apply and clean, and suitable for
ceramic and glass mosaics and ceramic tiles.
Epotech aqua is suitable for grouting for joints measuring 0 to 10
mm on floors and cladding, both indoors and out. Suitable for
residential, industrial and commercial use. Excellent resistance to
chemical substances. Suitable for use in swimming pools, spas. Suitable
for ceramic tiles with any degree of absorption and format, klinker,
natural stone, ceramic and glass mosaics.
Application: Use a rubber trowel to spread the grout, making sure that
the joints are filled completely. Use the same trowel to remove any
surplus grout.
Cleaning after grouting: Before the mortar sets, any remnants must be
removed with a sponge or cloth. This operation must be carried out
at least twice, rinsing the surface thoroughly and then removing any
remnants of mortar the following day in the same way.
4. INSTRUCTIONS FOR CUTTING GLASS
Follow the instructions given below in order to work with the glass
correctly.
The following tools are recommended, depending on the type of work
to be carried out:
-For small cuts and clippings, we recommend using the special Butech
clippers for glass mosaics.
-Dry cuts should be made using a SIGMA machine, specially designed for
cutting glass mosaics.
-Cuts made on whole sections should be made using a water-cooled
Butech diamond disc cutter, specially designed for glass mosaics with
a continuous crown; after marking the required cuts on the mosaic or
glass section with a pencil, cut the section using a series of increasingly
deeper radial cuts to prevent it from breaking.
-To drill holes in glass sections to hang mirrors, countertops, lamps etc.,
a FLEX BHW 1549 VR drill with water supply and Butech diamond bits
should be used. These bits must be water-cooled, and are available in
6, 8, 10 and 12mm diameters.
Important: Rubber washers must be used to ensure a secure fit and to
prevent the glass from breaking.
5. LIMPIEZA
For daily cleaning we recommend using glass cleaner and neutral soaps,
then drying with a soft clean cloth to prevent scratches and flaking. For
perfect maintenance we recommend applying a marble repairer or polish
to the glass surface once a year.
Comments:
-When laying sections with a matt finish, take special care not to stain
the front part with adhesive or grouting in order to maintain a perfect
appearance.
-The use of detergents or abrasives as cleaning agents may cause
irreversible damage. If you are not sure, please contact the manufacturer.

3 421
348
Product prone to shade variations. The colour of the supplied material might not be exactly the same as the sample.
NOOHN MIX MOSAICS / TECHNICAL INFORMATION
NOOHN MOSAICS
1. PREPARING THE SUBSTRATE
Surfaces where the material is to be laid must be smooth and consistent,
and dry and clean. They should be levelled to create a white background,
using specific products for levelling layers thicker than 2mm. To keep
the levelling material in good condition, the environmental temperature
must be between 5ºC and 30ºC.
2. LAYING MOSAICS
To ensure properly laid mosaics, white One-Flex should be used. This
high-performance cement-based adhesive is specially suited for laying
mosaics. Use the smooth side of a notched trowel to spread the cement-
based adhesive evenly across the wall. Then comb it with the notched
side (using a minimum 3mm notched trowel). Do not spread the
adhesive across large surface areas in case it dries before the mosaics can
be laid. After laying the sheet, the surface must be pressed down evenly,
using a rubber trowel, making sure that the distance between each sheet
is the same as between each chip, so that the final result is uniform and
all of the joints are the same distance apart. Before grouting, leave the
adhesive to dry for at least 24-48 hours. Once dry, clean the surface with
a damp cloth and leave to dry before grouting.
NOTE: L’Antic specifically recommends for installations in which the
material is going to be in contact (direct or indirect) with water, the use
of a type R2 T high-tech two-component polyurethane-based adhesive,
in accordance with EN 12004. Politech by Butech is recommended as the
attaching material and Epotech by Butech for the grouting. These should
always be applied in accordance with the manufacturer’s instructions.
Both materials are made up of a polyurethane base (component A) and
a specific hardener (component B). Hardening occurs by means of a
chemical reaction, creating an elastic film that is completely waterproof.
For exterior installations, protect from rain and frost for the first 8 hours.
3. GROUTING (only applicable to mosaics with joint)
We recommend the use of Colorstuk Rapid, a fast setting grouting
mortar available in different colours, with an excellent mechanical
resistance, low water absorption and anti-fungal qualities. For polished
surfaces prone to scratching, we recommend Colorstuck especial n.
Application: Use a rubber trowel to spread the grout, making sure that
the joints are filled completely. Use the same trowel to remove any
surplus grout.
Post-grout cleaning: Before the grout sets, remove any surplus remains
with a sponge or cloth. Repeat this process at least twice, rinsing the
sponge or cloth out well. The following day, repeat the process one last
time to remove any final remains.
4. CLEANING
Use a neutral soap detergent for everyday cleaning, drying the surface
afterwards with a soft clean cloth so as not to scratch or chip the
mosaics.
Comments:
-When laying sections with a matt finish, take special care not to stain
the front part with adhesive or grouting in order to maintain a perfect
appearance.
-The use of detergents or abrasives as cleaning agents may cause
irreversible damage. If you are not sure, please contact the manufacturer.
-Minor variations in size or shade are typical of hand-made mosaics.

349
Product prone to shade variations. The colour of the supplied material might not be exactly the same as the sample.
TECHNICAL INFORMATION / NOOHN FUSION MOSAICS
NOOHN MOSAICS
INSTALLATION INSTRUCTIONS
Glass and metal mosaics
The following instructions are intended to guarantee the correct
installation of Fusion Mosaics. All installation work must be carried
out by a qualified professional. Please read the following installation
instructions carefully.
1. PREPARING THE SUBSTRATE
Surfaces on which the product is to be laid should be smooth and
even, and dry and clean. We recommend the surface is levelled to
create a white background. For levelling layers of more than 2 mm,
we recommend the use of specific products. To ensure the levelling
compound is kept in good condition, the ambient temperature should
be kept between 30 ºC and 5 ºC.
2. LAYING THE MOSAICS
To ensure the mosaics are laid correctly, we recommend the use of
white one-Flex with a number 6 trowel, a high performance cement-
based adhesive. When installing, maintain the verticality so that all the
aluminium tiles line up with the grooves and apply the material in the
opposite direction to the mosaic so that it grips better. Use the flat side
of a notched trowel to spread the cement – glue evenly across the wall,
then “comb“ it with the notched side (minimum notch size 3 mm). Do
not spread the cement-glue over large areas in one go to prevent it from
drying before the tiles are laid. After positioning the mesh in place, press
down with a rubber trowel and make sure that the distance between the
each sheet is equal to the distance between each of the tiles to ensure a
uniform appearance and evenly spaced joints. Allow the cement-glue to
dry for 24 hours before grouting.
Special care should be taken when using hard or sharp tools to avoid
damaging the metallic tiles which may be easily scratched.
Fusion 3D mosaics have a compact format. Nevertheless, traces of the
gluing compound may enter between the individual tiles if applied in
excess.
NOTE: To correctly install the Fusion Dice series, special attention should
be given to ensure that, between different mesh sheets, the aluminium
tiles on one of the two ends (profile and mouth) line up, i.e. mouth with
mouth and profile with profile; otherwise you may find spaces between
the pieces.
3. REJUNTADO
Please note when grouting that an adhesive with a non-neutral pH could
react with the aluminium. Test the adhesive before applying the paste, to
confirm that the natural colour of the tiles is not altered by the adhesive.
We recommend the use of Colorstuk rapid gris (with the same grain size
as the 0-4, but as it is fast-drying it helps to prevent variations in shade,
although the 0-4 could also be used), a fast-drying grout, with excellent
mechanical resistance, low water absorption rate and resistance to
mould. Excess adhesive must be removed while it is still fresh. Wait until
the rest of the adhesive has dried before starting the grouting.
Fusion 3D mosaics have a compact format, and therefore do not require
grouting.
Application: Use a rubber trowel to spread the grout, making sure that
the joints are filled completely. Use the same trowel to remove any
surplus grout.
Cleaning up after grouting: Remove any excess mortar before it sets,
using a sponge or cloth. Repeat the procedure at least twice, rinsing
well. Remove any remains of paste the next day, protecting the product
from getting wet. On completion, protection with tapes is not necessary.
4. CUTTING
The following instructions should be observed to ensure the product is
handled correctly:
Use a knife or hand saw to cut mesh-mounted mosaics. After cutting the
mosaic, sand the cut edge. Remember that some of the tiles are made
of aluminium and dark patches may remain on the pieces where the
material has been cut.
When drilling holes in the tiles to hang mirrors. countertops, wall lights,
etc., use the special drill bits according to whether the tile is made of
glass or metal. When drilling glass tiles, we recommend the use of a drill
with a FLEX BHW 1549 VR integrated water supply and Butech diamond
drill bits. These drill bits must be water-cooled. They are available in a
variety of diameters: 6, 8, 10, 12 mm.
Important: Rubber washers must be used to ensure a secure fit and to
prevent the glass from breaking.
5. CLEANING
Use neutral soaps for day-to-day cleaning. Acid cleaners or detergents
could cause permanent damage to the pieces. Use a sponge or cloth
with soapy water or alcohol. Next, dry product with a soft clean cloth to
prevent scratching. For perfect care, we recommend applying a repairing
agent or polish to the surface.

3 4521
350
Product prone to shade variations. The colour of the supplied material might not be exactly the same as the sample.
NOOHN METAL MOSAICS / TECHNICAL INFORMATION
NOOHN MOSAICS
1. PREPARING THE SUBSTRATE
The substrate on which the Mosaico Acero tiles are to be laid should be
smooth and consistent. Make sure that it is clean and dry. We advise
you to level the surface to create a white background. When there are
deviations in flatness of over 2mm, use special levelling products, making
sure that the environmental temperature is between 30ºC and 5ºC to
maintain the product in the right condition.
2. LAYING MOSAICO ACERO TILES
To ensure the correct laying of the Acero Mosaic, we recommend you
use white one – Flex, a high performance cement-based adhesive
(C2TES1 EN12004). Use the flat side of a notched trowel to spread the
cement – glue evenly across the wall, then “comb“ it with the notched
side (minimum notch size 3 mm). Do not spread the cement-glue over
large areas in one go to prevent it from drying before the tiles are laid.
After laying the mesh sheets, press them down with a rubber trowel and
make sure that the distance between the meshes is equal to the distance
between each of the tiles to ensure a uniform appearance and that all
the joints are evenly spaced. Allow the cement-glue to dry for 24 hours
before grouting.
3. REJUNTADO
Before the tiles are grouted, they should all be absolutely clean, with no
dust remains. Any surplus adhesive from the tile-laying process should be
removed while it is still wet, and the rest of the adhesive should be left
to dry before starting to grout the tiles. We advise you to use Colorstuck
(always with a fine grain). This high-performance, fast-drying grouting
mortar is available in a range of different colours. It has an excellent
mechanical resistance, low water absorption rate, and resistance to
mould.
Application: Use a rubber trowel to spread the grout, making sure that
the joints are filled completely. Use the same trowel to remove any sur-
plus grout.
Cleaning up after grouting: Any traces of adhesive should be wiped
away using a sponge or cloth before the adhesive sets. This operation
must be carried out at least twice, rinsing the surface thoroughly and
then removing any remnants of mortar the following day in the same
way.
4. CUTTING MOSAICO ACERO TILES
To handle Mosaico Acero tiles properly, follow these instructions:
Use a radial tile saw with a steel cutting blade to cut the mesh-mounted
tiles. After cutting them, lay the cut part so that it is concealed. (Being a
metal, dark patches will always remain where the material has been cut).
To perforate Mosaico Acero tiles in order to hang mirrors, counter tops,
wall lights etc., we advise you to use special drill bits for perforating steel.
5. CLEANING
For everyday cleaning, use a neutral soap and then dry the surface with
a soft, clean cloth to avoid scratches. To maintain the tiles in good con-
dition, we advise you to treat the surface with a repair product or polish.
Using detergents and abrasive materials like cleaning powder can dama-
ge the mosaics irretrievably. If in doubt, contact the manufacturer.
Small variations in calibre are typical of mosaic tiles that are mesh moun-
ted by hand. We advise you to check the tiles before laying them.

351
Product prone to shade variations. The colour of the supplied material might not be exactly the same as the sample.
TECHNICAL INFORMATION / NOOHN ATELIER MOSAICS
NOOHN MOSAICS
The purpose of this manual is to provide the necessary information to correctly lay
the mosaics from our ATELIER series.
PRELIMINARY CONTROL OF THE SUBSTRATES
Before proceeding with the installation, check that the substrates have the
following characteristics:
Surface flatness
A fundamental requirement for the substrate is its surface flatness.
For glass mosaics, it is characterised by a thickness of 4 mm, and must not exceed
this measurement by ± 1.5 mm. Any unevenness can be corrected by using the
adhesive itself as a levelling mortar.
Maturation and maximum humidity permitted
Whatever the nature of the substrates, they must have completed their drying
cycle so that they are dimensionally stable and do not undergo contractions after
laying the mosaics or slabs. In the case of traditional cement-based screeds, drying
time may vary depending on the season from between 7 to 10 days per centimetre
thickness.
In the case of concrete surfaces, the minimum setting time is 6 months. Plaster-
based substrates, including anhydrite-based screeds or gypsum plasters, shall
have reached a maximum residual humidity of 0.5%. For pre-mixed cement-
based plasters, the manufacturer’s recommendations regarding drying times and
mechanical strengths should be observed.
Cleaning
The substrates must be thoroughly clean, without any chipped parts, paint, wax,
grease, oil or any other substance that may prevent the adhesive from adhering
properly. Concrete substrates shall not have any residues of concrete release
agents. Preventive cleaning with a pressure washer with hot water or sandblasting
is recommended. Existing ceramic wall coverings should be thoroughly degreased
using alkaline detergents or an aqueous solution of caustic soda.
Mechanical resistance
In the case of floorings, substrates must have an adequate mechanical resistance
to compression depending on the intended use. For example, an interior cement-
based screed in a residential building must have a minimum compressive strength
of 20 N/mm2, whereas a cement or gypsum-based plaster applied on an interior
wall should have a substrate adhesion of at least 0.5 N/mm2. If laying tiles on an
exterior façade on plaster, it is necessary to ensure that the plaster is suitable for
gluing mosaics or natural stone tiles (characterised by their heavy weight) and that
it has, therefore, a minimum substrate adhesion value of 1 N/mm2. To guarantee a
good level of adherence, the substrates should not have loose superficial powder.
General installations
It is necessary to carry out a preventive levelling of the substrate using the cement-
based adhesive, fr-one n by BUTECH to make the colour uniform and not alter
the colour of the mosaic. In the case of substrates that are very smooth, not very
absorbent, or subject to vibrations and expansions, the fr-one n (C2TES1) should
be mixed with UNILAX latex to improve adherence. The mosaic may be installed
after the leveller has completely hardened, which takes approximately 24 hours,
depending on the room temperature. Before laying the tiles, we recommend
marking the surface with lines to help in the correct alignment of the sheets. Set
squares, level detectors or laser tools can be used at this stage. After spreading
the sheets on the ground, measure 3 sheets, laying them together so that the
distance between each one is the same as the distance between each tile. Mark
this measurement on the surface to be covered, horizontally and vertically, drawing
a grid, using a rule and level. In this way the wall is divided into various squares,
each of which corresponds to nine sheets of mosaics. If the mosaic forms a picture
or must be laid in one direction in particular, observe the instructions for laying.
For mosaics with non-square sheets and, therefore with irregular sheet edges, it is
important to ensure that the distance between one sheet and the next is the same
as the distance between the tiles, so that all the joints are evenly spaced.
Installation on plexiglass, polycarbonate, glass and crystal.
This installation technique can only be used in the case of transparent mosaics
mounted on paper. Taking advantage of the transparency of the substrate, we can
create exclusive decorative effects and backlit walls.
Remove the transparent protective film from the substrates, if there is one. Before
starting the installation, the substrates should be cleaned and thoroughly degreased
using specific detergents and a cloth that does not leave residues on the surface.
Remember that, depending on the transparency of the mosaic, it is possible that
residual dirt or material on the substrate might be visible on completion of the
installation. Apply the single-component transparent sealer using a cartridge gun,
directly on the substrate, and make a few walnut-sized balls, at a distance of 8-10
cm, both horizontally and vertically, for an area of less than 60x90 cm.
Spread the product with a 2 mm triangular tooth notched trowel (VVVV) and
continue with the installation as described above. For this type of installation, it is
important to remove all air bubbles by gently pressing the mosaic sheets on the
substrate. The paper must be removed 24 hours after installing, once the single-
component adhesive has hardened.
Installation in POOLS, HAMMAMS AND THERMAL POOLS
We have considered it appropriate to devote more attention to these types of
installations because they are more critical. The main instructions for correct
installation are given below:
Swimming pools
Installation in pools, with a reinforced concrete structure requires a series of
structural controls and checks in order to ensure the correct duration of the work.
1.In buried reinforced concrete structures, the external walls must be waterproofed
before covering the excavation in order to prevent negative water pressures,
which may have an impact on the internal surface.
2.Structural concrete requires a maturation time of approximately 6 months
in order to be able to carry out all the hygrometric contractions and to be
considered dimensionally stable.
3.It is necessary to make a final static test of the rough structure by filling with
water in order to speed up the structure’s setting procedures and control its
waterproofness, detecting potential leaks that can be repaired immediately.
4.The pool’s internal walls and flooring must be rectified with suitable cement-
based mortars modified with polymers, in order to even out the flatness of the
installation, and thus avoid excessive amounts of adhesive, which in the case of
thin glass mosaics make their installation difficult or impossible.
5.To ensure the complete watertightness of the pool, two-component cement-
based, waterproofing mortars such as Politech (R2T) from BUTECH should be
applied prior to installation.
HAMMAMS AND THERMAL POOLS
The hammam or wet sauna is a complete wellness itinerary that takes place in
humidity-saturated rooms with temperatures ranging from +30°C to +60°C.
Often the structures within these rooms are made up of prefabricated panels and
elements with special shapes (couches, benches, alcoves, etc.) made from extruded
polystyrene attached to waterproof coverings, onto which the coating materials
can be glued directly.
GROUTING
Before grouting the joints it is necessary to check that the adhesive used for the
installation is completely dry and has hardened, and that the joints are perfectly
dry. After these checks, any adhesive remaining in the joints must be removed
mechanically. L’Antic recommends the epoxy mortar Epotech Crystal (R2T)
manufactured by BUTECH for grouting mosaics and marble slabs.
Follow the instructions for use on the product packaging closely.
Make sure that the installation site conditions are appropriate for its use.
EPOTECH CRYSTAL
EPOTECH CRYSTAL has been designed for grouting transparent glass and artistic
mosaics. Its special composition, based on inert agents made up of glass spheres,
allows the product to pick up the colour of the transparent glass tiles when
applied on the joints and, therefore, it changes depending on their colour. The
best results are obtained when used on transparent substrates such as plexiglass,
polycarbonate glass and crystal, sometimes backlit by a light source.
Another potential use for EPOTECH CRYSTAL involves the caulking of artistic
mosaics, i.e. compositions made up of mosaics that, suitably shaped and combined,
reproduce exclusive images full of diffusions and shadows. If these compositions
are caulked using traditional coloured sealants, it damages the look of the depicted
image as the colour caulking creates a discontinuity between the mosaic tiles.
On the contrary, if EPOTECH CRYSTAL is used, thanks to its semi-transparency,
the original composition diffusions are maintained, making a neutral, colourless
caulking that does not interfere with the image. In the case of slim mosaic caulking
with Crystal, we recommend using a 2 mm triangular-tooth spatula (VVVV) to
spread the adhesive, to prevent the higher spots of adhesive from being visible
through the caulking.
The application phases for Epotech Crystal are described below.
1-Pour the catalyst contained in the packet onto the coloured paste. We
recommend you use the full contents of the packet.
2-Mix, using a drill equipped with a propeller mixer at low speed, until a uniform
lump-free paste is obtained.
3-Carefully add the special finishes (optional) to obtain exclusive effects. These
additives are available separately and are provided in doses suited to the 5 kg
and 2.5 kg containers.
4-Stir slowly until the additive is evenly mixed in.
5-Apply as an adhesive directly onto the substrate using a 3.5 mm notched trowel.
6-Apply as a sealant on the joints using a rubber trowel.
7-Make an initial cleaning, while the sealant is still fresh, using water and a white
lint-free cloth.
8-Go over the caulking immediately with a Sweepex sponge and water.
9-Once the caulking has hardened (after about 24 hours depending on the
temperature), clean the surface using a neutral detergent and a white lint-free
cloth, removing any transparent stains.
10-To clean the covering, use Epotech cleaner.
11-Rinse with clean water to remove all traces of detergent.
12-Dry the surface with a dry cloth, without waiting for the rinse water to
evaporate.
The information obtained in this document is provided in good faith and on the
basis of extensive research carried out by L’Antic and BUTECH at their own internal
laboratories. Nevertheless, as the conditions and methods of use are beyond
the control of the companies, this information does not replace the preliminary
essential testing required to ensure the total suitability and safety of the product
for its specific application. Sicis and Litokol do not accept any responsibility for
results obtained from other operational methods, over which they do not have
any control. The user is responsible for determining the usage suitability in terms
of the required application, as well as taking suitable precautions to safeguard
property and persons against any risks associated with the use of the product. We
recommend that each user conducts verification tests of the potential application
before using it. Suggestions for use should not be interpreted as encouragement
to break any patent-protected rights. The information contained in this document
may be subject to change without prior notice. Tests have been conducted on
materials as they are typically produced and sold, maintained in good condition and
without any defects caused by improper transport and storage.

1
2 3 4
10ºC-27ºC
2 mm
max.
2 m
30%-65% HR
352
Product prone to shade variations. The colour of the supplied material might not be exactly the same as the sample.
NOOHN WOOD MOSAICS / TECHNICAL INFORMATION
NOOHN MOSAICS
1 CONDITIONS FOR THE RECEPTION AND STORAGE OF MATERIAL
ON SITE
1.1 Reception
On reception, the consignments of mosaic should be checked,
considering the following aspects:
-Type, colour and design. As with all natural materials, the wood may
present minor variations in tone.
-Quantity supplied;
-Dimensions and quality class or appearance;
-Moisture content of the elements;
-General condition and physical integrity of the elements.
The best way to obtain a harmonious finish is to create a panel on the
ground, combining the different tones of the mosaics before mounting
them on the wall. Installation of the material supposes acceptance of
the consignment.
1.2 Storage of the mosaic
The mosaic should be stored, protected from outdoor weather conditions,
in a well-ventilated, clean and dry building, and stacked leaving spaces
between the wood, the ground and the walls. If the mosaics are
delivered skin-wrapped in plastic, they should be kept in their unopened
packets until use.
1.3 Storage of adhesives
These should be stored in well-ventilated, cool, dry buildings at
temperatures between 10 ºC and 25 ºC, in their unopened packaging
and protected from direct sunlight and other sources of heat. In these
conditions, they can normally be stored for up to 6 months without
losing their properties.
1.4 Recommendations for use
Mosaics with relief and without joints are recommended for installation
as wall covering, in interior premises with ambient conditions within
the normal humidity and temperature parameters. Wood mosaics are
not recommended for use outdoors or in direct contact with water in
bathrooms, spas, pools, etc.
1.5 Instructions for assembly WOOD ANTIQUE (BRICK, SQUARE).
The WOOD ANTIQUE (BRICK, SQUARE) series, given its hygroscopic
nature, should be unpacked from the plastic and cardboard packaging
at the site of installation for 24-48 hours, to allow the wood to adjust to
the temperature and humidity conditions of the site.
Before starting the installation, spread the material on the ground and
fit the bricks together to ensure that they fit correctly, before mounting
on the wall.
Use a rubber mallet to tap the pieces into place, gently tapping on the
side of the piece, thus helping the anchorage of the bricks.
Once you have confirmed that the pieces fit together correctly, proceed
to the installation of the material on the wall.
2 PRELIMINARY CONDITIONS OF THE BUILDING
2.1 Windows and doors
The mosaic is mounted after the exterior windows and doors have
been glazed, to prevent the entrance of rainwater, the effect of frosts,
excessive changes in relative humidity and temperature, etc.
2.2 Site humidity of walls and ceilings
The materials used in the walls and ceilings in the same room as the one in
which the mosaic is to be installed should have a moisture content of less
than 2.5 %, except for plasterwork and paintwork that may reach 5 %.
2.3 Relative humidity and temperature of the buildings
The hygrothermal conditions listed below shall be maintained throughout
the mosaic installation process. Installation work must not be started
until the relative humidity conditions of the building reach and remain
between 30 and 65 %. Temperature is an important factor in the gluing
and finishing of the mosaic. Gluing and finishing work should not be
carried out at temperatures below 10 º C, or above 27 º C.
2.4 Maintenance of the conditions of the buildings
If necessary, use auxiliary means to prepare the building. These may
include fan heaters, humidifiers or dehumidifiers as required. They
should be used for as long as necessary to guarantee the correct
conditions for installation.
3 GENERAL CONDITIONS OF THE SUBSTRATE
3.1 General conditions
The substrate or installation base must be uniformly compact in depth
and on the surface (eliminating friable parts or parts that may be easily
detached), thoroughly dry, free of dust, grease or any other substance.
Do not install on substrates at risk of humidity due to capillary ascension
as this may affect the adherence and the wood mosaic. Similarly, the
surface should be plumb perfect, level and flat with defects measuring a
maximum of 2 mm, measured using a 2 m rule. The retraction joints of
flooring may be filled with flexible materials. The joints of the building
must be left free.
3.2 Cement mortar substrates
The moisture content of the substrate prior to installation must be less
than or equal to 2.5 %.
The moisture content can be measured using a capacitive-, microwave-
or carbide-type electronic hygrometer. In each case, the manufacturer’s
instructions for the equipment used must be observed.
In all cases, and irrespective of the measurement or estimation method
used, remember that the sample must be representative of the thickness
of the substrate.
Written records shall be kept of the measurements made.
3.3 Existing wood substrate
If using a wood substrate, it is necessary to guarantee the release of
moisture, prevent the risk of attack by insects and general problems of
sanitation. Wood is a hygroscopic element that absorbs and releases
moisture from and to the surrounding atmosphere and consequently
may undergo dimensional changes.
3.4 Existing ceramic or stone substrates
The necessary tests must be carried out with this type of substrate to
guarantee the correct adherence of the mosaic to the substrate and
that there is no moisture transmission. When applying wood mosaics on
masonry walls, check that these are completely dry.
3.5 Existing textile pavings
In general, we do not recommend the installation of wood mosaics on
textile substrates to prevent problems of sanitation.
4 SPECIFICATIONS FOR LAYING THE MOSAIC
4.1 General points
The materials used in the installation, including the mosaics and the
adhesives, filler materials, etc. must all comply to the necessary technical
specifications for the design and the manufacturer’s instructions for the
same must be observed.
4.2 Mosaic moisture content
The moisture content of wood mosaics, whether in conditions of heating
or air conditioning, shall be between 7% and 9% humidity.

5
4-6 mm
353
Product prone to shade variations. The colour of the supplied material might not be exactly the same as the sample.
TECHNICAL INFORMATION / NOOHN WOOD MOSAICS
NOOHN MOSAICS
4.3 Perimeter joints
A perimeter joint of between 4 and 6 mm should be left. This joint can
be filled with flexible materials. The purpose of the perimeter joint is to
prevent moisture from passing from the walls to the wood and to act
as an acoustic barrier (to prevent acoustic bridges). It is not intended
to absorb possible movements due to swelling that may occur in the
installation.
4.4 Gluing the pieces
The use of a type R2 T high-tech two-component polyurethane-based
adhesive is recommended in general, and specifically for special
substrates where it is not possible to use cement-based adhesives, in
accordance with EN 12004. L´Antic Colonial recommends Politech from
Butech. Always apply a fine coat using a notched trowel with notching of
8 mm at maximum. Use the flat part of the trowel to spread the adhesive
across the substrate, and then comb it with the notched part. Mount the
mosaic, making sure that it is clean, there is no waste or residue from the
building work, before the adhesive forms a surface film (within the
adhesive open time). In general, the manufacturer’s instructions should
be observed for the use of adhesives regarding open times, gel times,
useful life, dose, application, products, formats, etc.
4.5 Installation tolerances
4.5.1 Joints
As a consequence of the hygroscopic nature of the wood, dimensional
variations may take place which should be considered as normal. The
reduction in the width of the pieces results in the appearance of the
joints between the mosaic elements. To the contrary, excess moisture will
cause the wood mosaic to absorb moisture and increase in size.
In order to control this factor, IT IS VITAL to maintain the hygrometric
conditions of the environment in which the mosaic is being installed
stable. Please refer to the instructions in the maintenance section, as
failure to comply with the instructions could result in damage to the
installation and the loss of cover under any applicable guarantee.
4.5.2 Fillers and repairs
Specific repair fillers should be used for this type of work. Strange
mixtures, for example flour based glues or sawdust mixed with adhesive
or varnishes should not be used.
4.5.3 Variations in the colour and appearance of the mosaic
Every species of timber as a characteristic colour depending on the colour
of the cell walls and the substances in the lumen of the cell wall.
The wood used in this mosaic may vary in appearance (colour, grain,
texture etc.), and this is one of the most appreciable aspects of the
installation and an inherent feature of the wood.
All timber undergoes changes in colour on exposure to light, although
the changes may be more noticeable in some species than in others.
Variations in colour should be considered as a natural phenomenon
inherent to the wood.
4.6 Protection, maintenance and inspection of the wood mosaic
4.6.1 Provisional protection of the mosaic
Schedule the installation to coincide with the final stages of the work,
where possible after the paintwork. During the finishing work, the
hygrometric conditions specified in section 2 must be maintained in the
buildings.
4.6.2 Preparation of the buildings
Wood and wood products are hygroscopic materials that absorb and
release moisture from and to the surrounding atmosphere depending
on the hygrothermal conditions (humidity and temperature). The finish
applied to the mosaic is only intended to offer protection against the
absorption from or release to the air of moisture by the paving. A high
relative humidity in the building (above 65% for more than 15 days)
may result in excess absorption of moisture by the mosaic. A low relative
humidity in the building (below 35 %) for the same period may result
in excessive loss of moisture from the mosaic. It is necessary to ensure
the building is suitably prepared (ventilation, heating, protection from
direct sunlight, etc.) so that the mosaic is not subjected to unwanted
fluctuations in moisture content and the consequent unexpected
dimensional variations.
Buildings should be kept at between 50 and 70 % relative humidity in
coastal zones and between 35 and 60 % in inland zones.
On completion of the installation work, maintenance of these conditions
is the responsibility of the party in charge of the project at any time.
4.6.3 Inspection for reception
On completion of the installation work, an inspection is made in
the company of the customer who is provided with a copy of the
Maintenance and Conservation Manual for the covering mounted.
The mosaic is inspected from a standing position, with natural light
behind the observer. Angular sources of light should not be used, nor
should the work be inspected for surface irregularities while standing
against the light. The final inspection of the installed mosaic shall take
place at most seven days after the installation and a project acceptance
document should be prepared for signing by the installer and the
customer, noting any relevant observations.
4.6.4 Instructions for use and maintenance
On completion of the installation work, the installation company
shall provide the subcontractor with a manual or instructions for use
and maintenance which should contain, at minimum, the following
information:
-Name of the company
-Technical specifications for the mosaic installed.
-Hygrothermal conditions that must be maintained for the mosaic until
delivery and afterwards by the user;
-Prevention treatments and recommendations for suitable cleaning
products and procedures;
-Certificate of guarantee of work.
4.6.5 Maintenance and care
To keep wood mosaics in optimum conditions after installation, the room
should be kept at a relative humidity of 45 to 60%, and a temperature
of 15 to 20 ºC.
In dry climates it is necessary to maintain the correct degree of humidity,
either using traditional methods such as containers of water or by using
humidifiers.
On the other hand, in humid climates, the use of dehumidifiers or air
conditioners is recommended to avoid damage to the wood.
For the care, maintenance and cleaning of the wood mosaics by L´Antic
Colonial, we recommend the use of Woca products, to offer the best
guarantees and longer life for your mosaics:
-Dry cleaning: as a general rule wipe with a cloth, mop, brush or
vacuum.
-Wet cleaning: use Woca Natural Soap for oiled woods. Clean&Green
Aqua Oil.
-Intense cleaning: use Woca intensive cleaner. After cleaning, apply
Woca Natural Oil.
/