2
F
G
A B C D E H N
O
P
K
L
M
I
J
A
B
C
D
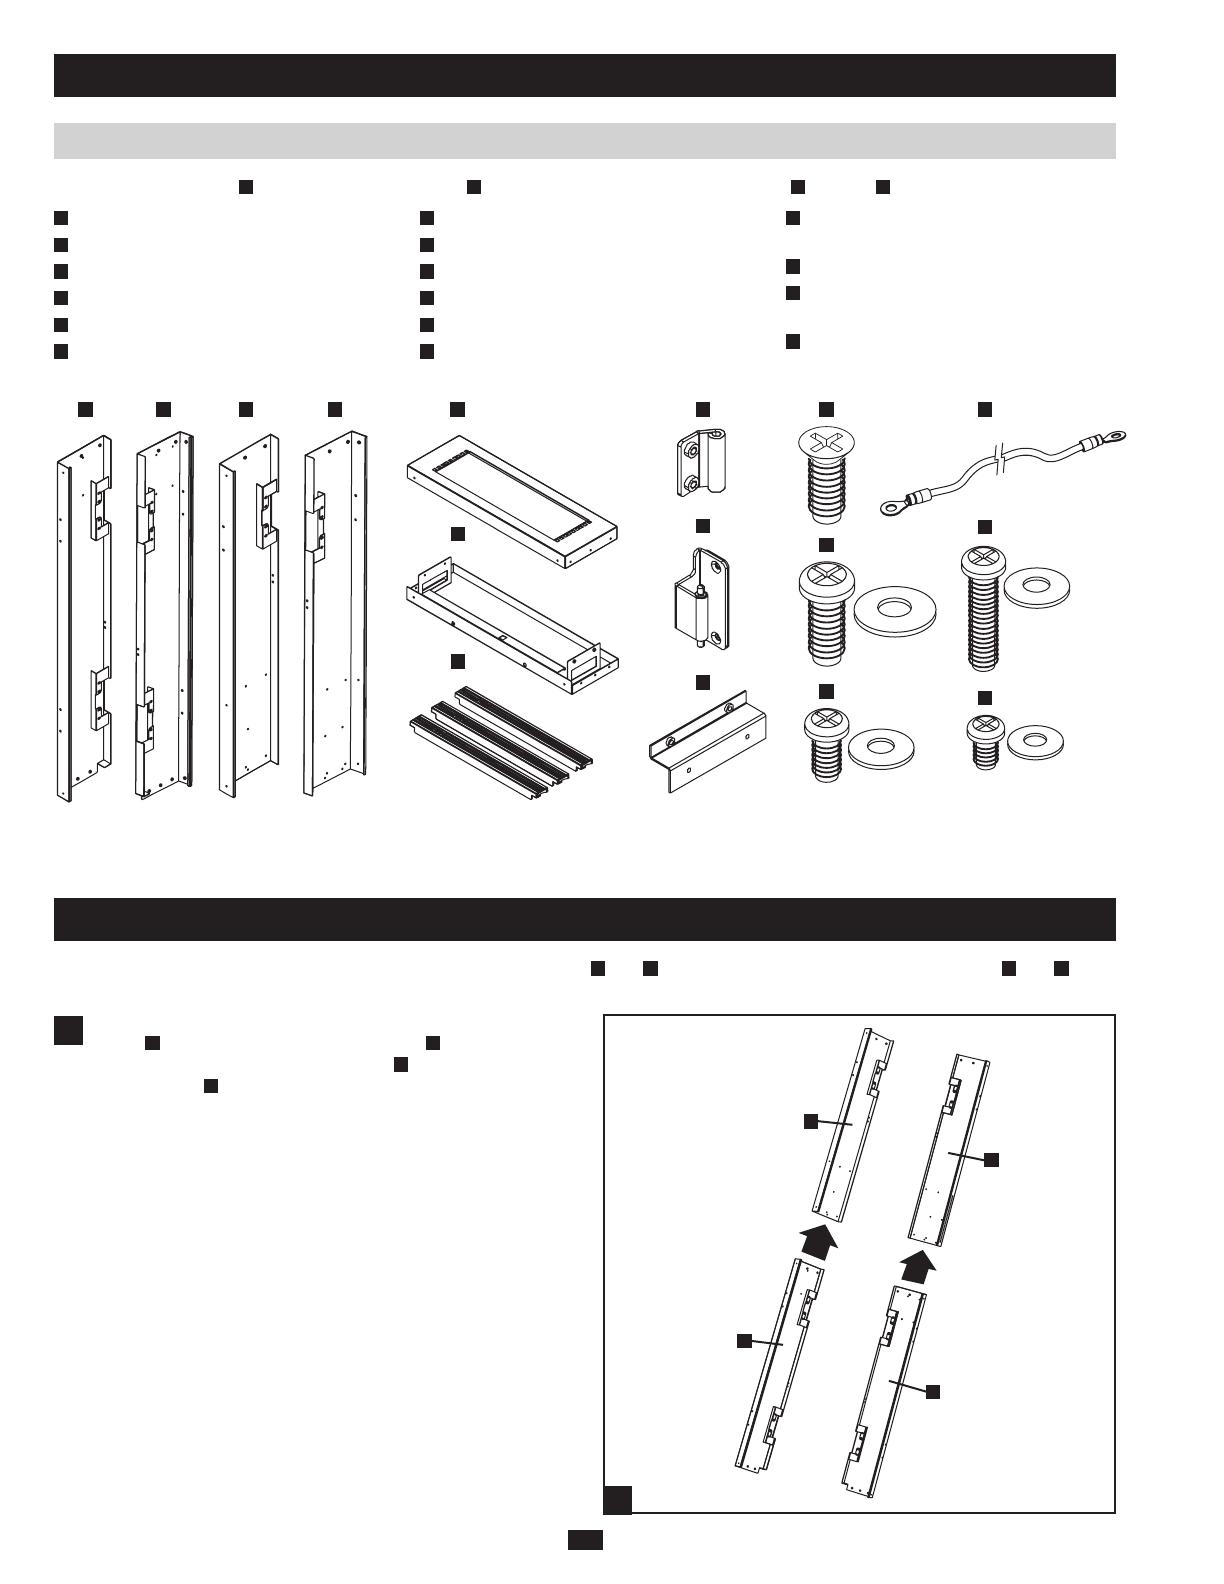
48/42U
1-1
Preparation (continued)
Note: The hinge swivels
H
and 12 hinge swivel screws
L
are pre-installed in the vertical sections
A
through
D
.
Parts List (If any parts are missing, contact Tripp Lite.)
A
LowerLeftVerticalSection(1)
B
LowerRightVerticalSection(1)
C
UpperLeftVerticalSection(1)
D
UpperRightVerticalSection(1)
E
TopSection(1)
F
BottomSection(1)
G
1UBlankingPanels(3)
H
HingeSwivels(6-allpre-installed)
I
Hinges(4)
J
CableManagerBrackets(2)
K
M6x12mmFlat-HeadScrews(8)
L
M6x12mmPan-HeadScrews
andWashers(14total-12pre-installed)
M
M5x10mmPan-HeadScrews
andWashers(40)
N
GroundingCable(1)
O
M5x20mmPan-HeadScrewsand
Washers(4)
P
M4x8mmPan-HeadScrews
andWashers(8)
1 – Frame Assembly
Note: For 25U enclosures, you will use only the lower vertical sections
A
and
B
. You will not use the upper vertical sections
C
and
D
.
For 48U and 42U enclosures, you will use all four vertical sections.
(For25Uenclosures,skipthisstep.)Slidethelowerleftvertical
section
A
inside the upper left vertical section
C
as shown.
Repeatforthelowerrightverticalsection
B
and the upper right
vertical section
D
. The vertical sections are not interchangeable,
so refer to the diagram to confirm that you’re assembling the
correct sections.
1-1