Page is loading ...

Extreme Weather Pet Door
™
Installation Guide for Small, Medium and Large
Please read this entire guide before beginning.
Model Numbers: PPA00-10984, PPA00-10985, PPA00-10986

2 Customer Care Center 1-800-732-2677
Important Safety Information
Explanation of Attention Words and Symbols used in this guide
This is the safety alert symbol. It is used to alert you to potential personal
injury hazards. Obey all safety messages that follow this symbol to avoid
possible injury or death.
WARNING indicates a hazardous situation which, if not avoided,
could result in death or serious injury.
CAUTION, used with the safety alert symbol, indicates a hazardous
situation which, if not avoided, could result in minor or moderate
injury.
NOTICE is used to address safe use practices not related to
personal injury.
• When children are present in the home, it is important to consider
the pet door during child proong activities, the pet door may
be misused by a child resulting in the child accessing potential
hazards that may be on the other side of the pet door. Purchasers/
Homeowners with swimming pools should ensure that the pet
door is monitored at all times and that the swimming pool has
adequate barriers to entry. If a new hazard is created inside or
outside of your home, which may be accessed through the pet door,
Radio Systems
®
Corporation recommends that you properly guard
access to the hazard or remove the pet door. The closing panel or
lock, if applicable, is provided for aesthetic and energy efciency
purposes and is not intended as a security device. Radio Systems
®
Corporation will not be liable for unintended use and the purchaser
of this product accepts full responsibility for oversight of the
opening it creates.
• Power Tools. Risk of severe injury; follow all safety instructions for
power tools. Be sure to always wear safety goggles.
• The user, prior to installation, must become familiar with all
building codes that may affect the installation of the pet door and
determine, along with a licensed contractor, its suitability in a given
installation. This pet door is not a re door. It is important for the
owner and contractor to consider any risks that may be present
inside or outside of the pet door, and any risks that may be created
by subsequent changes to your property and how they may relate
to the existence and use, including misuse of the pet door.
• Be sure to use heavy scissors for cutting the core covers.
• If cutting a metal surface, be aware of sharp edges to prevent
injury.

3 Customer Care Center 1-800-732-2677
• Keep these instructions with important papers; be sure to transfer
these instructions to the new owner of the property.
• If painting the pet door, it is recommended to paint it prior to
installation. For best results, use a primer for plastics before
applying paint.
• If homeowner’s door or other application is not level, the pet door
must be marked level to swing properly.
• Cut out correct size template. For the Large no cutting is required.
If installing in a wall, reduce cut-out width by 1” for the Small and
Medium. For the Large, reduce cut-out width by 1” and cut-out
height by 1”.
• When applying cutting template there should be a minimum of 3”
between the bottom and sides of the door and the outer edge of
the template to maintain the structural integrity of the door.
• Make sure there is nothing underneath the door where you will be
drilling the holes or cutting out opening.
• Use a manual screwdriver to tighten screws. Do not overtighten.
Overtightening can strip the screws or warp the pet door frame.

4 Customer Care Center 1-800-732-2677
Thank you for choosing the PetSafe
®
brand. You and your pet deserve a companionship that includes
memorable moments and a shared understanding together. Our products and training tools promote a
lifestyle of protection, teaching, and love—essentials that inuence memories for a lifetime. If you have
any questions about our products or training your pet, please visit our website at www.petsafe.net or
contact our Customer Care Center at 1-800-732-2677.
PRODUCT WARRANTY
To get the most protection out of your warranty, please register your product within 30 days at
www.petsafe.net. By registering and keeping your receipt, you will enjoy the product’s full warranty
and should you ever need to call the Customer Care Center, we will be able to help you faster. Most
importantly, PetSafe
®
will never give or sell your valuable information to anyone. Complete warranty
information is available online at www.petsafe.net.
Snap-on
Closing Panel
Interior Frame
with 2 flaps
Plastic Core Covers
Cutting Template
Installation Guide
Exterior Frame
with Flap
Hex Nuts
- Small 4 pcs.
- Medium 6 pcs.
- Large 10 pcs
.
Nylon Screws
- Small 4 pcs.
- Medium 6 pcs.
- Large 10 pcs.
Core Cover
Supports
Foam Strip
Weather Strips
Kit Includes
• Hammer
• Jigsaw
• Drill
•
½” (13 mm) Drill Bit
• Wire Cutters
• Slotted & Phillips
Screwdrivers
• Tape Measure
• Masking or P
ainter’s
Tape
• Pencil
• Level
• Scissors
• Safety Equipment
Optional
• Duct Tape
• Caulk
Tools Needed
NOTE: The Extreme Weather Pet Door
™
can be installed in most doors and walls.
Installation in thinner or thicker applications may not require the Plastic Core Covers.
If installing in a wall, reduce cut-out width by 1” for the Small and Medium. For the
Large reduce cut-out width by 1” and cut-out height by 1”. Additional tools and
materials, such as wood framing, may be required.
Want Professional Installation Help?
Invisible Fence
®
Brand installers (where available) may come to your home and install your new PetSafe
®
Pet Door for an additional cost. Contact the Customer Care Center at 1-877-866-DOGS (3647) or visit
the website at www.invisiblefence.com for more information.
Key Denitions
• Outer Frame Size: Overall pet door dimensions
• Cut-Out Size: Opening cut in homeowner’s door for proper t and pet door installation
• Replacement Flap Size: Overall ap size when removed from pet door. During extreme changes in
weather, vinyl aps can shrink during cold months and stretch in warmer months
• Flap Opening Size: Usable ap size for pet to enter and exit through pet door
• Interior Frame: Pet door frame on the inside of home
• Exterior Frame: Pet door frame on the outside of home
• Insulated Flap: Yellow ap located behind the vinyl ap in the interior frame
• Plastic Core Covers: Plastic pieces that cover the cut-out or “core” of the homeowner’s door
• Snap-on Closing Panel: Cover that snaps onto the pet door frame to close the pet door opening

5 Customer Care Center 1-800-732-2677
NOTICE
If painting the pet door, it is recommended to paint it prior to installation.
For best results, use a primer for plastics before applying paint.
Step
1
Step
2
Determine Pet Door Location
1A
1B
1A Measure and mark your pet’s shoulder height on the
interior side of door.
1B Determine location for the pet door. Draw a vertical
center line through the shoulder height line using a level.
NOTICE
If homeowner’s door or other application is
not level, the pet door must be marked level to
swing properly.
Prepare Door
2A
2B
2C
2A Remove door by removing door hinge pins.
2B Place on a raised level surface such as saw horses.
Place interior side of door facing up.
Helpful Tip:
Clamp down the door to prevent it
from moving.
Note:
The Pet Door can be installed with the door
hanging based on your skill level.
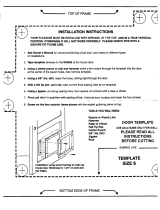
2C Cut out the correct size template. Match the
marked lines on the door with the shoulder and center
lines on the template. Tape the template in place and
carefully trace template. Make sure to trace under-
neath tape and connect the corners. Now, remove the
template and any excess tape from the door.
NOTICE
When applying cutting template there should be a
minimum of 3” between the bottom and sides of the
door and the outer edge of the cutting template to
maintain the structural integrity of the door.
NOTICE
Cut out correct size template. For the Large, no
cutting is required. If installing in a wall, reduce cut-
out width by 1” for the Small and Medium. For the
Large reduce cut-out width by 1” and cut-out height
by 1”.
Installation Instructions

6 Customer Care Center 1-800-732-2677
Step
3
Step
4
Cut Pet Door Opening
3B
3A
3A Drill ½” holes in inside corners of drawn template.
These will be the pilot holes for the saw blade.
Helpful Tip:
Use both hands to hold drill steady and
straight at a 90° angle.
3B Beginning in one of the holes just drilled, cut along
the drawn template lines. After cutting out the opening,
you may need to recut to square the opening. This is
necessary for the pet door frame to t correctly.
Helpful Tip:
Use proper saw blade length and type
according to door thickness and material (for example
a wood blade for a wood door and a metal blade for
a metal door). Cut slowly using both hands to hold
the saw steady and straight at a 90° angle. This will
prevent the blade from cutting unevenly between
interior and exterior sides of the door.
NOTICE
Make sure there is nothing underneath the door where
you will be drilling the holes or cutting out opening.
Fit Core Covers
4A
4B
4C
4D
4A Measure the thickness (T) of your door. Note this
measurement.
4B Cut the grooved side of the plastic core covers and
core cover supports to equal the thickness (T) of your
door + ⅞”.
Top
Bottom
Side
Left Support Right Support
4C Place cut edge of bottom core cover toward you
with ribbed side facing up. Snap left core cover
support into left end of “T”-shaped rib on bottom core
cover. Snap right core cover support into right end of
“T”-shaped rib on bottom core cover. With channel
sides facing in, align uncut edge (side with one rib)
of side core covers with uncut edge of core cover
supports. Slide channel of side core covers onto tab of
core cover supports to form a “U”-shape.
4D Slide weather strips into channels of side core
covers. Weather strips should face inside. Weather
strips may need trimming to meet at end of side core
covers.

7 Customer Care Center 1-800-732-2677
4E
4E Snap uncut edge (side with one rib) of
assembled core covers inside bottom and side tabs
of interior frame (frame with 2 aps). The bottom
core cover should be at bottom of interior frame.
Weather strips and ribbed sides (uncut edges)
should face ap. Snap the uncut edge (side with
one rib) of top core cover inside top tabs of interior
frame. Uncut edge (side with one rib) of top core
cover should face ap. Core covers may need
trimming to meet at corners.
Optional:
Use duct tape in the
corners of core covers to help secure
in place and to improve weather
resistance. Cut off any excess tape.
Step
5
Install Pet Door
Before putting away jigsaw, place the exterior frame (frame with 1 ap) into
the underside of the opening to check the t. If the screw holes on frame are not visible
through cut-out, you may need to recut opening before proceeding with the installation.
5C
5D
5A Place interior frame (frame with 2 aps)
into cut-out. Next place exterior frame into
cut-out from under side of door, inserting core
covers inside tabs of frame. Hold frame
together. Insert nylon screws through holes in
interior frame into holes in exterior frame.
Thread a hex nut onto bottom of each screw.
5B Start screws, but do not tighten at
this time. Place foam strip under interior frame for
additional insulation. Cut off any excess.
Helpful Tip:
Use a screwdriver to tuck the foam strip
under as you work around the frame.
5C Use a screwdriver to evenly tighten screws through-
out frame while keeping core covers in position. It may
be necessary to adjust screws to make sure pet door
t is correct.
Helpful Tip:
Look though ap opening to check if core
covers are in position as you tighten the screws.
5D Use wire cutters to trim screws ush with exterior
frame.
NOTICE
Use a manual screwdriver to tighten screws. Do not
overtighten. Overtightening can strip the screws or
warp the pet door frame.
Optional:
Caulk around the exterior frame (frame
with one ap) and inside threshold where core covers
meet for weather resistance.
5A
5B

8 Customer Care Center 1-800-732-2677
Step
6
Train Your Pet
6A
6A Rehang your door and begin training your pet. It may
help for you to be on one side of the door and your pet
on the other. Lift or tape open ap and try to talk your
pet through the pet door. After your pet has gone through
a few times, allow the ap to touch your pet’s back so
they will become comfortable using the pet door. If your
pet will not go through the door, tape the ap open until
they use it on their own.
Helpful Tip:
Try treats or toys to encourage your pet to
go through the pet door and become comfortable using it.
Closing Panel
The Closing Panel snaps onto the interior frame of the
Extreme Weather Pet Door™. It is useful during inclement
weather or to keep your pet from using the pet door.
An additional closing panel (sold separately) can be used
on the exterior frame of the Extreme Weather Pet Door™
for improved weather resistance. See “Replacement Parts
and Accessories” on page 10.

9 Customer Care Center 1-800-732-2677
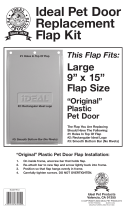
Replacement Flaps
3
To Replace
vinyl ap,
remove ap screws and ap
support from top of pet door
frame.
Note:
Interior ap has a
ap support, exterior ap
does not.
To Adjust
slightly loosen
ap screws on top of pet
door frame.
Vinyl Flap Replacement and Adjustment
During extreme changes in weather, vinyl aps can shrink during cold months and expand in warmer
months. Easily replace or adjust to ensure a snug t during seasonal changes.
Remove vinyl ap and ap
clamp with attached insulated
ap.
Note:
Interior ap clamp
has insulated ap attached,
exterior ap clamp does not.
Replace ap clamp with
attached insulated ap. Insert
new vinyl ap between ap
clamp and ap screw holes in
top of frame. The PetSafe
®
logo
should be readable on vinyl
ap. Replace ap support. Align
screw holes in ap support,
frame, vinyl ap and ap clamp.
Replace and start screws to
hold ap in place. Adjust ap
horizontally until centered in
pet door frame. Adjust ap
vertically until magnet bar on
frame jumps to meet magnet
on bottom of ap. Tighten
screws.
Adjust ap horizontally until
centered in pet door frame.
Adjust ap vertically until
magnet bar on frame jumps
to meet magnet on bottom of
ap. Tighten screws.
1
2

10 Customer Care Center 1-800-732-2677
3
To replace the insulated
ap, remove ap screws
and ap support from top
of pet door frame.
Insulated Flap Replacement
Remove vinyl ap and
ap clamp with attached
insulated ap.
Remove screws, insulated
ap and backing plate from
back of ap clamp. Insert
new insulated ap between
ap clamp back and backing
plate. Align screw holes.
Replace and tighten screws.
Follow step 3 under “Vinyl
Flap Replacement and
Adjustment” on page 9.
1
2
Part Description Part Number
Small Vinyl Replacement Flap PAC11-11037
Medium Vinyl Replacement Flap PAC11-11038
Large Vinyl Replacement Flap PAC11-11039
Small Insulated Replacement Flap Kit MPA00-12817
Medium Insulated Replacement Flap Kit MPA00-12818
Large Insulated Replacement Flap Kit MPA00-12819
Small Snap-on Closing Panel MPA00-12826
Medium Snap-on Closing Panel MPA00-12827
Large Snap-on Closing Panel MPA00-12828
Installation Hardware Kit MPA00-11824
Small Plastic Core Cover Kit MPA00-12664
Medium Plastic Core Cover Kit MPA00-12665
Large Plastic Core Cover Kit MPA00-12666
Replacement Parts and Accessories
Replacement aps can be purchased by visiting www.petsafe.net or by contacting our Customer
Care Center at 1-800-732-2677.

11 Customer Care Center 1-800-732-2677
TERMS OF USE AND LIMITATIONS OF LIABILITY
1. Terms of Use- This product is offered to you conditioned upon your acceptance without modications
of the terms, conditions and notices contained herein. Use of this product implies acceptance of all such
terms, conditions and notices.
2. Proper Use- This product is designed for use with pets where training is desired. The specic
temperament of your pet may not work with this product. If you are unsure whether this is appropriate
for your pet, please consult your veterinarian or certied trainer. Proper use includes reviewing the
entire Installation Guide provided with your product including any specic safety information.
3. Limitations of Liability- In no event shall Radio Systems
®
Corporation be liable for any direct,
indirect, punitive, incidental, special or consequential damages whatsoever arising out of or connected
with the use or misuse of this product. Buyer assumes all risks and liabilities from the use of this
product.
4. Modications of Terms and Conditions- Radio Systems
®
Corporation reserves the right to change
the terms, conditions and notices under which this product is offered.

Radio Systems
®
Corporation
10427 PetSafe Way
Knoxville, TN 37932
1-800-732-2677
www.petsafe.net
400-1352
©2007 Radio Systems
®
Corporation
/
