Casio XJ-F10X, XJ-F20XN, XJ-F100W, XJ-F200WN, XJ-F210WN User guide
- Type
- User guide
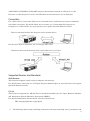
Casio XJ-F10X, XJ-F20XN, XJ-F100W, XJ-F200WN, XJ-F210WN projectors offer versatile connectivity and control options for a range of applications. Connect them to a wired LAN network and control them remotely via web browser, PJLink, Crestron, AMX, or Extron systems. Easily switch between various input sources, including computer, video, S-video, HDMI, and USB, for flexible content display. Additionally, you can enable or disable power on via wired LAN, allowing you to turn on the projector remotely from standby mode.
Casio XJ-F10X, XJ-F20XN, XJ-F100W, XJ-F200WN, XJ-F210WN projectors offer versatile connectivity and control options for a range of applications. Connect them to a wired LAN network and control them remotely via web browser, PJLink, Crestron, AMX, or Extron systems. Easily switch between various input sources, including computer, video, S-video, HDMI, and USB, for flexible content display. Additionally, you can enable or disable power on via wired LAN, allowing you to turn on the projector remotely from standby mode.


-
 1
1
-
 2
2
-
 3
3
-
 4
4
-
 5
5


Casio XJ-F10X, XJ-F20XN, XJ-F100W, XJ-F200WN, XJ-F210WN User guide
- Type
- User guide
Casio XJ-F10X, XJ-F20XN, XJ-F100W, XJ-F200WN, XJ-F210WN projectors offer versatile connectivity and control options for a range of applications. Connect them to a wired LAN network and control them remotely via web browser, PJLink, Crestron, AMX, or Extron systems. Easily switch between various input sources, including computer, video, S-video, HDMI, and USB, for flexible content display. Additionally, you can enable or disable power on via wired LAN, allowing you to turn on the projector remotely from standby mode.
Ask a question and I''ll find the answer in the document
Finding information in a document is now easier with AI
Related papers
-
Casio XJ-F11X, XJ-F21XN, XJ-F101W, XJ-F211WN User guide
-
Casio XJ-M141, XJ-M146, XJ-M151, XJ-M156, XJ-M241, XJ-M246, XJ-M251, XJ-M256 User guide
-
Casio XJ-SK650 User manual
-
-
Casio XJ-UT331X, XJ-UT311WN, XJ-UT351W, XJ-UT351WN User guide
-
-
Casio XJ-V10X, XJ-V100W, XJ-V110W User manual
-
Casio XJ-F20XN Installation guide
-
AKG XJ-M140, XJ-M145, XJ-M150, XJ-M155, XJ-M240, XJ-M245, XJ-M250, XJ-M255 (Serial Number: A9****) User guide
-
Casio YA-F10/F20 Owner's manual
Other documents
-
Optoma WU470 User manual
-
Optoma EH465 User manual
-
Panasonic TH80LFB70E Operating instructions
-
Canon REALiS LCOS 4K5020Z User manual
-
Panasonic TH50LFC70E Operating instructions
-
Canon XEED 4K6021Z User manual
-
Panasonic TH50LFB70E Operating instructions
-
Canon WUX7000Z User manual
-
Optoma EH503 Owner's manual
-
Canon XEED WUX7500 User manual