Page is loading ...

NOTICE
Dear Customers:
Thank you for choosing our barbeque grill and hope that you enjoy
our product.
Our gas valves and components are preset at the factory to operate
on Liquid Propane (LP). If you wish to convert your grill from LP to
Natural Gas (NG), we strongly recommend that you hire a
professionally trained technician to convert the unit. Please
understand that we will not be responsible for any liability, personal
injury, or property damage resulting from an improperly converted
grill.
We will provide warranty parts for this product after it is converted,
however, we will not honor any warranty claims for parts damaged
during the conversion of the original LP valves and orifices to NG
configuration if the conversion is done improperly.
5270 Edison Avenue., Chino, CA 91710
(Tel) 800-790-1299 (Fax) 909-718-1949
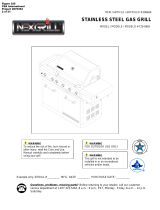
Model no: 710-0002
19000357A0

Safety Instruction
IMPORTANT SAFETY INSTRUCTIONS
WARNING: To reduce the risk of fire injury to persons, or damage when using NG Conversion Kit & and outdoor
cooking gas appliance, follow basic precautions, including the following:
• Gas conversions must be done by a qualified installer.
• The connector is intended only for use outdoors with portable appliance that may be moved for convenience of
operation.
• Connectors are designed for movement after installation, but must not be kinked, twisted or torque. Periodic
visual inspection should be made to determine that the connector is suitable for continued use.
• Connect with damaging foreign objects or substances must be avoided.
• Connected hose assembly shall be of adequate length and capacity for intended application. Final assembly
must be tested for leaks.
Caution:
Test for leaks only with leak test solution. Rinse with clear water after leak test to remove any corrosive
residue.
DO NOT USE OPEN FLAME TO TEST FOR GAS LEAKS.
SAVE THESE INSTRUCTIONS
2

Tools and Parts for Gas Conversion
Gather the required tools and parts before starting installation.
Read and follow the instructions provided with any tools listed
here.
Tools needed
■Phillips screwdriver ■Thin flat-blade screwdriver
■Pipe wrench ■Pliers
■Adjustable wrench ■Pipe thread sealant
■6mm socket and wrench certified for LP gas
or 6mm nut driver
Parts supplied
■ Natural gas orifices
■ 10 ft (3.0 m) Natural gas hose with quick connector
■ 5.9" (150 mm) Natural gas regulator hose
IMPORTANT:
Gas conversions must be done by a qualified
installer. Before proceeding with conversion, shut off
the gas supply to the appliance prior to disconnecting
the electrical power.
If there are damaged or missing parts when you
unpack this kit, call 1-800-790-1299. DO NOT have
your QUALIFIED GAS TECHNICIAN attempt to instal
l
this kit until you receive replacement for any damaged
or missing parts.
Parts needed
■ Natural gas conversion kit
The conversion kit includes:
■ Natural gas regulator 4" W.C. (marked “Natural Gas
Regulator)
3

Conversion from Liquid Propane (LP) to Natural Gas (NG)
Installation of the regulator
1. Turn off the main gas supply valve.
2. Unplug grill or disconnect power.
3. Disconnect 20 lb LP gas fuel tank (if present).
4. Turn off all burner control valves.
5. Remove the 20 lb LP gas fuel tank (if present) from the grill
cart.
6. Use an adjustable wrench to remove the LP regulator from
the manifold.
2.Connect the brass connector on one end of the 10 ft (3.0 m)
PVC flexible gas supply hose (supplied) to the Natural gas
pressure regulator.
3.Connect the quick connector on the other end of the
10’’(3.0 m) PVC flexible gas supply hose to the rigid Natural
gas supply pipe.
7. Use an adjustable wrench to install the Natural gas regulator
hose to the manifold and secure. Attach the Natural gas
regulator to the side panel inside the grill cart with the two
screws that are preassembled on the regulator.
Change Grill Main Burner Valve Orifices
1.Remove the grates and flame tamers.
2.Remove the 2 screws and/or pin that hold the burner
in place. Set the screws and/or pin aside. Remove the
burner from the grill by lifting the burner out.
Make Gas Connection
1. A combination of pipe fittings must be used to connect
the grill to the existing gas line.
■
The 10 ft (3.0 m) PVC flexible gas supply hose design
certified by CSA must be used.
■ Pipe-joint compounds suitable for use with Natural gas
must be used. Do not use Teflon tape.
■ There must be a certified manual shutoff valve in the
gas supply line near the grill for easy access.
A.Manifold
B. Side panel
C.10ft. (3.0m) PVC gas hose
D.Natural gas pressure regulator/hose assembly
4
Note: You may also refer to your grill manual for
conversion instructions, if this instruction is not
exactly consistent for your grill.

3. Use a 6 mm socket and wrench or 6 mm nut driver to
remove the brass orifice from the end of gas valve. The
main burner NG orifice is located behind the LP orifice, so
no additional orifice needs to be installed.
4. Reinsert the burner and reattach using the 2 screws or
pin previously removed. Repeat the procedure for each
main burner.
5. Position the igniters so they are 1/4" (6.0 mm) away from
each burner.
Change the Rotisserie/Infrared Burner Orifice
1.Using a Phillips screwdriver, unscrew the screws and
remove the rotisserie/infrared burner wind baffle.
2. Remove the access cover at the back of the grill by
removing screws inside the grill at the back of firebox.
3. Using a Phillips screwdriver, remove the 2 screws holding
the spider guard to the burner.
4. Use a 24 mm wrench to remove the orifice nut.
IMPORTANT: Check that the NG orifice is properly
installed inside of the burner opening.
5
NOTE: Only Main Burners have the NG orifice pre-installed
behind the LP orifice. All other burners require LP orifice to be
removed and NG orifice to be installed.
Conversion from Liquid Propane (LP) to Natural Gas (NG)

5. Take out the orifice support, and then use a 6 mm socket
and wrench or 6 mm nut driver to remove the LP orifice at
the end of the supply pipe. Replace with Natural gas
orifice.
Change the Side Sear burner orifices (if your grill is
equipped with a side sear burner)
1.Remove the screw securing the igniter and the 2 searing
side burner screws.
4. Use 6 mm socket wrench or 6 mm nut driver to remove
the orifice. Replace with the Natural gas orifice.
2. Lift the searing side burner out of the grill.
3. Locate the Natural gas orifice to the end of the valve.
IMPORTANT: Check that the orifice is properly installed inside
of supply pipe.
6. Reinstall the spider guard, access cover, and wind baffle.
IMPORTANT: Check that the orifice is properly installed inside
of valve.
6
Conversion from Liquid Propane (LP) to Natural Gas (NG)

5. Reinstall the searing side burner. Make sure that the
igniter is out of the way to allow proper positioning of
burner. Use Phillips screwdriver to attach the mounting
screws.
6. Use Phillips screwdriver to reattach the igniter and
searing side burner plate.
7. Reinstall searing side burner cover. Use Phillips
screwdriver to attach mounting screws.
7
Change the Main Sear Burner Orifices (If your grill is
equipped with a main sear burner)
1.Remove the screw securing the igniter and the 2 sear burner
screws.
2. Lift out the sear burner.
3. Locate the Natural gas orifice at the end of the valve.
4. Use 6 mm socket wrench or 6 mm nut driver to remove the
orifice. Replace with the Natural gas orifice.
IMPORTANT: Check that the orifice is properly installed
inside of the burner opening.
5. Reinstall the sear burner. Make sure that the igniter is out
of the way to allow proper positioning of burner. Use
Phillips screwdriver to attach the mounting screws.
6. Use Phillips screwdriver to reattach the igniter and sear
burner plate.
7. Reinstall sear burner cover. Use Phillips screwdriver to
attach mounting screws.
Conversion from Liquid Propane (LP) to Natural Gas (NG)

Change the Oven Burner Orifice (if your grill is
equipped with a oven burner)
1.Use a Phillips screwdriver to remove the access panel from
the rear of the oven.
2.Grasp brass elbow with vice grip or pliers and remove from
end of gas supply valve.
3.Use 10mm socket wrench 10mm nut driver to remove the
LP orifice at the end of the supply pipe. Replace with the
Natural gas orifice.
IMPORTANT: Check that the orifice is properly installed
inside of the burner opening.
4.Reinstall the access panel
5.Open the manual shutoff valve in the gas supply line. The
valve is open when the handle is parallel to the gas pipe.
6.Test all connections using an approved noncorrosive leak-
detection solution. Bubbles will show a leak. Correct any leak
found.
Adjust High Flame Setting Screw
When converting from LP to Natural gas, you will need to
adjust the high flame setting screw for ideal burner flame
height.
1.Remove each control knob for the main burners and side
burner by loosening the socket head screw with the Allen key.
2. Use a flat-blade screwdriver to turn the high flame setscrew
counterclockwise approximate 90 degree.
Record Conversion
1.The appliance nameplate is located inside the grill cabinet
on the left-hand cabinet side. With a permanent marker,
check the box next to ‘’Natural gas’’ and mark through ‘’LP -
Propane.’’
In the last page of the Use and Care Guide, write ‘’Converted
to Natural Gas.’’ Also record the conversion date and the
technician/company that performed the conversion.
NOTE: Place LP gas parts in plastic parts bag for future use
and keep with pack containing literature.
3. Check that burner operates at the new high flame setting. It
may be necessary to adjust the screw setting slightly more to
get the ideal burner flame height.
Conversion from Liquid Propane (LP) to Natural Gas (NG)
8

Check and Adjust Burner
9
The burners are tested and factory-set for most efficient
operation. However, variations in gas supply and other
conditions may make minor adjustments to air shutter or
low flame setting necessary.
It is recommended that a qualified technician make burner
adjustments.
NOTE: The rotisserie burner cannot be adjusted.
Checking and adjusting the grill burner flames requires
removing the grates and flame tamers.
Burner Flame Characteristics
The flames of the grill burners and side burners (on some
models) should be blue and stable with no excessive noise
or lifting (LP gas flames will have a slightly yellow tip). A
yellow flame indicates not enough air. If flame is noisy or lifts
away from the burner, there is too much air. Some yellow
tips on flames when the burner is set to HIGH setting are
acceptable as long as no carbon or soot deposits appear.
The flames should be approximately 1" (2.5 cm)
high.
Check that burners are not blocked by dirt, debris, insect
nests,
etc., and clean burners as necessary. If they are clean, adjust
air
shutters as needed.
IMPORTANT: Before adjusting air shutters, let burners cool
completely.
To Adjust:
1. Light grill using information in the “Outdoor Grill Use”
section.
2.Observe flame to determine which burners need adjustment
and how the flame is acting.
3.Turn off the valve and wait until grill and burners cool
completely.
4. Remove grill grates and flame tamers.
5. Remove the screw and cotter clip that hold the burner in
place. Remove gas burner from the grill.
6. If flame is yellow (not enough air), turn air shutter adjustment
screw counter clockwise.If flame is noisy or lifts away from
burner (too much air), turn air shutter adjustment screw
clockwise.
Adjustment should be made clockwise or
counterclockwise
from 1/8" (3.2 mm) to 1/4" (6.4 mm).
7. Replace gas burner, flame tamers and grates.
8. Light grill using information in the “Outdoor Grill Use”
section.
See “Burner Flame Characteristics.”
Low Flame Adjustment
If flame goes out on the “LOW” setting, the low flame
setting must be adjusted.
1.Turn off the valve and wait until grill and burners are
cool.
2.Remove grill grates and flame tamers.
3.Light grill using information in the “Outdoor Grill Use”
section.
4.Turn burner to its lowest setting.
5. Pull out each control knob for the main burner and
side burner.
6.Hold valve stem with pliers and insert a small flat-
blade screwdriver into the shaft.
7.Watch the flame and slowly turn the screwdriver
counterclockwise.
8.Adjust flame to minimum stable flame.
9. Replace the control knob and turn off the burner.
10. Repeat steps 3 through 9 for each burner if needed.
11. Replace the flame tamers and grates after the burners
have cooled.

Nexgrill warrants to the original consumer-purchaser only that this product (Model #710-0002) shall be free from
defects in workmanship and materials after cor
rect assembly and under normal and reasonable home use for the
periods indicated below beginning on the date of purchase. The manufacturer reserves the right to require
photographic evidence of damage, or that defective parts be returned, postage and or freight pre-paid by the consumer,
for review and examination.
ALL PARTS: 1 Year LIMITED warranty
Upon consumer supplying proof of purchase as provided herein, Manufacturer will repair or replace the parts which are
proven defective during the applicable war
ranty period. Parts required to complete such repair or replacement shall be
free of charge to you except for shipping costs, as long as the purchaser is within the war
ranty period from the original
date of purchase. The original consumer-purchaser will be responsible for all shipping charges of parts replaced under
the terms of this limited warranty. This limited warranty is applicable in the United States only, is only available to the
original owner of the product and is not transferable. Manufacturer requires reasonable proof of your date of purchase.
Therefore, you should retain your sales receipt and/or invoice. If the unit was received as a gift, please ask the gift-giver
to send in the receipt on your behalf, to the below address. Defective or missing parts subject to this limited war
ranty
will not be replaced without registration or proof of purchase. This limited warranty applies to the functionality of the
product ONLY and does not cover cosmetic issues such as scratches, dents, cor
rosions or discoloring by heat,
abrasive and chemical cleaners or any tools used in the assembly or installation of the appliance, surface rust, or the
discoloration of stainless steel surfaces. Surface rust, cor
rosion, or powder paint chipping on metal parts that does not
affect the structural integrity of the product is not considered a defect in workmanship or material and is not covered by
this warranty. This limited war
ranty will not reimburse you for the cost of any inconvenience, food, personal injury or
property damage. If an original replacement part is not available, a comparable replacement part will be sent. You will
be responsible for all shipping charges of parts replaced under the terms of this limited war
ranty.
ITEMS MANUFACTURER WILL NOT PAY FOR:
•Service calls to your home.
•Repairs when your product is used for other than normal, single-family household or residential use.
•Damage resulting from accident, alteration, misuse, lack of maintenance/cleaning, abuse, fire, flood, acts of God,
improper installation, and installation not in accordance with electrical or plumbing codes or use of products not
approved by the manufacturer.
•Any food loss due to product failures.
•Replacement parts or repair labor costs for units operated outside the United States or Canada.
•Pickup and delivery of your product.
•Postage fees or photo processing fees for photos sent in as documentation.
•Repairs to parts or systems resulting from unauthorized modifications made to the product.
•The removal and/or reinstallation of your product.
•Shipping cost, standard or expedited, for warranty/non warranty and replacement parts.
DISCLAIMER OF IMPLIED WARRANTIES; LIMITATION OF REMEDIES
Repair or replacement of defective parts is your exclusive remedy under the terms of this limited warranty.
Manufacturer will not be responsible for any consequential or incidental damages arising from the breach of either this
limited war
ranty or any applicable implied warranty, or for failure or damage resulting from acts of God, improper care
and maintenance, grease fire, accident, alteration, replacement of parts by anyone other than Manufacturer, misuse,
transportation, commercial use, abuse, hostile environments (inclement weather, acts of nature, animal tampering),
improper installation or installation not in accordance with local codes or printed manufacturer instructions.
THIS LIMITED WARRANTY IS THE SOLE EXPRESS WARRANTY GIVEN BY THE MANUFACTURER. NO
PRODUCT PERFORMANCE SPECIFICATION OR DESCRIPTION WHEREVER APPEARING IS WARRANTED BY
MANUFACTURER EXCEPT TO THE EXTENT SET FORTH IN THIS LIMITED WARRANTY. ANY IMPLIED
WARRANTY PROTECTION ARISING UNDER THE LAWS OF ANY STATE, INCLUDING IMPLIED WARRANTY OF
MERCHANTABILITY OR FITNESS FOR A PARTICULAR PURPOSE OR USE, IS HEREBY LIMITED IN DURATION
TO THE DURATION OF THIS LIMITED WARRANTY.
Limited Warranty
10

5 /2011
Printed in China
710-0002
Neither dealers nor the retail establishment selling this product has any authority to make any additional warranties or
to promise remedies in addition to or inconsistent with those stated above. Manufacturer's maximum liability, in any
event, shall not exceed the documented purchase price of the product paid by the original consumer. This war
ranty
only applies to units purchased from an authorized retailer and or re-seller.
NOTE: Some states do not allow an
exclusion or limitation of incidental or consequential damages, so some of the above limitations or exclusions may not
apply to you; this limited war
ranty gives you specific legal rights as set for herein. You may also have other rights
which vary from state to state.
If you wish to obtain performance of any obligation under this limited warranty, you should write to:
Nexgrill Customer Relations
5270 Edison Avenue.,
Chino, CA 91710
All consumer returns, parts orders, general questions, and troubleshooting
assistance can be acquired by calling 1-800-913-8999
.
/