Page is loading ...

PART NO. 9379143059
English
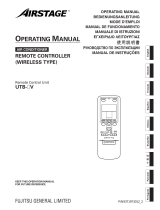
UTY-LNHGU
OPERATING MANUAL
WIRELESS REMOTE CONTROLLER
Keep this manual for future reference.
TM
9379143059-01_OM.indb 19379143059-01_OM.indb 1 10/18/2017 09:40:2310/18/2017 09:40:23

En-1
OPERATING MANUAL
PART NO. 9379143059
WIRELESS REMOTE CONTROLLER
CONTENTS
SAFETY PRECAUTIONS ...............................................1
FEATURES AND FUNCTIONS ......................................1
NAME OF PARTS ..........................................................2
PREPARATION ..............................................................2
OPERATION ...................................................................3
TIMER OPERATION ......................................................4
SLEEP TIMER OPERATION ..........................................5
MANUAL AUTO OPERATION ........................................5
ECONOMY OPERATION ...............................................5
FILTER RESET ..............................................................6
SELECTING THE REMOTE CONTROL UNIT
CUSTOM CODE .............................................................6
OPERATING TIPS ..........................................................6
TROUBLESHOOTING ...................................................8
SPECIFICATIONS .......................................................... 8
SAFETY PRECAUTIONS
• The “SAFETY PRECAUTIONS” indicated in this operating
manual contain important information pertaining to your safety.
Be sure to observe them.
• For details of the operation methods, refer to this manual.
• Request the user to keep the manual on hand for future use,
such as for relocating or repairing the unit.
WARNING
This mark indicates procedures which, if
improperly performed, might lead to the
death or serious injury of the user.
This product contains no user-serviceable parts. Always consult
authorized service personnel for repairs.
When moving, consult authorized service personnel for discon-
nection and installation of this product.
If children may approach the unit, take preventive measures so
that they cannot reach the unit.
Do not repair or modify by yourself. It may cause failure or
accident.
Stop operation immediately when indication lamp of indoor unit
blinks, or abnormal situation is displayed. Continuous operation
may cause fi re or failure.
Do not use fl ammable gases near the unit. It may cause a fi re
from leaking gas.
CAUTION
This mark indicates procedures which,
if improperly performed, might possibly
result in personal harm to the user or
damage to property.
Do not disassemble the unit. Contact with internal circuitry may
cause fi re or malfunction.
Do not drop the unit. Doing so may cause the case to crack and
may disable control.
Do not press any button using a sharp object. Doing so may
cause an electric shock or a malfunction.
Do not wipe the unit with benzine, thinner or chemical cloths
etc. Doing so may cause discoloration or malfunction. If the unit
becomes extremely dirty, dampen a cloth with water-diluted
neutral detergent and wipe the unit with it.
Do not place electrical devices within 1 m of this product. It may
cause malfunction or failure.
Do not use fi re near this product or place a heating apparatus
nearby. It may cause malfunction.
Do not expose this product directly to water. Doing so will cause
trouble, electric shock, or heating.
Do not set fl ower vases or water containers on top of the unit.
It may cause heating, fi re or electric shock.
Do not touch any button with wet hands. Doing so may cause
an electric shock or malfunction.
Dispose of the packing materials safely. Tear and dispose of
the plastic packing bags so that children cannot play with them.
There is the danger of suffocation if children play with the original
plastic bags.
Do not spray insecticide or other fl ammable sprays. Do not
place fl ammable sprays near the unit or spray directly at the
unit. Doing so may result in fi re or explosion.
Do not use in applications involving the storage of foods, plants
or animals, precision equipment, or art works.
Do not wash with water. Doing so may cause an electric shock
or malfunction.
Do not use in any special environment. Using in any place
exposed to oil (including machine oil), steam and sulfuric gas
may deteriorate the performance signifi cantly or give damage
to the component parts.
FEATURES AND FUNCTIONS
AUTOMATIC OPERATION
● COOLING MODEL
Merely press the “START/STOP” button, and the unit will begin
automatic operation in the Cooling or Dry mode as appropri-
ate, in accordance with the temperature setting and the actual
temperature of the room.
● HEAT PUMP MODEL
Merely press the “START/STOP” button, and the unit will begin
automatic operation in either the Heating, Cooling or Monitor
modes as appropriate, in accordance with the temperature
setting and the actual temperature of the room.
SLEEP TIMER
● COOLING MODEL
When the “SLEEP” button is pressed during Cooling or Dry
mode, the temperature setting is gradually raised during the
period of operation. When the set time is reached, the unit
automatically turns off.
● HEAT PUMP MODEL
When the “SLEEP” button is pressed during Heating mode,
the air conditioner’s temperature setting is gradually lowered
during the period of operation; during Cooling or Dry mode,
the temperature setting is gradually raised during the period
of operation. When the set time is reached, the unit automati-
cally turns off.
WIRELESS REMOTE CONTROL UNIT
The WIRELESS REMOTE CONTROL UNIT allows convenient
control of air conditioner operation.
9379143059-01_OM.indb 19379143059-01_OM.indb 1 10/18/2017 09:40:2410/18/2017 09:40:24

En-2
NAME OF PARTS
Remote control unit
F
1
2
7
4
5
6
8
9
0
A
CD
3
E
B
Display
1 “MODE” button
2 “ECONOMY” button
3 “
SET TEMP. / SET
TEMP.
” button
4 “FILTER RESET” button
5 “SLEEP” button
6 “FAN” button
7 “START/STOP” button
8 “ SET” button (Vertical)
9 “ SET” button (Horizon-
tal)
0 “ SWING” button
A “TIMER MODE” button
B “TIMER / TIMER ”
button
C “CLOCK ADJUST” button
D “RESET” button
E “TEST RUN” button
This is used during test run. For
details, refer to the installation
manual.
F Signal Transmitter
Display panel
L
N
O
M
K
H
G
I
J
To facilitate explanation, the accompanying illustration has
been drawn to show all possible indicators; in actual operation,
however, the display will only show those indicators appropriate
to the current operation.
G Temperature SET Indicator
H ECONOMY Indicator
I Operating Mode Indicator
J SLEEP Indicator
K Transmit Indicator
L Fan Speed Indicator
M SWING Indicator
N Timer Mode Indicator
O Clock Indicator
Notes of the operation
Functions of START/STOP, MODE, SET TEMP. and TIMER
SET may be restricted depending on the operating state of
the indoor unit.
In this case, when the signal of remote control unit is received,
it is notifi ed by the blinking of TIMER lamp.
PREPARATION
Load Batteries (AAA/LR03/R03 x 2)
1
Press and slide the battery compartment
lid on the reverse side to open it.
Slide in the direction of the arrow
while pressing the
mark.
2
Insert batteries.
Be sure to align the battery polarities ( ) correctly.
3
Close the battery compartment lid.
4
Press the “RESET” button.
Use the tip of a ball-point pen or other small object to press
the button.
Set the Current time
1
Press the “CLOCK ADJUST” button.
Use the tip of a ball-point pen or other small object to press
the button.
2
Use the “TIMER / TIMER ” button
to adjust the clock to the current time.
button: Press to advance the time.
button: Press to reverse the time.
(Each time the buttons are pressed, the time will be ad-
vanced/reversed in 1 minute increments; hold the buttons
depressed to change the time quickly in 10 minute incre-
ments.)
3
Press the “CLOCK ADJUST” button
again.
This completes the time setting and starts the clock.
To Use the Remote Control Unit
● The Remote Control Unit must be pointed at remote control
signal receiver to operate correctly.
● Operating Range: About 5 meters.
● When a signal is properly received by the receiver unit control
panel, some lamp will be fl ashed.
● If no lamp is fl ashed, press the Remote Control Unit button
again.
WARNING
Never allow the alkaline batteries to short-circuit. Never disassemble,
heat or place them in fi re.
● Doing so can cause the strong alkaline liquid to leak and possibly
enter your eyes or cause the batteries to explode or heat up, resulting
in personal injuries, burning or mechanical breakdowns.
● If strong alkaline liquid comes in contact with your skin or clothes,
wash it off with clean water. If it gets in to your eyes, wash them with
clean water and consult a doctor immediately.
9379143059-01_OM.indb 29379143059-01_OM.indb 2 10/18/2017 09:40:2410/18/2017 09:40:24

En-3
CAUTION
Incorrect use of batteries can cause liquid leakage, explosion or heating
and may result in malfunction or personal injury. Adhere to the following.
● Do not recharge the batteries.
● Insert the batteries in the correct direction.
● Do not mix a new battery with an old battery or batteries of different
types.
● Remove the batteries immediately when they have run out.
Take care to prevent infants from accidentally swallowing batteries.
When not using the unit for an extended period, remove the batteries
to avoid possible leakage and damage to the unit.
Dead batteries should be removed immediately and disposed of
properly, either in a battery collection receptacle or to the appropriate
authority.
OPERATION
To Select Mode Operation
1
Press the “START/STOP” button.
The receiver unit control panel’s OPERATION Indicator
Lamp (green) will light.
The air conditioner will start operating.
2
Press the “MODE” button to select the
desired mode.
Each time the button is pressed, the
mode will change in the following
order.
X
W
X X
W
AUTO
*1
COOL DRY
FAN
*2
HEAT
About 3 seconds later, the entire
display will reappear.
*1 “AUTO” can be set only in the
indoor unit assigned to the repre-
sentative indoor unit.
*2 “FAN” cannot set to heat pump
type.
To Set the Room temperature
Press the “ SET TEMP. / SET TEMP. ”
button.
button: Press to raise the temperature setting.
button: Press to lower the temperature setting.
● Temperature setting range:
AUTO ...............................20-30 °C
Cooling/Dry ......................20-30 °C
Heating ............................16-30 °C
The temperature setting cannot be used
to set room temperature during the FAN
mode (the temperature will not appear on
the Remote Control Unit’s Display).
About 3 seconds later, the entire display
will reappear.
The temperature setting should be considered a standard value,
and may differ somewhat from the actual room temperature.
Example: When
set to COOL.
Example: When
set to 26 °C.
To Set the Fan Speed
Press the “FAN” button.
Each time the button is pressed, the fan
speed changes in the following order:
AUTO HIGH
MEDLOW
X
W
X
W
About 3 seconds later, the entire display will
reappear.
When set to AUTO:
Heating:
Fan operates so as to optimally circulate
warmed air. However, the fan will operate
at very low speed when the temperature
of the air issued from the indoor unit is
low.
Cooling:
As the room temperature approaches that of the temperature
setting, the fan speed becomes slower.
Fan:
The fan runs at the low fan speed.
The fan will operate at a very low setting during Monitor operation
and at the start of the Heating mode.
To Stop Operation
Press the “START/STOP” button.
The OPERATION Indicator Lamp (green) will go out.
About AUTO CHANGEOVER Operation
AUTO:
● When AUTO CHANGEOVER operation fi rst selected, the
fan will ope-rate at very low speed for about 1 minute, during
which time the unit detects the room conditions and selects
the proper operating mode.
Room temperature is higher than the defi ned temperature
in temperature setting → Cooling mode or Dry mode
Room temperature is close to the defi ned temperature in
temperature setting → Determined by outdoor temperature
Room temperature is lower than the defi ned temperature in
temperature setting → Heating mode
Defi ned temper-
ature in tem-
perature setting
Cooling or Dry
Determined by out-
door temperature
Heating
● When the air conditioner has adjusted your room’s tempera-
ture to near the temperature setting, it will begin monitor
operation. In the monitor operation mode, the fan will operate
at low speed. If the room temperature subsequently chang-
es, the air conditioner will once again select the appropriate
operation (Heating, Cooling) to adjust the temperature to the
value set in the indoor unit.
(The monitor operation range is ±2 °C relative to the tem-
perature setting.)
● If the mode automatically selected by the unit is not what you
wish, select 1 of the mode operation (HEAT, COOL, DRY,
FAN).
Example: When
set to AUTO.
9379143059-01_OM.indb 39379143059-01_OM.indb 3 10/18/2017 09:40:2510/18/2017 09:40:25

En-4
About Mode Operation
Heating:
● Use to warm your room.
● When Heating mode is selected, the air conditioner will
operate at very low fan speed for about 3 to 5 minutes, after
which it will switch to the selected fan setting. This period of
time is provided to allow the indoor unit to warm up before
beginning full operation.
● When the room temperature is very low, frost may form on
the outside unit, and its performance may be reduced. In or-
der to remove such frost, the unit will automatically enter the
defrost cycle from time to time. During Automatic Defrosting
operation, the OPERATION Indicator Lamp (green) will fl ash,
and the heat operation will be interrupted.
● After the start of heating operation, it takes some time before
the room gets warmer.
Cooling:
● Use to cool your room.
Dry:
● Use for gently cooling while dehumidifying your room.
● You cannot heat the room during Dry mode.
● During Dry mode, the unit will operate at low speed; in order
to adjust room humidity, the indoor unit’s fan may stop from
time to time. Also, the fan may operate at very low speed
when adjusting room humidity.
● The fan speed cannot be changed manually when Dry mode
has been selected.
Fan:
● Use to circulate the air throughout your room.
During Heating mode:
Set the temperature to a temperature setting that is higher than the
current room temperature. The Heating mode will not operate if the
preset temperature is set lower than the actual room temperature.
During Cooling/Dry mode:
Set the temperature to a temperature setting that is lower than the cur-
rent room temperature. The Cooling and Dry modes will not operate if
the preset temperature is set higher than the actual room temperature
(in Cooling mode, the fan alone will operate).
During Fan mode:
You can not use the unit to heat and cool your room.
TIMER OPERATION
Before using the timer function, be sure that the Remote Control
Unit is set to the correct current time (See page 2).
To Use the ON timer or OFF timer
1
Press the “START/STOP” button
(If the unit is already operating, proceed
to step 2).
The receiver unit control panel’s OPERATION Indicator
Lamp (green) will light.
2
Press the “TIMER MODE” button to se-
lect the OFF timer or ON timer operation.
Each time the button is pressed the timer function changes
in the following order:
XXX
W
CANCEL OFF ON
PROGRAM
(OFF → ON, OFF ← ON)
The receiver unit control panel’s TIMER Indicator Lamp
(orange) will light.
3
Use the “TIMER / TIMER ” button to
adjust the desired OFF time or ON time.
Set the time while the time display is fl ashing (the fl ashing
will continue for about 5 seconds).
button: Press to advance the time.
button: Press to reverse the time.
About 5 seconds later, the entire display will reappear.
To Cancel the Timer
Use the “TIMER MODE” button to select “CANCEL”.
The air conditioner will return to normal operation.
To Change the Timer Settings
Perform steps 2 and 3.
To Stop Air Conditioner Operation while the Timer is Op-
erating
Press the “START/STOP” button.
To Change Operating Conditions
If you wish to change operating conditions (Mode, Fan Speed, Tempera-
ture Setting), after making the timer setting wait until the entire display
reappears, then press the appropriate buttons to change the operating
condition desired.
To Use the Program timer
1
Press the “START/STOP” button
(If the unit is already operating, proceed
to step 2).
The receiver unit control panel’s OPERATION Indicator
Lamp (green) will light.
2
Set the desired times for OFF timer and
ON timer.
See the section “To Use the ON timer or OFF timer” to set
the desired mode and times.
About 5 seconds later, the entire display will reappear.
The receiver unit control panel’s TIMER Indicator Lamp
(orange) will light.
3
Press the “TIMER MODE” button to se-
lect the PROGRAM timer operation (OFF
ON or OFF ON will display).
The display will alternately show “OFF timer” and “ON
timer”, then change to show the time setting for the opera-
tion to occur fi rst.
● The program timer will begin operation. (If the ON timer
has been selected to operate fi rst, the unit will stop
operating at this point.)
About 5 seconds later, the entire display will reappear.
To Cancel the Timer
Use the “TIMER MODE” button to select “CANCEL”.
The air conditioner will return to normal operation.
To Change the Timer Settings
1. Follow the instructions given in the section “To Use the ON Timer or
OFF Timer” to select the timer setting you wish to change.
2. Press the “TIMER MODE” button to select either OFF ON
or OFF ON.
To Stop Air Conditioner Operation while the Timer is Op-
erating
Press the “START/STOP” button.
9379143059-01_OM.indb 49379143059-01_OM.indb 4 10/18/2017 09:40:2510/18/2017 09:40:25

En-5
To Change Operating Conditions
If you wish to change operating conditions (Mode, Fan Speed, Tempera-
ture Setting), after making the timer setting wait until the entire display
reappears, then press the appropriate buttons to change the operating
condition desired.
About the Program timer
● The program timer allows you to integrate OFF timer and ON
timer operations in a single sequence. The sequence can
involve 1 transition from OFF timer to ON timer, or from ON
timer to OFF timer, within a 24 hour period.
● The fi rst timer function to operate will be the 1 set nearest to the
current time. The order of operation is indicated by the arrow
in the Remote Control Unit’s Display (OFF → ON, or OFF ←
ON).
● One example of Program timer use might be to have the air
conditioner automatically stop (OFF timer) after you go to
sleep, then start (ON timer) automatically in the morning before
you arise.
SLEEP TIMER OPERATION
Unlike other timer functions, the SLEEP timer is used to set the
length of time until air conditioner operate is stopped.
To Use the SLEEP Timer
While the air conditioner is operating or
stopped, press the “SLEEP” button.
The receiver unit control panel’s OPERATION Indicator Lamp
(green) lights and the TIMER Indicator Lamp (orange) light.
To Change the Timer Settings
Press the “SLEEP” button once again and
set the time using the “TIMER
/ TIMER
” button.
button: Press to advance the time.
button: Press to reverse the time.
About 5 seconds later, the entire display will reappear.
To Cancel the Timer
Use the “TIMER MODE” button to select “CANCEL”.
The air conditioner will return to normal operation.
To Stop the Air Conditioner During Timer Operation:
Press the “START/STOP” button.
About the SLEEP Timer
To prevent excessive warming or cooling during sleep, the SLEEP
timer function automatically modifi es the temperature setting
in accordance with the set time setting. When the set time has
elapsed, the air conditioner completely stops.
Based on temperature set in remote control unit, temperature of
indoor unit varies little by little. However in this case, temperature
indication of remote control unit does not vary as it continues to
indicate the temperature when SLEEP Timer was set.
During Heating operation (Indoor unit):
When the SLEEP timer is set,
the temperature setting is auto-
matically lowered 1 °C every 30
minutes. When the preset tem-
perature has been lowered a total
of 4 °C, the temperature setting at
that time is maintained until the set
time has elapsed, at which time
the air conditioner automatically
turns off.
During Cooling/Dry operation (Indoor unit):
When the SLEEP timer is set,
the temperature setting is au-
tomatically raised 1 °C every 1
hour. When the preset tempera-
ture has been raised a total of
2 °C, the temperature setting at
that time is maintained until the
set time has elapsed, at which time the air conditioner automati-
cally turns off.
MANUAL AUTO OPERATION
Use the MANUAL AUTO operation in the event the remote control
unit is lost or otherwise unavailable.
How To Use the Main Unit Controls
Press the “MANUAL AUTO” button on the
receiver unit control panel.
To stop operation, press the “MANUAL AUTO” button once again.
● When the air conditioner is operated with the controls on the receiver
unit, it will operate under the same mode as the AUTO mode selected
on the remote control unit.
However, about Multi-type Air conditioner, the Heat pump model will
follow the operating mode of the other indoor unit.
● The fan speed selected will be “AUTO” and the temperature setting
will be 24 °C.
ECONOMY OPERATION
Begin Air Conditioner operation before performing this procedure.
To Use the ECONOMY Operation
Press the “ECONOMY” button.
“ECO” appears on the Remote Control Unit display.
Economy operation begins.
To Stop the ECONOMY Operation
Press the “ECONOMY” button again.
“ECO” disappears from the Remote Control Unit display.
Normal operation begins.
About the ECONOMY Operation
Economy operation can be set by remote controller.
The temperature setting is offset automatically over a certain
period of time.
Based on temperature set in remote control unit, temperature of
indoor unit varies little by little. However in this case, temperature
indication of remote control unit does not vary as it continues to
indicate the temperature when ECONOMY Operation was set.
SLEEP timer setting
2 °C
3 °C
4 °C
30
minutes
1 °C
1 hour
1 hour
30 minutes
Set time
Set time
1 hour
1 °C
2 °C
SLEEP timer setting
9379143059-01_OM.indb 59379143059-01_OM.indb 5 10/18/2017 09:40:2510/18/2017 09:40:25

En-6
Save temperature
Cooling set temperature
Heating set temperature
Save temperature
30 60 900
°C
1
1
2
2
3
4
0
0
Min.
ECONOMY operation
Start
Cooling
Operation
Heating
Operation
FILTER RESET
When cleaning the air fi lter of the indoor unit, reset the display
that indicates the schedule for fi lter cleaning.
To Use the FILTER RESET Operation
Press the “FILTER RESET” button.
SELECTING THE REMOTE CON-
TROL UNIT CUSTOM CODE
When 2 or more air conditioners are installed in a room and the
remote control unit is operating an air conditioner other than
the one you wish to set, change the custom code of the remote
control unit to operate only the air conditioner you wish to set (4
selections possible).
When 2 or more air conditioners are installed in a room, please
contact authorized service personnel to set the individual air
conditioner custom codes.
Selecting the Remote Control Unit
Custom Code
Use the following steps to select the custom code of the remote
control unit. (Note that the air conditioner cannot receive a signal
if the air conditioner has not been set for the custom code.)
1
Press the “START/STOP” button until
only the clock is displayed on the remote
control unit display.
2
Press the “MODE” button
for at least 5 seconds to
display the current custom
code (initially set to ).
3
Press the “ SET TEMP.
/ SET TEMP. ” button to
change the custom code
between . Match
the code on the display to the air condi-
tioner custom code.
4
Press the “MODE” button again to return
to the clock display. The custom code
will be changed.
If no buttons are pressed within 30 seconds after the custom
code is displayed, the system returns to the original clock dis-
play. In this case, start again from step 1.
The air conditioner custom code is set to A prior to shipment.
Contact authorized service personnel to change the custom code.
The remote control unit resets to custom code A when the
batteries in the remote control unit are replaced. If you use a
custom code other than custom code A, reset the custom code
after replacing the batteries.
If you do not know the air conditioner custom code setting, try
each of the custom codes (
) until you fi nd the code
which operates the air conditioner.
OPERATING TIPS
● Remote control unit may not be available depending on
the functions, while local operation with a standard remote
control unit, including a wireless remote control unit, is
prohibited.
● Display of operating condition on the indoor unit and this
product may differ while indoor unit is operated with the RC
Prohibition control.
Instructions relating to heating (*) are applicable only to
“HEAT PUMP MODEL”.
*Heating Performance
● This air conditioner operates on the heat-pump principle,
absorbing heat from outdoor air and transferring that heat
indoors. As a result, the operating performance is reduced as
outdoor air temperature drops. If you feel that insuffi cient heat-
ing performance is being produced, we recommend you use
this air conditioner in conjunction with another kind of heating
appliance.
● Heat-pump air conditioners heat your entire room by recirculat-
ing air throughout the room, with the result that some time may
be required after fi rst starting the air conditioner until the room
is heated.
* When Indoor and Outdoor Tempera-
ture are High
● When both indoor and outdoor temperatures are high during
use of the heating mode, the outdoor unit’s fan may stop at
times.
Fan speed: AUTO
*Heating:
The fan will operate at very low speed when the temperature
of the air issued from the indoor unit is low.
Cooling:
As the room temperature approaches that of the set tempera-
ture, the fan speed becomes slower.
Dry:
The fan runs at the low fan speed.
9379143059-01_OM.indb 69379143059-01_OM.indb 6 10/18/2017 09:40:2610/18/2017 09:40:26

En-7
* Microcomputer-controlled Automatic
Defrosting
● When using the Heating mode under conditions of low outdoor
temperature and high humidity, frost may form on the outdoor
unit, resulting in reduced operating performance.
In order to prevent this kind of reduced performance, this
product is equipped with a Microcomputer-controlled Automatic
Defrosting function. If frost forms, the air conditioner will tem-
porarily stop, and the defrosting circuit will operate briefl y (for
about 4 to 15 minutes).
During Automatic Defrosting operation, the OPERATION indica-
tor lamp (green) will fl ash.
Low Ambient Cooling
● When the outdoor temperature drops, the outdoor unit’s fans
may switch to Low Speed.
*Hot start (for heating)
● The indoor unit prevents cold drafts when heating operation
begins.
The indoor unit fan will not operate or it will operate at a very low
speed until the heat exchanger reaches the set temperature.
Mode operation: AUTO
COOLING MODEL
● When the room temperature is higher than the defi ned tem-
perature in temperature setting, the mode will switch between
Cooling and Drying.
HEAT PUMP MODEL
Auto changeover function
● When AUTO CHANGEOVER is selected, the air conditioner
selects the appropriate operation mode (Cooling or Heating)
according to your room’s present temperature.
● When AUTO CHANGEOVER is fi rst selected, the fan will
operate at a very low speed for about 1 minute while the unit
determines the current conditions of the room and selects the
proper operation mode.
Room temperature is higher than the defi ned temperature in
temperature setting → Cooling mode or Dry mode
Room temperature is close to the defi ned temperature in
temperature setting → Determined by outdoor temperature
Room temperature is lower than the defi ned temperature in
temperature setting → Heating mode
● During the Drying mode operation, the FAN setting should be
switched to LOW for a gently cooling effect during which the
fan may temporarily stop rotating.
Defi ned temper-
ature in tem-
perature setting
Cooling or Dry
Determined by out-
door temperature
Heating
● When the room temperature is near the temperature setting,
the air conditioner will begin monitor operation. In the monitor
operation mode, the fan will operate at a very low speed. If the
room temperature subsequently changes, the air conditioner
will once again select the appropriate operation (Heating or
Cooling) to adjust the temperature to the value set in the in-
door unit. (The monitor operation range is ±2 °C relative to the
temperature setting.)
About Mode Operation
*Heating:
● Use to warm your room.
● When Heating mode is selected, the air conditioner will
operate at very low fan speed for about 3 to 5 minutes, after
which it will switch to the selected fan setting. This period of
time is provided to allow the indoor unit to warm up before
beginning full operation.
● When the room temperature is very low, frost may form on the
outside unit, and its performance may be reduced. In order
to remove such frost, the unit will automatically enter the
defrost cycle from time to time. During Automatic Defrosting
operation, the OPERATION indicator Lamp (green) will fl ash,
and the heat operation will be interrupted.
● After the start of heating operation, it takes sometime before
the room gets warmer.
Cooling:
● Use to cool your room.
Dry:
● Use for gently cooling while dehumidifying your room.
● You cannot heat the room during Dry mode.
● During Dry mode, the unit will operate at low speed; in order
to adjust room humidity, the indoor unit’s fan may stop from
time to time. Also, the fan may operate at very low speed
when adjusting room humidity.
● The fan speed cannot be changed manually when Dry mode
has been selected.
Fan:
● Use to circulate the air throughout your room.
During Heating mode:
Set the temperature to a temperature setting that is higher than the
current room temperature. The Heating mode will not operate if the
preset temperature is set lower than the actual room temperature.
During Cooling/Dry mode:
Set the temperature to a temperature setting that is lower than the cur-
rent room temperature. The Cooling and Dry modes will not operate if
the preset temperature is set higher than the actual room temperature
(in Cooling mode, the fan alone will operate).
During Fan mode:
You can not use the unit to heat and cool your room.
AUTO Restart
In Event of Power Interruption
● Should the power supply to the air conditioner be interrupted
by a power failure, the air conditioner will restart automatically
in the previously selected mode once the power is restored.
● Should a power failure occur during TIMER operation, the timer
will be reset and the unit will begin (or stop) operating under
the new timer setting. In this event, the TIMER indicator lamp
(orange) will fl ash.
● Use of other electrical appliances (electric shaver, etc.) or
nearby use of a wireless radio transmitter may cause the air
conditioner to malfunction. In this event, temporarily disconnect
the power supply plug, reconnect it, and then use the remote
control unit to resume operation.
9379143059-01_OM.indb 79379143059-01_OM.indb 7 10/18/2017 09:40:2610/18/2017 09:40:26

En-8
TROUBLESHOOTING
Instructions relating to heating (*) are applicable only to
“HEAT PUMP MODEL”.
WARNING
In the event of a malfunction (burning smell, etc.), immediately
stop operation, disconnect the power supply plug or turn off
the circuit breaker, and consult authorized service personnel.
Merely turning off the unit’s power switch will not completely
disconnect the unit from the power source. Always be sure to
disconnect the power supply plug or turn off your circuit breaker
to ensure that power is completely off.
Before requesting service, perform the following checks:
NORMAL FUNCTION
Doesn’t operate immediately:
● If the unit is stopped and then immediately started again,
the compressor will not operate for about 3 minutes, in or-
der to prevent fuse blowouts.
● Whenever the power supply plug is disconnected and then
reconnected to a power outlet, the protection circuit will op-
erate for about 3 minutes, preventing unit operation during
that period.
Noise is heard:
● During operation and immediately after stopping the unit,
the sound of water flowing in the air conditioner’s piping
may be heard. Also, noise may be particularly noticeable for
about 2 to 3 minutes after starting operation (sound of cool-
ant fl owing).
● During operation, a slight squeaking sound may be heard.
This is the result of minute expansion and contraction of the
front cover due to temperature changes.
*● During Heating operation, a sizzling sound may be heard
occasionally. This sound is produced by the Automatic De-
frosting operation. (See page 7)
Smells:
● Some smell may be emitted from the indoor unit. This smell
is the result of room smells (furniture, tobacco, etc.) which
have been taken into the air conditioner.
Mist or steam are emitted:
● During Cooling or Dry operation, a thin mist may be seen
emitted from the indoor unit. This results from the sudden
Cooling of room air by the air emitted from the air condi-
tioner, resulting in condensation and misting.
*● During Heating operation, the outdoor unit’s fan may stop,
and steam may be seen rising from the unit. This is due to
the Automatic Defrosting operation. (See page 7)
Airfl ow is weak or stops:
*● When Heating operation is started, fan speed is temporarily
very low, to allow internal parts to warm up.
*● During Heating operation, if the room temperature rises
above the temperature setting, the fan of indoor unit starts
and stops. If you wish to warm the room further, set the pre-
set temperature to a higher setting.
*● During Heating operation, the unit will temporarily stop
operation (between 4 and 15 minutes) as the Automatic
Defrosting mode operates. During the Automatic Defrosting
operation, the OPERATION indicator lamp (green) will fl ash.
(See page 7)
● The fan may operate at very low speed during Dry opera-
tion or when the unit is monitoring the room’s temperature.
● In the monitor AUTO operation, the fan will operate at very
low speed.
Water is produced from the outdoor unit:
*● During Heating operation, water may be produced from the
outdoor unit due to the Automatic Defrosting operation. (See
page 7)
Instructions relating to heating (*) are applicable only to
“HEAT PUMP MODEL”.
CHECK ONCE MORE
Doesn’t operate at all:
● Has the circuit breaker been turned off?
● Has there been a power failure?
● Has a fuse blown out, or a circuit breaker been tripped?
Poor Cooling (or Heating) performance:
● Is the timer operating? (See page 4 to 5)
● Is the air fi lter dirty?
● Are the air conditioner’s intake grille or outlet port blocked?
● Did you adjust the room temperature settings correctly?
● Is there a window or door open?
● In the case of Cooling operation, is a window allowing bright
sunlight to enter? (Close the curtains.)
● In the case of Cooling operation, are there heating appara-
tus and computers inside the room, or are there too many
people in the room?
The unit operates differently from the remote control unit’s
setting:
● Are the remote control unit’s batteries dead? (See page 2)
● Are the remote control unit’s batteries loaded properly? (See
page 2)
Signal is not received after replacing the batteries for the
remote control unit:
● Are you using an air conditioner custom code other than
custom code A? (See page 6)
If the problem persists after performing these checks, or if you
notice burning smells, or the TIMER indicator lamp (orange) and
OPERATION indicator lamp (green) fl ashes, stop operation im-
mediately, disconnect the power supply plug, and consult with
authorized service personnel.
SPECIFICATIONS
REMOTE CONTROLLER (WIRELESS TYPE)
MODEL UTY-LNHGU
POWER DC 3 V
DIMENSIONS &
WEIGHT
HEIGHT 170 mm
WIDTH 56 mm
DEPTH 19 mm
WEIGHT 85 g (w/o batteries)
9379143059-01_OM.indb 89379143059-01_OM.indb 8 10/18/2017 09:40:2610/18/2017 09:40:26

9379143059-01_OM.indb 99379143059-01_OM.indb 9 10/18/2017 09:40:2610/18/2017 09:40:26

9379143059-01_OM.indb 109379143059-01_OM.indb 10 10/18/2017 09:40:2610/18/2017 09:40:26
/