Sharp A49CU8052EB21Y User manual

Category
LCD TVs
Type
User manual
EN
Important safety instructions
CAUTION
RISK OF ELECTRIC SHOCK
DO NOT OPEN
Please, read these safety instructions and respect
the following warnings before the appliance is
operated:
In order to prevent  re always
keep candles and other open
ames away from this product.
Television sets with 43”size screens or more must be lifted and carried by
at least two people.
This TV does not contain any parts which could be repaired by the user.
In case of afault, contact the manufacturer or the authorised service
agent. Contact with certain parts inside the TV might endanger your life.
The guarantee does not extend to faults caused by repairs carried out by
unauthorized third parties.
Do not remove the rear part of the appliance.
This appliance is designed for the receiving and reproduction of video
and sound signals. Any other use is strictly forbidden.
To disconnect the TV from mains please unplug the mains plug from the
mains socket.
If the supply cord is damaged, it must be replaced by the manufacturer,
aservice agent or similarly quali ed persons in order to avoid ahazard.
The ideal distance to watch TV is approximately  ve times longer than
the diagonal of the screen. Re ections on the screen from other light
sources can make the quality of the picture worse.
Ensure the TV has su cient ventilation and is not close to other appli-
ances and other pieces of furniture.
Ensure a minimum distance of 5 cm around the apparatus for su cient
ventilation.
Ensure that the ventilation openings are clear of items such as newspa-
pers, table-cloths, curtains, etc.
The TV set is designed to be used in amoderate climate.
Do not expose the TV to dripping or splashing liquid.
The TV set is designed exclusively for operation in adry place. When
using the TV outside, please, make sure it is protected against moisture
(rain, splashing water). Never expose to moisture.
Do not place any objects, containers  lled with liquids, such as vases,
etc. on the TV. These containers might get pushed over, which would
endanger electric safety. Place the TV exclusively on  at and stable
surfaces. Do not place any objects such as newspaper or blankets, etc.
on or under the TV.
Make sure the appliance does not stand on any power cables as they
might get damaged. Mobile phones and other devices such as WLAN
adapters, monitoring cameras with wireless signal transmission, etc.
might cause electromagnetic interference and they should not be
placed near the appliance.
Do not place the appliance near heating elements or in aplace with
direct sunlight as it has anegative e ect on cooling of the appliance.
Heat storage is dangerous and it can seriously reduce the lifetime of the
appliance. In order to ensure the safety, ask aquali ed person to remove
the dirt from the appliance.
Try to prevent damage to the mains cable or mains adapter. The appli-
ance can only be connected with the supplied mains cable/ adapter.
Storms are dangerous for all electric appliances. If the mains or aerial
wiring is struck by lightening the appliance might get damaged, even if
it is turned o . You should disconnect all the cables and connectors of
the appliance before astorm.
To clean the screen of the appliance use only adamp and soft cloth. Use
only clean water, never detergents and in no case use solvents.
Position the TV close to the wall to avoid the possibility of it falling when
pushed.
WARNING - Never place a television set in an unstable location. A televi-
sion set may fall, causing serious personal injury or death. Many injuries,
particularly to children, can be avoided by taking simple precautions
such as:
Use cabinets or stands recommended by the manufacturer of the
television set.
Only use furniture that can safely support the television set.
Ensure the television set is not overhanging the edge of the supporting
furniture.
Not place the television set on tall furniture (for example, cupboards or
bookcases) without anchoring both the furniture and the television set
to a suitable support.
Not place the television set on cloth or other materials that may be
located between the television set and supporting furniture.
Educate children about the dangers of climbing on furniture to reach the
television set or its controls.
Ensure that children do not climb or hang onto the TV.
If your existing television set is being retained and relocated, the same
considerations as above should be applied.
The instructions shown below are asafer way to set up the TV, by fixing it
to the wall and will avoid the possibility of it falling forwards and causing
injury and damage.
For this type of installation you will need afastening cord
A) Using one/both of the top wall-mounting holes and screws (the
screws are already supplied in the wall mounting holes) fasten one end
of the fastening chord/sto the TV.
B) Secure the other end of the fastening chord/sto your wall.
The software on your TV and the OSD layout can be changed without
notice.
Note: In case of electrostatic discharge (ESD) the apparatus may show
incorrect function. In such case, switch the TV o and back on. The TV
will work normally.
Warning:
Do not use TV set directly after unpacking. Wait until TV warms up to the
room temperature before using it.
Never connect any external devices to alive appliance. Switch o not
only the TV but also the devices which are being connected! Plug the
TV plug into the wall socket after connecting any external devices and
the aerial!
Always make sure there is free access to the TV mains plug.
The appliance is not designed for ause in aworkplace  tted with
monitors.
The systematic use of headphones at high volume might lead to irrevers-
ible hearing damage.
Ensure environmental disposal of this appliance and any components
including batteries. When in doubt, please, contact your local authority
for details of recycling.
While installing the appliance, do not forget that furniture surfaces are
treated with various varnishes, plastics, etc. or they might be polished.
The chemicals contained in these products might have areaction with
the TV stand. This could result in bits of the material sticking to the furni-
ture surface, which are di cult to remove, if not impossible.
The screen of your TV has been produced under top quality conditions
and was checked in detail for faulty pixels several times. Due to the tech-
nological properties of the manufacturing process, it is not possible to
eliminate the existence of asmall number of faulty points on the screen
(even with maximum care while in production). These faulty pixels are
5
not considered faults in terms of guarantee conditions, if their extent is
not greater than the boundaries de ned by DIN norm.
The manufacturer cannot be held responsible, or be liable, for customer
service-related issues related to the third party content or services. Any
questions, comments or service-related inquiries relating to the third
party content or service should be made directly to the applicable
content or service provider.
There are a variety of reasons you may be unable to access content or
services from the device unrelated to the device itself, including, but not
limited to, power failure, the Internet connection, or failure to con gure
your device correctly. Universal Media Corporation, its directors, o cers,
employees, agents, contractors and a liates shall not be liable to you
or any third party with respect to such failures or maintenance outages,
regardless of cause or whether or not it could have been avoided.
All third party content or services accessible via this device is provided to
you on an as-is” and “as available basis and Universal Media Corporation
and its a liates make no warranty or representation of any kind to you,
either express or implied, including, without limitation, any warranties
of merchantability, non-infringement,  tness for a particular purpose
or any warranties of suitability, availability, accuracy, completeness, se-
curity, title, usefulness, lack of negligence or error-free or uninterrupted
operation or use of the content or services provided to you or that the
content or services will meet your requirements or expectations.
‘Universal Media Corporation is not an agent of and assumes no
responsibility for the acts or omissions of third party content or service
providers, nor any aspect of the content or service related to such third
party providers.
In no event will ‘Universal Media Corporation and/or its a liates be
liable to you or any third party for any direct, indirect, special, incidental,
punitive, consequential or other damages, whether the theory of liability
is based on contract, tort, negligence, breach of warranty, strict liability
or otherwise and whether or not Universal Media Corporation and/or its
a liates have been advised of the possibility of such damages.
Important information regarding use of video
games, computers, captions and other  xed image
displays.
The extended use of  xed image program material can cause aperma-
nent “shadow image “ on the LCD screen (this is sometimes incorrectly
referred to as “burnout to the screen“). This shadow image is then perma-
nently visible on the screen in the background. It is irreversible damage.
You can avoid such adamage by following instructions below:
Reduce the brightness/contrast setting to aminimum viewing level.
Do not display the  xed image for along period of time. Avoid display-
ing of:
» Teletext time and charts,
» TV/DVD menu, e.g. DVD contents,
» In the„Pause“ mode (hold): Do not use this mode for along time,
e.g. while watching aDVD or avideo.
» Turn o the appliance if you are not using it.
Batteries
Observe the correct polarity when inserting the batteries.
Do not expose batteries to high temperatures and
do not place them on locations where the tempera-
ture might increase quickly, e.g. near the  re or on
the direct sunshine.
Do not expose batteries to excessive radiant heat,
do not throw them into the  re, do not disassemble
them and do not try to recharge un-rechargeable
batteries. They could leak or explode.
» Never use di erent batteries together or mix
new and old ones.
» Dispose of batteries in an environmentally friendly way.
» Most of the EU countries regulate the disposal of batteries by law.
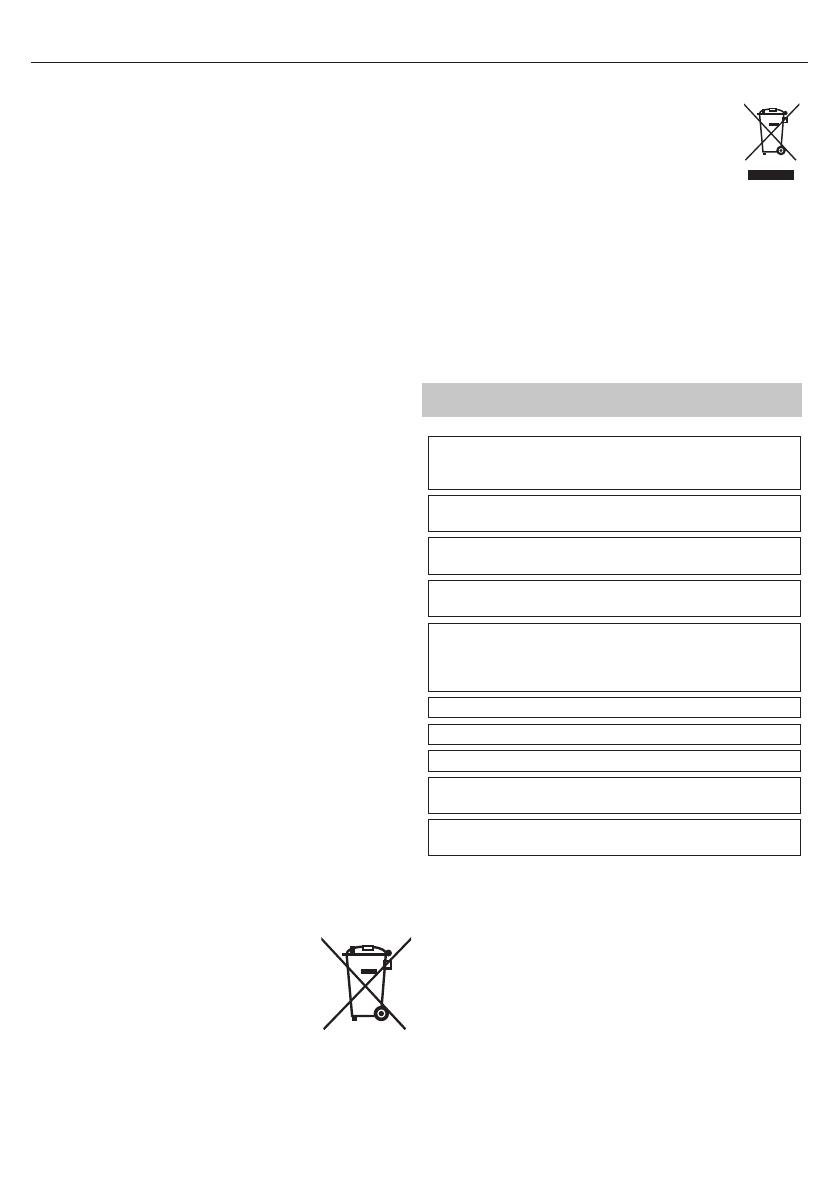
Disposal
Do not dispose of this TV as unsorted municipal waste.
Return it to adesignated collection point for the recycling
of WEEE. By doing so, you will help to conserve resources
and protect the environment. Contact your retailer or local
authorities for more information.
CE Statement:
Hereby, UMC Poland Sp. z o.o. declares that this LED TV is in compliance
with the essential requirements and other relevant provisions of RED
Directive 2014/53/EU. The full text of the EU declaration of conformity
is available by following the link: https://www.sharpconsumer.eu/
documents-of-conformity/
This equipment may be operated in all EU countries.
The 5 GHz WLAN(Wi-Fi) function of this equipment may only be
operated indoors.
Wi-Fi max transmitter power: 100mW at 2,412 GHz – 2,472 GHz; 5,150
GHz – 5,350 GHz; 5,470 GHz – 5,725 GHz
Trademarks
The terms HDMI and HDMI High-De nition Multimedia Interface,
and the HDMI Logo are trademarks or registered trademarks of HDMI
Licensing, LLC in the United States and other countries.
The "DIGITALEUROPE UHD Display" logo is a trademark of DIGITAL-
EUROPE.
The DVB logo is the registered trademark of the Digital Video Broad-
casting - DVB - project.
Manufactured under license from Dolby Laboratories. Dolby, Dolby
Audio and the double-D symbol are trademarks of Dolby Laboratories.
For DTS patents, see http://patents.dts.com. Manufactured under
license from DTS Licensing Limited. DTS, the Symbol, & DTS and the
Symbol together are registered trademarks. DTS Studio Sound is a
trademark of DTS, Inc. © DTS, Inc. All Rights Reserved.
YouTube and the YouTube logo are trademarks of Google Inc
The Wi-Fi CERTIFIED Logo is a certi cation mark of the Wi-Fi Alliance.
Wi-Fi CERTIFIED Miracast and Miracast are trademarks of Wi-Fi Alliance
DLNA, the DLNA Logo and DLNA CERTIFIED are trademarks, service
marks, or certi cation marks of the Digital Living Network Alliance.
MHL and the MHL logo are a trademark, registered trademark or
service mark of MHL, LLC in the United States and /or other countries.
The Bluetooth word mark and logos are registered trademarks owned
by Bluetooth SIG,. Inc.
Cd
YouTube and the YouTube logo are trademarks of Google Inc
The Wi-Fi CERTIFIED Logo is a certi cation mark of the Wi-Fi Alliance.
Wi-Fi CERTIFIED Miracast and Miracast are trademarks of Wi-Fi Alliance
DLNA, the DLNA Logo and DLNA CERTIFIED are trademarks, service
marks, or certi cation marks of the Digital Living Network Alliance.
Harman Kardon is trademark of HARMAN International Industries,
Incorporated, registered in the United States and/or other countries.
EN
What is included in the box
Supply of this TV includes following parts:
1x TV 1x RF cable
1x Remote control 1x TV stand installation packet
2x AAA batteries 1x User guide
1x mini component adapter
cable
1x mini composite adapter
cable
1x mini SCART adapter cable 1x power cable
Attaching the Stand
Please follow the instructions on last page of this user manual.
Wall mounting the TV
1. Remove the four screws that are supplied in the wall mounting holes.
2. The wall mount can now be easily attached to the mounting holes on
the rear of the TV.
3. Install the wall mounting bracket to the television as advised by the
bracket manufacturer.
Getting started - initial set up
1. Using the RF cable supplied, connect the TV to the TV Aerial wall
socket.
2. For connecting to the Internet with a wired connection connect a
Cat 5/Ethernet cable (not included) from the TV to your broadband
modem/router.
3. Insert the batteries supplied into the Remote control.
4. Connect the power cable to the Electrical outlet.
5. Usually the TV is supplied with a pre-paired remote control. If the
TV does not respond to remote control commands, follow the
instructions below.
Pairing the remote control:
a) If the TV turns on automatically and the "First Time Installation"
window appears on the screen, press and hold for a few seconds blue
and yellow buttons on the Remote control. The power indicator will
blink 5 times, that would con rm the pairing of TV and remote control
is completed.
b) If the TV does not automatically turn on:
b1) [for TV with buttons] you need to power it on by pressing of
standby key located on the TV (not the remote control).
After TV started up, press once again a standby button, then "pairing
menu" will appear.
Scroll the cursor down using the buttons CH+/CH-, to select "Pair
again", and con rm it by pressing standby button one more time.
b2) [for TV with control stick] you need to power it on by pressing
of TV control stick on TV back cover.
Press and hold TV control stick on TV back cover until special menu
appears. Choose option "Pair Again".
Simultaneously press and hold for a few seconds blue and yellow
buttons on the Remote control. The power indicator will blink 5
times, this con rming the pairing of the TV and the remote control
completed.
Now proceed with next steps to con guring the TV.
6. You will be now welcomed with the First Time Installation screen.
If it does not appear, on the remote control, please press [MENU] then
8-8-8-8 and the menu will appear.
If you wish to make changes to any of the default settings, use the
scroll ▲/▼/◄/► buttons. To exit this menu at anytime, press [EXIT]
button.
7. Please set desired settings in First Time Installation screen.
STEP 1 - Set the TV Menu language.
STEP 2 - set your country
STEP 3 - Set type of network connection. If you wish to skip this step
and connect TV to network later, please choose Skip Network Setting
STEP 4 - Select the location of TV. For home use, please select Home.
For shop demonstration mode, set Store.
STEP 5 - choose if your TV has stand, or if it is mounted on the wall. TV
will set optimal audio settings for selected option.
STEP 6 - choose input source which you want to use. If you have
connected RF cable directly to TV, choose DTV. If you have satellite
directly connected to your TV, choose DVB-S*. In case you are using
set-top-box, please pick correct input to which it is connected.
8. If you selected in last step DTV or DVB-S2, you will be asked if you
want to tune channels. If you choose “No, you can tune channels later
from SETTINGS/CHANNEL menu. If you choose Yes”, tuning menu
will appear.
Digital TV (DTV) tuning: In DVB Antenna, please choose which type
of signal you have. Terrestrial (DVB-T) or Cable (DVB-C). Then enter
Auto tuning and set your desired settings. Again choose Auto tuning
to start tuning of channels.
Satellite (DVB-S2) tuning: Enter Auto Tuning and enter Satellite. Here
you can choose between the various satellites. Select satellite which
you wish to tune by pressing OK button on remote control. Then
return to previous menu by pressing BACK button on your remote
control and choose Auto tuning to start tuning of channels.
NOTE: To shorten tuning time of satellite channels, some countries
have preinstalled channel list for most popular satellite in that region.
If this is the case for your selected country, you will be asked if you
wish to load preinstalled channel list. If you choose “Yes”, satellite
channel list will be imported to your TV within few seconds.
TIP: If you are missing channels, the reason for this is likely to be signal
strength, you should consider connecting signal booster and re-tuning the TV.
Remote control
Radio controlled remote control - No more aiming in the TV direction!
Refer to remote control picture on the second page of this user
manual.
1.
STANDBY – Switch on TV when in standby or vice versa.
2. NETFLIX – Displays NETFLIX menu.
3.
MUTE – Mute the sound or vice versa.
4. 0 – 9 – to select aTV channel directly.
5. YouTube – Displays YouTube application.
6. NET+ – Displays AQUOS NET+ menu.
7. SOURCE – To display the input/source menu.
8. TV GUIDE – Opens the 7 Day TV Guide (Digital mode).
9.
To return to the previous channel viewed.
10. DTV – Switch to digital TV source.
11. VOL ▲/▼ To increase/decrease the sound level.
12. FAV To display favourites menu.
13. INFO – Press once for now/next channel information. Press twice for
programme information about current programme.
14. CH ▲/▼To increase or decrease the channel being watched.
15. SUBTITLE – To switch the dialogue at the bottom of the screen (on/
o ).
16. TELETEXT – Teletext mode - To enter Teletext
17. MENU – To display OSD menu.
18. BACK – Back to previous menu.
7
19. EXIT – To exit all menus.
20. (▲/▼/◄/►/ OK) – Allows you to navigate the on-screen menus
and adjust the system settings to your preference. Pressto change
picture mode during watching TV. Pressto change sound mode
during watching TV.
21.
To play in fast rewind mode.
22.
To play in fast forward mode.
23.
To play/pause
24. Rec
1
PVR Record
25.
To restart the current chapter
26.
To advance forward to the next chapter
27.
To stop the playback
28. Rec List
1
Opens the list of recordings.
29. COLOUR BUTTONS – Additional teletext and OSD functions
1
- available only with PVR function
TV buttons*
Vol+ Volume up and menu right
Vol- Volume down and menu left
CH+ Programme/Channel up and menu up
CH- Programme/Channel down and menu down
MENU Displays Menu/OSD
SOURCE Displays the input source menu
STANDBY Standby Power On/O
* - for TV with buttons
TV Control Stick*
TV control stick is located on the lower left corner of back side of the TV.
You can use it instead of remote control to control most of the functions
of your TV.
While TV is in standby mode:
short press of control stick - Power On
While watching TV:
RIGHT/LEFT – volume up/volume down
UP/DOWN – changes channel up/down
short press – Displays Menu
long press – Standby Power O
While in menu:
RIGHT/LEFT/UP/DOWN – navigation of cursor in on-screen menus
short press – OK/Con rm selected item
long press – Back to previous menu
* - for TV with control stick
Choosing Mode Input/Source
To switch between the di erent input/connections.
a) Using the buttons on the remote control:
1. Press [SOURCE/
] - The source menu will appear.
2. Press [] or [] to select the input you require.
3. Press [OK].
b1) Using the buttons* on the Television:
1. Press [SOURCE].
2. Scroll up/down using VOL+ /VOL- buttons to the input/source you
require.
3. Press [SOURCE] to change input/source to the one selected.
b2) Using the TV control stick*:
1. Shortly press control stick to enter menu.
2. Press control stick down and navigate cursor to SOURCES menu.
3. Shortly press control stick to enter SOURCES menu.
4. with control stick choose the input/source yourequire.
5. By short press of control stick, you will change input/source to the
one selected.
* - optional
Connections
Please see the table for connector types for
diff erent models available on the page 68.
USB
USB 2.0 input 1, 2; USB 3.0 input 3
HDMI 1, 2 (ARC), 3 (MHL) in
HDMI2.0-Input 1, 2, 3
SD
SD Card reader
SD Card Input
Mini AV
Video Input & Component/Video audio input
Mini YPbPr
Mini Component HD Input
Mini SCART
Mini SCART-Input
CI Card IN
CI input
RF In
RF/TV Aerial Input
Sat In
Satellite Input
Digital Optical Audio Out
Digital optical output
RJ 45
Ethernet
HEADPHONES
3.5mm Headphone output
D-link
service input only
* - Only on supported devices
TV Menu navigation
To access this menu, press [MENU] button on the remote control. To enter
amenu press [OK]. If you wish to make changes to any of the default
settings, use the scroll (▲/▼/◄/►) buttons. To con rm any settings press
[OK] button. To exit this menu at anytime, press [EXIT] button.
Net ix
World’s leading Internet television network. It is o ering thousands
of movies and TV shows, including original series, documentaries and
feature  lms. Members can play, pause and resume watching, all without
commercials or commitments. You can log in to this application with your
existing Net ix account. If you do not have Net ix account yet, you can
register via this app or via o cial Net ix website.
EN
YouTube
Videosharing app allows you to discover and watch originally-created
videos.
NOTE: For Youtube app to work, it is required to have set up correct date
and time in TV. For more information about setting up date/time in TV,
please refer to the TIME menu chapter of this user guide. Please ensure
that your network is not blocking access to YouTube and the speed of
your internet connection is fast enough for viewing YouTube content.
More Apps
Contains the most commonly used apps for quick and easy access.
AQUOS NET+ - Opens the Sharp SMART portal.
Weather - Weather forecasting app AccuWeather.
Browser - Application for accessing websites via
the internet. Navigation in the browser:
CH+ - scroll page up
CH- - scroll page down
Red Button - show/hide browser menu bar
Yellow Button - Zoom in
Blue Button - Zoom out
Sources
From this menu, you can switch your TV input signal to di erent source/
connected device.
Media
USB - Multimedia mode o ers the playback of various
content saved on a USB Memory Stick. The content will be
divided into various  le types: Photo, Music and Movie.
The ‘File Option’ will show and allow you to play all types of supported
content.
1. You can navigate through the menu using the scroll ▲/▼/◄/►
buttons. To con rm the item you wish to play/view press [OK] button.
2. While viewing content you can control the playback modes using the
remote control buttons or by bringing up the playback navigation
menu and selecting on-screen buttons ▲/▼/◄/► and [OK]
NOTE: USB extension cables are not recommended as
they can cause a reduction in picture/audio quality and
stoppages during play back of USB content.
Miracast* - Allows you to view content from your smart phone or
tablet on the TV screen. Miracast is formed using Wi-Fi Direct, so access
to a Wi-Fi network is not needed. You can share content from your
smartphone or tablet based on Android 4.4 and newer system.
Media Server - Automatically searches for digital media servers
(DMS) connected to your home network and enables the
playback and rendering of content from media servers
* - This function is only available on selected smartphones and note-
books.
PICTURE
Picture Mode - Choose from the following presets.
Standard - Default settings
Movie - Set to be lighter in colour and less bright.
Personal - Lets you manually alter all the settings.
Eco - Consume 15% less energy.
Dynamic - Recommended settings for fast moving pictures.
Contrast - Switch the balance between black and white.
Brightness - Increase or decrease the brightness of the picture.
Colour - Increases the colour from black and white.
Sharpness - Increase or decrease the sharpness of the picture.
Colour Temperature - Choose from the following presets.
Normal - Default settings.
Warm - Increases red within the picture.
Cold - Increases blue within the picture.
Aspect Ratio - Picture format varies depending on the channel/broadcast.
There are a number of di erent options to best meet your needs.
Auto - Automatically displays the best picture format.
So the picture is in the correct position. May have
black lines at the top/bottom and/or sides.
4:3 - Displays the 4:3 picture in its original size.
Side bars are shown to  ll the 16:9 screen.
16:9 - Fills the screen with a regular 16:9 signal.
Zoom 1/2 - The picture is the correct proportion
but zoomed in to  ll the screen.
Dot by Dot (HDMI) - Will display the picture in its
original resolution without any change.
Full Screen - Stretch signal to  ll the screen.
Expert Settings
Noise Reduction - Filters and reduces the
noise (interference) of the picture.
Active Contrast - Automatically optimises the ‘backlight’ and
contrast’ of the picture according to the brightness of the screen.
Backlight - Adjust the screen's brightness by increasing/
decreasing the panel's backlighting.
Gamma - Adjust the tones between the bright
and dark parts of the picture.
Red - Adjust red tone of the picture
Green - Adjust green tone of the picture
Blue - Adjust blue tone of the picture
SOUND
Sound Mode - Choose from the following presets
Standard - Default settings
Music - Emphasises music over voices
Movie - Provides live and full sound for movies
Personal - Selects your personal sound settings
Sports - Emphasises sound for sports
Equalizer - Adjusts the volume of di erent sound
frequencies. The equalizer sound levels can only be adjusted
when the sound mode ‘Personal’ is selected.
Headphones
HP+TV - option to play sound from TV speakers
and headphones simultaneously.
Volume - adjust volume for headphones.
Balance - To switch the sound between the left and right speakers.
Auto Volume Level (AVL) - When on’ is selected, the volume
will stay at aconstant level regardless of input/source.
DTS TruSurround - Allows you to turn surround sound e ect ON or OFF.
Digital Output - This is the digital Audio output.
Choose from the following options:
O - O
Auto - Selects the best settings automatically
PCM - Select this option if you are connecting to aStereo
Hi- via digital cable (Pulse-code modulation (PCM) is
adigital representation of an analogue signal).
Audio Description - Additional sound track for visually impaired.
Available only on selected DTV shows.
AD Volume - to adjust volume of Audio Description sound track
AudioTrack - allows you to choose di erent audio/
language for Digital TV or media.
9
Audio Delay (ms) - Enables the user to adjust sound
setting to sync picture and audio for TV speakers.
SPDIF Delay (ms) - Enables the user to adjust sound setting to sync picture
and audio for external speakers connected via digital audio output.
SETTINGS
CHANNEL
DVB Antenna - Set the type of DTV signal
Terrestrial - Terrestrial (DVB-T)
Cable - Cable (DVB-C)
Auto Tuning - Allows you to retune the television for all digital
channels, digital radio stations and analogue channels.
Analogue Manual Tuning - Allows you to
manually tune your analogue signal.
Digital Manual Tuning - Allows you to manually tune your digital signal.
Channel Edit - Allows you to delete, skip and add favourite channels.
Red Button - delete selected channel.
Yellow Button - Move selected channel. Go with cursor to
channel, which you wish to move to di erent position, then
press YELLOW button. Now move selected channel with UP/
DOWN arrow to desired position and press YELLOW button
again to con rm its new position in channel list.
Blue Button - Skip selected channel. Channels selected to Skip
will not be displayed while pressing CH+ or CH- buttons.
Signal Information - Information about DVB signal.
CI Information - Pay per view services require a“smartcard” to be
inserted into the TV. If you subscribe to apay per view service the
provider will issue you with a‘CAM’ and a“smartcard”. The CAM can
then be inserted into the COMMON INTERFACE PORT (CI Card In).
Sorting by LCN - Set LCN to ON if you want to arrange channels by
provider preferences (only applies to DVB-T and DVB-C channels).
Channel Auto Update - if you set this option ON, channel positions,
names and frequencies will be periodically updated by the provider.
This may cause issues if you ordered channels in the list of channels
by yourself. In such case we recommend to keep this option o .
Recorded list* - List of recorded TV shows.
Schedule List - Lists your programme reminders.
Satellite Setup- This menu is only available in DVB-S2 mode. You can
select the type of satellite, your transponder and your LNB type, etc.
OAD (Software Update) - Switch on/o OAD
(over air download) software updates.
* - Only for devices with built in PVR function
NETWORK
Network Con guration - First you will need to select your connection
type. You can choose between either a Wi-Fi or Wire (cable) connection.
NOTE: For connecting to the Internet with a wired connection, connect a Cat
5/Ethernet cable (not included) from the TV to your broadband modem/router.
IP con g - LAN network connection settings
Auto - Will automatically connect the TV to your home network
(this is the default setting and is highly recommended)
Manual - Allows you to manually change the IP,
Netmask, Gateway and DNS information.
Wi–Fi Con guration - Wireless network connection settings
Wi–Fi Auto Search - Automatically searches for available wireless
networks. Select the desired Wi–Fi network and then enter the
network password (if network is password protected). Once
the password is accepted, you will not be asked for it again.
NOTE: The connection process may take a few minutes, please be
patient. Every time the TV is then powered on it will automatically
connect to the network, this may also take some time.
Network Info - Information about the network settings
Network Test - A network connection test
TIME
Auto Sync - Automatically sets the time and date on the TV set. Requires
the TV to be tuned in with a digital signal and/or an internet connection.
Turn “Auto Sync” o to manually adjust the time and date settings. If
Auto Sync” is set to o with the time and date manually adjusted, this
information will be reset when the power to the TV is disconnected.
Clock - Shows the date and time. Can be adjusted
when Auto Sync” is set to o .
Off Time - Allows you to set aspeci c time for your TV to turn o .
On Time - Allows you to set aspeci c time for your TV to turn on, the
channel it will then display, the source it will be on and also the volume.
This function can then be toggled to repeat every day or acertain day.
Sleep Timer - Lets you set the sleep timer so the television automatically
switches o after aset amount of time. O -> 10min -> 20min ->
30min -> 60min -> 90min -> 120min -> 180min -> 240min.
OSD Timer - Lets you adjust the amount of time the On
Screen Menu stays on the screen before disappearing.
Auto standby - Adjustment for the auto standby in
hourly increments: O -> 3h -> 4h -> 5h.
Time Zone - Change your current time zone.
LOCK
System Lock - Allows you to lock or unlock the menu. You will be
asked to enter a4 digit password. Use the button to quit the
password input. Use the button to clear. Default password is 0000.
Set Password - Change the default password.
Channel lock - Lock speci c TV channels.
Parental Guidance - Lock TV channels based on age restriction.
Key lock - Allows you to lock the buttons of the TV set.
Source Lock - Allows you to hide selected inputs from the source menu.
Hotel Mode - Advanced settings for hotels.
SETUP
Language - Allows you to change the language of the menu.
Audio Languages - Allows you to change audio
language on selected DVB channels.
Subtitle Language - Allows you to change subtitles
language on selected DVB channels.
Hearing Impaired - If signal provides support for the hearing
impaired, the subtitles can be played by pressing the “Subtitle”. If
you set Hearing Impaired ON and switch to achannel with supports
for hearing impaired subtitles will be activated automatically.
Blue Screen - Changes the background when there is no input between
transparent and ablue background (Only available on some sources).
PVR File System - PVR Recording options*
Select disk - Select USB port and disk partition
TimeShift Size - Set size time of shift bu er.
Format - You can format connected USB
storage device to FAT 32  le system.
WARNING: ALL DATA ON THE USB DEVICE WILL BE DELETED
Speed - Tests write speed of connected USB storage devices.
* - only for devices with built in PVR function
First Time Installation - Starts the  rst time installation.
Software Update (USB) - From time to time we may release new
rmware to improve the operation of the television (available to
download). This menu lets you install the new software/ rmware onto
the television. Further details of how to do this will be issued with the
rmware. Contact the helpline or refer to the ‘www.sharp.eu/av’ website.
Software Upgrade (NET) - Allows for the TV software to
be updated over the Internet. This function will search
for new software and update it when necessary.
NOTE: The TV will automatically search for new releases of
software every time it is turned on. If new software is found, it
will ask you if you would like to download and install it. If you
select "Yes" the TV will upgrade to the latest software.
WARNING: Do not turn o the TVs power until the upgrade is complete!
Reset TV - This resets the menus to factory settings.
EN
HDMI CEC* - Allows you to operate devices
connected via HDMI with TV remote control.
Device list* - Allows you to access devices menu and
operate the menu using TV remote control.
HDMI CEC - enable/disable HDMI CEC function
Auto standby* - Automatically turn on/
o connected devices via HDMI CEC
HDMI ARC* - Sends audio signal from terrestrial/satellite broadcast
via HDMI to the AV receiver without using any additional audio
cables, this functions is available only on HDMI 2 output.
* - HDMI CEC must be supported by connected device.
HDMI EDID - transmits the TV sets capabilities (resolution, audio support
etc.) directly to the devices connected via HDMI. This item allows you to
switch modes of selected HDMI input between HDMI and HDMI2.0 mode.
Standard - recommended if the TV is connected to a
device with a HDMI 1.4 output or lower, for example Full
HD Blu-Ray player, DVD player or gaming console.
Enhancement - recommended if the TV is connected to a device with
a HDMI 2.0 output, for example 4K Blu-ray player or modern PC.
LED Status - Allows the user to switch the LED Power indicator light ON
or OFF, when the TV is being operated. (When this option is set to OFF the
LED Power indicator light will flash when the remote control is used).
HbbTV - Allows the user to switch HbbTV on/o . To
use HbbTV, TV must be connected to the internet and
watched channel must support HbbTV service.
Version Info - shows version of TV software
Source Edit - this allows user to manually rename items
in your list of input sources. For example, you can rename
inputs to the names of connected devices.
AQUOS NET+
To access the AQUOS NET+ Menu at any time press the NET+ button on the
remote control or select it from More Apps menu.
NOTE: Please wait while the TV connects to the Wi-Fi network.
It may take a few minutes after you switch on the TV.
Navigate the menu using the scroll ▲/▼/◄/► buttons. To con rm the
item you wish to play/view press [OK] button. For one-step’ back press
[Menu] button, and to access additional functions use the coloured
buttons. To leave AQUOS NET+ press [EXIT] button.
Home - Home screen with recommended movies
and recently opened applications
All Apps - Opens a list of available applications
Movies - Opens a list of available movies
TV Shows - Opens a list of available TV shows
Music - Opens a list of available Music and Music videos
Games - List of games and gaming related apps.
Sport - List of sport related apps.
News - List of news apps.
Search - search for app by entering its name or part of the name.
My apps - By adding apps to the “My Apps” list, you will be able to quickly
access your favourite apps. To add an app to the list, simply highlight
any app and press the green button, this will now appear in your "My
apps" list. To remove an unwanted app from the “My Apps” list, you
must highlight the app you want to delete and press GREEN button.
Settings - In the settings menu you can change the language of the
Aquos NET+ portal, set up a  lter for applications speci c to the language
selected and reset all user settings back to the default settings.
RESET OF USER SETTINGS: If you wish to completely reset all user
settings on AQUOS NET+, you must  rst enter the Settings menu of the
portal and select “Reset your device”. Please select YES with cursor and
then press OK on the remote control to con rm the reset of the settings.
NOTE: To meet our customers’ demands, we are improving our
products. As a result of our ongoing e orts new applications will
be added continuously to the AQUOS NET+. Applications and
content in AQUOS NET+ can be changed without notice. Some of
the functions and content may not be available in your country.
7 Day TV Guide
TV Guide is available in Digital TV mode. It provides information about
forthcoming programmes (where supported by the Digital channel). You
can view the start and end time of all programmes and on all channels for
the next 7 days and set reminders.
1. Press [TV GUIDE]. The following 7 Day TV Guide will appear.
2. Navigate through the menu using ▲/▼/◄/►.
You can now:
Record selected TV channel and TV show by pressing the RED button.*
Set areminder by pressing GREEN.
View aprevious day by pressing YELLOW.
View the next day by pressing BLUE. [INFO] shows detailed
information about the selected post
3. Press [EXIT] to exit the 7 day TV Guide.
* - only for models with recording function
USB Record - Digital mode*
Built into this television is aUSB record facility. This function is available in
Digital mode when used in conjunction with acompatible USB memory
stick or USB Hard drive. The bene ts of this are as follows:
Pause live TV and then playback, fast forward and rewind (up to live TV).
One button record, if you decide you want to record the current
programme.
Easy programmable recording from the 7 day TV Guide
Due to the nature of the product, it is necessary to use ahigh speed USB
memory stick (as the TV reads from and writes to the memory stick at the
same time, some memory sticks may not be suitable).
Minimum Speci cation - USB Memory Stick
Read Speed - 20 Mb/s(Megabit Per Second)
Write Speed - 6 Mb/s(Megabit Per Second)
Pause Live TV (Time Shift)*
Pausing Live TV is very simple.
Press the play/pause button and the television will pause and the live
content will be recorded. To resume watching press play/pause again.
Press fast forward to go forward in arecording (i.e. to skip adverts).
Press fast rewind to go back in arecording (i.e. if you fast forwarded too
far).
TIP: When you switch the TV to standby or change channel the Time Shift
memory is wiped. To restart time shift you must press play/pause button.
One Button Record
At any point in time you may decide to record the current channel that you
are watching. To do this you need to press the [REC] button.
TIP: This television contains one TV tuner, therefore it can
only record the channel you are watching or record one
channel while the television is in standby mode.
NOTE: USB record function is only available in Digital TV mode.
Due to copyright laws and illegal copying/recording it is not
possible to record to/from any other input/output source.
* - only for devices with built in PVR function
MHL
MHL Port (HDMI 3) - MHL is a wired solution that allows you to
access the media from your phone or tablet onto the big screen in
the highest quality. By connecting an MHL cable (sold separately)
from your mobile device and into your TV you can playback all
your videos, games and photographs directly onto your TV.MHL
simply mirrors the screen of your mobile device so will work with all
applications, whilst connected it will also charge your device too.
11
SHARP
LC-43CUG8052E
LC-43CUG8062E
LC-49CUG8052E
LC-49CUG8062E
LC-55CUG8052E
LC-55CUG8062E
LC-65CUG8052E
LC-65CUG8062E
A A A A+
43" / 109cm 49" / 123cm 55" / 139cm 65" / 164cm
69,0 W 89,0 W 110,0 W 118,0 W
101 kWh 130 kWh 161 kWh 172 kWh
<0,50 W <0,50 W <0,50 W <0,50 W
3840 (H) x 2160 (V) 3840 (H) x 2160 (V) 3840 (H) x 2160 (V) 3840 (H) x 2160 (V)
Product  che
Trademark
Model
Energy e ciency class
Visible screen size (diagonal)
On-mode power consumption
Annual energy consumption*
Standby power consumption**
O mode power consumption
Screen resolution
* -
Energy consumption XYZ kWh per year, based on the power consumption of the television operating 4 hours per day for 365 days. The actual
energy consumption will depend on how the television is used.
** - when the TV is turned o with the remote control and no function is active
N/A
Technical speci cation | Technische Angaben | Spéci cation technique
| Speci che tecniche | Especi cación técnica | Especi cação técnica |
Dane techniczne | Technische speci caties
Model
TUNER
HDMI Input
SD Card reader
USB Input
RF Input - ( Analog /Digital)
Sat. Input
CI Card Input
Mini SCART Input
Mini AV - Composite/CVBS Video In. + R/L
Audio in. for Composite/CVBS & Component/YPbPr
Mini Component/YPbPr Input
Optical Audio output
3.5 mm headphones output
RJ 45
LC-43CUG8052E T/T2/C/S2 x3 x1 x3 x1 x1 x1 x1 x1 x1 x1 x1 x1
LC-43CUG8062E T/T2/C/S2 x3 x1 x3 x1 x1 x1 x1 x1 x1 x1 x1 x1
LC-49CUG8052E T/T2/C/S2 x3 x1 x3 x1 x1 x1 x1 x1 x1 x1 x1 x1
LC-49CUG8062E T/T2/C/S2 x3 x1 x3 x1 x1 x1 x1 x1 x1 x1 x1 x1
LC-55CUG8052E T/T2/C/S2 x3 x1 x3 x1 x1 x1 x1 x1 x1 x1 x1 x1
LC-55CUG8062E T/T2/C/S2 x3 x1 x3 x1 x1 x1 x1 x1 x1 x1 x1 x1
LC-65CUG8052E T/T2/C/S2 x3 x1 x3 x1 x1 x1 x1 x1 x1 x1 x1 x1
LC-65CUG8062E T/T2/C/S2 x3 x1 x3 x1 x1 x1 x1 x1 x1 x1 x1 x1
ACE PRO ULTRA
Picture Processing Engine
H.265
HEVC
4K
RESOLUTION
400
Wireless
Connection
69
Model | Modell | Modèle | Modello | Modelo | Modelo | Model | Model
LC-43CUG8052E
LC-43CUG8062E
LC-49CUG8052E
LC-49CUG8062E
LC-55CUG8052E
LC-55CUG8062E
LC-65CUG8052E
LC-65CUG8062E
Audio power | Musikleistung | Puissance audio | Potenza audio | Potencia de audio | Potência de áudio | Moc dźwięku | Audio vermogen
2 x 10W 2 x 10W + 15W Subwoofer
Voltage | Spannung | Tension | Voltaggio | Voltaje | Voltagem | Napięcie | Spanning
AC 220V~240V; 50Hz;
Power consumption | Stromverbrauch | Consommation d'énergie | Consumo energetico | Consumo de electricidad | Consumo energético | Pobór mocy |
Energieverbruik
(Ecohome/Standard/Max/Standby/Annum); EEI | (Ecohome/Standard/Max/Standby/Jährlich); EEI | (Ecohome/Standard/Max/Standby/Annum); EEI |
(Ecohome/Standard/Max/Standby/Anno); IEE | (Económica/Estándar/Máximo/En espera/Año); EEI | (Ecohome/Standard/Max/Standby/Annum); EEI | (Eco/
Standard/Maks/Tryb czuwania/Rocznie); EEI | (Ecohome/Standard/Max/Standby/Annum); EEI
69/95/115/
<0,5W / 101kWh; A
89/115/140/
<0,5W / 130kWh; A
110/145/180
<0,5W / 161kWh; A
118/155/180/
<0,5W / 172kWh; A+
3840 x 2160 3840 x 2160 3840 x 2160 3840 x 2160
43" / 109cm 49" / 123cm 55" / 139cm 65" / 164cm
300 cd/m² 300 cd/m² 300 cd/m² 350 cd/m²
1242 mm
55" / 139cm
VESA: 600 × 300
15,7kg
230 mm
765 mm
84 mm
724 mm
1462mm
65" / 164cm
VESA: 600 × 300
20,2kg
280 mm
901 mm
87 mm
849 mm
1103mm
49" / 123cm
VESA: 600 × 300
11,2kg
230 mm
683 mm
83 mm
645 mm
966 mm
43" / 109cm
VESA: 200 × 300
7,9kg
184 mm
596 mm
67 mm
571mm
English: To assemble the base stand to the TV you will need a cross
head screwdriver. To avoid damage to the TV screen during assembly
ensure the TV is placed on a soft  at surface with the LCD screen
facing downwards.
Deutsch: Zur Befestigung des Ständers am Fernsehgerät benötigen
Sie einen Kreuzschraubendreher. Legen Sie das Fernsehgerät mit
dem LCD-Bildschirm nach unten auf eine weiche,  ache Ober äche,
um Schäden am Fernsehschirm zu vermeiden.
Français : Pour monter le support sur la TV, un tournevis pour vis
cruciforme sera nécessaire. Pour éviter d'endommager l'écran TV
pendant le montage, s'assurer que la TV est placée sur une surface
plate, douce, avec l'écran LCD dirigé vers le bas.
Italiano: Per attaccare il supporto al televisore avete bisogno di un
cacciavite a stella. Per evitare di danneggiare lo schermo del televiso-
re durante l'operazione, assiucuratevi che questo sia posizionato su
una super cie piatta e morbida, con lo schermo LCD all'ingiù.
Español: Para instalar el soporte a la televisión, se necesita un
destornillador de estrella. Para evitar dañar la pantalla de la televisión
durante su montaje, asegúrese de colocar el aparato en una super -
cie plana suave con el panel LCD hacia abajo.
Português: Para montar o suporte da base do televisor necessitará
de uma chave de fendas em cruz. Para evitar danos no ecrã do
televisor enquanto estiver a montar, certi que-se de que o televisor
se encontra colocado numa superfície suave e lisa, com o ecrã LCD
voltado para baixo.
Polski: Żeby zamocować podstawę telewizora potrzebny jest
śrubokręt krzyżowy. Żeby uniknąć uszkodzenia ekranu podczas
montażu, ułóż telewizor na miękkiej, płaskiej powierzchni z ekranem
LCD skierowanym do dołu.
Nederlandse: Om de voet aan de TV te bevestigen bent u een
kruiskop schroevendraaier nodig. Om schade aan de TV te voorko-
men tijdens de assemblage plaats de TV op een zacht vlak oppervlak
met het LCD scherm naar beneden gericht.
Stand Installation
Ständermontage
Installation du support
Installazione supporto
Instalación del soporte
Instalação do Suporte
Instalacja podstawy
Installatie voet
4 x
1
2
L
R
3
4
71
Media | Medium
| Média | Mezzo
| Medios | Media
| Materiały
| Media
Codec | Codec | Codec | Codec |
Códec | Codec | Kodek | Codec
Resolution | Au ösung |
Résolution | Risoluzione
| Resolución | Resolução |
Rozdzielczość | Resolutie
Data Rate | Data rate
| Débit | Velocità di
trasferimento dati |
Velocidad de datos | Taxa
de Dados | Przepływ
danych | Data Rate
File Ext. | Dateierw. | Extension
de  chier | Estensione del  le
| Extensión de archivo | Ext.
do Ficheiro | Rozszerzenie
pliku | Bestand Ext.
Movie | Film
| Film | Film |
Película | Filme |
Filmy | Film
MPEG1/2
1080Px2@30fps
1080P@60fps
80Mbps
.DAT, .VOB, .MPG, .MPEG,.ts, .trp,
.tp, .mp4, .mov, .3gpp, .3gp, .avi,
.mkv, .asf
MPEG4
1080Px2@30fps
1080P@60fps
40Mbps
.MPG, .MPEG, .mp4, .mov,
.3gpp, .3gp, .avi
XviD
1080Px2@30fps
1080P@60fps
40Mbps .divx, .mp4, .mov, .avi, .mkv, .asf
H.263
1080Px2@30fps
1080P@60fps
40Mbps
.mp4, .mov, .3gpp, .3gp, .av,
.mkv
H.264
3840x2160@30fps
1080P@60fps
135Mbps
. v, .mp4, .mov, .3gpp, .3gp, .ts,
.trp, .tp, .asf, .wmv, .avi, .mkv
Motion JPEG
720P@30fps
1080P@30fps
10Mbps
.avi, .3gpp, .3gp, .mp4, .mov,
.mkv, .asf
VP8 20Mbps .mkv, .webm
HEVC 4K2K@60fps 100Mbps .mp4, .mov, .mkv, .ts, .trp, .tp
VP9 4K2K@30fps 100Mbps .mkv, .webm
Media Codec
Sample rate | Sample Rate |
Fréquence d'échantillonnage |
Frequenza di campionamento
| Velocidad de muestreo |
Taxa de Amostra | Częstość
próbkowania | Sample rate
Data Rate File Ext.
Audio | Musik |
Musique | Musica
| Music | Música |
Muzyka | Muziek
MPEG1/2 Layer1, 2, 3 16KHz ~ 48KHz 32Kbps ~ 320Kbps
.mp3, .avi, .as, .divx, .mkv,
.ts, .trp, .tp, .DAT, .VOB, .MPG,
.MPEG, .wav
AC3
32KHz, 44.1KHz,
48KHz
32Kbps ~ 640Kbps
.ac3, .avi, .mkv, .divx, .3gpp,
.3gp, .mp4, .mov, m4a, .ts, .trp,
.tp, .DAT, .VOB, .MPG, .MPEG,
.rm, .rmvb
EAC3
32KHz, 44.1KHz,
48KHz
32Kbps ~ 6Mbps
.ec3, .3gpp, .3gp, .mp4, .mov,
m4a, .ts, .trp, .tp, .DAT, .VOB,
.MPG, .MPEG
AAC, HEAAC 8KHz ~ 48KHz 128bps ~ 320Kbps
.aac, .avi, .mkv, .divx, .3gpp,
.3gp, .mp4, .mov, m4a, .ts, .trp,
.tp, .DAT, .VOB, .MPG, .MPEG, . v,
.rm, .rmvb
VORBIS Up to 48KHz
.mkv, .webm, .3gpp, .3gp, .mp4,
.mov, m4a, .ogg
Media
File | Datei | Fichier | File |
Archivo | Ficheiro | Plik | Bestand
Resolution | Au ösung | Résolution | Risoluzione |
Resolución | Resolução | Rozdzielczość | Resolutie
File Ext.
Photo | Foto |
Photo | Foto |
Foto | Foto | Zdję-
cia | Foto
JPEG
15360x8640, (1920x8 x 1080x8) Base-line
.jpg/.jpeg
1024x768 Progressive
PNG
9600x6400 Non-interlace
.png
1200x800 Interlace
BMP 9600x6400 .bmp
MPO
15360x8640, (1920x8 x 1080x8) Base-line
.mpo
1024x768 Progressive
Compatible  les in USB Mode | Für den USB Modus geeignete Dateiformate | Fichiers compatibles en mode
USB | File compatibili in modalità USB | Archivos compatibles en modo USB | Ficheiros compatíveis no Modo
USB | Pliki kompatybilne w trybie USB | Compatibele bestanden in USB modus
SHA/MAN/0290
UMC Poland Sp. z o.o.
Ostaszewo 57B, 87-148 Łysomice,
Poland
Assembled in Europe
www.sharpconsumer.eu
1 / 1

Sharp A49CU8052EB21Y User manual

Category
LCD TVs
Type
User manual

Ask a question and I''ll find the answer in the document

Finding information in a document is now easier with AI

Ask the document