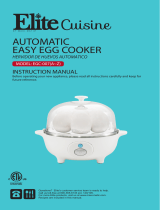
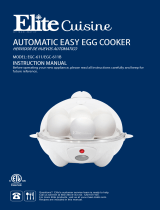
Elite Gourmet EGC314 User manual

Category
Small kitchen appliances
Type
User manual

Elite Gourmet EGC314 is a versatile kitchen appliance that simplifies egg cooking. It features a digital control panel with a delay timer, allowing you to set the cooking time and have your eggs ready when you want them. With its dual cooking racks, you can cook up to 14 eggs at a time, choosing from soft-, medium-, or hard-boiled. The EGC314 also includes a poaching tray for perfectly poached eggs, an omelet tray for fluffy omelets, and a steaming rack for vegetables and fish. Its compact design and easy-to-clean parts make it a convenient addition to any kitchen.

Elite Gourmet EGC314 is a versatile kitchen appliance that simplifies egg cooking. It features a digital control panel with a delay timer, allowing you to set the cooking time and have your eggs ready when you want them. With its dual cooking racks, you can cook up to 14 eggs at a time, choosing from soft-, medium-, or hard-boiled. The EGC314 also includes a poaching tray for perfectly poached eggs, an omelet tray for fluffy omelets, and a steaming rack for vegetables and fish. Its compact design and easy-to-clean parts make it a convenient addition to any kitchen.

EASY EGG COOKER
MODEL: EGC314(A~Z)
INSTRUCTION MANUAL & RECIPE GUIDE
Questions? We’re here to help! Visit: shopelitegourmet.com for support on this product.
EASY EGG COOKER
IMPORTANT SAFEGUARDS ...........................................................................3
PARTS IDENTIFICATION ................................................................................ 6
BEFORE FIRST USE ........................................................................................9
DELAY TIMER .................................................................................................9
HOW TO USE YOUR EGG COOKER .............................................................. 10
CLEANING & MAINTENANCE TIPS ............................................................... 21
RECIPES ..........................................................................................................22
WARRANTY & CUSTOMER SERVICE .............................................................46
3
IMPORTANT SAFEGUARDS
The Elite Brand takes consumer safety very seriously. Products are designed
and manufactured with our valued consumers’ safety in mind. Additionally,
we ask that you exercise a level of caution when using any electrical
appliance by following all instructions and important safeguards.
When using electrical appliances, basic safety precautions should
always be followed, including the following:
1. READ ALL INSTRUCTIONS
CAREFULLY.
2. Remove all packaging and labels
from appliance prior to use.
3. To protect against risk of electrical
shock, do not put cords, plugs or the
appliance in or near water or any
other liquid.
4. Keep appliance away from children
when in use.
5. Only use approved ingredients
with this product – other food may
damage the appliance.
6. Unplug from outlet when not
in use, during assembly, during
disassembly and before cleaning.
7. Avoid contact with heating parts.
8. Do not operate this appliance with
a damaged cord, damaged plug,
after the appliance malfunctions, is
dropped, or damaged in any manner.
9. Use only Egg Cooker/Steamer
attachments recommended or sold
by Elite Gourmet. Others may result

10. Do not use outdoors.
11. Do not leave eggs in Egg Cooker/

prolonged period.
12. Do not let the cord hang over the
edge of a table, edge of a counter,
over the sink or touch any hot
surfaces.
13. Only use the Egg Cooker/Steamer on
a stable surface.
14. Do not put your hands or other

while it is in operation. If food spills
on the Heating Plate, make sure the

4Questions? We’re here to help! Visit: shopelitegourmet.com for support on this product.
and cool before cleaning.
15. Keep hands and utensils away from
Heating Plate while cooking eggs to

damage to the Egg Cooker/Steamer.
16. Cooking plate and contents (water,
eggs & foods) of the Egg Cooker/
Steamer are hot when in use. Let
cool before handling or cleaning.
17. Do not place on or near a hot gas
burner, hot electric burner or in a
heated oven.
18. Use extreme caution when handling
the Measuring Cup, as it contains
a sharp Pin located on the bottom

19. When cleaning the egg cooker base,
do not submerse in any liquid.
Instead, use a soft, wet cloth to wipe
it down.
20. The Lid becomes very hot while in
use- do not touch while the eggs are
cooking. Let it cool before touching.
21. Be certain the Lid is securely in place
prior to turning Egg cooker on.
22. Do not open Lid when Egg Cooker/
Steamer is cooking.
23. 
removing the cord from the wall
or the eggs from the Egg Cooker/
Steamer.
24. Do not put the appliance in the
refrigerator.
IMPORTANT SAFEGUARDS (cont.)
Do not use expired eggs,
expired egg whites, or
expired liquid eggs.
SAVE THESE INSTRUCTIONS
THIS PRODUCT IS FOR
HOUSEHOLD USE ONLY
5
SHORT CORD PURPOSE
POLARIZED PLUG
NOTE: 
resulting from becoming entangled in or tripping over a longer cord.
Longer power-supply cords or extension cords may be used if care is
exercised in their use.
If an extension cord is used: (1) the marked electrical rating of the extension
cord should be at least as great as the electrical rating of the product;
(2) the extension cord should be arranged so that it will not drape over the
countertop or tabletop where it can unintentionally be pulled on or tripped
over by children or pets.
If this appliance is equipped with a polarized plug (one blade is wider than
the other), please follow the below instructions:




plug can be fully inserted into the extension cord. Do not alter the plug of the
product or any extension cord being used with this product. Do not attempt
to defeat the safety purpose of the polarized plug.
6
PARTS IDENTIFICATION
1
11
7
2
3
4
5
1. Lid Handle
2. Steam Vent
3. Lid
4. Measuring Cup
5. Piercing Pin
6. Egg Cooking Top Rack
7. Egg Cooking Rack Handle
7
9
10
6
12
13
8
8. Extension Ring
9. Egg Cooking Bottom Rack
10. Omelet Tray
11. Digital Control Panel
12. Poaching Tray (x4)
13. Base
8Questions? We’re here to help! Visit: shopelitegourmet.com for support on this product.
CONTROL PANEL
1 2 3 4 5
1. Delay Timer Button
2. Decrease Time Button
3. *Time Display
4. Increase Time Button
5. Menu/Cancel Button
*Time display has a decimal point between the 1st & 2nd digit (ex. 1.4


increments up to 9.5 hours total.
9
BEFORE FIRST USE
1. Wash and rinse all removable parts in hot, soapy water. DO NOT
submerge the base in any liquids. Base can be wiped clean with
a damp cloth. Please refer to the Cleaning Instructions for more
information.
2. Place poaching tray, measuring cup, omelet tray, lid and egg rack next
to the unit.
CAUTION: Piercing pin is on the base of the measuring cup and is
extremely sharp.
3. Position the egg rack over the base. The side handles should be facing
upward. Place lid over the egg rack.
NOTE: If using 2nd egg rack, place Extension Ring on base, place 2nd
egg rack on ring, then place lid on rack & extension ring.
(Refer to page 12 Fig. 5)
4. Plug in the power cord. Your egg cooker is now assembled for use.
DELAY TIMER
Your new digital egg cooker has a Delay Timer that allows you to delay
cooking for up to 9.5 hours.

timer in 1/2 hour increments by using the +/- buttons for up to 9.5 hour
cooking delay. After selecting the delay time, the egg cooker/steamer will
automatically begin counting down to point where cooking is initiated.
NOTE: Do not use this function when cooking foods that may spoil or that
are not intended for long periods without refrigeration.
10 Questions? We’re here to help! Visit: shopelitegourmet.com for support on this product.
NOTE: Provided measuring cup holds up to 3 ounces of water. It may be

foods.
SOFT, MEDIUM AND HARD-BOILED EGGS
1. Plug the unit into wall power source. The display screen


2. Fill measuring cup with cold water to level for desired
doneness and pour onto cooking plate. (Fig. 1)
TIP: For best results, use distilled water - tap water
contains minerals that can cause heating plate to
discolor.
The times listed below are guidelines so that you will know how long it will

automatically and a buzzer will sound when the eggs are done - no additional
timer is necessary. The following time guidelines are for cold large eggs. Extra

achieve desired results.
*Time display has a decimal point between the 1st & 2nd digit (ex. 1.4 = 14 minutes,


HOW TO USE YOUR EGG COOKER
DONENESS # OF EGGS COOK TIME
(MIN)
WATER ON
COOKING PLATE
SOFT-BOILED 1-7 8-14 11 14 3oz. 4oz.
MEDIUM-BOILED 1-7 8-14 14 17 3oz. 4oz.
HARD-BOILED 1-7 8-14 18 23 3oz. 4oz.
Fig. 1
11
3. Place the Egg Cooking Rack over the Heating Plate.
The side handles should be facing upward. (Fig. 2)
4. *Optional: Pierce the larger end of each egg using
the Piercing Pin on the bottom of the Measuring Cup.
(Fig. 3)
5. Place an egg in each allotted spot on the Egg Cooking
Rack making sure the holes pierced in the eggs are
pointing upwards. Do not let the eggs touch the
Heating Plate. (Fig. 4)
NOTE: If using 2nd egg rack tier, refer to chart on
page #10, WATER ON COOKING PLATE. Place
Extension Ring on base, place 2nd rack on ring,
repeat steps 3 - 5 then place lid on rack & extension
ring. (Fig.5)
6. Place Lid on top of the unit and push the MENU
Button to turn ON. The Eggs (hard) Indicator Light
will illuminate. There is no need to press any other
buttons as the unit will pause and automatically
begin the cooking process. (Fig. 6)
7. When the Egg Cooker alarm sounds, the eggs will be
cooked. Actual cooking time depends on number of
eggs and desired doneness (See Cooking Time Chart
on Pg.10).
8. Remove eggs immediately and rinse under cold water
to prevent overcooking.
9. When cooking is complete, unplug the unit and allow
to cool before cleaning.
HOW TO USE YOUR EGG COOKER (cont.)
Fig. 2
Fig. 3
Fig. 4
12 Questions? We’re here to help! Visit: shopelitegourmet.com for support on this product.
HOW TO USE YOUR EGG COOKER (cont.)
POACHED EGGS
1. Fill the Measuring Cup with 3oz. of cold water and
pour onto Heating Plate.
2. Lightly butter or spray cooking oil in Poaching Tray(s).
3. Break one egg for each poaching section. (Fig. 7)
NOTES AND TIPS
Refrigerate eggs until ready to use. Always use cold eggs
– do not bring them to room temperature before using or
the eggs will be slightly overcooked.

a bowl of salted, cool water. If they sink, they are fresh. If

The recommended water levels are a guide, and water

consistency.
To make cleaning easier and avoid discoloration or
mineral buildup on the cooking plate, we recommend
spreading a few drops of cooking oil onto the cooking
plate before each use. Note: Apply while the cooking plate
is not heated or in use.
Fig. 5
Fig. 6
Fig. 7
13
HOW TO USE YOUR EGG COOKER (cont.)
4. Place Egg Cooking Rack over the Heating Plate. (Fig. 8)
5. Place Poaching Tray on top of Egg Cooking Rack. (Fig. 9)
CAUTION: Never place Poaching Tray or Omelet Tray
directly onto Heating Plate as they will melt and damage
the Egg Cooker.
NOTE: If using 2nd egg rack tier, refer to chart on page
#10, WATER ON COOKING PLATE. Place Extension
Ring on base, place 2nd rack on ring, repeat steps 2-5
then place lid on rack & extension ring. (Fig.5)
6. Place Lid on top of the unit and press the MENU Button
to turn ON. Eggs (hard) Indicator Light will illuminate
and the countdown timer will show 23 minutes.
Reduce cooking time to 14 minutes by pressing the
Decrease Time Button. The unit will pause and them
automatically begin the cooking process. (Fig. 10)
7. When the alarm sounds, the eggs will be ready.
8. When cooking is complete, unplug the unit and allow
to cool before cleaning.
Fig. 8
Fig. 9
Fig. 10
14 Questions? We’re here to help! Visit: shopelitegourmet.com for support on this product.
HOW TO USE YOUR EGG COOKER (cont.)
OMELETS
1. Fill the Measuring Cup with 4 ounces with cold water
and pour onto Heating Plate. (Fig. 11)
2. Lightly butter or spray vegetable oil on Omelet Tray.
3. Break up to 3 large eggs into a separate bowl and mix.
Add milk or water to desired omelet consistency. If
desired, add ingredients (i.e. chives, mushrooms,).
Pour beaten mixture into Omelet Tray. (Fig. 12)
4. Place Egg Cooking Rack over the Heating Plate. (Fig. 13)
5. Place Omelet Tray on top of Egg Cooking Rack. (Fig. 14)
CAUTION: Never place Poaching Tray or Omelet Tray
directly onto Heating Plate as they will melt and damage
the Egg Cooker.
NOTE: If using 2nd egg rack tier, refer to chart on page
#16, WATER ON COOKING PLATE. Place Extension
Ring on base, place 2nd rack on ring, repeat steps 3 & 4
then place lid on rack & extension ring. (Refer to page
12 Fig.5)
6. Place lid on top of the unit and press the MENU Button
to turn ON. Eggs (hard) Indicator Light will illuminate.
Press Menu button until the omelet indicator
illuminates. The unit will pause & then automatically
begin the cooking process. (Fig. 15)
Fig. 11
Fig. 12
Fig. 13
15
HOW TO USE YOUR EGG COOKER (cont.)
7. When the alarm sounds, the omelet will be ready.
8. 
for a few extra minutes. It is normal for the omelet
to expand during cooking. Once the Lid is removed,
the omelet will shrink back down.
9. When cooking is complete, unplug and allow to cool
before cleaning. Fig. 14
Fig. 15
16 Questions? We’re here to help! Visit: shopelitegourmet.com for support on this product.
HOW TO USE YOUR EGG COOKER (cont.)
NOTE: Provided measuring cup holds up to 3 ounces of water. It may be

foods.
NOTE: Your new egg cooker has pre-programmed cooking times for each

preferred doneness. Please refer to cooking chart below.
6 PRESET FUNCTIONS
FUNCTION TIME
(MIN)
WATER ON
COOKING PLATE
WATER/FOOD IF
APPLICABLE
Eggs (hard-boiled) 23 3oz. 1-7 eggs,
4oz. 8-14 eggs
Up to 14 eggs
Omelet 14 4oz. 2 eggs
Vegetables 16 4oz. 3.5oz.
Rice 23 5oz. 3oz.
Fish 10 4oz. 5oz.
Chicken 14 4oz. 6oz.
17
HOW TO USE YOUR EGG COOKER (cont.)
VEGETABLES
1. Use Measuring Cup to pour 4 ounces of water (cooks
3.5 oz of vegetables) onto Heating Plate.
2. Add up to 3.5 ounces of cut up vegetables to the
omelet tray. (Fig. 16)
3. Place Egg Cooking Rack over the Heating Plate. (Fig. 17)
4. Place Omelet Tray on top of Egg Cooking Rack.
CAUTION: Never place Omelet or Poaching Trays directly
onto Heating Plate as they will melt and damage the Egg
Cooker.
NOTE: If using 2nd tier, place Extension Ring on base,
place 2nd egg rack on ring, repeat steps 3 & 4. (Refer to
page 12 Fig. 5)
Additional water may be necessary (up to 6oz.)
depending on desired doneness, amount & type of
vegetables being steamed.
5. Place lid on top of the unit and press the MENU Button
to turn ON. Eggs (hard) Indicator Light will illuminate.
Press Menu button until the Vegetables indicator
illuminates. The unit will pause & then automatically
begin the cooking process. (Fig. 18)
6. When the alarm sounds, the vegetables will be ready.
7. For a softer vegetable, leave in the Egg Cooker/Steamer
for a few extra minutes.
8. When cooking is complete, unplug the unit and allow
to cool before cleaning.
Fig. 16
Fig. 17
Fig. 18
18 Questions? We’re here to help! Visit: shopelitegourmet.com for support on this product.
HOW TO USE YOUR EGG COOKER (cont.)
RICE
1. Fill Measuring Cup to the 3-ounce line with cold water and
pour onto Heating Plate, then add another 2 ounces of
water to cooking plate for total of 5 ounces.
2. Add up to 3 ounces of uncooked rice to the omelet tray
then add 4.5 ounces of water to the rice. (for the best
tasting rice, rinse rice multiple times to remove beta starch).
(Fig. 19)
3. Place Egg Cooking Rack over the Heating Plate. (Fig. 20)
4. Place Omelet Tray on top of Egg Cooking Rack.
CAUTION: Never place Poaching Tray or Omelet Tray directly
onto Heating Plate as they will melt and damage the Egg
Cooker.
NOTE: If using 2nd tier, place Extension Ring on base, place
2nd egg rack on ring, repeat steps 2 - 4.
(Refer to page 12 Fig. 5)
*We do not recommend using 2nd tier to cook additional
rice as the water capacity of the cooking plate cannot
exceed 6oz.. Other foods are okay to steam with rice.
5. Place lid on top of the unit and press the MENU Button to
turn ON. Eggs (hard) Indicator Light will illuminate. Press
Menu button until the Rice indicator illuminates. The unit
will pause & then automatically begin the cooking process.
(Fig. 21)
6. When the alarm sounds, the rice will be ready.
7. When cooking is complete, unplug and allow to cool before
cleaning.
Fig. 19
Fig. 20
Fig. 21
19
HOW TO USE YOUR EGG COOKER (cont.)
FISH
1. Fill Measuring Cup to the 3-ounce line with cold water
and pour onto Heating Plate, then add another 1
ounce of water to cooking plate for total of 4 ounces.
2. Lightly butter or spray vegetable oil on Omelet Tray.
3. 
tray (seasoned to taste). (Fig. 22)
4. Place Egg Cooking Rack over the Heating Plate. (Fig. 23)
5. 
Rack.
CAUTION: Never place Poaching Tray or Omelet Tray
directly onto Heating Plate as they will melt and damage
the Egg Cooker.
NOTE: If using 2nd tier, place Extension Ring on base,
place 2nd egg rack on ring, repeat steps 3 & 4. (Refer
to page 12 Fig. 5)
Additional water may be necessary (up to 6oz.)

being steamed.
6. Place Lid on top of the unit and press the press
the MENU Button to turn ON. Eggs (hard) Indicator
Light will illuminate. Press Menu button until the
Fish indicator illuminates. The unit will pause & then
automatically begin the cooking process. (Fig. 24)
7. 
8. When cooking is complete, unplug and allow to cool
before cleaning.
Fig. 22
Fig. 23
Fig. 24
20 Questions? We’re here to help! Visit: shopelitegourmet.com for support on this product.
HOW TO USE YOUR EGG COOKER (cont.)
CHICKEN
1. Fill Measuring Cup to the 3-ounce line with cold water and
pour onto Heating Plate, then add another 1 ounce of
water to cooking plate for total of 4 ounces.
2. Lightly butter or spray vegetable oil on Omelet Tray.
3. Add up to 6 ounces of chicken (boneless) to the omelet
tray (seasoned to taste). (Fig. 25)
4. Place Egg Cooking Rack over the Heating Plate. (Fig. 26)
5. Place Omelet Tray with chicken on top of Egg Cooking
Rack.
CAUTION: Never place Poaching Tray or Omelet Tray directly
onto Heating Plate as they will melt and damage the Egg
Cooker.
NOTE: If using 2nd tier, place Extension Ring on base, place
2nd egg rack on ring, repeat steps 2 - 5.
(Refer to page 12 Fig. 5)
Additional water may be necessary (up to 6oz.) depending
on desired doneness & amount of chicken being steamed.
6. Place Lid on top of the unit press the MENU Button to turn
ON. Eggs (hard) Indicator Light will illuminate. Press Menu
button until the Chicken indicator illuminates. The unit will
pause & then automatically begin the cooking process.
(Fig. 27)
7. When the alarm sounds, the chicken will be ready.
8. When cooking is complete, unplug and allow to cool
before cleaning.
Fig. 25
Fig. 26
Fig. 27
  • Page 1 1
  • Page 2 2
  • Page 3 3
  • Page 4 4
  • Page 5 5
  • Page 6 6
  • Page 7 7
  • Page 8 8
  • Page 9 9
  • Page 10 10
  • Page 11 11
  • Page 12 12
  • Page 13 13
  • Page 14 14
  • Page 15 15
  • Page 16 16
  • Page 17 17
  • Page 18 18
  • Page 19 19
  • Page 20 20
  • Page 21 21
  • Page 22 22
  • Page 23 23
  • Page 24 24
  • Page 25 25
  • Page 26 26
  • Page 27 27
  • Page 28 28
  • Page 29 29
  • Page 30 30
  • Page 31 31
  • Page 32 32
  • Page 33 33
  • Page 34 34
  • Page 35 35
  • Page 36 36
  • Page 37 37
  • Page 38 38
  • Page 39 39
  • Page 40 40
  • Page 41 41
  • Page 42 42
  • Page 43 43
  • Page 44 44
  • Page 45 45
  • Page 46 46
  • Page 47 47
  • Page 48 48
  • Page 49 49
  • Page 50 50
  • Page 51 51
  • Page 52 52

Elite Gourmet EGC314 User manual

Category
Small kitchen appliances
Type
User manual

Elite Gourmet EGC314 is a versatile kitchen appliance that simplifies egg cooking. It features a digital control panel with a delay timer, allowing you to set the cooking time and have your eggs ready when you want them. With its dual cooking racks, you can cook up to 14 eggs at a time, choosing from soft-, medium-, or hard-boiled. The EGC314 also includes a poaching tray for perfectly poached eggs, an omelet tray for fluffy omelets, and a steaming rack for vegetables and fish. Its compact design and easy-to-clean parts make it a convenient addition to any kitchen.

Ask a question and I''ll find the answer in the document

Finding information in a document is now easier with AI