6
Examine Your Oven
Unpack oven, remove all packing material and examine the oven
for any damage such as dents, broken door latches or cracks in the
door. Notify dealer immediately if oven is damaged. DO NOT install
if oven is damaged.
Placement of Oven
1. The oven must be placed on a flat, stable surface. Place the front
surface of the door 3 inches (7.6 cm) or more from the counter
top edge to avoid accidental tipping of the microwave oven
during normal use. For proper operation, the oven must have
sufficient air flow. Allow 3 inches (7.6 cm) of space on both sides
of the oven and 2 inches (5 cm) of space on top of the oven.
(a) DO NOT block air vents. If they are blocked during operation,
the oven may overheat and be damaged.
(b) DO NOT place oven near a hot, damp surface such as a gas or
electric range, or dishwasher.
(c) DO NOT operate oven when room humidity is excessive.
2.
This oven is manufactured for household use only. It is not
approved or tested for mobile vehicle, marine, or commercial use.
Installation
1. DO NOT block air vents. If they are blocked during operation,
the oven may overheat. If the oven overheats, a thermal safety
device will turn the oven off. The oven will remain inoperable
until it has cooled.
2. If the oven is designed for installation into a wall cabinet,
only use the proper Panasonic trim kit available from a local
Panasonic dealer, or online from the Panasonic Canada eStore.
Follow all instructions packed with the trim kit.
3. Use of a non-Panasonic trim kit will void the Manufacturer’s
warranty for the Microwave oven.
WARNING: IMPROPER USE OF THE GROUNDING
PLUG CAN RESULT IN A RISK OF ELECTRIC SHOCK.
Consult a qualified electrician or service person if the grounding
instructions are not completely understood, or if doubt exists as to
whether the appliance is properly grounded. If it is necessary to use
an extension cord, use only a three-wire extension cord that has a
three-prong polarized grounding plug, and a three-slot receptacle
that will accept the plug of the appliance. The marked rating of the
extension cord should be equal to or greater than the electrical
rating of the appliance.
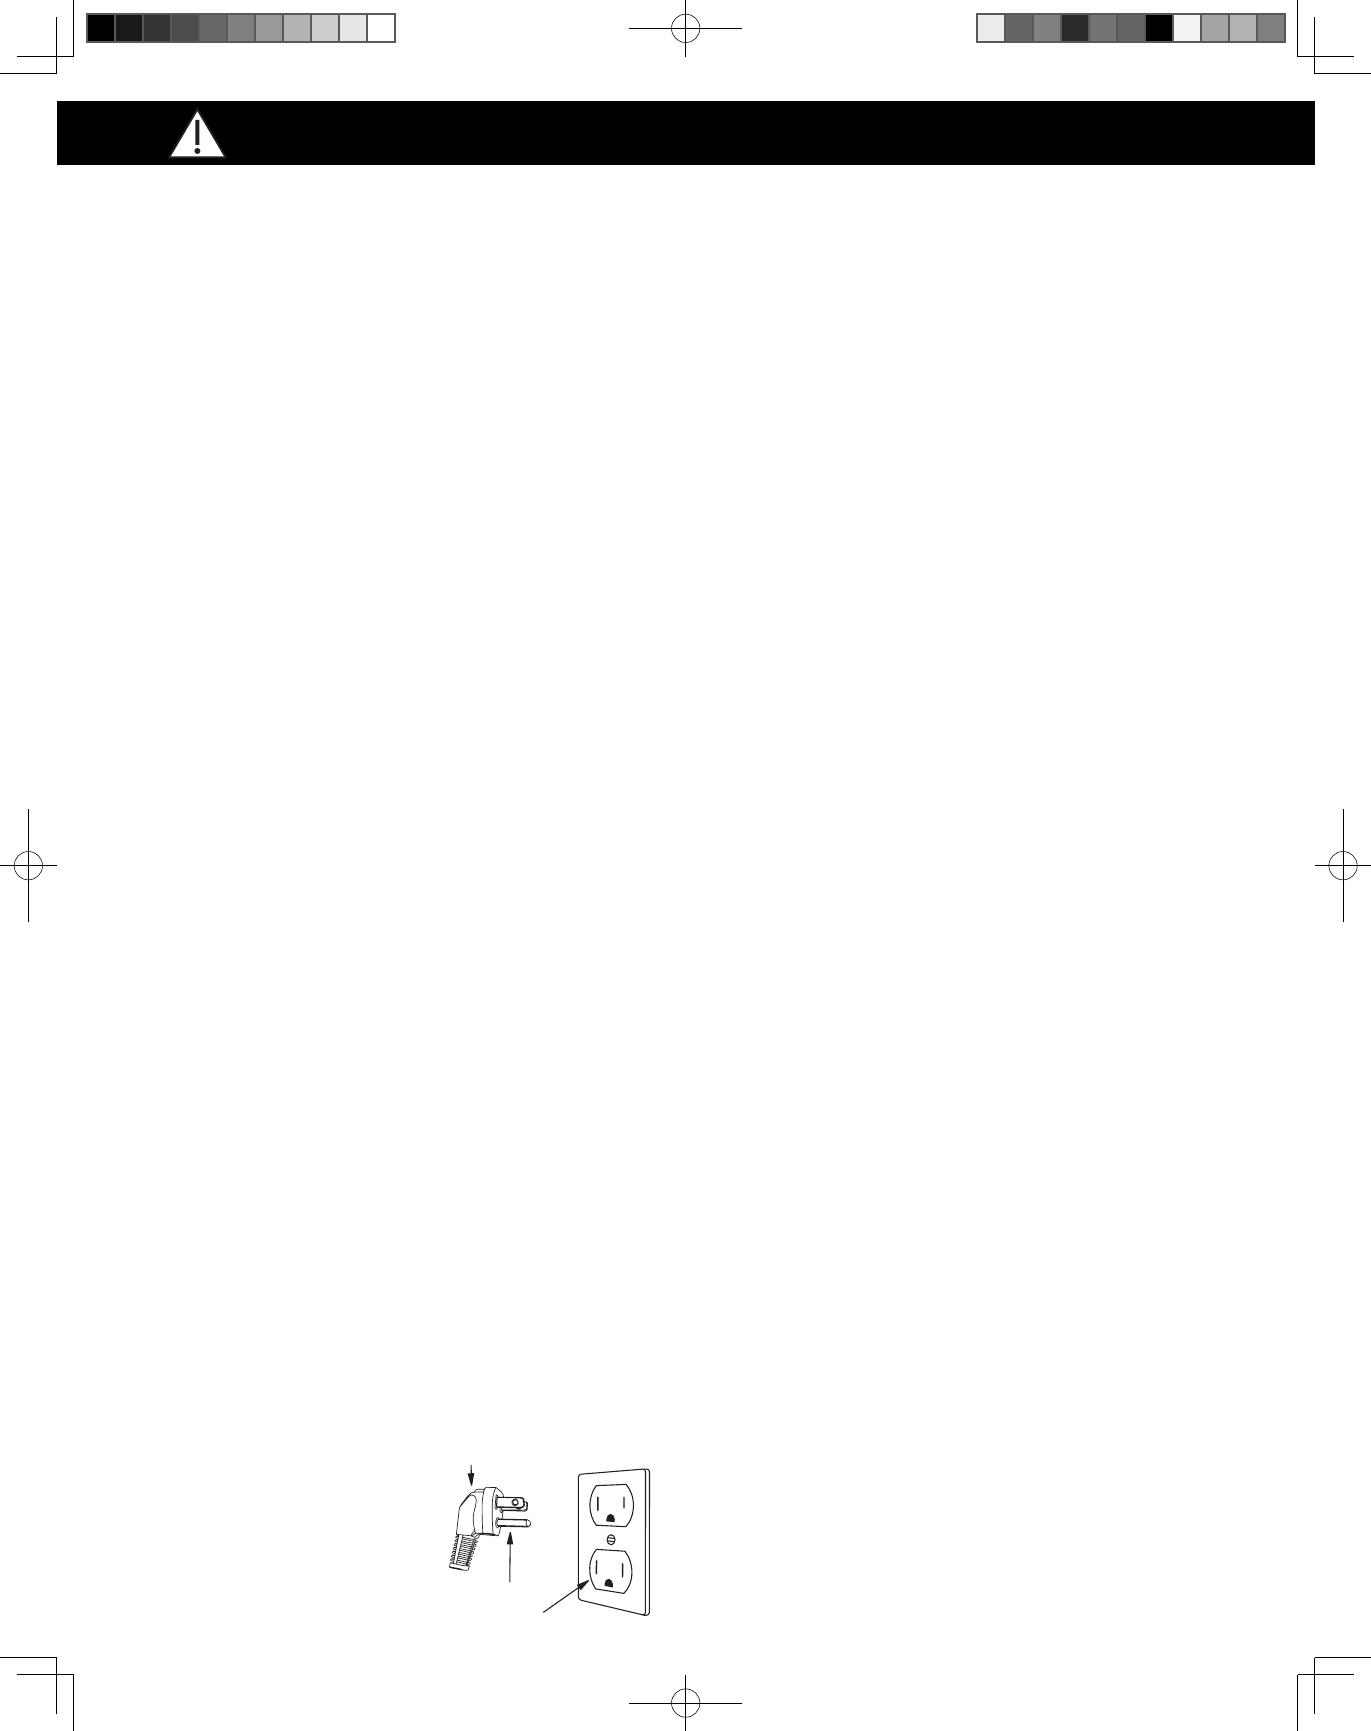
Grounding Instructions
THIS APPLIANCE MUST BE GROUNDED.
In the event of an electrical short circuit, grounding reduces the
risk of electric shock by providing an escape wire for the electric
current. This appliance is equipped with a cord having a grounding
wire with a grounding plug. The plug must be plugged into an
outlet that is properly installed and grounded.
• Plug into properly
installed and grounded
three-prong outlet.
• DO NOT remove ground
prong.
• DO NOT use an adapter.
Power Supply
1. A short power-supply cord is provided to reduce the risks
resulting from becoming entangled in or tripping over a longer
cord.
2. Longer cord sets or extension cords may be used if care is
exercised in their use. DO NOT let cord hang over edge of a
table or counter.
3. If a long cord or extension cord is used,
• The marked electrical rating of the cord set or extension
cord should be at least as great as the electrical rating of the
appliance.
• The extension cord must be a grounding-type 3-wire cord.
• The longer cord should be arranged so that it will not drape
over the counter top or tabletop where it can be pulled on by
children or tripped over accidentally.
Wiring Requirements
1. The oven must be operated on a SEPARATE CIRCUIT. No other
appliance should share the circuit with the microwave oven.
If it does, the branch circuit fuse may blow or the circuit breaker
may trip.
2. The oven must be plugged into at least a 15 A or 20 A, 120V,
60 Hz GROUNDED OUTLET. (Beginning in 2017, all new
construction and all renovated single family homes must
have at least a 20 A, 120 VOLT, 60 Hz GROUNDED OUTLET).
Where a standard two-prong outlet is encountered, it is the
responsibility and obligation of the consumer to have it replaced
with a properly grounded three-prong outlet.
3. The VOLTAGE used must be the same as specified on this
microwave oven (120V, 60Hz). Using a higher voltage is
dangerous and may result in a fire or oven damage. Using
a lower voltage will cause slow cooking. Panasonic is NOT
responsible for any damages resulting from the use of the oven
with any voltage other than specified.
TV / RADIO / WIRELESS EQUIPMENT INTERFERENCE
This product has been tested and found to comply with the limits
for Microwave Oven. This product can radiate radio frequency
energy, which could cause interference to such products as radio,
TV, baby monitor, cordless phone, Bluetooth, wireless router, etc.,
which can be confirmed by turning this product off and on. If
present, the user is encouraged to try to correct by taking one or
more of the following countermeasures:
(1) Increase the spacing distance between the microwave oven and
other product receiving the interference.
(2) If possible, use a properly installed receiver antenna and/or
reorient the receiving antenna of the other product receiving the
interference.
(3) Plug the microwave oven into a different outlet from the other
product receiving the interference.
(4) Clean door and sealing surfaces of the oven. (See Care and
Cleaning of Your Microwave Oven)
3-Pronged Plug
Ground Plug
3-Prong Receptacle
Installation and Grounding Instructions