81532

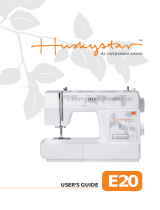
Husqvarna 81532 User guide

  • Hello! I've reviewed the user guide for the sewing machine E20. This document contains detailed safety information, operational guidance on various sewing techniques including buttonholes and darning, and maintenance instructions. I'm ready to assist you with any questions you have.
  • What should I do before cleaning the sewing machine?
    What type of bulb should I use for replacement?
    What should I do if the machine has a damaged cord?
E20
USER’S GUIDE
This houshold sewing machine is designed to comply with IEC/EN 60335-2-28 and UL1594
IMPORTANT SAFETY INSTRUCTIONS
When using an electrical appliance, basic safety precautions should always be followed,
including the following:
Read all instructions before using this household sewing machine.
DANGER - To reduce the risk of electric shock:
A sewing machine should never be left unattended when plugged in. Always unplug this
sewing machine from the electric outlet immediately after using and before cleaning.
Always unplug before relamping. Replace bulb with same type rated 10 Watt (110-120V),
15 Watt (220-240V).
WARNING - To reduce the risk of burns, re,
electric shock, or injury to persons:
Do not allow to be used as a toy. Close attention is necessary when this sewing machine is
used by or near children and in rm persons.
Use this sewing machine only for its intended use as described in this manual. Use only
attachments recommended by the manufacturer as contained in this manual.
Never operate this sewing machine if it has a damaged cord or plug, if it is not working
properly, if it has been dropped or damaged, or dropped into water. Return the sewing
machine to the nearest authorized dealer or service center for examination, repair,
electrical or mechanical adjustment.
Never operate the sewing machine with any air openings blocked. Keep ventilation
openings of the sewing machine and foot controller free from the accumulation of lint, dust,
and loose cloth.
• Keep ngers away from all moving parts. Special care is required around the sewing
machine needle.
Always use the proper needle plate. The wrong plate can cause the needle to break.
Do not use bent needles.
Do not pull or push fabric while stitching. It may de ect the needle causing it to break.
Switch the sewing machine off (“0”) when making any adjustment in the needle area, such
as threading needle, changing needle, threading bobbin, or changing presser foot, etc.
Always unplug sewing machine from the electrical outlet when removing covers,
lubricating, or when making any other user servicing adjustments mentioned in the
instruction manual.
Never drop or insert any object into any opening.
Do not use outdoors.
Do not operate where aerosol (spray) products are being used or where oxygen is being
administrated.
To disconnect, turn all controls to the off (“0”) position, then remove plug from outlet.
Do not unplug by pulling on cord. To unplug, grasp the plug, not the cord.
SAVE THESE INSTRUCTIONS
3
CONTENTS
PRINCIPAL PARTS ............................................................................................................. 4
ACCESSORIES .................................................................................................................. 6
SLIDE ON THE SNAP-IN ACCESSORY BOX .................................................................... 7
CONNECTING THE MACHINE TO POWER SOURCE ...................................................... 8
CHANGING THE BULB ....................................................................................................... 9
TWO-STEP PRESSER FOOT LEVER .............................................................................. 10
ADJUSTING THE PRESSER FOOT PRESSURE ............................................................ 10
PRESSER FOOT SHANK ..................................................................................................11
WINDING THE BOBBIN .................................................................................................... 12
INSERTING THE BOBBIN ................................................................................................ 13
CHANGING THE NEEDLE (SYSTEM 130/705H) ............................................................ 14
THREADING THE UPPER THREAD ................................................................................ 15
BRINGING UP THE BOBBIN THREAD ............................................................................ 16
THREAD TENSION ........................................................................................................... 17
RAISE OR LOWER THE FEED DOG ............................................................................... 18
REVERSE SEWING .......................................................................................................... 19
CHANGING SEWING DIRECTIONS ................................................................................ 19
REMOVING THE FABRIC ................................................................................................. 19
CUTTING THE THREAD ................................................................................................... 19
HOW TO CHOOSE YOUR PATTERN ............................................................................... 20
MATCHING NEEDLE / FABRIC / THREAD ...................................................................... 21
ZIG ZAG SEWING ............................................................................................................. 22
STRAIGHT STITCHING AND NEEDLE POSITION .......................................................... 23
OVERLOCK STITCHES .................................................................................................... 24
BLIND HEM ....................................................................................................................... 25
ONE STEP BUTTONHOLES ........................................................................................... 26
LEFT AND RIGHT SIDE BALANCE FOR BUTTONHOLE ................................................ 27
ZIPPERS AND PIPING ..................................................................................................... 28
3-STEP ZIG-ZAG .............................................................................................................. 29
STRETCH STITCH SELECTION ...................................................................................... 30
FREE MOTION DARNING ................................................................................................ 31
DARNING .......................................................................................................................... 32
QUILTING .......................................................................................................................... 33
MAINTENANCE ................................................................................................................ 34
TROUBLESHOOTING GUIDE .......................................................................................... 35
Obsah je uzamčen
Dokončete, prosím, proces objednávky.
Následně budete mít přístup k celému dokumentu.
Proč je dokument uzamčen? Nahněvat Vás rozhodně nechceme. Jsou k tomu dva hlavní důvody:
1) Vytvořit a udržovat obsáhlou databázi návodů stojí nejen spoustu úsilí a času, ale i finanční prostředky.
Dělali byste to Vy zadarmo? Ne*. Zakoupením této služby obdržíte úplný návod a podpoříte provoz a
rozvoj našich stránek. Třeba se Vám to bude ještě někdy hodit.
*) Možná zpočátku ano. Ale vězte, že dotovat to dlouhodobě nelze. A rozhodně na tom nezbohatneme.
2) Pak jsou tady „roboti“, kteří se přiživují na naší práci a „vysávajívýsledky našeho úsilí pro svůj
prospěch. Tímto krokem se jim to snažíme překazit.
A pokud nemáte zájem, respektujeme to. Urgujte svého prodejce. A když neuspějete, rádi Vás uvidíme!
/