Jura J6 Reference guide

Category
Coffee makers
Type
Reference guide

Jura J6: Experience the art of coffee perfection with a device designed to cater to your personal preferences. Whether you're craving a quick espresso, a velvety cappuccino, or a smooth latte macchiato, the Jura J6 is your ultimate coffee companion.

Jura J6: Experience the art of coffee perfection with a device designed to cater to your personal preferences. Whether you're craving a quick espresso, a velvety cappuccino, or a smooth latte macchiato, the Jura J6 is your ultimate coffee companion.

J6/J600 – Quick Reference Guide
2
J6/J600 – Quick Reference Guide
J
These short instructions do not replace the ‘J6/J600 Instructions for
Use’. Make sure you read and observe the safety information and
warnings first in order to avoid hazards.
You can initiate the rinse operation manually at any time.
T Place a receptacle under the coffee spout.
T Press the P button.
‘Maintenance status
T Press the Rotary Switch.
‘Clean’
T Turn the Rotary Switch until ‘Rinse’ is displayed.
T Press the Rotary Switch to initiate the rinse operation.
‘Machine is rinsing’, ‘Milk system is being rinsed’, water
flows out of the coffee spout.
The rinse stops automatically. ‘Please select product’
appears on the display.
15 minutes after milk preparation, the milk system is automatically
rinsed. Therefore always place a receptacle under the cappuccino
frother after preparing milk.
When Rinse the milk system is displayed, you can start rinsing by
pressing the Rotary Switch.
Rinsing the machine
Automatic milk system
rinsing
3
J6/J600 – Quick Reference Guide
To ensure that the cappuccino frother always works properly, you
must clean it daily when you have been preparing milk.
If the wrong cleaning agent is used, the machine could be damaged
and/or traces could be left behind in the water.
T Use only original JURA maintenance products.
E JURA milk system cleaner is available from specialised dealers.
E To clean the milk system, use the container supplied.
T Press the P button.
‘Maintenance status
T Press the Rotary Switch.
‘Clean’
T Turn the Rotary Switch until ‘Clean the milk system is dis-
played.
T Press the Rotary Switch.
‘Clean the milk system
T Press the Rotary Switch again.
T Press the ‘Start’ button.
T Remove the milk pipe from the milk container or carton.
T Add milk system cleaner to the front part of the container
up to the bottom mark (indicated by 6).
T Then fill with water up to the upper mark.
T Place the container under the cappuccino frother.
T Turn the setting wheel of the cappuccino frother to the Milk
position z.
T Connect the milk pipe to the container.
E To connect the milk pipe to the container correctly, the pipe
must be fitted with a connector.
T Press the ‘Next’ button.
‘Milk system is being cleaned’ appears and the cappuccino
frother and the milk pipe are cleaned.
Cleaning the milk system
CAUTION
6
6
4
J6/J600 – Quick Reference Guide
T During the first brief interruption, set the setting wheel of
the cappuccino frother to the Milk Foam position 5.
‘Water for cleaning milk system
T Rinse the container thoroughly and fill the front part with
fresh water up to the upper mark.
T Place this under the cappuccino frother and reconnect the
milk pipe to the container.
T Press the ‘Next’ button.
‘Milk system is being cleaned’ appears and the cappuccino
frother and the milk pipe are rinsed with fresh water.
The start screen is displayed.
To make sure the cappuccino frother works properly, and in the inte-
rests of hygiene, it must be dismantled and rinsed daily if you have
been preparing milk.
T Remove the milk pipe and rinse it thoroughly under running
water.
T Carefully pull the cappuccino frother down and off.
T Dismantle the cappuccino frother into its individual parts.
T Rinse all the parts under running water. If there are severely
dried-on milk residues, firstly immerse the individual parts
in a solution of 250 ml cold water and 1 capful of JURA milk
system cleaner. Then rinse the parts thoroughly.
T Reassemble the cappuccino frother.
E Ensure that all individual parts are correctly and firmly con-
nected to ensure correct operation of the cappuccino frother.
T Firmly attach the frother to the connector.
Dismantling and rinsing
the cappuccino frother
5
J6/J600 – Quick Reference Guide
Your JURA no longer has to be descaled if you are using the CLARIS
Smart filter cartridge. If you did not insert the filter cartridge the first
time you used the machine, you can do this now as follows.
T Place a receptacle under the hot-water spout.
T Remove and empty the water tank.
T Open the filter holder.
T Fit the filter cartridge extension supplied on top of a CLARIS
Smart filter cartridge.
T Insert the filter cartridge with its extension into the water
tank.
T Close the filter holder. It will click into place audibly.
T Fill the water tank with fresh, cold water and reinsert the
tank.
E The machine automatically detects that you have just inserted
the filter cartridge.
‘Filter operation / ‘Saved
‘Filter is being rinsed’, water flows out of the hot-water
spout.
Rinsing of the filter stops automatically after approximately
300 ml.
‘Empty drip tray’
T Empty the drip tray and put it back into the machine.
‘Filter operation/ ‘Filter rinsing complete’
‘Please select product’ appears on the display. Your JURA is
once more ready for use.
Inserting the filter
6
J6/J600 – Quick Reference Guide
E Once the filter cartridge stops working (depending on the
water hardness setting), the JURA will prompt you to change
the filter.
E CLARIS Smart filter cartridges are available from specialised
dealers.
Precondition: ‘Change filter’ is displayed.
T Place a receptacle under the hot-water spout.
T Remove and empty the water tank.
T Open the filter holder and remove the old CLARIS Smart
filter cartridge and filter extension.
T Fit the filter cartridge extension on top of a new CLARIS filter
cartridge Smart.
T Insert the filter cartridge with its extension into the water
tank.
T Close the filter holder. It will click into place audibly.
T Fill the water tank with fresh, cold water and reinsert the
tank.
E The machine automatically detects that you have just chan-
ged the filter cartridge.
‘Change the filter’ / ‘Saved’
‘Filter is being rinsed’, water flows out of the hot-water
spout.
‘Empty drip tray’
T Empty the drip tray and put it back into the machine.
‘Change the filter’ / ‘Filter rinsing complete’
‘Please select product’ appears on the display. Your JURA is
once more ready for use.
Changing the filter
7
J6/J600 – Quick Reference Guide
After 180 preparations or 80 switch-on rinses, the JURA will prompt
you to clean it.
If the wrong cleaning agent is used, the machine could be damaged
and/or traces could be left behind in the water.
T Use only original JURA maintenance products.
E The cleaning programme lasts approximately 20 minutes.
E Do not interrupt the cleaning programme. The quality of
cleaning will be impaired if you do so.
E JURA cleaning tablets are available from specialised dealers.
Precondition: ‘Clean machine’ is displayed.
T Press the P button.
‘Clean’
T Press the Rotary Switch.
T Press the ‘Start’ button.
T Press the ‘Start’ button again.
‘Empty coffee grounds container’
T Empty the drip tray and coffee grounds container and put
them back into the machine.
‘Press the Rotary Switch
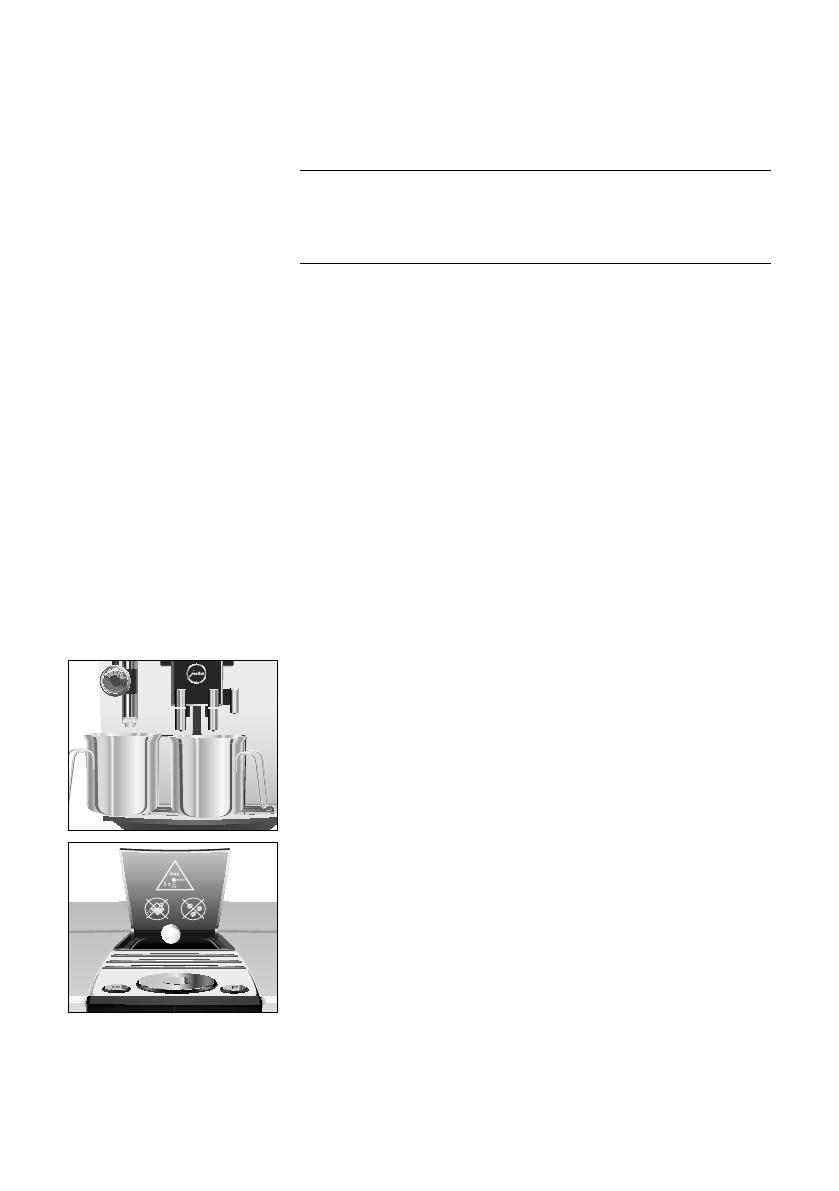
T Place one receptacle under the coffee spout and another
under the cappuccino frother.
T Press the Rotary Switch.
‘Machine is being cleaned’, water flows out of the coffee
spout.
The operation is interrupted, Add cleaning tablet’.
T Open the cover of the filler funnel for ground coffee.
T Insert a JURA cleaning tablet into the filler funnel.
T Close the cover of the filler funnel.
‘Press the Rotary Switch
T Press the Rotary Switch.
‘Machine is being cleaned’, water flows repeatedly out of the
coffee spout and the cappuccino frother.
The operation stops automatically.
‘Empty coffee grounds container’
T Empty the drip tray and coffee grounds container and put
them back into the machine.
Cleaning is now complete. The start screen is displayed.
Cleaning the machine
CAUTION
8
J6/J600 – Quick Reference Guide
The JURA builds up deposits of limescale over time and automati-
cally prompts you to descale it when necessary. The degree of calci-
fication depends on the hardness of your water.
E If you are using a CLARIS Smart filter cartridge, you will not be
prompted to descale.
If the descaling agent comes into contact with the skin or eyes, this
can cause irritation.
T Avoid contact with the skin or eyes.
T Rinse off the descaling agent with clean water. Should you get
any descaling agent in your eye, see a doctor.
If the wrong descaling agent is used, the machine could be dama-
ged and/or traces could be left behind in the water.
T Use only original JURA maintenance products.
If the descaling operation is interrupted, there may be damage to
the machine.
T Allow the descaling programme to run to the end.
If the descaling agent comes into contact with sensitive surfaces
(e.g. marble), damage cannot be ruled out.
T Clean up any splashes immediately.
E The descaling programme lasts approximately 45 minutes.
E JURA descaling tablets are available from specialised dealers.
Precondition: ‘Decalcify machine’ is displayed.
T Press the P button.
‘Descale’
T Press the Rotary Switch.
T Press the ‘Start’ button.
T Press the ‘Start’ button again.
‘Empty drip tray’
T Empty the drip tray and coffee grounds container and put
them back into the machine.
‘Pour descaling agent into water tank’
T Remove and empty the water tank.
Descaling the machine
J
CAUTION
CAUTION
CAUTION
CAUTION
9
J6/J600 – Quick Reference Guide
T Completely dissolve 3 JURA descaling tablets in a receptacle
holding 500 ml of water. This may take several minutes.
T Pour the solution into the empty water tank and insert it
into the machine.
T Place one receptacle under the hot-water spout and another
under the cappuccino frother.
‘Press the Rotary Switch
T Press the Rotary Switch.
‘Machine is being descaled’ appears and water flows repea-
tedly out of the hot-water spout and the cappuccino frother.
The operation is interrupted, ‘Empty drip tray’.
T Empty the drip tray and coffee grounds container and put
them back into the machine.
‘Fill water tank’
T Remove the water tank and rinse it thoroughly.
T Fill the water tank with fresh, cold water and reinsert the
tank.
‘Press the Rotary Switch
T Place a receptacle under the cappuccino frother, the coffee
spout and the hot-water spout.
T Press the Rotary Switch.
‘Machine is being descaled’, the descaling operation is
continued.
The operation is interrupted, ‘Empty drip tray’.
T Empty the drip tray and coffee grounds container and put
them back into the machine.
Descaling is now complete. The start screen is displayed.
E If the descaling operation stops unexpectedly, rinse the water
tank thoroughly.
10
J6/J600 – Quick Reference Guide
Coffee beans may be covered with a slight oil film which remains on
the walls of the bean container. These traces may negatively affect
the coffee result. For this reason clean the bean container from time
to time.
Precondition: ‘Fill bean container’ is displayed.
T Switch the machine off with the On/Off button Q.
T Open the bean container cover and remove the aroma
preservation cover.
T Clean the bean container with a soft, dry cloth.
T Fill the bean container with coffee beans, then close the
aroma preservation cover and the bean container cover.
Limescale deposits may form in the water tank. To ensure correct
function of the machine, descale the water tank from time to time.
T Remove the water tank.
T If you use a CLARIS Smart filter cartridge, remove this.
T Completely fill the water tank and dissolve 3 JURA descaling
tablets in it.
T Leave the water tank with the descaling solution for several
hours (e.g. overnight).
T Empty the water tank and rinse it thoroughly.
T If you use a CLARIS Smart filter cartridge, insert this again.
T Fill the water tank with fresh, cold water and reinsert the
tank.
Cleaning the bean
container
Descaling the water tank
J6/J600_Kurz/en/201804
  • Page 1 1
  • Page 2 2
  • Page 3 3
  • Page 4 4
  • Page 5 5
  • Page 6 6
  • Page 7 7
  • Page 8 8
  • Page 9 9
  • Page 10 10

Jura J6 Reference guide

Category
Coffee makers
Type
Reference guide

Jura J6: Experience the art of coffee perfection with a device designed to cater to your personal preferences. Whether you're craving a quick espresso, a velvety cappuccino, or a smooth latte macchiato, the Jura J6 is your ultimate coffee companion.

Ask a question and I''ll find the answer in the document

Finding information in a document is now easier with AI