Cleaning the appliance after each use
1. Food containing sugar, plastics, tin foil residues should be removed at once using a
scraper. Place a scraper on the glass ceramic surface at an angle and remove residues
by sliding the blade over the surface. Wipe the appliance with a damp cloth and a little
washing up liquid. Finally, rub the appliance dry using a clean cloth .
2. Limescale rings, water rings, fat splashes, shiny metallic discolorations should be re-
moved after the appliance has cooled down using cleaner for glass ceramic or stainless
steel.
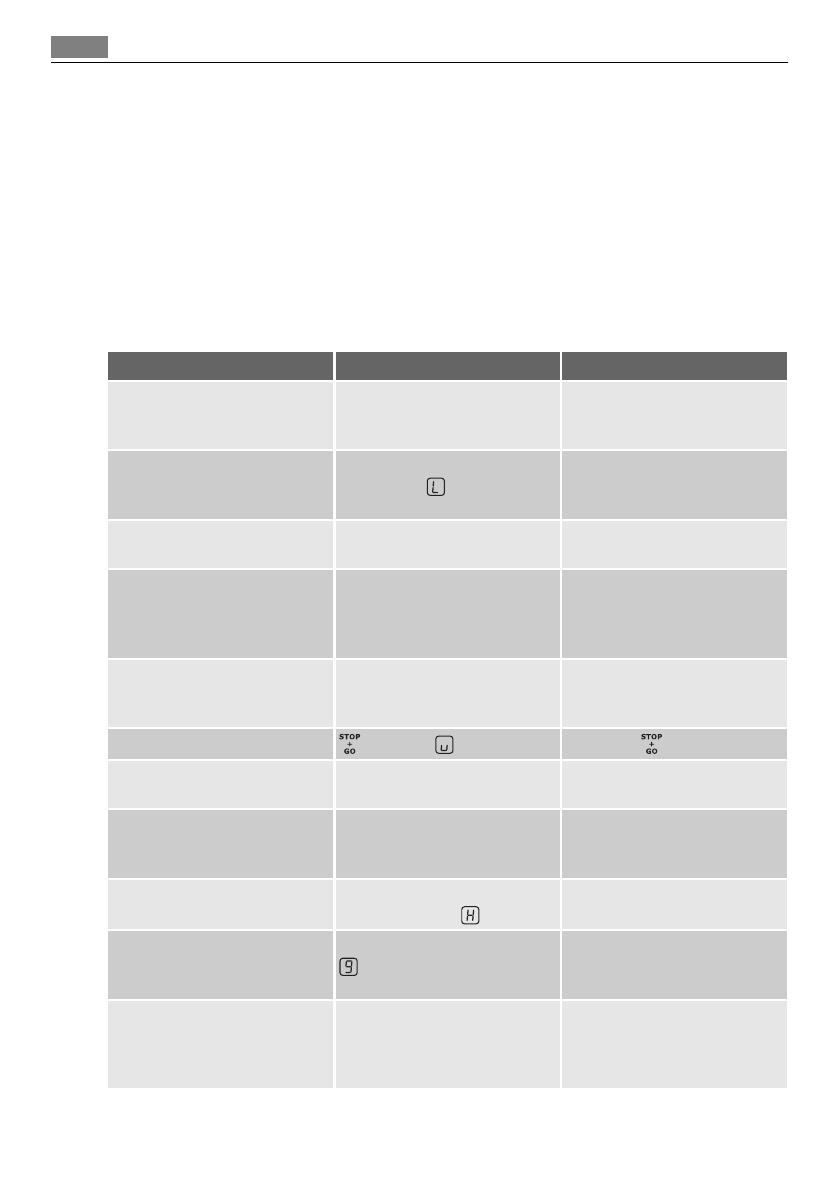
What to do if...
Problem Possible cause Remedy
The cooking zones will not
switch on or are not function-
ing
More than 10 seconds have
passed since the appliance was
switched on
Switch the appliance on again.
The child safety device is
switched on
Deactivate child safety device
(See the section “Child safety
device”)
Several sensor fields were
touched at the same time
Only touch one sensor field
Automatic switch off has been
triggered
Remove any objects (pan,
cloths, etc.) that are lying on
the control panel. Switch the
appliance on again
There is water on the control
panel, or the control panel is
covered with splashes
Wipe the control panel
is active - Switch off
Acoustic signal sounds when
appliance is switched off
The control panel is wholly or
partly covered by objects.
Remove objects.
The residual heat indicator is
not displaying anything
The cooking zone was only on
for a short time and is therefore
not hot
If the cooking zone is supposed
to be hot, call the Customer
Service Department.
The automatic warm up func-
tion is not switching itself on
There is still residual heat on
the cooking zone
Let the cooking zone cool down
The highest heat setting is set The highest heat setting has
the same power as the auto-
matic warm up function
Acoustic signal sounds and ap-
pliance switches itself on and
then off again; after 5 seconds
another acoustic signal sounds
The On/Off sensor field has
been covered up, e.g. by a cloth
Do not place any objects on the
control panel
14
What to do if...


