Page is loading ...

www.whirlpool.eu/register
Health & Safety, Use & Care and Installation guide
AWG 1112 /PRO
AWG 1112 S/PRO

2
ENGLISH (Instruction manual translated from
the English language) ..........................3

3
EN
ENGLISH
HEALTH & SAFETY, USE & CARE
and INSTALLATION GUIDES
THANK YOU FOR BUYING A WHIRLPOOL PRODUCT.
In order to receive a more complete assistance,
please register your appliance on www.whirlpool.eu/register
Index
Health and Safety Guide
SAFETY INSTRUCTIONS ..............................................................................5
DECLARATION OF CONFORMITY .....................................................................7
Use and Care guide
PRODUCT DESCRIPTION .............................................................................8
APPLIANCE ...........................................................................................8
DETERGENT DISPENSER ...............................................................................8
CONTROL PANEL ......................................................................................9
TECHNICAL DATA FOR WATER CONNECTION ..........................................................10
DOOR ...............................................................................................11
DRUM LIGHT (if available) ............................................................................11
ACCESSORIES ........................................................................................11
HOW TO USE THE APPLIANCE .......................................................................12
FIRST TIME USE ......................................................................................12
DAILY USE ...........................................................................................13
PROGRAMMES AND OPTIONS ........................................................................17

4
Installation guide ...................................................................................44
FUNCTIONS ..........................................................................................23
INDICATORS .........................................................................................25
DOSING AID / FIRST USE ..............................................................................26
DOSING AID / DAILY USE .............................................................................28
SAVING TIPS .........................................................................................29
CLEANING & MAINTENANCE ........................................................................30
CLEANING THE OUTSIDE OF THE WASHING MACHINE ..................................................30
CHECKING THE WATER SUPPLY HOSE .................................................................31
CLEANING THE MESH FILTERS IN THE WATER SUPPLY HOSE ............................................32
CLEANING THE DETERGENT DISPENSER ...............................................................33
CLEANING THE WATER FILTER / DRAINING RESIDUAL WATER ...........................................34
TRANSPORT AND HANDLING ........................................................................36
TROUBLESHOOTING ................................................................................37
DOOR – HOW TO OPEN IT IN CASE OF A FAILURE, TO TAKE OUT YOUR LAUNDRY ........................42
AFTER SALES SERVICE ................................................................................43

5
EN
SAFETY
INSTRUCTIONS
CAUTION: Read the
instructions before using
appliance.
Before using the appliance,
read these safety instructions.
Keep them nearby for future
reference.
These instructions and the
appliance itself provide
important safety warnings, to
be observed at all times. The
manufacturer declines any
liability for failure to observe
these safety instructions, for
inappropriate use of the
appliance or incorrect setting
of controls.
Very young children
(0-3years) should be kept away
from the appliance. Young
children (3-8years) should be
kept away from the appliance
unless continuously
supervised. Children from
8years old and above and
persons with reduced physical,
sensory or mental capabilities
or lack of experience and
knowledge can use this
appliance only if they are
supervised or have been given
instructions on safe use and
understand the hazards
involved. Children must not
play with the appliance.
Cleaning and user
maintenance must not be
carried out by children without
supervision.
Never open the door forcibly or
use it as a step.
PERMITTED USE
CAUTION: The appliance is
not intended to be operated by
means of an external switching
device, such as a timer, or
separate remote controlled
system.
This appliance is intended to
be used in public areas and
applications such as: sta
kitchen areas in shops, oces
and other working
environments; farm houses; by
clients in hotels, motels, bed &
breakfasts and other
residential environments.
Do not load the machine
above the maximum capacity
(kg of dry cloth) indicated in
the programme table.
Do not use the appliance
outdoors.
Do not use any solvents (e.g.
turpentine, benzene),
detergents containing
solvents, scouring powder,
glass or general purpose
cleaners, or ammable uids;
do not machine wash fabrics
that have been treated with
solvents or ammable liquids.
INSTALLATION
The appliance must be
handled and installed by two
or more persons- risk of injury.
Use protective gloves to
unpack and install- risk of cuts.
If you want to stack a dryer on
top of your washing machine,
rst contact our After-Sales
Service or your specialist dealer
to verify whether this is
possible. This is only possible if
the dryer is attached to the
washing machine by means of
appropriate stacking kit
available through our After-
Sales Service or your specialist
dealer.
Move the appliance without
lifting it by the worktop or top
lid.
Installation, including water
supply (if any) and electrical
connections and repairs must
be carried out by a qualied
technician. Do not repair or
replace any part of the
appliance unless specically
stated in the user manual. Keep
children away from the
installation site. After
unpacking the appliance, make
sure that it has not been
damaged during transport. In
the event of problems, contact
the dealer or your nearest
After-sales Service. Once
installed, packaging waste
(plastic, styrofoam parts etc.)
must be stored out of reach of
children- risk of suocation.
The appliance must be
disconnected from the power
supply before any installation
operation- risk of electric
shock. During installation,
make sure the appliance does
not damage the power cable-
risk of re or electric shock.
Only activate the appliance
when the installation has been
completed.
In the event of failure, only
original spare parts must be
used. Repairs must be carried
out by our authorised After
Sales Service.
Do not install your appliance
where it may be exposed to
extreme conditions, such as:
poor ventilation, temperatures
below 5°C or above 35°C.
When installing the
appliance make sure that the
Health and Safety Guide
6
safe operation, please see the
Use and Care Guide.
DISPOSAL OF PACKAGING
MATERIALS
The packaging material is
100% recyclable and is marked
with the recycle symbol
.
The various parts of the
packaging must therefore be
disposed of responsibly and in
full compliance with local
authority regulations
governing waste disposal.
DISPOSAL OF HOUSEHOLD
APPLIANCES
This appliance is manufactured
with recyclable or reusable
materials. Dispose of it in
accordance with local waste
disposal regulations. For
further information on the
treatment, recovery and
recycling of household
electrical appliances, contact
your local authority, the
collection service for
household waste or the store
where you purchased the
appliance. This appliance is
marked in compliance with
European Directive 2012/19/
EU, Waste Electrical and
Electronic Equipment (WEEE).
By ensuring this product is
disposed of correctly, you will
help prevent negative
consequences for the
environment and human
health.
The symbol
on the product
or on the accompanying
documentation indicates that
it should not be treated as
domestic waste but must be
taken to an appropriate
collection center for the
recycling of electrical and
electronic equipment.
four feet are stable and resting
on the oor, adjusting them as
required, and check that the
appliance is perfectly to level
using a spirit level.
If the appliance is being
installed on wood or “oating”
oors (certain parquet and
laminate materials), secure a
60x60x3cm (at least) sheet of
plywood to the oor then
place the appliance on top of
this.
Connect the water inlet
hose(s) to the water supply in
accordance with the
regulations of your local water
company.
For cold ll only models: do
not connect to the hot water
supply.
For models with hot ll: the
hot water inlet temperature
must not exceed 60°C.
The washing machine is
tted with transport bolts to
prevent any possible damage
to the interior during transport.
Before using the machine, it is
imperative that the transport
bolts are removed. After their
removal, cover the openings
with the 4 enclosed plastic
caps.
After installation of the
device, wait a few hours before
starting it so that it acclimates
to the environmental
conditions of the room.
Make sure that the
ventilation openings in the
base of your washing machine
(if available on your model) are
not obstructed by a carpet or
other material.
Use only new hoses to
connect the appliance to the
water supply. The old hose-sets
should not be reused.
The supply water pressure
must be in the 0.1-1Mpa
range.
ELECTRICAL WARNINGS
It must be possible to
disconnect the appliance from
the power supply by
unplugging it if plug is
accessible, or by a multi-pole
switch installed upstream of
the socket in accordance with
the wiring rules and the
appliance must be earthed in
conformity with national
electrical safety standards.
The appliance shall be
disconnected from its power
source during service and
when replacing parts.
Furthermore the removal of
the plug must be such that an
operator can check from any of
the points to which they have
access that the plug remains
removed.
Do not use extension leads,
multiple sockets or adapters.
The electrical components
must not be accessible to the
user after installation. Do not
use the appliance when you
are wet or barefoot. Do not
operate this appliance if it has a
damaged power cable or plug,
if it is not working properly, or
if it has been damaged or
dropped.
If the supply cord is
damaged, it must be replaced
with an identical one by the
manufacturer, its service agent
or similarly qualied persons in
order to avoid a hazard- risk of
electric shock.
CLEANING AND
MAINTENANCE
WARNING: Ensure that the
appliance is switched o and
disconnected from the power
supply before performing any
maintenance operation; never
use steam cleaning
equipment- risk of electric
shock.
For the details of inspections
and maintenance required for

7
EN
DECLARATION
OF CONFORMITY
Mr. Stefano Demattè, Global Platform Leader, Horizontal Axis Washers, representative of
Whirlpool EMEA S.p.A
Via Carlo Pisacane n.1, 20016 Pero (MI), Italy
declare under our sole responsibility that the product
washing machine WHIRLPOOL AWG 1112 /PRO AWG 1112 S/PRO
12NC Code: 859991545620 859991538480
to which this declaration relates is in conformity with the following standard(s) or other normative document(s)
EN 60335-1:2012+A11:2014+AC:2014
EN 50571:2013
EN 61770:2009
EN 62233:2002+Ber.1:2008
EN 55014-1: 2006+A1:2009+A2:2011
EN 55014-2: 1997+A1:2001+A2:2008
EN 61000-3-2: 2014
EN 61000-3-3: 2013
following the provisions of Directive(s):
2006/42/EC Machinery Directive
2014/30/EU Electromagnetic Compatibility Directive
2011/65/EU RoHS Directive
Fabriano, 22/09/2017 Stefano Demattè
Global Platform Leader
Horizontal Axis Washers
Year of CE Marking: 2017
The noise level of the washing machine is below 70dB(A).
8
PRODUCT
DESCRIPTION
APPLIANCE
DETERGENT DISPENSER
1. Worktop
2. Detergent dispenser
3. Control panel
4. Door handle
5. Door
6. Water filter / Emergency drain hose
(if available) - behind plinth -
7. Plinth (removable)
8. Adjustable feet (4)
1. Main wash compartment
• Detergent for the main wash
• Stain remover
• Water softener
2. Prewash compartment
• Detergent for the prewash
3. Softener compartment
• Fabric softener
• Liquid starch
Pour softener or starch solution only up to the
“MAX” mark.
4. Release button
(press to remove the detergent dispenser for
cleaning)
Use and Care guide
1.
3.
2.
5.
4.
7.
6.
8.
9
EN
1. On/Off button (Reset/Drain if long pressed)
2. Programme button
3. Colours 15° button
4. Fresh Care button
5. Dosing Aid button (Dosing Aid settings if long
pressed)
6. Knob (Turn to select / Press to confirm)
7. Start delay button
8. Temperature button
9. Spin speed button
10. Options button (Key lock if long pressed)
11. Start/Pause button
12. Display
13. Programmes area
CONTROL PANEL
Detergent recommenDations for various types of launDry
White robust laundry (cold-HT) Heavy duty detergents
White delicate laundry (cold-40°C)
Mild detergents containing whitener and/or optical
brighteners
Light/pastel- shaded colours (cold-60°C)
Detergents containing whitener and/or optical brighte-
ners
Intensive colours (cold-60°C)
Colour detergents without whitener / optical brighte-
ners
Black/dark colours (cold-60°C) Special detergents for black/dark laundry
MAX
HT
1. 7.2.
13. 12.
6. 8.4. 10.3. 9.5. 11.

10
TECHNICAL DATA FOR WATER
CONNECTION
WATER CONNECTION
WATER SUPPLY Cold
WATER TAP 3/4” threaded hose connector
MINIMUM WATER SUPPLY PRESSURE 100 kPa (1 bar)
MAXIMUM WATER SUPPLY PRESSURE 1000 kPa (10 bar)
11
EN
DOOR
DRUM LIGHT (if available)
ACCESSORIES
To open the door, pull the handle
• During programme selection: the light goes on
for laundry loading
• After programme start, the light fades on and o
while the laundry load is detected.
• After programme end, when you open the door,
the light goes on for a while for unloading the
laundry. Then it goes o to save energy; touch
any button to switch it on again.
Contact our After-Sales Service to check if the
following accessories are available for your washing
machine (and dryer) model
STACKING KIT SHELF
by which your dryer can be xed on top of your
washing machine to save space and to facilitate
loading and unloading your dryer in the higher
position.
To close the door, hold the handle and push so that
you can hear it click shut.

12
HOW TO USE
THE APPLIANCE
FIRST TIME USE
If you plug in the washing machine, it will switch
on automatically.
To remove residues from manufacturing,
1. Select programme “Cotton” with temperature
HT. Consider the instructions in paragraph “DAILY
USE”.
2. Add a small amount of heavy duty detergent
(maximum 1/3 of the quantity the detergent
manufacturer recommends for lightly soiled
laundry) to the main wash compartment of the
detergent dispenser.
3. Start the programme without adding any
laundry. See information on how to select and start
a programme in paragraph “DAILY USE”.
13
EN
1. REMOVE ALL OBJECTS FROM
POCKETS
• Coins, pins etc. can damage your
laundry as well as parts of the washing
machine.
• Objects like paper handkerchiefs will tear into
small pieces which must be removed manually
after the wash.
2. CLOSE ZIP FASTENERS,
BUTTONS OR HOOKS. TIE LOOSE
BELTS OR RIBBONS TOGETHER.
• Wash small items (e.g. nylon stockings, belts etc.)
and items with hooks (e.g. bras) in a laundry bag
or pillow case with zip fastener. Always remove
curtain rings, or wash curtains with the rings
safely tied inside a cotton bag.
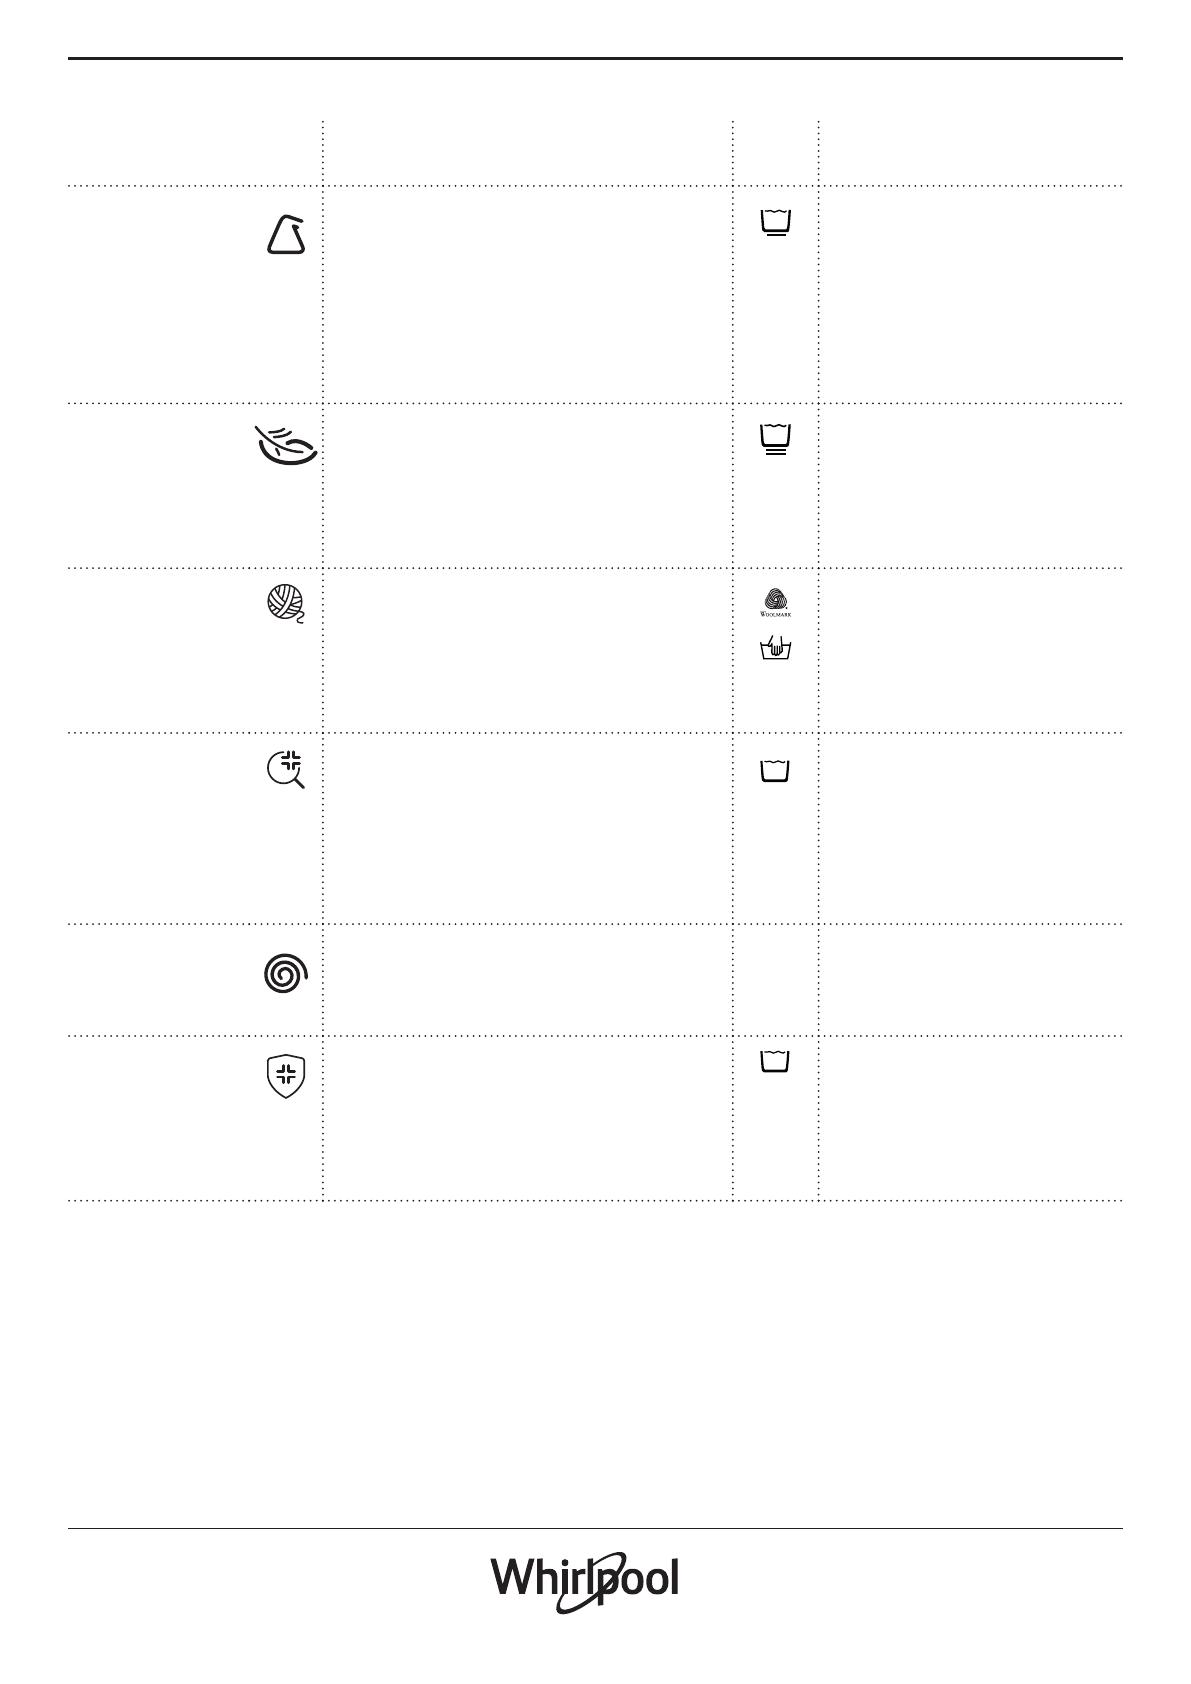
3. TYPE OF FABRIC / CARE LABEL SYMBOL
Cottons, mixed bres, easy care / synthetics, wool,
handwash items.
• Colour
separate coloured and white items. Wash new
coloured articles separately.
• Size
Wash items of dierent sizes in the same
wash load, to improve washing eciency and
distribution of the articles in the drum.
• Delicates
Wash delicate items separately; they require
gentle treatment.
DAILY USE
SORTING YOUR LAUNDRY
14
Find more information regarding programmes in
the Programme Chart.
Change temperature, if needed
If you want to change the temperature
indicated on the display, make sure that the
Temperature button « lights up.
Turn the knob to select the desired temperature,
then press the knob to conrm.
Change spin speed, if needed
If you want to change the spin speed
indicated on the display, make sure that the
Spin button lights up.
Turn the knob to select the desired spin speed, or
Rinse hold , then press the knob to conrm.
If you select spin speed “0”, the programme ends
with draining the rinse water. No nal spin cycle
will be applied.
If you select “Rinse hold”, the programme will
stop after the rinse phase. The laundry will remain
immersed in the last rinse water. See more
information in section PROGRAMMES, OPTIONS
AND FUNCTIONS / Rinse hold.
1. LOAD LAUNDRY
• Open the door and load the laundry.
Observe the maximum load sizes given in
the programme chart.
2. CLOSE DOOR
• Make sure that no laundry gets
stuck between door glass and
rubber seal.
• Close the door so that you can hear it click shut.
3. OPEN WATER TAP
• Make sure that the washing machine is
connected to the mains.
• Open the water tap.
4. SWITCH ON WASHING MACHINE
• Press the On/O button until the
programme button lights up. An
animation will appear, and there will be a sound.
Afterwards the washing machine is ready to be
operated.
• The programme setting which you used last will
appear on the control panel.
5. SET THE DESIRED PROGRAMME
GUIDED MODE
the button light will guide you through setting a
programme in the following order: selection of
programme / temperature / spin speed / options.
As soon as you conrm a selection by pressing the
knob, the button light will jump to the next step.
Select programme
Make sure that the programme button lights up.
Turn the knob to select the desired programme.
The indicator next to the selected programme
lights up.
Conrm the desired programme by pressing the
knob.
HOW TO USE THE WASHING MACHINE
15
EN
Select options, if needed
If you want to select additional options,
make sure that the options button lights
up. The options which are selectable for your
programme are indicated by lighting arrows.
Turn the knob to select the desired options.
The symbol of the selected option blinks. To
conrm it, press the knob.
Some options / functions can be selected by
directly pressing the button:
Refer to section PROGRAMMES, OPTIONS AND
FUNCTIONS for more information.
INDIVIDUAL MODE
After you have switched on the washing machine,
you are not forced to follow the GUIDED MODE.
It is up to you which order you choose to set your
programme. To do a setting, rst press the relevant
button, then turn the knob to select, and nally
press the knob to conrm.
The range of temperatures, spin speeds and
options depend on the programme selected.
Therefore it is recommended to start your setting
with selecting the programme.
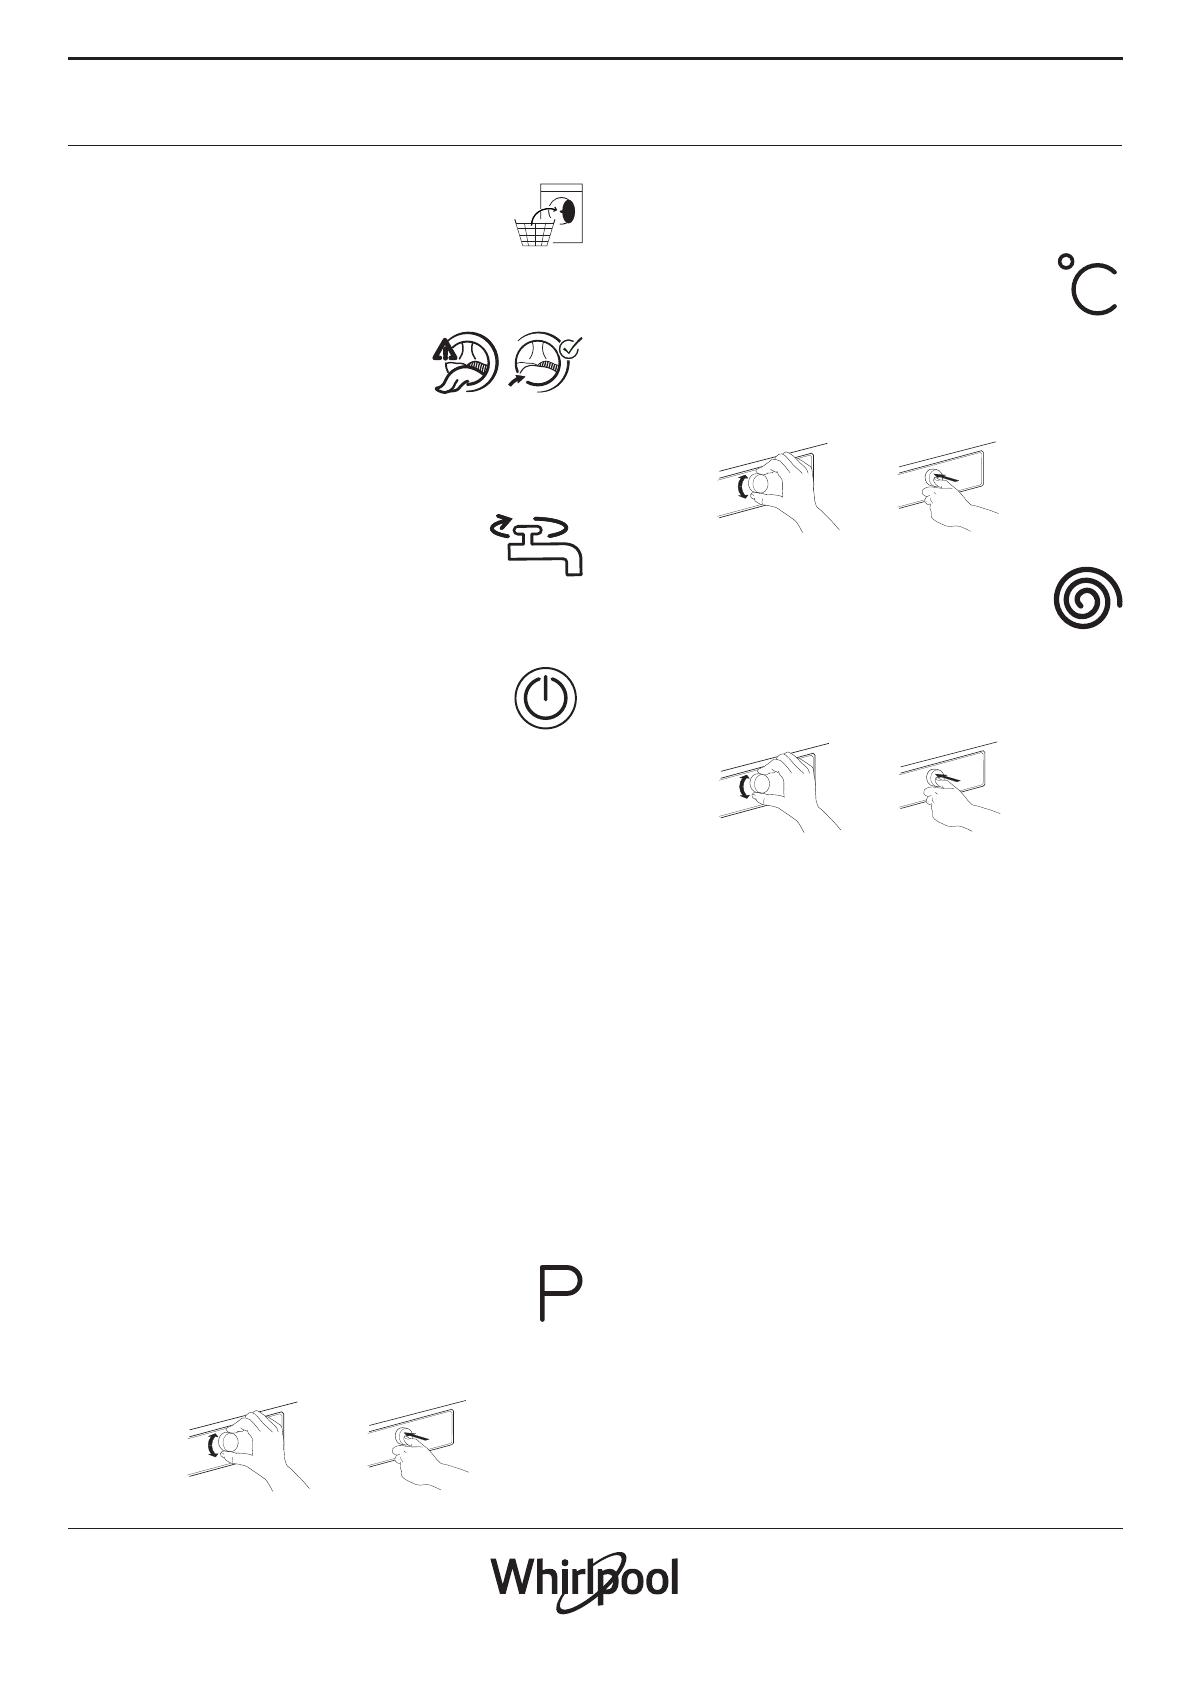
6. ADD DETERGENT
• If you do not use the Dosing Aid function,
pull out the detergent dispenser and
add detergent (and additives/softener) now, as
indicated in section DETERGENT DISPENSER.
Observe the dosing recommendations on the
detergent pack. If you have selected PREWASH or
START DELAY, observe the instructions in section
PROGRAMMES, OPTIONS AND FUNCTIONS.
Afterwards carefully close the detergent
dispenser again.
• If you use the “Dosing Aid” function, add
detergent later, after you have started the
programme. Refer to section DOSING AID/DAILY
USE.
Correct dosing of detergent / additives is
important, because
• it optimizes the cleaning result
• it avoids irritating residues of surplus detergent in
your laundry
• it saves money by avoiding waste of surplus
detergent
• it protects the washing machine by avoiding
calcication of components
• it respects the environment by avoiding
unnecessary environmental burden
7. START PROGRAMME
Press and hold Start/Pause until the button
lights up solidly; the programme will start.
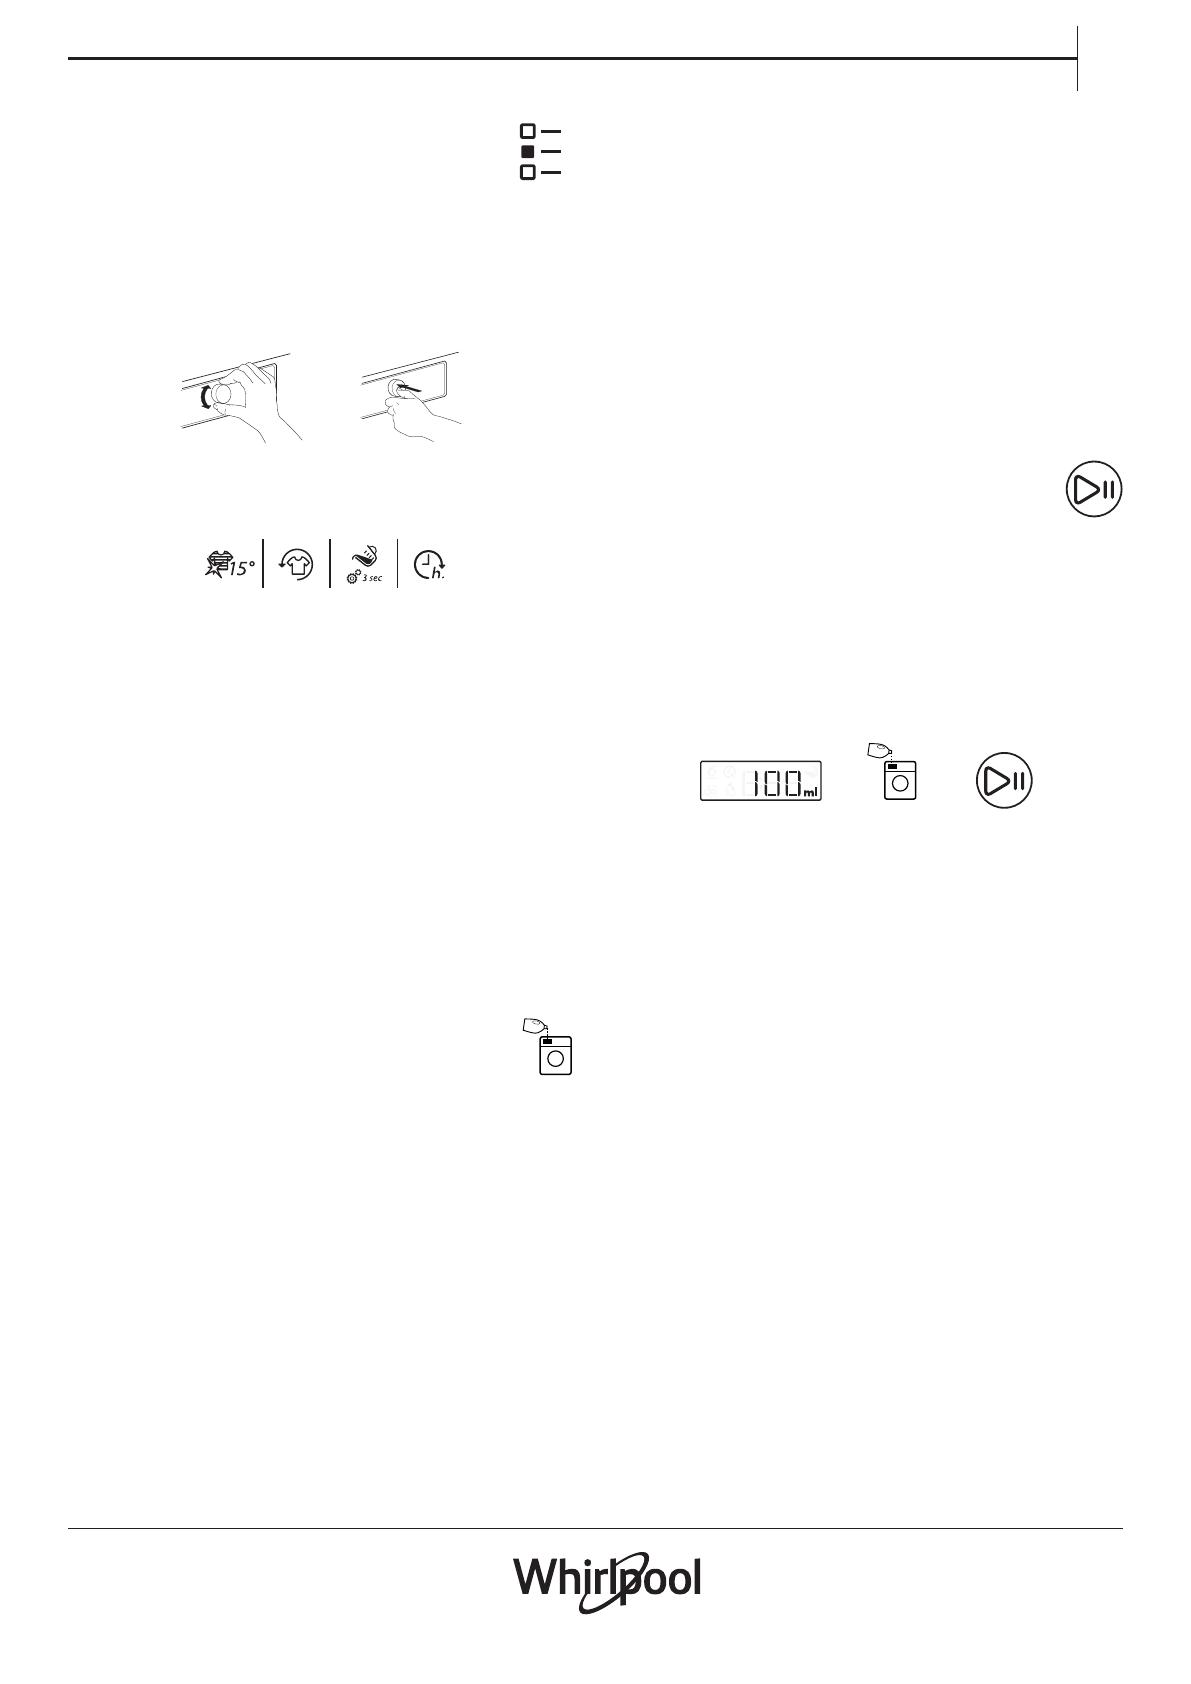
• If you have selected “Dosing Aid”, the washing
machine will indicate the recommended
detergent amount for your laundry load after
programme start. – Add detergent to the main
wash compartment of the detergent dispenser,
close the dispenser and press “Start/Pause” to
proceed with the programme
• If you have selected “Dosing Aid” and also
“Prewash”, add the indicated detergent amount
to the main wash compartment, and half of the
indicated detergent amount also to the Prewash
compartment.
• Close the detergent dispenser and press “Start/
Pause” to proceed with the programme. To avoid
overow, do not open the detergent dispenser
anymore.
• The remaining programme duration which is
indicated on the display can vary. Factors like
unbalance in the wash load, or foam formation,
can have an eect on the programme duration.
Whenever the remaining programme duration is
calculated newly, an animation appears on the
display.

16
8. CHANGE THE SETTINGS OF A RUNNING
PROGRAMME, IF NEEDED
It is possible to change the settings while a
programme is running. The changes will be
applied, provided the respective programme phase
has not nished yet.
• Press the relevant button (for example the “Spin
speed” button to change the spin speed). The
selected value blinks for a few seconds.
• While blinking, you can adjust the setting
by turning the knob. If the value stopped
blinking and you have not yet done the desired
modication, press the button again.
• Press the knob to conrm the modication. If
you do not conrm, the modication will be
conrmed automatically – the modied setting
will stop blinking.
The programme will proceed automatically after
you have changed the setting. To prevent that
a running programme is changed by accident
(for instance by children), use the “Key lock”
(see paragraph PROGRAMMES, OPTIONS AND
FUNCTIONS).
To change the settings of a running programme,
you can also
• Press “Start/Pause” to put the running
programme on pause
• Change your settings
• Press “Start/Pause” again to continue the
programme.
If you have changed the programme, do not add
detergent for the new programme.
9. PAUSE A RUNNING PROGRAMME
AND OPEN THE DOOR, IF NEEDED
Press “Start/Pause” to interrupt a running
programme
• Provided water level or temperature is
not too high, the “door open”
indicator lights up. You can open the
door, for example to add more laundry, or to
remove laundry which was loaded by mistake.
• Press “Start/Pause” to proceed with the
programme
10. RESET A RUNNING PROGRAMME, IF
NEEDED
• Press and hold the On/O button until the
display shows “rES”. The water drains and the
programme is ended. The door unlocks.
11. SWITCH OFF THE WASHING MACHINE
AFTER PROGRAMME END
• „End“ will appear on the display, and the Door
open indicator will light up – you can take out
your laundry
• Press “On/O” to switch o the washing machine.
If you do not switch it o, the washing machine
will switch o automatically after a quarter of an
hour after programme end, to save energy.
• Leave the door ajar, so that the inside of the
washing machine can dry.

17
EN
PROGRAMMES
AND OPTIONS
For selecting the appropriate programme for your
kind of laundry, always respect the instructions on the
care labels of the laundry.
PROGRAMME Type of Wash
and Recommendations
Care
Labels
Settings
WORKING
CLOTHES
Dirty working clothes made of robust
cotton material or cotton-synthetics
blends.
Options “Prewash” and “Intensive
rinse” are preset in this programme -
thus it is optimized to enable the best
cleaning result. For extremely dirty
garments, we recommend to shake
them out thoroughly before putting
them into the washing machine.
- If you want, you can use a stain
remover on oxygen basis
max. load max
temperature range
Cold to 80°C HT*
max spin speed max
selectable options Prewash,
Hot Finish, Bio Stain 15°,
Heavy Soil, Intensive
Rinse, Rapid, Colours 15°,
Fresh care, Dosing Aid,
Start Delay
MOPS AND
TOWELS
Normally to heavily soiled washable
cleaning cloths, mops, towels and
similar laundry made of robust cotton
cloth types.
Intensive wash programme with an
included prewash; add detergent
also to the prewash chamber of the
detergent drawer in case of heavy
soiling.
Do not deselect Prewash, to ensure an
optimum cleaning result.
max. load 6.0 kg
temperature range
Cold to 60°C
max spin speed max
selectable options Prewash,
Hot Finish, Bio Stain 15°,
Intensive Rinse, Rapid,
Colours 15°, Fresh care,
Dosing Aid, Start Delay
COTTON
Normally to heavily soiled robust
laundry made of cotton and linen, such
as towels, underwear, table, bed linen
etc.
max. load max
temperature range
Cold to 60°C
max spin speed max
selectable options Prewash,
Hot Finish, Bio Stain 15°,
Intensive rinse, Rapid,
Colours 15°
ANTISTAIN
QUICK
This programme is ideal for washing
the most dicult daily stains in 1
hour. It is ideal for mixed fabrics and
coloured garments, caring for your
clothes as it washes.
max. load 5.5 kg
temperature range
Cold to 40°C
max spin speed max
selectable options Prewash,
Fresh care, Dosing Aid,
Start Delay
18
PROGRAMME Type of Wash
and Recommendations
Care
Labels
Settings
SYNTHETICS
Normally soiled laundry made
of articial bres (like polyester,
polyacrylics, viscose etc.) or their
blends with cotton.
max. load 4.0 kg
temperature range
Cold to 60°C
max spin speed max
selectable options Prewash,
Bio Stain 15, Heavy Soil,
Intensive Rinse, Rapid,
Colours 15°
DELICATES
Fine laundry made of delicate fabrics,
which needs gentle treatment.
max. load 3.0 kg
temperature range
Cold to 40°C
max spin speed 1000
selectable options Prewash,
Rapid, Colours 15°
WOOL
Woolens, labeled with the Woolmark
and identied as machine washable, as
well as textiles made of silk, linen, wool
and viscose marked as handwashable.
Respect the manufacturers
recommendations on the care label.
max. load 2.0 kg
temperature range
Cold to 40°C
max spin speed 1000
selectable options Rapid,
Colours 15°
HYGIENE
It is specically developed to provide
maximum hygienic cleaning results,
while guaranteeing your laundry is safe
and sanitized.
max. load max
temperature range
Cold to 85°C HT*
max spin speed max
selectable options Prewash,
Fresh care, Dosing Aid,
Start Delay
SPIN
Separate intensive spin programme.
Suitable for robust laundry.
max. load max
temperature range Cold
max spin speed max
selectable options Fresh Care
ANTIALLERGY
Use programme to remove major
allergens such as pollen, mites, cat’s
and dog’s hair.
max. load 6.0
temperature range 60°C
max spin speed max
selectable options Prewash,
Fresh care, Dosing Aid,
Start Delay
max = 11 kg (laundry load) 1200 rpm (spin speed)
(*) Highest Temperature that can be reached with this cycle, related to the dierent operating conditions
of the washing machine, such as: water temperature, power supply voltage, load quantity, etc.

19
EN
OPTIONS SELECTABLE BY THE OPTIONS
BUTTON
PREWASH
Helps to clean heavily soiled laundry
by adding a prewash phase to the
wash programme selected. For
heavily soiled laundry, for example
containing sand or granular dirt.
Shake out the laundry thoroughly
before loading it into the washing
machine.
Prolongs the programme by about 20
minutes.
Add detergent also to the prewash
compartment of the detergent
dispenser, or directly into the drum.
– When selecting “Prewash”, use
powder detergent for the main wash,
to ensure that the detergent stays in
the detergent dispenser until start
of the main wash phase. Respect the
detergent manufacturer’s dosing
recommendations, or use the “Dosing
Aid” option.
HOT FINISH
The programme ends with a warm
rinse phase. Relaxes the bres of your
laundry.
The laundry feels comfortably warm
when taking it out a short time after
programme end.
BIO STAINS 15°
Helps to remove all kinds of stains,
except grease / oil.
The programme begins with a cold
water wash phase.
Duration is prolonged by about 10
minutes.
Pre-treatment recommended for
obstinate stains.
Not selectable for Cotton HT.
The programme chart gives an
overview of possible combinations
of programmes and options. Not
all combinations of programmes
and options are selectable.
Also certain options are not
combinable. In this case, the
indicator of the non-combinable
option blinks and switches o
again, and a signal sounds.

20
HEAVY SOIL
Helps to clean heavily soiled, stained
laundry by optimizing the eciency
of additives for stain removal.
Add an appropriate amount
of in-wash additive for stain
removal (powder) to the main
wash compartment, together
with your detergent. Only use
powder detergent with this option.
Respect the manufacturer’s dosing
instructions.
Can prolong the programme by up to
15 minutes.
Important: Appropriate for use of
stain removers and bleaches on
oxygen basis. Chlorine or perborate
bleaches must not be used!.
INTENSIVE RINSE
Helps to avoid detergent residues
in the laundry by a prolonged rinse
phase.
Particularly suitable for washing baby
laundry, for people suering from
allergies and for areas with soft water.
RAPID
Enables quicker washing. Shortens
the programme duration while
keeping a good wash result.
Recommendable for only lightly
soiled laundry.
Not selectable for Cotton or Working
Clothes at HT.
/