Page is loading ...

INSTRUCTION MANUAL
Phone: 1-360-734-3482 • On-Line Technical Support: [email protected]
COPYRIGHT © DECEMBER 2003 BY WOODSTOCK INTERNATIONAL, INC. REVISED OCTOBER, 2008.
WARNING: NO PORTION OF THIS MANUAL MAY BE REPRODUCED IN ANY SHAPE OR FORM WITHOUT
THE WRITTEN APPROVAL OF WOODSTOCK INTERNATIONAL, INC.
MODEL
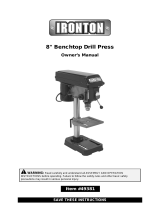
W1669 and W1670
RADIAL DRILL PRESS
#6218CR
Printed in China

Some dust created by power sanding, sawing, grind-
ing, drilling, and other construction activities con-
tains chemicals known to the State of California to
cause cancer, birth defects or other reproductive
harm. Some examples of these chemicals are:
• Leadfromlead-basedpaints.
• Crystallinesilicafrombricks,cement,and
other masonry products.
• Arsenicandchromiumfromchemically
treated lumber.
Your risk from these exposures varies, depending on
how often you do this type of work. To reduce your
exposure to these chemicals: work in a well venti-
lated area, and work with approved safety equip-
ment, such as those dust masks that are specially
designed to filter out microscopic particles.

-1-
AbouttheW1669andW1670 Radial Drill Presses ......................................................... 2
WoodstockTechnical Support ................................................................................. 2
Standard Safety Instructions .................................................................................. 4
AdditionalSafetyInstructionsforDrillPresses ............................................................ 5
AvoidingPotentialInjuries .................................................................................... 6
110VOperation ................................................................................................. 7
Extension Cords ................................................................................................. 7
Grounding ........................................................................................................ 7
Base and Column ............................................................................................... 9
Table Support ................................................................................................. 10
Headstock ...................................................................................................... 12
Drill Chuck and ............................................................................................... 13
Spindle ......................................................................................................... 13
Belt Tension ................................................................................................... 14
Feed Shaft Spring Tension ................................................................................... 15
Quill-Shaft Screw ............................................................................................. 16
Table ............................................................................................................ 17
Test Run ........................................................................................................ 18
Headstock ...................................................................................................... 19
Changing Drill Bits ............................................................................................ 20
Speed Changes ................................................................................................ 21
Drill Press RPM Chart ......................................................................................... 22
Drilling Depth ................................................................................................. 22
Drill, Cutter, and Hole Saw Suggested RPM Chart .................................................. 23
General ......................................................................................................... 25
Table and Base ................................................................................................ 25
Lubrication .................................................................................................... 25
Troubleshooting ............................................................................................... 26
W1669andW1670DrillPress110VWiring ............................................................... 27
W1669 andW1670 Parts ..................................................................................... 28
W1669 Parts ................................................................................................... 30
W1670 Parts ................................................................................................... 32
Accessories .................................................................................................... 34
Notes ........................................................................................................... 36
Warranty ....................................................................................................... 38

-2-
The SHOP FOX
®
ModelW1669andW1670RadialDrillPresseshavebeenspeciallydesignedby
WoodstockInternational,Inc.toprovidemanyyearsoftroublefreeservice.Closeattentiontodetail,
ruggedly built parts and a rigid quality control program assure safe and reliable operation.
TheModelW1669andW1670 Radial Drill Presses are capable of a wide variety of drilling and sanding
operations.PurchasingtheD2677DrumSanderSetandD2722Mandrelallowsyoutosandsmallorfinely
detailed pieces. The tilting table and headstock allows surfaces to be sanded and drilled at many different
angles.TheModelW1669andW1670ispackagedwithadrillchuck,motorandpaddleswitchwithremov-
able safety key.
WoodstockInternational,Inc.iscommittedtocustomersatisfactioninprovidingthismanual.Itisour
intent to make sure all the information necessary for safety, ease of assembly, practical use and dura-
bility of this product be included.
Westandbehindourmachines!Intheeventthatquestionsariseaboutyourmachine,partsaremiss-
ing,oradefectisfound,pleasecontactWoodstockInternationalTechnicalSupportat1-360-734-3482or
send e-mail to: .Ourknowledgeablestaffwillhelpyoutroubleshootprob-
lems and send out parts for warranty claims.
If you need the latest edition of this manual, you can download it from .
If you still have questions after reading the latest manual, or if you have comments please contact us at:

-3-
Motor Type: ...................................................... TEFC Capacitor Start Induction
Motor: .............................................. 1⁄2HP,110V,5Amp.,Single-Phase⁄60Hz
RPM: .............................................................................................. 1725
Power Transfer: ........................................................................V-BeltDrive
Bearings: ................................................... Shielded&LubricatedBallBearings
Switch: ............................................ ToggleON/OFFSwitch,w/SafetyLockKey
Spindle Travel: .................................................................................3-1⁄4''
Maximum Distance, Spindle to Base: ......................... W1669=15-1⁄2,''W1670=49''
Maximum Distance, Spindle to Table: .................... W1669=9-1⁄4,''W1670=31-1⁄2''
OverallHeight: ..............................................W1669=31-1⁄2,''W1670=64-1⁄2''
Head Tilt: .......................................................................45°Left,90°Right
Table Tilt: ....................................................................... 90°LeftandRight
Table Rotation: .................................................................................. 360°
Spindle Taper: ...................................................................................JT-33
Swing: ............................................................................................... 34''
ChuckSize: ..........................................................5⁄8''(1-13mmJT-33),Keyed
Speeds: ........................................................................... 5, Belt Controlled
Range of Speeds: ...................................................
550,880,1570,2490,3470RPM
Drilling Capacity: ..........................................................1⁄2''Diameter in Steel
ApproximateShippingWeight: .......................... W1669=100lbs.,W1670=150lbs.

-4-
Learntheapplications,
limitationsandpotentialhazardsofthismachine.Keepmanualinasafe,convenientplacefor
future reference.
Clutterandinadequatelightinginvitepotentialhazards.
If a machine is equipped with a three-prong plug, it must be plugged into a
three-hole electrical outlet or grounded extension cord. If using an adapter to aid in accommodat-
ing a two-hole receptacle, ground the adapter using a screw to a known ground.
Use safety goggles with side shields or safety goggles, meeting
the national safety standards, while operating this machine.
operate this machine in wet or open flame environ-
ments.Airbornedustparticlescouldcauseanexplosionandseverefirehazard.
and in working condition.
OFFbefore connecting power to machine.
free of clutter, grease, etc.
Allvisitorsshouldbekeptatasafedistanceawaywhileoperat-
ing unit.
with padlocks, master switches, or by removing starter keys.
Indicatesanimminentlyhazardoussituationwhich,ifnotavoided,WILL
resultindeathorseriousinjury.
Indicatesapotentiallyhazardoussituationwhich,ifnotavoided,COULD
resultindeathorseriousinjury.
Indicatesapotentiallyhazardoussituationwhich,ifnotavoided,MAY
resultinminorormoderateinjuryanddamagetothemachine.Itmay
also be used to alert against unsafe practices.
This symbol is used to alert the user to useful information about proper
operation of the equipment.
NOTICE

Alwaysoperateyourdrillpressatspeedsthatareappropriateforthedrill
bitsizeandthematerialthatyouaredrilling.
Feed the drill bit evenly into the workpiece. Back the bit out of deep holes and
clear the chips with a brush after you have turned the machine off.
Use only round, hex or triangular shank drill bits, and make sure
the drill bit you are using is tightened properly..
Never do maintenance or change speeds with this machine plugged in.
Never use tools that are in poor condition. Cutting tools that are dull
ordamagedaredifficulttocontrolandmaycauseseriousinjury.
Never hold a workpiece by hand while drilling, never drill sheet metal
unless it is clamped securely to the table, and always secure the workpiece to the table before
drilling.
Properly position workpieces to avoid drilling into the table.
Afaceguardusedorsafetygogglesisrecommended.
Habits – good and bad – are hard to break. Develop good habits in your shop and
safety will become second-nature to you.
-
5-
Themachine willdo asaferandbetterjob atthe ratefor whichitwas
designed.
forcemachineorattachmenttodoajobforwhichitwasnotdesigned.
wearlooseclothing,neckties,gloves,jewelry;andtiebackhair.
Before turning the machine on, make it a habit to check that
alladjustingkeysandwrencheshavebeenremoved.
Whenusinganextensioncord,makesureitisingoodcondition.
Whenextensioncordis100feetandlessinlength,usethosethatareratedStandardService
(gradeS)orbetter,andthathaveaconductorsizeof16AWG.Adropinlinevoltage,lossof
powerandoverheatingcanresultwhenusinganundersizedcord.Theextensioncordshouldhavea
ground wire and ground plug pin, as well.
at all times.
Waituntilitcomestoacompletestopbeforeleavingthearea.
Follow lubrication and accessory attachment instruc-
tions in the manual.
Operatingmachinesnearpilotlightsand/oropenflames
creates a high risk if dust is dispersed in the area. Dust particles and an ignition source may cause
an explosion. operate the machine in high risk areas, including but not limited to, those
mentioned above.

Never drill while holding the
workpiece by hand.
Keepfingersawayfromspinning
drill bits, cutters, and sanding surfaces.
Remove switch safety key when not
in use.
-6-

-7-
The electrical cord sup-
pliedwiththeW1669andW1670RadialDrill
Press comes with a grounding pin.
remove the pin if your outlet does not accept a
ground pin, see . Have the outlet box
replaced by a qualified electrician or have an
appropriate adapter installed.
Remember, an adapter with a grounding wire
does not guarantee the machine will be ground-
ed.Agroundsourcemustalwaysbeverifiedin
the electrical circuit within the wall or conduit.
The SHOP FOX
®
W1669andW1670RadialDrill
Pressesoperateat110voltsonly.Themotor
supplied with your new drill press is rated at
1⁄2HPandwilldrawapproximately5amps.
Whenchoosinganoutletforthismachine,con-
sider using one with a 15 amp circuit breaker
orfuse.Keepinmindthatacircuitbeingused
by other machines or tools at the same time
will add to the electrical load being applied by
thedrillpress.Adduptheloadratingsofall
machines on the circuit. If this number exceeds
the rating of the circuit breaker or fuse, use a
different outlet.
modify an existing low-amperage
circuit by only replacing the circuit breaker
with a breaker rated for a higher amperage.
The breaker and the complete circuit must be
replaced by a qualified electrician.
Never remove a grounding pin.
If you must use an extension cord, use the guide-
lines below to determine the correct cord length
andgauge.Ifyouuseanundersized-gaugeexten-
sion cord or one that is too long, heat will gener-
ate in the cord and fire or circuit damage may
result.

-8-
Component inventory.
HeadstockAssembly
Base
Column
Table
TableBracketAssembly
DrillChuckandKey
SpindleHandlesandKnobs(3)
W1669:HexWrenches3MM,
5MM,10MM
ColumnBolts(4)
BeltCoverKnobandScrew
LiftHandleCrank
Pinion Gear
LockHandles(4)
Rack
Column Ring
OpenEndWrench(Notshown)
W1670:LockLever
G
D
O
L
I
C
N
S
H
M
K
E
F
J
B
Q
Use the list below and to inventory your shipment before beginning assembly. If any parts
aremissing,callWoodstockInternational,Inc.at360-734-3482or[email protected].
WhilethemaincomponentsoftheSHOP FOX
®
W1669andW1670DrillPressesareassembledatthefac-
tory, some assembly is required. The following order of procedures is the recommended sequence.
W1670:TableSupportArm
Bracket
W1670:HexWrenches,3MM
and 5mm
Mounting Hardware
(Refertothe parts list on
fordetails)
Use the parts list at the back of
this manual when ordering parts.
R
T
A

-9-
Secure base to floor.
Securebaseto4'x4'x
3
⁄4" plywood.
Position the drill press in a sensible work
area where the base sits flat at all four
corners, or the base may crack when you
tighten the fasteners.
Mark and drill the floor, and install the
concreteanchorbolts(notincluded)(see
).
Position the base and fasten the base to
the floor carefully as not to crack it.
Center the drill press base along the back
edgeofthe4'x4'x
3
⁄4" sheet of plywood
(see).
Ateachcornerofthedrillpressbase,drill
the plywood.
Secure the base to the plywood with four
3/8"diameterbolts,washers,andnuts
(notincluded).
Position the base on a bench or tool table
capableofsupportingapproximately100
lbs.
Drilltwomountingholes(),and
secure the base to the table with the two
supplied carriage bolts and wing nuts
Place the column on the base, and install the
four column bolts supplied.
Formaximumstability,securetheW1670
floor-model drill press to a sturdy surface like
afloorora4'x4'x
3
⁄4" piece of plywood. For
theW1669bench-model,secureittoasturdy
workbench or tool table.
Workbenchmountingholes.
Mounting
Holes

-10-
Installing rack and table bracket.
Alignsetscrewwithflatpadon
pinion.
TheW1669comeswithaonegearedtable
bracket.TheW1670comeswithagearedtable
bracket and table support arm, which allows
the distance between the column and table to
beadjusted.Notablesupportpartsareinter-
changeable between the two drill presses.
Insert the table lock lever through the un-
threadedhole(see
)inthe
table
bracket, and then tighten the lever into
the threaded side exactly three turns.
tarting with the pinion gear, insert the
shaft into the table bracket and mesh the
teeth with the worm gear as shown in
Alignthesetscrewinthecrankhandle
with the flat pad on pinion shaft.
Tighten the 3mm set screw to lock the
handleinplace(see
).
Examine the rack and note that the rack
teeth at one end are cut closer to the end
of the rack than the other.
Insert the rack through the table bracket
so the end that has the rack teeth cut clos-
ertotheendispointingdown(see
).
Hold the rack against the worm gear and
slide the table bracket and rack onto the
column(see
).
Pinion and worm gear installation.
Pinion
Gear
Worm
Gear
Un-threaded Hole
Flat
Pad
Set Screw

Column ring in the correct position.
Seat the rack tapered-point into the bevel
that is cut into the column support tube
(see).
Slide the column ring onto the column with
the inside bevel in the down position until
the rack tapered-point seats into the bevel
(see).
Position the column ring so the table
bracketandrackcanjustrotatearound
the column without binding.
Carefully, snug the set screw to hold the
columnringinplace.Over-tighteningthe
column ring will distort or split the column
ring.
Column Ring
Bevel
Bevel and rack seated correctly.
Tapered Rack
Point and
Column Support
Tube Bevel.
Set
Screw
-11-

-12-
The headstock is secured with a set screw so it
is aligned with the drill press base for balance
and weight distribution. over tighten
the set screw, or you will bend the column or
strip the threads.
Place the locking gib into the recessed
pocket on the inside of the column bracket
casting(see).
Withanassistant,liftandpositionthe
headstock pocket over the column and
allow the headstock to slide down until
the column fully seats into the headstock
(approximately2",see).
Rotate the headstock directly over the foot
of the base as viewed from the front of the
drill press.
Screw in the two lock handles on the sides
of the headstock.
Using a plumb bob and ruler, center the
headstock with the base, and tighten the
two set screws to secure the headstock to
thecolumn(see ).
Lockinggibinstallation.
. Headstock-to-column installation.
Aligningtheheadstock.
Locking
Gib

-13-
Your keyed drill chuck attaches to the drill
spindle.Whenproperlyjoined,theJT-33
tapers on the spindle and inside the chuck cre-
ate an almost permanent connection.
Clean the drill chuck and spindle with min-
eral spirits and follow all safety warnings
onthecontainer(see ).
: Failure to clean the tapered mating
surfaces of the spindle and drill chuck may
result in a loose or wobbly chuck.
Usetheprovidedchuckkeytoadjustthe
jawsofthechuckuntiltheyareinsideof
thedrillchuckbody(see ).
Place the drill chuck on the spindle and tap
the chuck onto the spindle with a block of
woodoradead-blowhammer(see
).use a metal hammer to seat
thedrillchuckontothespindle!
Seating chuck into spindle.
Clean the chuck before installation.
Chuck Jaws
Recessed and
Protected
Inside of
Chuck

-14-
During the life of your drill press you will use differ-
ent belt and pulley combinations. No matter which
pulley combination you use, make sure that the belt
is tensioned properly
Openthebeltsafetycover(see
).
Loosenbothmotorlockknobsattheside
of the headstock (see ).
Slide the motor away from the headstock
until the belt is taut.
Hold the motor in position, and tighten the
lock screw, and make sure the belt deflec-
tion gap is correct when pinched together
between the pulleys(see ).
• If the gap between both inner sides of
the belt is greater or less than
3
⁄4" repeat
- until the deflection gap is
3
⁄4".
• If the deflection gap is
3
⁄4" the belt is ten-
sioned correctly.
Close the belt safety cover.
Openbeltsafetycover.
Motor lock knob.
Measuring belt deflection.
Motor
LockKnob
Push rod
Belt Deflection
gap should be
about
3
⁄4"

-15-
Typical spring cover lock slot and
locking lug.
Spring-Cover
LockSlot
LockingLug
Feed shaft return spring assembly.
Spring
LockCover
Jam Nut
and
Cover Nut
Thefeedshaftreturnspringisadjustedatthefac-
tory;however,duringthelifeofthedrillpressyou
maywanttoadjustthefeedshaftreturnspringto
a greater tension for a stronger quill return.
Wipeoffanyoilonthespring-lockcoverso
it will not slip when you hold the cover from
spinning(see ).
Make sure the quill is completely seated and
thedepthstopreadszero.
Put on thick leather gloves, and hold the
spring cover against the side of the head-
stock so the cover stays splined with the
lockinglug;removethejamnutandloosen
the cover nut approximately
1
⁄4"(6.4mm).
Pullthecoveroutwardjustenoughtodis-
engage the spring-cover lock slot from the
lockinglug(see ).
Rotate the cover counterclockwise to
increase spring tension, or let the cover
slowly unwind in the clockwise direction to
reducespringtension(see ).
LockingLug

Whileyoumayneverhavetoadjustthequill-
shaft screw, you should understand its func-
tionandknowhowtoadjustitshouldyouever
need to remove the quill for cleaning. This
screw prevents the quill from rotating during
drillingandsandingprocedures,andifadjusted
incorrectly, the quill may have lash or bind.
Clean and lubricate the quill shaft with a
thin coat of light oil, so the quill travels
freely(see ).
Loosenthe jamnut(see).
Move the quill up and down through the
entire range of travel, and turn the quill-
shaft screw inward as far as it can go with-
out binding the quill.
Tightenthejamnut,andcheckthequill
movement for binding or play while moving
the quill up and down through its entire
range of travel.
Re-adjustthequill-shaft screw as required.
Clean and oil quill shaft.
Quill-shaftscrewandjamnut.
Quill-Shaft
Screw
Jam
Nut
Engage the next available spring-cover
lock slot with the locking lug and hold the
spring lock cover tightly against the side of
theheadstock(see ).
Snug the cover nut against the spring cover
justuntilthenutstops,andthenback-
off the nut approximately
1
⁄3turn,orjust
enough so there is no binding anywhere
along spindle travel path.
Holdthecovernutandtightenthejamnut
against the cover nut.
-16-
Hold the spring cover tightly.
Cover Nut
LockLug

-17-
Thetablecanbeadjustedforheight,rotation,
andangle.TheW1670addsthefourthadjust-
ment of table distance from column.
Table or table support parts are not
interchangeablebetweentheW1669andthe
W1670drillpresses(see).
Loosenthetablelocklever.
Turn the hand crank to raise or lower the
table.
Tighten the table lock lever.
FortheW1670,loosenthetabletiltlock
bolt (see);orfortheW1669,
loosen the cap screw.
Turn the index pin draw nut clockwise and
draw the index pin out of the casting until
you can rotate the table to your desired
angle(see).
Use this index pin only for indexing
the table to the “Zero degree” position.
Toindexthetablebacktothezero
position, back off the draw nut, turn the
tabletozero,taptheindexpinbackinto
the casting, and tighten the table tilt lock
bolt.
Tighten the tilt table lock bolt or cap
screw, and double check your angle.
W1669Tablesupportassembly.
W1670Tablesupportassembly.
Tilt mechanism and lock bolt.
Table-Tilt
LockBolt
(W1670)
or
Table-Tilt
LockCap
Screw
(W1669)
Index Pin
and
Draw Nut
Tilt
Scale

-18-
This drill press will perform many types of oper-
ations that are beyond the scope of this manual.
Many of these operations can be dangerous or
deadly if performed incorrectly.
The instructions in this section are written with
the understanding that the operator has the
necessary knowledge and skills to operate this
machine. If at any time you are experiencing
difficulties performing any operation, stop using
themachine!
If you are an inexperienced operator, we
strongly recommend that you read books, trade
articles, or seek training from an experienced
lathe operator before performing any unfamiliar
operations.Aboveall,yoursafetyshouldcome
first!
Make sure the starting switch paddle is
down for OFF.
Make sure all fasteners and lock handles are
tight.
Make sure the drill chuck key is removed.
Plug in the power cord.
LifttheON/OFF switch to start the drill
press, and make sure that your fingers are
poised near the paddle, as shown in
In case there is a problem you can turn
the drill press off.
Observeandlistentothedrillpress,it
should run smoothly, with little or no vibra-
tion or rubbing noises.
• If you hear strange or unusual noises, shut
the drill press OFF, and wait for the spin-
dle to stop moving.
Unplug the drill press and refer to the
“” table on
to help isolate and correct the problem
before using the drill press again.
Fingers poised near the stop switch.
/