Page is loading ...

User Guide
Your Palm
®
Treo
™
755P Smartphone

Intellectual property notices
© 2005–2007 Palm, Inc. All rights reserved. Blazer, HotSync, Palm,
Palm Desktop, Palm OS, Treo, VersaMail, and the Palm and Treo
logos are among the trademarks or registered trademarks owned by
or licensed to Palm, Inc. Documents To Go is a trademark or
registered trademark of DataViz, Inc. Adobe and Acrobat are either
registered trademarks or trademarks of Adobe Systems Incorporated
in the United States and/or other countries. Microsoft, ActiveSync,
Excel, Outlook, PowerPoint and Vista are either registered
trademarks or trademarks of Microsoft Corporation in the United
States and/or other countries. All other brand and product names are
or may be trademarks of, and are used to identify products or
services of, their respective owners.
This product is protected by one or more of the following United
States patents:
6,976,226; 6,975,304; 6,965,375; 6,961,567; 6,961,029; 6,957,397;
6,952,571; 6,950,988; 6,947,975; 6,947,017; 6,943,667; 6,940,490;
6,924,752; 6,907,233; 6,906,701; 6,906,741; 6,901,276; 6,850,780;
6,845,408; 6,842,628; 6,842,335; 6,831,662; 6,819,552; 6,804,699;
6,795,710; 6,788,285; 6,781,824; 6,781,575; 6,766,490; 6,745,047;
6,744,451; 6,738,852; 6,732,105; 6,724,720; 6,721,892; 6,712,638;
6,708,280; 6,697,639; 6,687,839; 6,685,328; 6,665,803; 6,618,044;
6,590,588; 6,539,476; 6,532,148; 6,523,124; 6,519,141; 6,516,202;
6,490,155; 6,480,146; 6,457,134; 6,456,247; 6,442,637; 6,441,824;
6,437,543; 6,429,625; 6,425,087; 6,389,572; 6,388,877; 6,381,650;
6,363,082; 6,344,848; 6,317,085; 6,241,537; 6,222,857; 6,185,423;
6,147,314; 6,115,248; 6,064,342; D421,251; D429,252; D466,128;
D478,091. Patent pending.
This product also is licensed under United States patent 6,058,304.
This product is protected by certain intellectual property rights of
Microsoft Corporation. Use or distribution of such technology outside
of this product is prohibited without a license from Microsoft or an
authorized Microsoft subsidiary.
This product contains ACCESS Co., Ltd.’s NetFront 3.0 Internet
browser software. © 1996-2007 ACCESS Co., Ltd. and ACCESS
Systems America, Inc. NetFront is the trademark or registered
trademark of ACCESS Co., Ltd. in Japan and in other countries except
the United States of America. NetFront is a registered trademark of
NetFront Communications, Inc. in the United States of America and
is used under a license. A portion of this software includes software
modules developed by the Independent JPEG Group.
Disclaimer and limitation of liability
Palm, Inc. and its suppliers assume no responsibility for any damage
or loss resulting from the use of this guide. Palm, Inc. and its
suppliers assume no responsibility for any loss or claims by third
parties that may arise through the use of this software. Palm, Inc. and
its suppliers assume no responsibility for any damage or loss caused
by deletion of data as a result of malfunction, dead battery, or repairs.
Be sure to make backup copies of all important data on other media
to protect against data loss.
Palm take back and recycling program
As part of Palm's corporate commitment to be a good steward of the
environment, we strive to use environmentally friendly materials,
reduce waste, and develop the highest standards in electronics
recycling. Our recycling program keeps Palm handheld devices, Treo
smartphones, and mobile companions out of landfills by evaluating
them for possible reuse and recycling.
Palm customers may participate in the recycling program free of
charge. Visit palm.com/recycle
for additional details and information
about how you can help reduce electronic waste.
PN: 406-10993-01
v. 2.0

CONTENTS
iii
Contents
Welcome . . . . . . . . . . . . . . . . . . . . . . . . . . . . . . . . . . . . . . . . . . . . . . . . . . . . . . . . . . . 7
What’s in the box? . . . . . . . . . . . . . . . . . . . . . . . . . . . . . . . . . . . . . . . . . . . . . . . . . . 8
What do I need to get started? . . . . . . . . . . . . . . . . . . . . . . . . . . . . . . . . . . . . . . . . 8
Where to learn more . . . . . . . . . . . . . . . . . . . . . . . . . . . . . . . . . . . . . . . . . . . . . . . . 9
Chapter 1: Setting up . . . . . . . . . . . . . . . . . . . . . . . . . . . . . . . . . . . . . . . . . . . . . . . . . . 11
Palm
®
Treo
™
755P smartphone overview . . . . . . . . . . . . . . . . . . . . . . . . . . . . . . . . . 13
Installing the battery . . . . . . . . . . . . . . . . . . . . . . . . . . . . . . . . . . . . . . . . . . . . . . . . . 15
Charging the battery . . . . . . . . . . . . . . . . . . . . . . . . . . . . . . . . . . . . . . . . . . . . . . . . . 16
Maximizing battery life . . . . . . . . . . . . . . . . . . . . . . . . . . . . . . . . . . . . . . . . . . . . . . . 18
Making your first call . . . . . . . . . . . . . . . . . . . . . . . . . . . . . . . . . . . . . . . . . . . . . . . . 19
Setting up your computer . . . . . . . . . . . . . . . . . . . . . . . . . . . . . . . . . . . . . . . . . . . . . 21
Synchronizing information—the basics . . . . . . . . . . . . . . . . . . . . . . . . . . . . . . . . . . 27
Chapter 2: Moving around on your smartphone . . . . . . . . . . . . . . . . . . . . . . . . . . . . . 29
Moving around the screen . . . . . . . . . . . . . . . . . . . . . . . . . . . . . . . . . . . . . . . . . . . . 31
Using the keyboard . . . . . . . . . . . . . . . . . . . . . . . . . . . . . . . . . . . . . . . . . . . . . . . . . 36
Opening applications . . . . . . . . . . . . . . . . . . . . . . . . . . . . . . . . . . . . . . . . . . . . . . . .39
Chapter 3: Your phone . . . . . . . . . . . . . . . . . . . . . . . . . . . . . . . . . . . . . . . . . . . . . . . . . 41
Turning your smartphone on and off . . . . . . . . . . . . . . . . . . . . . . . . . . . . . . . . . . . . 43
Making calls . . . . . . . . . . . . . . . . . . . . . . . . . . . . . . . . . . . . . . . . . . . . . . . . . . . . . . . 45
Receiving calls . . . . . . . . . . . . . . . . . . . . . . . . . . . . . . . . . . . . . . . . . . . . . . . . . . . . . 49
Using voicemail . . . . . . . . . . . . . . . . . . . . . . . . . . . . . . . . . . . . . . . . . . . . . . . . . . . .50
What can I do when I’m on a call? . . . . . . . . . . . . . . . . . . . . . . . . . . . . . . . . . . . . . .52
Viewing minutes usage . . . . . . . . . . . . . . . . . . . . . . . . . . . . . . . . . . . . . . . . . . . . . .58
Defining favorite buttons . . . . . . . . . . . . . . . . . . . . . . . . . . . . . . . . . . . . . . . . . . . . .58

CONTENTS
iv
Using a phone headset . . . . . . . . . . . . . . . . . . . . . . . . . . . . . . . . . . . . . . . . . . . . . . 61
Customizing phone settings . . . . . . . . . . . . . . . . . . . . . . . . . . . . . . . . . . . . . . . . . . . 66
What are all those icons? . . . . . . . . . . . . . . . . . . . . . . . . . . . . . . . . . . . . . . . . . . . . . 74
Chapter 4: Your email and other messages . . . . . . . . . . . . . . . . . . . . . . . . . . . . . . . . 79
Which application should I use? . . . . . . . . . . . . . . . . . . . . . . . . . . . . . . . . . . . . . . . . 81
The Wireless Sync application . . . . . . . . . . . . . . . . . . . . . . . . . . . . . . . . . . . . . . . . . 82
The VersaMail
®
application . . . . . . . . . . . . . . . . . . . . . . . . . . . . . . . . . . . . . . . . . . . . 88
Messaging . . . . . . . . . . . . . . . . . . . . . . . . . . . . . . . . . . . . . . . . . . . . . . . . . . . . . . . . 101
Chapter 5: Your connections to the web and wireless devices . . . . . . . . . . . . . . . . . 113
Web browser . . . . . . . . . . . . . . . . . . . . . . . . . . . . . . . . . . . . . . . . . . . . . . . . . . . . . . 115
BroadbandAccess Connect . . . . . . . . . . . . . . . . . . . . . . . . . . . . . . . . . . . . . . . . . . . 124
Connections with Bluetooth
®
devices . . . . . . . . . . . . . . . . . . . . . . . . . . . . . . . . . . . 128
Chapter 6: Your photos, videos, and music . . . . . . . . . . . . . . . . . . . . . . . . . . . . . . . . . 133
Camera and Camcorder . . . . . . . . . . . . . . . . . . . . . . . . . . . . . . . . . . . . . . . . . . . . . . 135
Pics & Videos . . . . . . . . . . . . . . . . . . . . . . . . . . . . . . . . . . . . . . . . . . . . . . . . . . . . . . 139
Pocket Tunes
™ . . . . . . . . . . . . . . . . . . . . . . . . . . . . . . . . . . . . . . . . . . . . . . . . . . . . . . . . . . . . . . . . . . . . . . . . . . . . . . . . . . . . . . . . . . . . . . . . . 145
Chapter 7: Your personal information organizer . . . . . . . . . . . . . . . . . . . . . . . . . . . . . 151
Contacts . . . . . . . . . . . . . . . . . . . . . . . . . . . . . . . . . . . . . . . . . . . . . . . . . . . . . . . . . . 153
Calendar . . . . . . . . . . . . . . . . . . . . . . . . . . . . . . . . . . . . . . . . . . . . . . . . . . . . . . . . . . 155
World Clock . . . . . . . . . . . . . . . . . . . . . . . . . . . . . . . . . . . . . . . . . . . . . . . . . . . . . . . 163
Tasks . . . . . . . . . . . . . . . . . . . . . . . . . . . . . . . . . . . . . . . . . . . . . . . . . . . . . . . . . . . . 165
Chapter 8: Your memos and documents . . . . . . . . . . . . . . . . . . . . . . . . . . . . . . . . . . 169
Documents To Go
®
Professional . . . . . . . . . . . . . . . . . . . . . . . . . . . . . . . . . . . . . . . 171
Memos . . . . . . . . . . . . . . . . . . . . . . . . . . . . . . . . . . . . . . . . . . . . . . . . . . . . . . . . . . . 173
Voice Memo . . . . . . . . . . . . . . . . . . . . . . . . . . . . . . . . . . . . . . . . . . . . . . . . . . . . . . . 173

CONTENTS
v
Chapter 9: Your application and info management tools . . . . . . . . . . . . . . . . . . . . . . . 177
Using Find . . . . . . . . . . . . . . . . . . . . . . . . . . . . . . . . . . . . . . . . . . . . . . . . . . . . . . . . 179
Viewing and using the alerts . . . . . . . . . . . . . . . . . . . . . . . . . . . . . . . . . . . . . . . . . . 179
Calculator . . . . . . . . . . . . . . . . . . . . . . . . . . . . . . . . . . . . . . . . . . . . . . . . . . . . . . . . . 180
Installing applications . . . . . . . . . . . . . . . . . . . . . . . . . . . . . . . . . . . . . . . . . . . . . . . .181
Removing applications . . . . . . . . . . . . . . . . . . . . . . . . . . . . . . . . . . . . . . . . . . . . . . . 184
Viewing application info . . . . . . . . . . . . . . . . . . . . . . . . . . . . . . . . . . . . . . . . . . . . . . 185
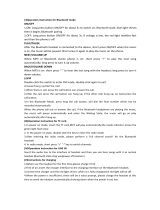
Sending information with Bluetooth
®
wireless technology . . . . . . . . . . . . . . . . . . . 186
Beaming information . . . . . . . . . . . . . . . . . . . . . . . . . . . . . . . . . . . . . . . . . . . . . . . . 188
Synchronizing information—advanced . . . . . . . . . . . . . . . . . . . . . . . . . . . . . . . . . . . 191
Using expansion cards . . . . . . . . . . . . . . . . . . . . . . . . . . . . . . . . . . . . . . . . . . . . . . .198
Chapter 10: Your personal settings . . . . . . . . . . . . . . . . . . . . . . . . . . . . . . . . . . . . . . . 205
System sound settings . . . . . . . . . . . . . . . . . . . . . . . . . . . . . . . . . . . . . . . . . . . . . . . 207
Display and appearance settings . . . . . . . . . . . . . . . . . . . . . . . . . . . . . . . . . . . . . . . 208
Applications settings . . . . . . . . . . . . . . . . . . . . . . . . . . . . . . . . . . . . . . . . . . . . . . . . 210
Locking your smartphone and info . . . . . . . . . . . . . . . . . . . . . . . . . . . . . . . . . . . . . . 213
System settings . . . . . . . . . . . . . . . . . . . . . . . . . . . . . . . . . . . . . . . . . . . . . . . . . . . . 220
Connection settings . . . . . . . . . . . . . . . . . . . . . . . . . . . . . . . . . . . . . . . . . . . . . . . . . 222
Chapter 11: Common questions . . . . . . . . . . . . . . . . . . . . . . . . . . . . . . . . . . . . . . . . .223
Upgrading . . . . . . . . . . . . . . . . . . . . . . . . . . . . . . . . . . . . . . . . . . . . . . . . . . . . . . . . . 225
Desktop software installation . . . . . . . . . . . . . . . . . . . . . . . . . . . . . . . . . . . . . . . . . . 227
Resetting your smartphone . . . . . . . . . . . . . . . . . . . . . . . . . . . . . . . . . . . . . . . . . . . 228
Replacing the battery . . . . . . . . . . . . . . . . . . . . . . . . . . . . . . . . . . . . . . . . . . . . . . . . 230
Screen . . . . . . . . . . . . . . . . . . . . . . . . . . . . . . . . . . . . . . . . . . . . . . . . . . . . . . . . . . .231
Synchronization . . . . . . . . . . . . . . . . . . . . . . . . . . . . . . . . . . . . . . . . . . . . . . . . . . . . 232
Phone . . . . . . . . . . . . . . . . . . . . . . . . . . . . . . . . . . . . . . . . . . . . . . . . . . . . . . . . . . . .240
Hands-free devices . . . . . . . . . . . . . . . . . . . . . . . . . . . . . . . . . . . . . . . . . . . . . . . . . . 243
Email . . . . . . . . . . . . . . . . . . . . . . . . . . . . . . . . . . . . . . . . . . . . . . . . . . . . . . . . . . . . . 244

CONTENTS
vi
Messaging . . . . . . . . . . . . . . . . . . . . . . . . . . . . . . . . . . . . . . . . . . . . . . . . . . . . . . . . 244
Web . . . . . . . . . . . . . . . . . . . . . . . . . . . . . . . . . . . . . . . . . . . . . . . . . . . . . . . . . . . . . 245
Camera . . . . . . . . . . . . . . . . . . . . . . . . . . . . . . . . . . . . . . . . . . . . . . . . . . . . . . . . . . . 248
Making room on your Treo
™
smartphone . . . . . . . . . . . . . . . . . . . . . . . . . . . . . . . . . 249
Third-party applications . . . . . . . . . . . . . . . . . . . . . . . . . . . . . . . . . . . . . . . . . . . . . . 250
Error messages . . . . . . . . . . . . . . . . . . . . . . . . . . . . . . . . . . . . . . . . . . . . . . . . . . . . 251
Terms . . . . . . . . . . . . . . . . . . . . . . . . . . . . . . . . . . . . . . . . . . . . . . . . . . . . . . . . . . . . . . 253
Important safety and legal information . . . . . . . . . . . . . . . . . . . . . . . . . . . . . . . . . . . . 257
Index . . . . . . . . . . . . . . . . . . . . . . . . . . . . . . . . . . . . . . . . . . . . . . . . . . . . . . . . . . . . . . 265

WELCOME
7
Welcome
Congratulations on the purchase of your
Palm
®
Treo
™
755P smartphone! In one
compact and indispensable device, you
now have all of the following:
• An advanced mobile smartphone
• Mobile email (corporate and personal)
• High-speed Internet connection and
data transfer with NationalAccess and
BroadbandAccess support
• Palm OS
®
organizer applications
• Expansion capability (mini-SD)
• A 1.3-megapixel digital camera (camera
version only)
• Text and multimedia messaging
• A media player
• Productivity software
This guide helps you set up your Treo
smartphone and learn to use it.
NOTE Phone and text messaging services
require a service contract with Verizon
Wireless. Web, email, and multimedia
messaging services require a service
contract and high-speed data service from
Verizon Wireless. Data speeds vary based
on network availability and capacity.
KEY
TERM
Organizer applications: The
Calendar, Contacts, Tasks, and Memos
applications are collectively referred to as
organizer or PIM (personal information
manager) applications.
DID
YOU
KNOW
?
The Verizon Wireless
business-to-business sales channel offers a
Treo 755
P smartphone without a camera. If
you purchased your smartphone from this
channel, check the package to see if your
smartphone includes a camera.

WELCOME
8
What’s in the box?
You should have received all the following
items in the Treo smartphone box:
Hardware
• Treo smartphone
• Rechargeable battery
• AC charger
• USB sync cable
• Stereo headset
Documentation and software
• Read This First setup poster
• Quick Reference
• Palm Software Installation CD, which
includes the following:
• Palm
®
Desktop software
• Links to bonus software for your
smartphone
• User Guide (this guide)
• Palm warranty
• Software license agreement
What do I need to
get started?
As you work through the instructions in this
guide, you’ll need all the items that came in
the Treo 755
P smartphone box (see What’s
in the box? ), as well as the following:
• An activated account with Verizon
Wireless
• A location with wireless coverage for
your smartphone
• An electrical outlet
• The computer with which you want to
synchronize your personal information
• The Palm Software Installation CD
included in the box

WELCOME
9
Where to learn more
For a quick introduction
Quick Tour:
Introduces you to many of your
smartphone’s features. You can open it
any time. Press
Applications
, and then
select
Quick Tour
.
Interactive User Guide:
Walks you through
how to move around on your smartphone, set
up features (such as voicemail and email), and
perform common tasks. To view this guide,
go to www.verizonwireless.com/multimedia/
mim/palm treo755p.
While using your Treo™ smartphone
On-device User Guide:
A specially formatted
version of this guide, available right on your
smartphone. To open the on-device guide,
press
Applications
, select
My Treo
, select the
Support
tab, and then select
User Guide
.
Tips:
Many of the built-in applications include
tips for getting the most out of your
smartphone. Some tips are available from a
menu: open an application, press
Menu
,
select
Options
, and then select
Tips
. Other
tips are available by selecting a
Tips
icon
in the upper-right corner of a dialog box.
Online support from Palm:
For up-to-date
downloads, troubleshooting, and support
information, go to
www.palm.com/treo755pverizon-support
.
If you need more information
Windows Vista™ users:
For information on
using your smartphone and desktop software
with Windows Vista, visit www.palm.com/
windowsvista.
Books:
Many books on Palm OS
®
devices are
available in local or online book retailers (look
in the computers section), or visit
www.palm.com/mypalm/755pverizon
.
Online forums:
Consult online Treo device
user discussion groups to swap information
and learn about topics you may find nowhere
else. For details, visit www.palm.com/
mypalm/755pverizon.
Customer service from Verizon Wireless:
For
questions about your mobile account or
features, contact Verizon Wireless technical
support at 800-922-0204 or Verizon Wireless
customer service and billing at 800-256-4646.

WELCOME
10

11
CHAPTER
1
Setting up
You’re about to discover the many things about your
Palm
®
Treo
™
755P smartphone that will help you better
manage your life and have fun, too.
As you become more familiar with your smartphone, you’ll
want to personalize the settings and add applications to make it
uniquely yours. But first, take these few easy steps to set up.
Benefits
• Know where your smartphone
controls are located
• Start using your smartphone right
away
• Establish a link between your
smartphone and your computer

In this chapter
Palm® Treo™ 755p smartphone overview . . . . . . . . . . . . . . . . . . . 13
Installing the battery . . . . . . . . . . . . . . . . . . . . . . . . . . . . . . . . . . . . 15
Charging the battery. . . . . . . . . . . . . . . . . . . . . . . . . . . . . . . . . . . . . 16
Maximizing battery life . . . . . . . . . . . . . . . . . . . . . . . . . . . . . . . . . . . 18
Making your first call . . . . . . . . . . . . . . . . . . . . . . . . . . . . . . . . . . . . 19
Setting up your computer. . . . . . . . . . . . . . . . . . . . . . . . . . . . . . . . . 21
Synchronizing information—the basics . . . . . . . . . . . . . . . . . . . . . . 27

SETTING UP
PALM
®
TREO
™
755P SMARTPHONE OVERVIEW
13
1
CHAPTER
Palm
®
Treo
™
755P smartphone overview
Front view
Indicator light (phone
and charge indicator)
Calendar
5-way navigator and
Center button
Earpiece
Menu
Send
Phone
Side button
Volume button
Power/End
Wireless Sync
Applications
Option
TIP
Protect your screen. Be careful to store
your smartphone away from items that might
scratch or crush the screen. Visit
www.palm.com/mypalm/755pverizon
to find
carrying cases and other useful accessories.
DID
YOU
KNOW
?
The indicator light is visible
only when the light is on.
DID
YOU
KNOW
?
When your smartphone screen
is on, you can press and hold the Side button
to open an application of your choice; see
Reassigning buttons
for details.

SETTING UP
PALM
®
TREO
™
755P SMARTPHONE OVERVIEW
14
1
CHAPTER
Back view
IMPORTANT The Treo smartphone
speaker includes a large magnet, so be
sure to keep your smartphone away from
credit cards or other items that could be
demagnetized.
Camera lens
(camera
version only)
Battery door release
Speaker
Self-portrait
mirror (camera
version only)
Multi-connector
Headset jack
Microphone
Stylus
Infrared
(IR) port
Mini-expansion
card slot

SETTING UP
INSTALLING THE BATTERY
15
1
CHAPTER
Top view
Installing the battery
1 Press the battery door release, and
slide the battery door downward to
remove it from your smartphone.
2 Align the metal contacts on the battery
with the contacts inside the battery
compartment.
3 Insert the battery into the compartment
at a 45-degree angle, and then press it
into place.
DID
YOU
KNOW
?
The Ringer switch silences all
sounds, including music, at once; you don’t
need to hunt for “off” or “mute” settings in
individual applications.
Ringer switch
Sound Off
Sound On
Battery door
release

SETTING UP
CHARGING THE BATTERY
16
1
CHAPTER
4 Slide the battery door onto the back of
the smartphone until it clicks into place.
5 When the language selection screen
appears, select the language you want
to use.
IMPORTANT You must select the same
language on your smartphone and desktop
software.
6 Follow the onscreen instructions to set
up your smartphone.
Charging the battery
The battery comes with a sufficient charge
to complete the setup process and activate
your phone. After activation, we
recommend charging your smartphone for
3.5 hours (or until the indicator light is solid
green) to give it a full charge. See
Maximizing battery life
for tips on
maximizing the life of your smartphone’s
battery.
Battery
contacts
Smartphone
contacts
TIP
If your smartphone does not turn on, you
need to connect it to the AC charger. If it still
does not turn on after you connect the AC
charger, then do a soft reset. See Performing
a soft reset.
TIP
To avoid draining the battery, charge your
smartphone every day, especially if you use
your phone often.
DID
YOU
KNOW
?
If your battery ever becomes
fully drained, your info is still stored safely on
your smartphone until you recharge the
battery or connect your smartphone to a
power source.

SETTING UP
CHARGING THE BATTERY
17
1
CHAPTER
1 Plug the AC charger into a wall outlet.
2 Connect the charger cable to the
bottom of the smartphone. Make sure
the arrow on the connector is facing up,
toward the screen.
3 To confirm that your smartphone is
charging, check the indicator light on
your smartphone.
• Solid red indicates that your
smartphone is charging.
• Solid green indicates that your
smartphone is fully charged.
DID
YOU
KNOW
?
You can also charge your
smartphone by connecting it to your computer
with the sync cable. You can do this with or
without using the charger cable (see
Connecting your Treo smartphone to your
computer).
Keep in mind that it takes longer to charge the
battery using the sync cable, and if your laptop
isn’t plugged into a power source, it can drain
the laptop’s battery.
TIP
If the battery is fully drained, it may take a
few moments for the indicator light to turn on
when you begin charging.
TIP
If the indicator light doesn’t turn on when
you connect your smartphone to the AC
charger, double-check the cable connection
and the electrical outlet to which it is
connected.
Indicator light

SETTING UP
MAXIMIZING BATTERY LIFE
18
1
CHAPTER
When your smartphone is on (see Turning
your phone on and off), the onscreen
battery icon displays the charging status:
Maximizing battery
life
Battery life depends on how you use your
smartphone. You can maximize the life of
your battery by following a few easy
guidelines:
A red lightning bolt indicates that
the battery is connected to a wall
outlet and is charging.
A green lightning bolt indicates
that the battery is connected to a
wall outlet and is fully charged.
A partial battery without a
lightning bolt indicates that the
battery is not connected to a wall
outlet and it has some power.
An almost empty battery that is
red at the bottom indicates that
you need to charge the battery
immediately.
TIP
To see exactly how much power is left in
your battery, tap the onscreen battery icon.
DID
YOU
KNOW
?
You can buy an extra battery as
a spare for long airplane trips or periods of
heavy use. To purchase batteries that are
compatible with your smartphone, go to
www.palm.com/mypalm/755pverizon
.
Battery icon

SETTING UP
MAKING YOUR FIRST CALL
19
1
CHAPTER
• Charge your smartphone whenever
you’re at your desk, or charge it
overnight. The Li-ion battery has a much
longer useful life when it is topped off
frequently, versus charging it after it is
fully drained.
• Your smartphone’s wireless features
(phone, email, messaging, and web)
and media features (camera, media
players, eBooks, and games) consume
more power than its organizer features.
If you spend a lot of time using the
wireless and media features, keep an
eye on the battery icon and charge
when necessary.
• If you don’t plan to use the wireless
features on your smartphone for a
while, turn off your phone (see Turning
your phone on and off) and let all calls
be picked up by voicemail.
• As with any mobile phone, if you are in
an area with no wireless coverage, your
smartphone searches for a signal, which
consumes power. If you cannot move to
an area of better coverage, temporarily
turn off your phone. While your phone is
off, you can continue to use your
smartphone’s nonwireless features.
• Turn down the screen brightness (see
Adjusting the brightness
).
• Decrease the settings in Power
Preferences and turn off Beam Receive
(see Optimizing power settings
).
• Turn off the Bluetooth
®
feature if you’re
not using it. See Connecting to a
Bluetooth® hands-free device.
Making your first call
BEFORE YOU BEGIN If Phone Off
appears in the title bar, you need to turn on
your phone (see Turning your phone on and
off). If No Service appears in the title bar,
you are outside a wireless coverage area. If
you believe you are in a wireless coverage
area and this problem persists, contact
Verizon Wireless for assistance:
• Verizon Wireless technical support:
800-922-0204
• Verizon Wireless customer service and
billing: 800-256-4646

SETTING UP
MAKING YOUR FIRST CALL
20
1
CHAPTER
1 Press Phone .
2 If prompted, press Center to turn
off Keyguard (see Locking your keyboard
(Keyguard) for more info).
3
If you haven’t already activated your phone,
follow these steps before continuing:
•
Tap the onscreen Dial Pad to enter
*228
.
• Press Send to dial.
• When prompted, press 1 (this number
appears on the E letter key) to
program your phone. A service
provisioning message appears on
your smartphone screen.
• Wait a few minutes until you see the
Programming Successful! message,
and then tap the onscreen OK button.
If the Ringer switch is set to Sound
On , you hear three tones when
programming is successful.
•
Press
Power/End
to end the call.
4 Tap the onscreen Dial Pad to enter the
number you want to call.
5 Press Send to dial.
6 After you finish the call, press Power/
End to end the call.
Adjusting call volume
While a call is in progress, press the
Volum e button on the side of your
smartphone to adjust the call volume.
• To increase the volume, press the upper
half of the Volume button.
• To decrease the volume, press the
lower half of the Vol ume button.
TIP
You can also dial phone numbers with the
number pad on the keyboard. See Dialing
using the keyboard for details.
/