18

2
3
1
3 2
4
A
C D
B
6
7
98
5
I
I
0
0

2
3
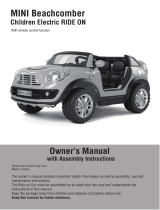
Instruction manual
USA
Age group: 18 m+
Please read these instructions carefully before using the toy and keep for future reference.
The car runs on a built-in rechargeable NiMH battery pack and the infrared steering wheel runs on 4 x 1.5 Volt “AA”
alkaline batteries (not included).
WARNING
For your child’s safety
• Before using the product remove and dispose of any plastic bags and any other packaging (e.g. fasteners and fixing
ties etc) and keep them out of reach of children. Suffocation hazard.
• Check the product regularly for signs of wear and damage and to ensure that it is assembled correctly. Should any
part be visibly damaged, do not use the toy and keep it out of children’s reach.
• Never touch the car wheels when in use.
• Entanglement Risk: Keep hair at a safe distance from moving wheels. Entanglement risk.
• Do not use the toy on the main road.
• Do not use the toy on wet, sandy or dusty surfaces.
• Never leave the toy in the vicinity of heat sources.
• When in use, the remote control could generate interference with other products that use infrared remote controls
such as televisions, video-recorders or similar appliances. In the unlikely case that this should occur, do no use the
two products at the same time.
Car: Diag. A
1) ON/OFF switch (I / O)
steering wheel: Diag. B
2) forward button
3) reverse button
4) car recharger slot
Diag. C
5) ON/OFF switch (I / O)
6) battery compartment cover
Diag. D
7) Correct car recharging position
8) Recharging in progress indicator
9) Low battery warning indicator
INTRODUCTION TO THE TOY
This toy is an infared remote controlled car. The steering wheel moves the car in 2 different modes: in a straight line
or in a half-circle to change direction. The car comes with a built-in rechargeable battery pack and the steering wheel
also acts as the battery charger for the car. Simply position the car on the steering wheel to recharge it.
HOW TO USE THE TOY
How to recharge the car
1. Switch the steering wheel ON by pushing the ON /OFF lever switch (Diag. C-5) to I.
2. Position the car in the steering wheel slot (Diag, B-4), making sure it is facing in the right direction; it is fitted
correctly when the LEDs are aligned with the rear of the car, as seen in Diag. D-7. When the recharging operation
is complete the car will honk its horn and a green indicator light will come on (Diag. D-8). The car will recharge
whether it is switched ON or OFF.

4
5
3. After about 6 minutes a honking sound will indicate that the car has been successfully recharged. The green
indicator light (Diag. D-8) will switch OFF.
When fully recharged, the car battery will last about 6 minutes. If the car is not used after recharging, always switch
the vehicle (Diag. A-1) and steering wheel (Diag. C-5) off by moving the lever switch to O.
Notes
• The car’s rechargeable battery life will start to decrease over time after about 250 recharge cycles. No
replacement is available.
• Should the red indicator light (Diag. D-9) come on when recharging the car, replace the steering wheel batteries.
Please read the section entitled “FITTING AND/OR REPLACING BATTERIES”.
How to drive the car
1. Turn the car and steering wheel ON by moving the ON/OFF lever switch (Diag. A-1 and Diag. C-5) to the
I position.
2. Point the infrared LED on the steering wheel towards the car. Press the button indicated in Diag. B-2 to move the
car forwards (the engine will roar). Press the button indicated in Diag. B-3 to reverse and change direction (you
will hear a sound).
3. When you have finished playing, always switch off the vehicle (diag. A-1) and steering wheel (Diag. C-5) by
moving the lever switch to O.
Notes
• The maximum operating range of the steering wheel is about 20 feet; this distance could decrease according to
the battery charge status.
• Obstacles or excessive light in the operating range between the transmitter (steering wheel) and the receiver (car)
can decrease the operating range or prevent the remote control from functioning altogether.
FITTING AND/OR REPLACING BATTERIES
• Batteries must only be replaced by an adult.
• To replace the batteries: loosen the screw on the battery compartment cover (Diag. C-6) with a screwdriver and
open the cover. Then remove the spent batteries and fit new ones, ensuring that they have been fitted with correct
polarity (as shown on the product), close the battery cover, and tighten the screw.
• Only use alkaline batteries of the same type or equivalent to the type recommended for the correct function of
this product.
• Never mix alkaline, standard (zinc-carbon) or rechargeable (nickel-cadmium) batteries.
• Never mix new and old batteries.
• Always keep batteries and tools out of the reach of children.
• Do not short-circuit the battery terminals.
• Always remove spent batteries from the product to avoid the danger of leakage from the battery damaging the
product.
• Always remove the batteries if the product will not be used for a long period of time
• Remove the batteries from the toy before disposing of the product.
• Do not burn or dispose of old batteries into the environment; dispose of them at an appropriate differentiated
collection point.
• If the batteries happen to leak liquid, replace them immediately, making sure you clean the compartment
beforehand; wash your hands thoroughly if you come into contact with any such liquid.
• Do not attempt to recharge non-rechargeable batteries: they might explode.
• The use of rechargeable batteries is not recommended as the toy may not work properly.
• If using rechargeable batteries, remove them from the steering wheel before recharging them. Batteries must
always be recharged under adult supervision;
This product is not designed to be used with replaceable lithium batteries. WARNING: Improper use could be
hazardous.

4
5
Do not dispose of this toy in household waste or at a municiple waste dump.
CLEANING, CARE & MAINTENANCE OF THE TOY
The toy should be cleaned using a soft, dry cloth.
Protect the toy against impact, heat, dust, sand, humidity and water.
FCC Information
Caution: Changes or modifications not expressly approved by the party responsible for compliance could void the
user’s authority to operate the equipment.
NOTE: This equipment has been tested and found to comply with the limits for a Class B digital device, pursuant to
Part 15 of the FCC Rules. These limits are designed to provide reasonable protection against harmful interference in
a residential installation. This equipment generates, uses and can radiate radio frequency energy and, if not installed
and used in accordance with the instructions, may cause harmful interference to radio communications. However,
there is no guarantee that interference will not occur in a particular installation. If this equipment does cause
harmful interference to radio or television reception, which can be determined by turning the equipment off and on,
the user is encouraged to try to correct the interference by one or more of the following measures:
- Reorient or relocate the receiving antenna.
- Increase the separation between the equipment and receiver.
- Connect the equipment into an outlet on a circuit different from that to which the receiver is connected.
- Consult the dealer or experienced radio/TV technician for help.
Made in China

6
7

6
7

8
Chicco - 1826 William Penn Way - Lancaster, PA 17601- Made in China
www.chiccousa.com
Charge & Drive
IS0068.2
69023 Charge & Drive Police
69025 Charge & Drive Fire Department
69024 Charge & Drive Ranger
69026 Charge & Drive Ambulance
/