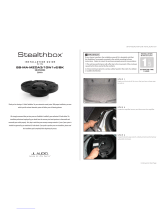
JL Audio SB-T-TUNDCMAX/13TW5/DG User manual
- Category
- Car speakers
- Type
- User manual
This manual is also suitable for
JL Audio SB-T-TUNDCMAX/13TW5/DG is a vehicle-specific enclosed subwoofer system designed to deliver years of listening pleasure with proper installation. This Stealthbox® is engineered to fit 2007-Up Toyota Tundra CrewMax vehicles and houses a 13TW5-3 subwoofer, providing exceptional bass response. With its acoustic suspension (sealed) enclosure type and 3 ohms mono nominal impedance, it seamlessly integrates with various amplifiers, including the recommended JL Audio 500/1v2 or HD750/1.
JL Audio SB-T-TUNDCMAX/13TW5/DG is a vehicle-specific enclosed subwoofer system designed to deliver years of listening pleasure with proper installation. This Stealthbox® is engineered to fit 2007-Up Toyota Tundra CrewMax vehicles and houses a 13TW5-3 subwoofer, providing exceptional bass response. With its acoustic suspension (sealed) enclosure type and 3 ohms mono nominal impedance, it seamlessly integrates with various amplifiers, including the recommended JL Audio 500/1v2 or HD750/1.


-
 1
1
-
 2
2
-
 3
3
-
 4
4
JL Audio SB-T-TUNDCMAX/13TW5/DG User manual
- Category
- Car speakers
- Type
- User manual
- This manual is also suitable for
JL Audio SB-T-TUNDCMAX/13TW5/DG is a vehicle-specific enclosed subwoofer system designed to deliver years of listening pleasure with proper installation. This Stealthbox® is engineered to fit 2007-Up Toyota Tundra CrewMax vehicles and houses a 13TW5-3 subwoofer, providing exceptional bass response. With its acoustic suspension (sealed) enclosure type and 3 ohms mono nominal impedance, it seamlessly integrates with various amplifiers, including the recommended JL Audio 500/1v2 or HD750/1.
Ask a question and I''ll find the answer in the document
Finding information in a document is now easier with AI
Related papers
-
JL Audio SB-F-SUPRCC/13TW5/DG User manual
-
JL Audio SB-T-TUNDC/8W7/GA User manual
-
JL Audio SB-J-JK2DR/10W1v3 Stealthbox Installation guide
-
JL Audio Stealthbox SB-H-CIVCPE3/10W6v2 User manual
-
JL Audio SB-J-UNLTD4DR/13TW5-3 User manual
-
JL Audio SB-T-TTNCRW/10W3v2 User manual
-
JL Audio 500/1v2 User manual
-
JL Audio 1000/1v2 Owner's manual
-
JL Audio SB-F-150-SPRCRW/13TW5/TN User manual
-
JL Audio SB-D-MAG/10W3v3 User manual


