Canon A610 User manual

Type
User manual

This manual is also suitable for

ENGLISH
Preparation
Shooting
Playback/Erasing
Menus and Settings
Printing
Downloading Images
to a Computer
Basic
CDI-E189-010 © 2005 CANON INC. PRINTED IN CHINA
Camera User Guide
Please Read This First
This guide explains how to prepare the camera and use its basic features.
Cover-Basic_Eng.fm Page 1 Friday, June 24, 2005 4:06 PM
The following guides are available. Refer to them as necessary
according to the flowchart below.
In this guide, the Basic Camera User Guide is called the Basic Guide,
and the Advanced Camera User Guide is called the Advanced Guide.
Flowchart and Reference Guides
For information on included items
and items sold separately
Preparations
Installing the batteries and memory card
Opening the LCD monitor
Setting the date, time and language
Shooting
Playback/Erasing
Menus and Settings
Handling precautions, references to
the various shooting and playback
functions
Printing
• Installing the software
• Downloading images to a
computer
• Using the software
System Map
Basic Camera User
Guide (This Guide)
• Read this first.
Advanced Camera
User Guide
Direct Print User Guide
Basic Camera User
Guide (This Guide)
Software Starter Guide
ZoomBrowser EX/
ImageBrowser
Software User Guide
• PDF manuals available
on the Canon website.
http://web.canon.jp/
Imaging/information-
e.html
100-BasicGuide.fm Page 0 Thursday, June 23, 2005 1:51 PM
1
Preparations
1.
Installing the batteries.
1. Slide the battery cover lock in the direction of the arrow and
open the cover.
2. Insert the supplied 4 AA-size alkaline batteries, or
separately sold AA-size NiMH batteries.
3. Close the battery cover.
2.
Inserting the Memory Card.
1. Slide the memory card slot cover in the direction of the
arrow and open it.
2. Insert the memory card until it clicks into place.
3. Close the memory card slot cover.
Preparations
Î See the Advanced Guide: Battery Handling (p. 105)
Ensure that the memory card is correctly oriented before
inserting it in the camera. It may damage the camera if
inserted incorrectly.
Î See the Advanced Guide: Handling the Memory Card (p. 107)
Î See the Advanced Guide: Formatting Memory Cards (p. 21)
Negative end (–)
Positive end (+)
100-BasicGuide.fm Page 1 Thursday, June 23, 2005 1:51 PM
2
To Remove the Memory Card
Use a finger to push the memory card in until you hear a click, then
release it.
You can use SD* memory cards and MultiMediaCards with this camera.
These cards are collectively called memory cards in this guide.
* SD stands for Secure Digital, a copyright protection system.
100-BasicGuide.fm Page 2 Thursday, June 23, 2005 1:51 PM
3
Preparations
First Time Settings
Opening the LCD Monitor
The LCD monitor can be used to check an image during shooting, to
play back recorded images or to adjust menu settings. It can be
opened to the following range of positions.
1. Opened right to left 180 degrees.
2. Tilted forward 180 degrees toward
the lens or backward 90 degrees.
When tilted forward 180 degrees
toward the lens, the image shown on
the LCD monitor is automatically
flipped and reversed so that it appears
correctly from in front of the lens.
* This reverse display function can be turned off.
3. Close the LCD monitor with the
LCD monitor facing out.
When the LCD monitor clicks into
place against the camera body, the
image will return to its original, non-
reversed orientation.
Î See the Advanced Guide: Rec. Menu (p. 24)
Î See the Advanced Guide: Using the LCD Monitor (p. 15)
When not using the camera, close the LCD monitor with
the monitor facing in to protect it. The LCD monitor will
automatically turn off when it clicks shut against the
camera body.
100-BasicGuide.fm Page 3 Thursday, June 23, 2005 1:51 PM
4
Setting the Date/Time
1. Press the power button (a).
2. Use the or button to select an item and the or
button to change its value (b).
3. Confirm that the correct time is displayed and press the
FUNC./SET button (c).
The date and time can also be set in the Set up menu (p. 13).
Setting the Display Language
1. Set the mode switch to (playback).
2. Hold down the FUNC./SET button and press the MENU
button.
3. Use the ,
, or button to select a language and
press the FUNC./SET button.
The display language can also be set in the Set up menu (p. 13).
A rechargeable lithium battery is built into the camera
to save such settings as the date/time. This battery
charges when the main batteries are in the camera.
When you purchase the camera, place the main
batteries in it for approximately four hours or use AC
Adapter Kit ACK600 (sold separately) to charge the
lithium battery. It will charge even if the camera is
turned off.
The date/time settings may be lost after approximately
three weeks if you remove the main batteries. Reset
the date/time settings if this occurs.
100-BasicGuide.fm Page 4 Thursday, June 23, 2005 1:51 PM
5
Shooting
1.
Press the power button.
The start-up sound will play and the start-up
image will display in the LCD monitor.
Pressing the power button again turns the
power off.
To switch to the setting that mutes all
sounds (except for the warning sound), press and hold the
MENU button while pressing the power button.
2.
Set the mode switch to (shooting).
3.
Set the shooting mode dial to
(Auto).
4.
Aim the camera at the subject.
5.
Focus and shoot.
1. Press the shutter button halfway to
focus.
When the camera focuses, the camera
beeps twice and the indicator lights green.
2. Press the shutter button fully to shoot.
The shutter sound will play and the image
will record. The indicator will blink green
while the image is recorded to the memory
card.
Shooting
Î See the Advanced Guide: Power Saving Function (p. 20)
Î See the Advanced Guide: Set up Menu (p. 25)
Î See the Advanced Guide: My Camera Menu (p. 27)
Î See Basic Shooting Functions (p. 6).
Î See the Advanced Guide: Indicators (p. 20)
Î
See the Advanced Guide for the various shooting methods
available.
Power button
Indicators
100-BasicGuide.fm Page 5 Thursday, June 23, 2005 1:51 PM
6
Reviewing an Image Right After Shooting
After a shot is taken, the image appears in the LCD monitor for
approximately 2 seconds.
You can continue to display images regardless of the review duration
setting with the following procedures.
Keeping the shutter button pressed after a shot.
Pressing the FUNC./SET button while the image is displayed in the
LCD monitor.
To stop displaying the image, press the shutter button halfway.
Basic Shooting Functions
Selecting a Shooting Mode
1. Set the shooting mode dial to the desired mode (a).
In the and modes, use the or button (b) to select
a shooting mode.
Shooting Modes
Î See the Advanced Guide: Review (p. 24)
AUTO
The camera automatically selects settings.
Image
zone
Allows you to shoot using settings automatically selected by the camera which
suit the conditions of the subject.
Portrait
Blurs the background
and makes a person
stand out.
Landscape
Shoots spacious
landscape scenes.
Night scene
Allows you to capture human subjects against the backdrop of
an evening sky or night scene. The flash is directed at the
person and the shutter speed is slow, so both the person and
the background can be beautifully shot.
Creative zone
Image zone
Auto
100-BasicGuide.fm Page 6 Thursday, June 23, 2005 1:51 PM
7
Shooting
Image
zone
(Special Scene)
By simply selecting one of the following shooting modes, you can shoot with the
most appropriate settings for the scene.
My Colors
Allows you to change
the image colors
easily with 9 modes.
Stitch
Assist
Allows you to shoot
overlapping
images that can
later be merged (stitched) to create
one panoramic image on a computer.
Snow
Shoots without a
blue tinge and
without making
people appear dark
against a snowy background.
Foliage
Shoots trees and
leaves - such as
new growth,
autumn leaves or
blossoms - in vivid colors.
Beach
Shoots without
making people
appear dark near
water or sand
where reflected sunlight is strong.
Underwater
Appropriate for
shooting images
with Waterproof
Case WP-DC90
(sold separately). This mode uses an
optimal white balance setting to
reduce bluish tones and record
images with a natural hue. The
exposure is regulated to use the flash
as little as possible.
Kids&Pets
Allows you to
capture subjects
that move around,
such as children
and pets, without missing photo
opportunities.
Night
Snapshot
Allows you to take
snapshots of
people against
twilight or night backgrounds by
reducing the effects of camera shake
even without using a tripod.
Indoor
Prevents camera
shake and
maintains the
subject’s true color
when shooting under fluorescent or
tungsten lighting.
Fireworks
Captures fireworks
in the sky sharply
and at optimal
exposure.
Î See the Advanced Guide (p. 59)
Î See the Advanced Guide (p. 39)
100-BasicGuide.fm Page 7 Thursday, June 23, 2005 1:51 PM
8
Using the Zoom
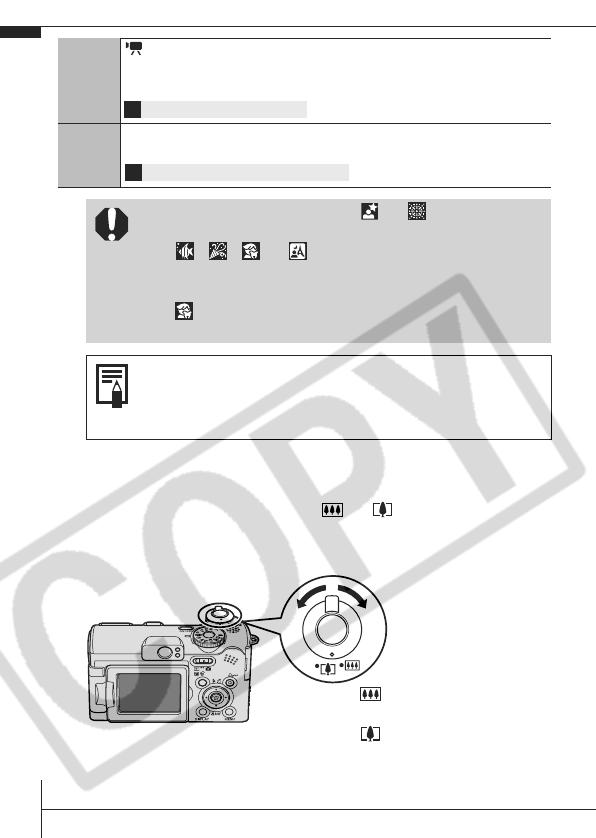
1. Press the zoom lever toward or .
The zoom can be adjusted from 35 mm – 140 mm (focal length)
in 35mm film equivalent terms.
Image
zone
Shoots a movie when you press the shutter button.
You can select from four modes: [Standard], [Fast Frame Rate] suitable for
sports or fast motion, [Compact] convenient for email attachments and [My
Colors] which allows you to change color effects.
Creative
zone
You can freely select camera settings such as the exposure and
aperture value to suit your shooting purposes.
The shutter speed is slow in or mode. Always
use a tripod to avoid camera shake.
In , , or mode, the ISO speed may
increase and cause noise in the image depending on
the scene being shot.
In mode, shoot with the subject 1 m (3.3 ft.) or more
from the end of the lens.
To shoot underwater, install the camera in Waterproof
Case WP-DC90 (sold separately).
We recommend you use Waterproof Case WP-DC90
(sold separately) for shooting at ski resorts or beaches.
Î See the Advanced Guide (p. 37)
Î See the Advanced Guide (p. 41 – 44, 69)
Wide Angle: Zooms
out from the subject.
Telephoto: Zooms in
on the subject.
100-BasicGuide.fm Page 8 Thursday, June 23, 2005 1:51 PM
9
Shooting
Using the Flash
1. Press the button to cycle through flash settings.
* Red-eye reduction: This feature reduces the effect of light reflecting back from
the eyes and making them appear red. You can set this feature on and off in
the Rec. menu.
Auto with red-eye
reduction
The flash fires automatically and fires the red-
eye reduction lamp each time.
Auto The flash fires automatically.
Flash on with red-
eye reduction
The red-eye reduction lamp and flash always
fire.
Flash on The flash always fires.
Flash off The flash will not fire.
You are recommended to shoot with the camera
attached to a tripod or other device if the camera shake
warning icon appears.
When [Slow Synchro] is set to [On] in the Rec. menu,
you can shoot at a slow shutter speed with the flash
activated. This helps brighten up dark backgrounds when
shooting night scenes or with indoor lighting conditions.
Î See the Advanced Guide: Rec. Menu (p. 24)
Î
See the Advanced Guide: Functions Available in Each Shooting
Mode (p. 136)
Each time you press the button, the
flash settings will change.
With the red-eye reduction function on:
With the red-eye reduction function off:
Flash settings cannot be used in some shooting modes.
100-BasicGuide.fm Page 9 Thursday, June 23, 2005 1:51 PM
10
Shooting Close-ups (Macro)
1. Press the button.
To cancel the macro mode, press the button again.
Macro
Use this mode to shoot close-ups of flowers or small items.
Image Area at Minimum Shooting Distance from End of Lens to Subject
• Maximum wide angle setting: 22 x 16 mm (0.9 x 0.6 in.)
Minimum shooting distance: 1 cm (0.4 in.)
• Maximum telephoto setting: 76 x 57 mm (3.0 x 2.2 in.)
Minimum shooting distance: 25 cm (9.8 in.)
Use the LCD monitor to compose close-ups in macro
mode since images composed with the viewfinder may
be off-center.
The exposure may not be optimal when the flash is
used in macro mode in the range of 1 – 25 cm (0.4 in. –
9.8 in.).
Î
See the Advanced Guide: Functions Available in Each Shooting
Mode (p. 136)
This setting cannot be set in some
shooting modes.
100-BasicGuide.fm Page 10 Thursday, June 23, 2005 1:51 PM
11
Playback/Erasing
1.
Set the mode switch to (playback).
The last recorded image will appear in the
LCD monitor.
2.
Use the or button to display the
image you wish to view.
Use the button to move to the previous image and the
button to move the next image.
Holding the button down advances the images more rapidly, but
shows them less clearly.
1.
In the playback mode, use the
or button to select an
image to erase (a) and press
the button (b).
2.
Confirm that [Erase] is selected and
press the FUNC./SET button (c).
To exit instead of erasing, select [Cancel].
Playback
Î
See the Advanced Guide for the various playback methods
available.
Erasing
Please note that erased images cannot be recovered.
Exercise adequate caution before erasing an image.
Î See the Advanced Guide: Erasing All Images (p. 82)
100-BasicGuide.fm Page 11 Thursday, June 23, 2005 1:51 PM
12
Settings for the shooting or playback modes or such camera settings
as the date/time and sounds are set using the FUNC., Rec., Play, Set
up or My Camera menu.
FUNC. Menu
This menu sets many of the common shooting functions.
aSet the mode switch to (shooting).
bPress the FUNC./SET button.
cUse the or button to select a menu item.
Some items may not be selectable in some shooting modes.
dUse the or button to select an option for the menu item.
After selecting an option, you can press the shutter button to
shoot immediately. After shooting, this menu will appear again,
allowing you to adjust the settings easily.
ePress the FUNC./SET button.
Menus and Settings
Î See the Advanced Guide: Menu List (p. 24)
a
b
e
d
c
100-BasicGuide.fm Page 12 Thursday, June 23, 2005 1:51 PM
13
Menus and Settings
Rec., Play, Set up and My Camera Menus
Convenient settings for shooting or playback can be set with these
menus.
aPress the MENU button.
bUse the or button to switch between menus.
You can also use the zoom lever to switch between menus.
cUse the or button to select a menu item.
Some items may not be selectable in some shooting modes.
dUse the or button to select an option.
Menu items followed by an ellipsis (...) can only be set after
pressing the FUNC./SET button to display the next menu.
Press the FUNC./SET button again to confirm the setting.
ePress the MENU button.
Î See the Advanced Guide: Menu List (p. 24)
(My Camera) Menu
This example shows the Rec. menu.
In playback mode, the Play menu displays.
You can switch
between menus with
the
or
button
when this part is
selected.
(Rec.) Menu
(Play) Menu
(Set up) Menu
a
b
e
dc
100-BasicGuide.fm Page 13 Thursday, June 23, 2005 1:51 PM
14
Connect the camera to a direct print compatible printer*
1
with a cable
and simply press the button on the camera.
1.
Connect the camera to a Direct Print compatible printer
and turn on the printer’s power.
*
1
Since this camera uses a standard protocol (PictBridge), you can use it
with other PictBridge-compliant printers in addition to Canon-brand
printers.
*
2
You can also use card photo printers such as the CP-10/CP-100/CP-200/
CP-300.
Printing
Canon Brand Printers
SELPHY CP Series
Compact Photo
Printers*
2
PIXMA Series/
SELPHY DS
Series Bubble Jet
Printers
Interface CableCamera
100-BasicGuide.fm Page 14 Thursday, June 23, 2005 1:51 PM
15
Printing
2.
Turn on the power in playback mode and confirm that
, or is displayed in the upper left of the LCD
monitor (a).
The button will light blue.
The displayed icon will vary according to the printer model.
3.
Select an image to print using the or button (b)
and press the button (c).
The button will blink blue and printing will start.
Î
See the Advanced Guide: Setting the DPOF Print Settings
(p. 83)
Î See the Direct Print User Guide
Î See the user guide for Your Printer
100-BasicGuide.fm Page 15 Thursday, June 23, 2005 1:51 PM
16
The following methods can be used to download images recorded by
the camera to a computer. Some methods, depending on the OS
used, may not be available. Please read System Requirements (p. 17)
in advance.
Camera to Computer Connection
* Please also see the Windows XP and Mac OS X Users leaflet.
Using a Memory Card Reader
A memory card reader can be used with all the operating systems
listed above. See the Software Starter Guide for details.
Downloading Images to a Computer
Supplied Software Install It Do Not Install It
Downloading Method
Computer
Procedure
Camera
Procedure
Computer
Procedure
OS Windows 98
Second Edition (SE)
zz
Windows 2000 zz
Windows Me zz
Windows XP zz z
Mac OS X zz z
Computer System
Requirements
Basic Guide (p. 17)
• Software Starter Guide
Connecting the Camera
to a Computer
Basic Guide (p. 19)
Software
Starter Guide*
Downloading Images to
a Computer
Basic Guide (p. 20, 21)
• Software Starter Guide
100-BasicGuide.fm Page 16 Thursday, June 23, 2005 1:51 PM
17
Downloading Images to a Computer
System Requirements
Please install the software on a computer meeting the following
minimum requirements.
Windows
Macintosh
OS Windows 98 Second Edition (SE)
Windows Me
Windows 2000 Service Pack 4
Windows XP (including Service Pack 1 and Service
Pack 2)
Computer Model The above OS should be pre-installed on computers with
built-in USB ports.
CPU Pentium 500 MHz or higher processor
RAM Windows 98 SE/Windows Me 128 MB or more
Windows 2000/Windows XP 256 MB or more
Interface USB
Free Hard Disk
Space
• Canon Utilities
- ZoomBrowser EX 250 MB or more
(Including the PhotoRecord printing program)
- PhotoStitch 40 MB or more
• Canon Camera TWAIN Driver 25 MB or more
• Canon Camera WIA Driver 25 MB or more
• ArcSoft PhotoStudio 50 MB or more
Display 1,024 x 768 pixels/High Color (16 bit) or better
OS Mac OS X (v10.2 – v10.3)
Computer Model The above OS should be pre-installed on computers with
built-in USB ports.
CPU PowerPC G3/G4/G5
RAM 256 MB or more
Interface USB
Free Hard Disk
Space
• Canon Utilities
- ImageBrowser 200 MB or more
- PhotoStitch 40 MB or more
• ArcSoft PhotoStudio 50 MB or more
Display 1,024 x 768 pixels/32,000 Colors or better
100-BasicGuide.fm Page 17 Thursday, June 23, 2005 1:51 PM
18
Preparing to Download Images
Items to Prepare
Camera and computer
Canon Digital Camera Solution Disk supplied with the camera
Interface cable supplied with the camera
1.
Install the software.
1. Place the Canon Digital Camera Solution Disk in the
computer’s CD-ROM drive.
2. Click the Digital Camera Software
[Install] button and click [Next].
3. Select [Easy Installation] as the
setup type and click [Next].
Proceed with the installation while
reviewing installation settings.
4. When the installation is complete,
select [Yes, I want to restart my
computer now.] and click [Finish].
Ensure that you install the software first before connecting the
camera to the computer.
Double-click the [Canon Digital Camera Installer] icon
in the CD-ROM window.
When the installation is
finished, click [OK].
100-BasicGuide.fm Page 18 Thursday, June 23, 2005 1:51 PM
  • Page 1 1
  • Page 2 2
  • Page 3 3
  • Page 4 4
  • Page 5 5
  • Page 6 6
  • Page 7 7
  • Page 8 8
  • Page 9 9
  • Page 10 10
  • Page 11 11
  • Page 12 12
  • Page 13 13
  • Page 14 14
  • Page 15 15
  • Page 16 16
  • Page 17 17
  • Page 18 18
  • Page 19 19
  • Page 20 20
  • Page 21 21
  • Page 22 22
  • Page 23 23
  • Page 24 24
  • Page 25 25
  • Page 26 26

Canon A610 User manual

Type
User manual
This manual is also suitable for

Ask a question and I''ll find the answer in the document

Finding information in a document is now easier with AI