Page is loading ...


Instructions Manual
Page 1
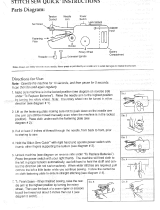
1. Set screw
2. Fastening plate
3. Bobbin
4. Rotary wheel
5. Battery compartment
6. AC/DC Adapter slot
7. Lock/Unlock
8. Power switch
9. Needle arm
10. Tension control
11. Threader
12. Extension spindle
Parts Identification

Instructions Manual
Page 2
The needle is sharp, use care when working with the needle to avoid injury.
Keep away from children.
When not in use the machine should always be kept in a locked position.
Note: Make sure machine is in the locked position prior to battery
replacement.
To open the compartment, press down on the arrow with your thumb and
push in the direction of the arrow (Figure 1).
Insert four AA batteries in the battery compartment (Figure 2).
Once batteries are inserted, replace battery cover by sliding it back and
clicking into place.
AC/DC adapter (not included)
Adapter must be 6V 800mA. Plugging in an adapter that has different ratings
could damage the machine and adapter.
Ensure the machine is in the locked position (Figure 3).
Raise the needle arm to the highest position by turning
the rotary wheel. (Note: The rotary wheel can be turned
in either direction (Figure 4).
Place the fabric to sew underneath the fastening plate.
Thread two inches of thread through the needle.
For Your Safety:
Insert/Replace Batteries (not included):
Directions for Use:
Lift up the fastening plate making sure not to push
down on the needle arm (Figure 5). The arm can still
be moved manually even when the machine is in the
locked position.

Instructions Manual
Page 3
Hold the sewing machine with right hand and operate power switch with
thumb, other fingers supporting the bottom.
Unlock the sewing machine. Press the power switch with your right thumb.
The machine will automatically sew the fabric/cloth to the left (Figure 6).
Use the left hand to hold cloth and control the direction (do not rush the
machine). When wider stitches are required, pull cloth to the left a little
faster while you continue sewing.
Follow the centerline on cloth fastening plate to ensure straight stitching.
To finish seam, raise the needle arm to the highest position by turning the
rotary wheel. Use the back of a seam ripper or scissors to pull the thread out
about three inches then cut it (Figure 7).
Turn the rotary wheel, lowering the needle into the cloth. Continue to turn
the rotary wheel until needle arm is again at its highest position.
Lift up the fastening plate and take off the cloth to the left (Figure 8),
making sure not pull the thread out the seam doing so can cause the seam
to unravel.
Turn to backside of the cloth and guide the reserved 3 inches according to
the following figures to make the knot (Figure 9):
1. First pass threader through the last stitch.
2. Put the reserved 3 inch thread through the threader hole.
3. Pull it out about 1 inch.
4. Guide the thread through the loop and pull it tight to finish the knot.
Note: The spring must be in place before installing bobbin. Thread should
flow from the top right of the bobbin or spool.
Pass thread through the eyelet on the needle arm (Figure 10).
Threading the Machine:

Instructions Manual
Page 4
Pass thread over top of tension control, do not wrap completely around
tension control (Figure 11).
Use the threader to pass the thread through the needle eye from back to
the front.
Loosen the bobbin nut and take off the bobbin. Slide thread spool onto
extension spindle. Connect the extension spindle on bobbin shaft (Figure
12).
Loosen the set screw with a screwdriver and take off the old needle and
insert a new one.
Needle must be installed with a flat side of the needle shank facing the
front of handheld sewing machine.
Always use a # 14 style DHx1 sewing needle.
To Use a Standard Thread Spool:
Replacing the Needle:
1 YEAR LIMITED WARRANTY
The Handheld Sewing Machine is warranted for 1 year from provable date of purchase against defects
in material and workmanship. During this period such defects will be repaired, or the product will be
replaced without charge. This warranty does not cover damage caused by misuse, negligence or
improper installation. Warranty is also invalid in any case that the product is taken apart or serviced
by an unauthorized service station. Send your package postage prepaid with a copy of your proof of
purchase. You will also need to enclose a letter explaining the nature of your difficulty in detail. Please
allow 2-4 weeks for return shipping.
Smartek USA Inc. • 49 Bartlett Street Brooklyn, NY 11206 • 1-877-678-6232
Sunbeam™ logo is a trademark of Sunbeam Products, Inc. used under license.
/


