Page is loading ...

1
Harvey
®
Chemiclave EC5500/EC6000
Sterilizers
Owner/Operator Manual
EC5500 Series 1121
EC6000 Series 1122
LT1121X1 • 1/9/03

2
Table of Contents
Safety Information ..................................................................................................................................................................3
Alert Signals..........................................................................................................................................................................3
Warnings ..............................................................................................................................................................................3
General Description ................................................................................................................................................................4
Controls and Features..........................................................................................................................................................5
Power Switch......................................................................................................................................................................5
Control Panel......................................................................................................................................................................5
Chemi-Filter........................................................................................................................................................................6
Door Latch..........................................................................................................................................................................6
Waste Tank Drain ..............................................................................................................................................................6
Pressure Relief Valve ........................................................................................................................................................6
Chemipurge........................................................................................................................................................................6
Operation ................................................................................................................................................................................7
Preparing Items for Sterilization ..........................................................................................................................................8
Items Not Recommened for Chemical Vapor Sterilization ..................................................................................................8
Recommended Sterilization Monitoring Program ................................................................................................................9
Filling The Vapo-Steril Reservoir ........................................................................................................................................10
Emergency Treatment ......................................................................................................................................................10
Draining the Waste Tank ..................................................................................................................................................11
Filling the Reservoir ........................................................................................................................................................12
Running a Cycle ................................................................................................................................................................14
Preparation ......................................................................................................................................................................14
Power ..............................................................................................................................................................................14
Loading the Chamber ......................................................................................................................................................14
If the Door Will Not Open ................................................................................................................................................16
Starting the Cycle ............................................................................................................................................................17
Completing the Cycle ......................................................................................................................................................18
Removing the Goods ......................................................................................................................................................18
Stopping a Cycle ..............................................................................................................................................................20
Power Interruption ............................................................................................................................................................20
Troubleshooting ....................................................................................................................................................................22
Maintenance ........................................................................................................................................................................22
Daily....................................................................................................................................................................................22
Cleaning the Door Gasket................................................................................................................................................22
Draining the Waste Tank ..................................................................................................................................................24
Weekly................................................................................................................................................................................25
Cleaning the Chamber and Trays ....................................................................................................................................25
Monthly ..............................................................................................................................................................................25
Checking the Pressure Relief Valve ................................................................................................................................25
When Required ..................................................................................................................................................................26
Replacing the Chemi-Filter ..............................................................................................................................................26
Finding the Replacement Date ........................................................................................................................................26
Replacing the Door Gasket ..............................................................................................................................................27
Door Adjustment ..............................................................................................................................................................28
Installation ............................................................................................................................................................................29
Positioning the Sterilizer ....................................................................................................................................................29
Electrical Requirements......................................................................................................................................................31
Chemi-Filter Installation......................................................................................................................................................31
Operational Check-Out ......................................................................................................................................................31
Technical Specifications........................................................................................................................................................32
Declaration of Conformity ..................................................................................................................................................33
Environmental Conditions ..................................................................................................................................................33
Replacement Parts ..............................................................................................................................................................34
Ordering Information ............................................................................................................................................................35
Glossary................................................................................................................................................................................36
Two Year Limited Warranty ..................................................................................................................................................40

3
Safety Information
Your Harvey
®
Chemiclave EC5500/EC6000 sterilizer has
been designed with function, reliability and safety in
mind. It is your responsibility to install it in conformance
with local electrical codes. This manual contains impor-
tant safety information. You must carefully read and un-
derstand the contents of this manual prior to the use of
this equipment. For safe operation, please pay attention
to the alert signals throughout the manual.
Warnings
This sterilizer employs a chemical vapor process using
Harvey Vapo-Steril solution, which contains 0.23% form-
aldehyde by weight.
Employers should be familiar with any occupational
Safety and Health Administration (OSHA) regulations
which apply to their workplace. OSHA standards (29
CFR 1910.1048) for Formaldehyde applies to the work-
place. For a copy of this standard, contact your nearest
OSHA office.
Refer servicing to qualified service personnel.
Warning
Warnings alert you to a possibility of
personal injury.
Caution
Cautions alert you to a possibility of
damage to the equipment.
Note
Notes alert you to pertinent facts and
conditions.
Hot Surface
Hot surfaces alert you to a possibility
of personal injury if you come in con-
tact with a surface during use or for a
period of time after use.
Alert Signals

4
The Harvey
®
Chemiclave sterilizer is a safe, fast and effective
sterilizer for use in medical and dental offices, hospitals, clin-
ics and other health care facilities.
To sterilize goods, Chemiclave sterilizers use an unsaturated
chemical vapor process. This method is proven for sterilizing
instruments without dulling, rusting, corroding or otherwise
impairing their properties. Cycles require no drying time—
goods come out dry.
The Chemiclave sterilizer is not intended for use with liquids,
agars, textiles or heat-sensitive items. Sterilization processes
of unique loads not specified in this manual must be validated
by the end users.
General Description
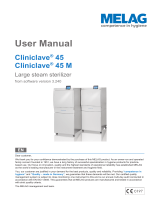
Figure 1: Chemiclave EC5500 (Front View)

5
Controls and Features
Power Switch
The power switch on the front of the sterilizer turns
power to the sterilizer ON (I) or OFF (O). See Figure 1.
Control Panel
Pressure Gauge
Displays the chamber pressure. See Figure 2.
Timer
Times the 20 minute exposure phase and the purge
phase. During the countdown, the decimal point flashes.
Control Knob
When the control knob is turned to PRESSURIZE at the
start of a cycle, Vapo-Steril enters the chamber, enabling
a cycle to begin. Turning the control knob to DEPRES-
SURIZE after the exposure phase permits vapors to
exhaust from the chamber.
Indicators
POWER: Lights when power to the unit is ON.
TEMP: Turns on and off as the chamber heaters cycle
on and off.
PURGE: Flashes when the exposure phase or purge
phase is complete. Lights during the purge phase.
COMPLETE: Lights when the exposure phase is com-
plete. Also lights when the purge phase is complete.
VAPO: Lights when the reservoir must be filled with
Vapo-Steril solution. The indicator will remain lit until
solution is added.
GENERAL DESCRIPTION
Figure 2: Control Panels

6
Chemi-Filter
®
The Chemi-Filter is a cylindrical filter that is placed in the top
of the sterilizer, directly behind the fill funnel. It removes form-
aldehyde and potentially objectionable odors from the
Chemiclave exhaust.
Door Latch
The door latch secures the door. It is opened by the door
handle. The handle mechanism prevents the door from being
opened while there is pressure in the chamber.
Waste Tank Drain
A quick-disconnect drain port below the sterilizer door is pro-
vided to drain used Vapo-Steril solution from the waste tank.
A drain hose connects to the port when required.
Pressure Relief Valve
A safety valve on the rear of the sterilizer relieves excess
chamber pressure (see Figure 3).
Chemi-Purge
The Chemipurge pumps filtered air into the chamber after a
cycle. This forces residual vapors out of the chamber into the
condenser and through to the Chemi-Filter.
GENERAL DESCRIPTION
Figure 3: Pressure Relief Valve

7
Warning
Do not attempt to open the door until
the pressure gauge has returned to 0
psig.
Warning
Do not use this equipment to sterilize
volatile substances or for any purpose
other than its intended design.
Warning
Do not operate the Chemiclave without
a Chemi-Filter in place. Operation with-
out a Chemi-Filter could result in emis-
sions above the permissible exposure
levels (PELs) established by OSHA.
Warning
Do not use the equipment to sterilize
liquids or solutions. Attempts to
process liquids or solutions could result
in (1) the liquids boiling over, and/or (2)
the containers exploding.
Caution
Replace the door gasket when dam-
age, deterioration or wear prevents a
proper seal. A proper seal is essential
to safety and performance (see instruc-
tions in the “Maintenance” section of
this manual.
The Chemiclave sterilizer uses Harvey® Vapo-Steril
solution to sterilize instruments without dulling, rusting or
corroding. To ensure safe and effective use, follow these
precautions:
• Follow the instructions in the Owner/Operator
Manual. Do not try to open the door until the chamber is
fully depressurized and the pressure gauge reads “o.”
Replace the door gasket when damage, deterioration or
wear is evident.
• Operate the Chemiclave sterilizer in a well-
ventilated area. Ventilation requirements will vary with
room size, frequency of use, the number of sterilizers
operated within a given area, etc. Ventilation must be
adequate to ensure compliance with applicable Occupa-
tional Safety and Health Administration (OSHA) stan-
dards for levels of exposure to formaldehyde and ethyl
alcohol.
Operation

8
Preparing Items for Sterilization
1. Thoroughly clean, rinse and dry the items before
placing them in the sterilizer, An ultrasonic cleaner
is suggested for removal of debris.
2. Clean and lubricate instruments according to the
manufacturer’s instructions.
3. If processed instruments will be stored, Harvey
Chemi-Test indicator bags and pouches are recom-
mended. These permit chemical vapor penetration
during processing and maintain integrity after
removal from the sterilizer.
4. Open any hinged instruments.
5. Uncover empty containers.
6. Chemical process indicators should be placed in
the center of each load. Weekly use of biological
indicators is recommended (see “Recommended
Sterilization Monitoring Program.”
Items not Recommended for
Chemical Vapor Sterilization
• Linen, textiles or fabrics— incompatible with the
chemical vapor process.
• Liquids and agars— incompatible with high temper-
ature processing (132°C [270°F]).
• Items contained in tightly woven packs or wraps or
sealed containers—cause poor vapor penetration.
Chemi-Test indicator bags and pouched are recom-
mended.
• Plastics which cannot tolerate temperatures in
excess of 132°C (270°F).
• Polycarbonate—chemically incompatible.
• Nylon tubing and bags—inhibit penetration of
chemical vapors.
OPERATION
Note
Items placed in the sterilizer must be
dry. Moisture on items processed in
the sterilizer may cause an incomplete
cycle or corrosion of the instruments.
Note
Unwrapped instruments processed in
the sterilizer should not be considered
sterile when exposed to unsterile envi-
ronments
Caution
Consult the manufacturer of the item
that will be placed in the Chemiclave to
determine its compatibility with high
temperatures. A single unwrapped
instrument may be exposed to a possi-
ble peak temperature of up to 150°C
during the normal cycle.

9
OPERATION
Recommended Sterilization Monitoring Program
All functions of the sterilizer should be monitored to provide maximum sterilization assurance.
The Joint Commission on Accreditation of Hospitals and the American Dental Association recommends that
biological indicators be used at least weekly to check the ef fectiveness of sterilizers. The biological indicator
recommended for monitoring chemical vapor sterilization contains Bacillus stearothermophilus. W e recom-
mend using Harvey Spor-Test biological indicator.
We also recommend using chemical process indicators such as Harvey Chemi-Test within each package in
each cycle. For additional assurance that minimum sterilizing conditions have been achieved, use a biological
indicator such as Harvey B/T Sure Biological Monitoring Service at least once a week.
The items below may be ordered from your authorized Harvey dealer , or contact the Customer Service
Department at Barnstead International at (800) 553-0039.
NOITPIRCSED .ONTRAP
SROTACIDNISSECORP
"5x"52.2)002foxoB(sehcuopgnilaes-fles,urhT-eeStseT-imehC 251XSZ
"01x"57.2)002foxoB(sehcuopgnilaes-fles,urhT-eeStseT-imehC 351XSZ
"5.01x"5.2)052foxoB(sehcuopgnilaes-fles,repaPllAtseT-imehC 100103032
"01x"5.3)002foxoB(sehcuopgnilaes-fles,urhT-eeStseT-imehC 551XSZ
"11x"52.5)002foxoB(sehcuopgnilaes-fles,urhT-eeStseT-imehC 651XSZ
"51x"5)051foxoB(sehcuopgnilaes-fles,urhT-eeStseT-imehC 100003032
"21x"3)052foxoB(sehcuopgnilaes-fles-noN,urhT-eeStseT-imehC
).ylnonoitaziliretsmaetsroF(
100303032
"51x"5)051foxoB(sehcuopgnilaes-fles-noN,urhT-eeStseT-imehC 100203032

10
Filling the Vapo-Steril Reservoir
When the VAPO indicator lights, drain the waste tank (a
drain fitting and tubing are provided) and fill the Vapo-Steril
reservoir. See “Draining the Waste Tank” and “Filling the
Reservoir.”
Emergency Treatment
In case of contact with Vapo-Steril solution, immediately
flush eyes or skin with water for at least 15 minutes. For
eyes, call a physician. Get medical attention if irritation per-
sists.
OPERATION
Warning
Avoid breathing Vapo-Steril fumes.
Warning
Vapo-Steril solution causes eye dam-
age and may cause skin irritation. Do
not get in eyes or on skin or clothing.
Wear goggles or face shield when han-
dling. Harmful or fatal if swallowed.
Avoid contamination of food.
Warning
Never fill the reservoir while a cycle is
in progress. Vapo-Steril solution could
be forcibly expelled, splashing solution
on the operator.
Warning
Vapo-Steril is flammable. Keep away
from heat or flame.
Caution
Always drain the waste tank before fill-
ing the reservoir. Otherwise waste
could overflow, damage the Chemi-
Filter and require cleanup.
Note
Adding Vapo-Steril solution is required
only when the VAPO indicator lights
on the control panel.

11
Draining the Waste Tank
1. Insert the open end of the tubing into a contain-
er.
2. Lock the drain fitting into the drain port. Waste
will begin to exit the drain (see Figure 4).
3. To release the drain fitting, press the release tab.
4. Store the tubing with the drain fitting attached.
5. Dispose of Vapo-Steril solution in accordance
with all prevailing federal, state and local
regulations.
OPERATION
Warning
Do not drain the waste tank while a
cycle is in progress. This could depres-
surize the chamber and interfere with
sterilization.
Warning
Do not reuse Vapo-Steril solution
removed from the waste tank. This liq-
uid may be contaminated or chemically
altered. It may damage the sterilizer.
Warning
Dispose of Vapo-Steril solution in
accordance with all prevailing local
jurisdictional requirements.
Warning
Flammable liquid. Treat Vapo-Steril
solution as a hazardous waste.
Dispose of it properly.
Figure 4: Draining the Waste Tank

12
Filling the Reservoir
1. Locate the fill funnel (see Figure 5). Remove
cap from the fill funnel.
2. Remove the cap from a bottle of Vapo-Steril
solution, and attach the fill spout.
3. Invert the bottle. Insert the fill spout completely
into the fill funnel.
4. Empty the bottle into the reservoir. If the reser-
voir fills before the bottle is empty, the flow will
stop automatically. When this occurs, air bub-
bles will stop entering the bottle.
5. Remove and store the fill spout. Dispose of the
bottle properly.
Warning
Do not fill the Chemiclave sterilizer
without a Chemi-Filter in place.
Operation without a Chemi-Filter could
result in emission above permissible
exposure levels (PELs) established by
OSHA.
Note
Use only Harvey Vapo-Steril
Solution in the sterilizer. Do not
dilute, alter or otherwise change
Vapo-Steril solution in any way. Do
not use water in the Chemiclave
sterilizer. The Harvey Chemiclave
sterilizer was designed to use the
Vapo-Steril solution. If a solution
other than Vapo-Steril is used and
damages the Chemiclave sterilizer,
the warranty is void.
Caution
Always drain the waste tank before fill-
ing the reservoir. If this is not done,
excess waste could overflow, damage
the Chemi-Filter and require substantial
cleanup.
Figure 5: Filling the Vapo-Steril Reservoir

13
OPERATION
Figure 6: Controls and Features

14
Warning
Do not use this equipment to sterilize
volatile substances or for any other
purpose than its intended design.
Warning
Do not use this equipment to sterilize
liquids or solutions. Attempts to
process liquids or solutions in the ster-
ilizer could result in (1) the liquids boil-
ing over and/or (2) the containers
exploding.
Running a Cycle
Preparation
1. Set control knob to DEPRESSURIZE. Do this
before turning the sterilizer ON (see Figure 5).
2. Check that the Chemi-Filter is in place. If it is
not, install it. (See “Chemi-Filter Installation.’)
Power
1. Switch the POWER switch to the ON (I) posi-
tion. All the indicators (LED’s) should light for
approximately two seconds, then extinguish
except for the POWER and TEMP indicators
which should remain ON.
• The POWER indicator will stay lit as long as the
POWER switch is on.
• The TEMP indicator lights whenever the heating
elements are on.
• The timer displays “00” during warm-up.
Loading the Chamber
When the TEMP indicator cycles off and on, the chamber
is ready to be loaded.
1. Open the door:
2. Check that chamber pressure is less than 2 psi.
The door latch cannot be released if pressure in
the chamber exceeds approximately 2 psi.
3. Pull the door handle to the right. This releases
the door latch (see Figure 8).
4. Swing the door open.
5. Place the items to be processed in the appropri-
ate trays.
If the door will not open, refer to “If the Door Will
Not Open” at the end of this section.
OPERATION
Caution
Do not operate the Chemiclave steriliz-
er without a Chemi-Filter in place.
Operation without a Chemi-Filter could
result in emission above permissible
exposure levels (PELs) established by
OSHA.
Figure 7: Power Switch

15
Unwrapped Goods
• Use Harvey Chemi-Test tray liners.
• Be sure instruments are clean and dry.
• Do not overload. Maximum loads: EC5500—3.1
lb. (1400 g); EC6000— 6.2 lb. (2800g).
Wrapped Goods
• Package loads loosely—single wrapped, paper
bags or pouches. This permits chemical vapor
penetration.
• Arrange pouches on edge, not flat, to permit
chemical vapor penetration.
• Do not stack bags or pouches. Do not allow
bags or pouches to touch the wall of the cham-
ber.
• Do not overload. Maximum load: EC5500—2.6
lb. (1200 g); EC6000—5.3 lb. (2400 g).
6. Set the trays in the sterilizer chamber (see
Figure 9).
7. Close and latch the door.
8. Turn the control knob to PRESSURIZE.
OPERATION
Note
Harvey recommends lining each tray
with a Harvey Chemi-Test tray liner.
Do not use paper towels as tray lin-
ers—the chamber will turn black.
Note
Do not use heavy or multiple wraps.
These will prevent proper penetration
of the VAPO-Steril vapor.
Figure 8: Door Release
Figure 9: Loading the Chamber

16
If the Door Will Not Open
1. Swing the door handle 180°.
2. Hook the fingers of your left hand around the
door handle and brace your left thumb against
the right side of the sterilizer.
3. Squeeze so the handle pulls directly to the right
(see Figure 10). This will release the door latch.
The door will now open.
4. If the door handle will not engage when cham-
ber pressure is less than 2 psig, adjust the door
(See “Door Adjustment” under the
“Maintenance” section.
Note
If there is pressure in the chamber, the
handle will pivot without releasing the
door latch. This safety feature helps
prevent opening the door accidentally.
Figure 10: Alternative Door Release
OPERATION

17
Starting the Cycle
1. Turn the control knob to PRESSURIZE.
• This starts the EXPOSURE phase of the cycle
(see Figure 11).
• The timer will display “20.”
• Chamber pressure will increase.
Timed Exposure Begins
• When chamber pressure reaches 20 psi, the
timer starts automatically (see Figure 12).
• The timer counts down to zero. During the count-
down, the decimal point flashes to show it is in
the EXPOSURE phase.
• The decimal point flashes while chamber pres-
sure exceeds 20 psi. If the decimal point stops
flashing, chamber pressure has dropped below
20 psi.
Timed Exposure Ends
The tone sounds.
• The timer displays “00.”
• The PURGE indicator flashes.
• The COMPLETE indicator lights.
Figure 11: Starting the Cycle
Figure 12: Automatic Timed Exposure Display
OPERATION

18
Completing the Cycle
1. After the tone sounds, turn the control knob to
DEPRESSURIZE (see Figure 13).
After 1 minute, the automatic purge phase begins (see
Figure 14).
• The PURGE indicator lights.
• The complete indicator goes out.
• The timer displays “07” (EC5500) or “09”
(EC6000).
• The decimal point on the timer flashes as the
timer counts down to “00.”
When the purge phase ends:
• The tone sounds.
• The PURGE indicator flashes.
• The COMPLETE indicator lights.
When the tone stops, the PURGE indicator goes out. The
COMPLETE indicator remains lit for about a minute and
then goes out. The timer continues to display “00.”
2. Wait 60 seconds.
This allows chamber pressure to drop and permits the
door to open easily.
Removing the Goods
1. Release the door latch. Open the door slightly.
Wait 15 seconds for any residual vapors to
escape.
If the door will not open:
• Swing the door handle 180°.
• Hook the fingers of your left hand around the
door handle and brace your left thumb against
the right side of the sterilizer.
OPERATION
Figure 13: Exposure Complete
Figure 14: Automatic Purge
Warning
Chemical Hazard: Vapo-Steril solution
may be in the chamber. Wear protec-
tive goggles and gloves when opening
the door.

19
• Squeeze so the handle pulls directly to the
right (see Figure 15 ). This will release the
door latch. The door will now open.
2. Open door fully.
3. Use the tray handle to remove the tray from
the sterilizer (see Figure 16).
When the unit is not in use, leave the door closed but
unlatched. This will prolong the life of the door gasket.
Between cycles, leave the unit ON with the door un-
latched and closed. This will give the fastest load turn-
around.
Turn the unit OFF only at the end of the working day or
when it is not to be used for a long time.
OPERATION
Figure 15: To Release the Door Figure 16: Removing the Tray
Note
If there is pressure in the chamber, the
handle will pivot without releasing the
door latch. This safety feature helps
prevent opening the door accidentally.
Warning
Hot goods! The tray and instruments
will be hot after processing. Use the
tray handle to remove the tray. DO
NOT carry the tray by the handle. Tray
must be supported by a gloved hand.
Wear heat-protective gloves when han-
dling the tray or goods. Otherwise
burns could result.
Note
The tray handle is also the tool to
adjust the door (see “Door
Adjustment”).
Note
During normal working hours when the
sterilizer is not being used, leaving the
door closed but unlatched will keep
the sterilizer in READY condition.
Caution
Failure to follow the routine cleaning
procedures in the “Maintenance” sec-
tion may cause equipment malfunction
and/or void the warranty.

20
Stopping a Cycle
If you must stop a cycle before it is complete, follow the
procedure below:
1. Turn the control knob to DEPRESSURIZE.
2. Observe the sterilizer.
a. The timer displays “00.”
b. The tone sounds.
c. The PURGE indicator flashes during the tone.
d. The purge phase will run (refer to “Completing
the Cycle”).
• The timer displays “00.”
• The PURGE indicator lights as the timer counts
down.
e. The tone sounds.
• The COMPLETE indicator does NOT light.
3. Wait 60 seconds.
4. Remove the load as usual (see “Removing the
Goods”).
5. Clean the items in case of contamination.
Process the load again.
Power Interruption
If the power is interrupted, follow the procedure below:
Power Off
While the power is off:
1. The POWER and TEMP indicators will be off.
2. Do not open the door.
OPERATION
Figure 17: Stopping a Cycle
Warning
Reprocess the load completely.
Otherwise the load may not have been
subjected to sterilizing conditions.
Caution
Danger of load contamination. Cooling
of the chamber may create a partial
vacuum in the chamber. If the control
knob is set to DEPRESSURIZE, this
vacuum could draw back waste Vapo-
Steril solution back into the chamber.
/