
PRINTED IN U .S . A .
Combitherm®
Combination
Oven / Steamer
CT EXPRESS™
s%3i
s%3I6(
s##I
s4%#(.)#!,
!" #$%
&&&
$'
Shown with ExpressTouch control
and optional hand sprayer

# /-")4(%2-#4%802%334%#(.)#!,3%26)#%-!.5!,si
How to Use this Technical Service Manual
This manual has been compiled as a complete resource for a technician working on CT Express models. It includes
necessary product information and drawings, along with helpful troubleshooting procedures.
Introduction gives a quick overview of the CT Express to aid in model identification.
Sections A through E contain information applying to all CT Express models:
– CONTROL PANEL IDENTIFICATION includes information on using the controllers and operating instructions. It is
the same material supplied to the customer.
– PREVENTIVE MAINTENANCE includes procedures for cleaning with our without the CombiClean option. This
information is also supplied to the customer.
– SERVICE MODE AND ERROR CODES explains the special programming available to you as a technician to
view status, make adjustments and test functions on models equipped with Simple and Express Touch Controllers.
Information is also included on the use of displayed error codes to resolve problems and on the functions that can be
operated under fault conditions.
– TROUBLESHOOTING TREES are provided for the most common conditions you will be required to address.
– COMBITHERM PARTS has drawings and lists of available parts that are common to all electric models.
Sections F contains Wiring Diagrams that is specific to each model.
Navigation
Starting with the Main Table of Contents on the following page, you may click on any item that has a page number and
quickly jump to the information you need. Note that you may Return to the Main Table of Contents from the bottom of
any Section Contents page.
Printing
You may print the Current Page or any range of pages. Here’s a tip: Because printers vary in their capacity to handle large
drawings, make a test print of one of the Wiring Diagrams before printing the model’s section.

# /-")4(%2-#4%802%334%#(.)#!,3%26)#%-!.5!,sii
TABLE OF CONTENTS
How to Use this Technical Service Manual ..................................... i
Introduction ................................................................................. iii
Control Panel Identification ........................................................... A-1
Preventive Maintenance ................................................................ B-1
Service Mode and Error Codes ...................................................... C-1
Troubleshooting Trees .................................................................. D-1
Combitherm Parts ........................................................................ E-1
Wire Diagrams ............................................................................. F-1

# /-")4(%2-#4%802%334%#(.)#!,3%26)#%-!.5!,siii
MODEL NUMBERS
This manual covers the following CT Express models:
4.10esi
4.10esiVH
4.10CCi
FEATURES AND OPTIONS
Available on all models:
s0ANELCOLORCHOICES
s,EFTHANDDOOR
s(ANDSPRAYER
s3INGLEPOINTPRODUCTTEMPERATUREPROBE
s#OMBI#LEAN®4ABLETBASEDCLEANINGSYSTEM
s3TACKINGCAPABILITIES
Available only on ExpressTouch Control models:
s3MOKER-ODE
s$ELTA4AND#OOK(OLDFUNCTIONALITY
s(!##0DATAACCESS
s'OLDN"ROWN&EATURE
s"ROILERELEMENTNOTAVAILABLEONPHUNITS
s#ATALYTIC#ONVERTERs##IONLY
INTRODUCTION

EXPRESSTOUCH OPERATING INSTRUCTIONS
C ONTROL PANEL IDENTIFICATIONs#/-")4(%2-#4%802%334%#(.)#!,3%26)#%-!.5!,s!n1
ExpressTouch Control Operation
Start Up Procedures ................................................ A-2
Settings Screen .................................................... A-3
Upload/Download Screen ............................................ A-4
Cooking Mode Screen ............................................... A-5
Cooking Mode Screen Identification ..................................... A-6
Auxiliary Functions ................................................. A-7
HACCP Access .................................................... A-8
Simple Control Operation
Screen Identification ................................................ A-9
Operation ........................................................ A-10
Return to Main Table of Contents ...................................... ii

C ONTROL PANEL IDENTIFICATIONs#/-")4(%2-#4%802%334%#(.)#!,3%26)#%-!.5!,s!n2
EXPRESSTOUCH OPERATING INSTRUCTIONS
MAIN MENU SCREEN
Cleaning Mode (optional)
Four (4) cleaning levels are available:
rinse, light, normal, and heavy-duty cleaning.
Download/Upload Files and
HACCP Access (optional)
Download all preprogrammed recipes (factory
default and user-programmed) and HACCP data to a
USB memory stick.
Settings
Change factory default settings. See next page for
more information.
Service Mode (password protected)
service technicians.
START-UP PROCEDURES
When the oven is powered on, the ExpressTouch screen
illuminates. “Loading” indicates that the software
is booting up. The screen will also indicate what level
of progress has been made as the software becomes
fully operational.

EXPRESSTOUCH OPERATING INSTRUCTIONS
C ONTROL PANEL IDENTIFICATIONs#/-")4(%2-#4%802%334%#(.)#!,3%26)#%-!.5!,s!n3
SETTINGS SCREEN
Fahrenheit or Celsius Function - Choose
temperature format.
Note: After choosing your format, return to
the Main Menu screen and then Press Oven
Power switch off.
Language Choice - English, Spanish, Mandarin,
French, German, Korean and Russian are
available.
Multi-shelf Timer Number of Shelves -
Choose the default number of items in the oven
to be used by the multi-shelf timer.
Default Memo - Revert time/temperature
setting to factory defaults when switching
modes or keep the last user setting.
Sound/Alarm Settings - Change alarm sounds
and volume.
100%
T
Touchscreen Brightness - Adjust brightness
of display screen.
Lock/Unlock Recipes - Password protect
preprogrammed recipes.
123
45678910
SMTWTFS
11 12 13 14 15 16 17
18 19 20 21 22 23 24
25 26 27 28 29 30 31
12
6
39
Set/Change Date & Time - Set or change oven
time and date settings.
Calibrate Product Probe (optional)
Software update - Upload new control software
to the oven using a USB drive.
Return to Previous Screen - Return to previous

C ONTROL PANEL IDENTIFICATIONs#/-")4(%2-#4%802%334%#(.)#!,3%26)#%-!.5!,s!n4
EXPRESSTOUCH OPERATING INSTRUCTIONS
UPLOAD/DOWNLOAD SCREEN
ADD ALL
RECIPES
Download Recipes
Copy all recipes from USB memory stick
to oven. This will replace and overwrite
existing recipes.
Upload Recipes
Copy all recipes from oven control to USB
memory stick.
Add All Recipes
Copy all recipes from USB memory stick to the
oven control. This will add the recipes to the
beginning of the existing recipe list.
P
P
P
P
P
P
P
CP
C
C
C
C
C
C
C
C
C
C
C
C
C
C
CC
C
C
C
C
C
C
C
C
C
CC
CC
C
C
C
C
C
C
C
C
CC
CC
CC
C
C
C
C
C
C
C
C
AC
AC
AC
AC
C
AC
C
A
A
C
C
A
A
A
A
A
A
A
HACC
C
C
C
C
C
C
C
C
C
C
C
C
C
C
C
C
C
C
CC
C
C
C
P
P
P
P
P
A
A
A
A
A
A
A
A
A
A
H
H
H
H
H
H
H
A
A
A
A
P
P
P
H
H
H
H
P
P
P
HACCP
HACCP Data (optional)
Download data to a USB drive for review in a
DOWNLOAD
RECIPES
DOWNLOAD
HACCP INFO
P
P
P
P
P
P
P
CP
C
C
C
C
C
C
C
C
C
C
C
C
C
C
C
C
C
C
C
C
C
C
C
CC
CC
C
C
C
C
C
C
C
CC
C
C
C
CC
C
C
C
C
C
C
C
AC
AC
C
C
AC
C
A
A
C
A
A
A
A
A
A
A
A
HACC
C
C
C
C
C
C
C
C
C
C
C
C
C
C
C
C
C
C
C
C
C
C
C
C
P
P
P
P
P
A
A
A
A
A
A
A
A
A
A
H
H
H
H
H
H
H
H
A
A
A
A
P
P
P
H
H
P
P
P
HACCP
GO TO
PREVIOUS
SCREEN
UPLOAD
RECIPES

EXPRESSTOUCH OPERATING INSTRUCTIONS
C ONTROL PANEL IDENTIFICATIONs#/-")4(%2-#4%802%334%#(.)#!,3%26)#%-!.5!,s!n5
COOKING MODE SCREEN
345°F
225°F
1:43
45
STEAM
MODE
TEMPERATURE TIME
CORE
TEMPERATURE
(OPTIONAL)
REDUCED
POWER MODE
GO TO
PREVIOUS
SCREEN
FAN SPEED
MULTI-SHELF
TIMER
FIND RECIPE
ADD RECIPE
GOLD-N-BROWN
MODE
CONVECTION
MODE
RETHERM
MODE
COMBINATION
MODE
DELAYED
START TIMER
START
CLEANING
COOL
DOWN
PREHEAT
BROILER
MODE
(OPTIONAL)
SMOKER MODE
(OPTIONAL)

C ONTROL PANEL IDENTIFICATIONs#/-")4(%2-#4%802%334%#(.)#!,3%26)#%-!.5!,s!n6
EXPRESSTOUCH OPERATING INSTRUCTIONS
MAIN MENU ICONS
Power ON key
steam generator equipped models with water that will
heat to a stand-by mode temperature of 188°F (77°C).
Power OFF key
Press once to initiate power shut down sequence to the
oven. Note: Oven will not shut down during a cooking
cycle. You may need to press harder due to the material
thickness. Firmly press and hold the OFF key for 10
seconds to power down the oven ONLY IF the control has
locked and is unresponsive.
Steam Mode
The oven will operate in the steam mode at a temperature
range of 85°F to 250°F (30°C to 121°C).
factory-set default.
and 121°C).
(29°C and 99°C).
Combination Mode
Selection key for cooking with a combination of steam
and convection heat. Can be set between 212°F to 485°F
(100°C and 252°C).
Convection Mode
Selection key for convection cooking without steam at a
temperature range of 85°F to 485°F (29°C to 252°C).
Broiler Mode (optional)
soups, and desserts with the top shelf broiling element.
Retherm Mode
Food rethermalization or reheating mode will operate
with automatic steam injection at a temperature range of
245°F to 320°F (120°C to 160°C).
Temperature
Used to set the required cooking temperature, to recall
the set cooking temperature, or to check the actual
oven temperature.
Time
Used to set the required cooking time or recall the set
cooking time.
Core Temperature (optional)
Used to set the required internal product temperature,
to recall the internal product temperature set by the
operator, or to display the current internal temperature of
the product.
Preheat Mode
Preheats the oven cavity to a temperature set by user.
Cool Down Mode
Lowers temperature of the oven cavity at an accelerated
pace to temperature set by user.
Delayed Start Time
while you’re away, and ready to go when you are.
Start/Stop
Initiates all cooking mode functions and programmed
procedures stored in memory. Stops an activated cooking
mode or programmed procedure currently in progress.
COOKING MODE SCREEN IDENTIFICATION

EXPRESSTOUCH OPERATING INSTRUCTIONS
C ONTROL PANEL IDENTIFICATIONs#/-")4(%2-#4%802%334%#(.)#!,3%26)#%-!.5!,s!n7
EXPRESSTOUCH FACTORY DEFAULT SETTINGS
COOKING MODE OVEN TEMPERATURE CORE TEMPERATURE COOKING TIME
Steam
212°F
(100°C)
160°F
(70°C)
25 minutes
Combination Steam
350°F
(175C)
160°F
(70°C)
70 minutes
Convection
350°F
(175°C)
160°F
(70°C)
30 minutes
Broiler/Finishing (optional) ____F N/A —— : ——
Retherm (available on
ExpressTouch only)
275°F
(135°C)
160°F
(70°C)
5 minutes
AUXILIARY FUNCTION ICONS
Reduced Power Mode
Used to reduce kitchen power peaks and
energy consumption.
1
2
3
4
5
6
Gold-N-Brown Mode
This indicator will illuminate when the browning
function is set by the operator in a timed or programmed
cooking cycle in any mode. Level 1 provides least amount
of browning, level 6 the most.
Fan Speed
This indicator will illuminate whenever the operator sets
a reduced fan speed to protect products affected by high-
velocity air movement.
Return to Previous Menu
Add Recipe
Used to create, change, duplicate, and delete
programmed menus.
Find Recipe
Access a menu list of all stored cooking programs.
Multi-shelf Timer
Use separate timers for one or more shelves in the oven
compartment (only visible in time mode).
Steam Injection (not shown on illustration)
Press to add moisture in any cooking mode. Steam will
inject into the cavity as long as the icon is touched.
Delta-T Core Temperature (optional) - only visible
in certain modes Cook by probe. Mode automatically
adjusts cooking temperature in proportion to the internal
temperature of the product.
Smoking Mode (optional) - only visible in
convection mode or combination mode. This indicator
will illuminate when the smoking function is set by the
operator in a timer, probe or programmed cooking cycle.

C ONTROL PANEL IDENTIFICATIONs#/-")4(%2-#4%802%334%#(.)#!,3%26)#%-!.5!,s!n8
EXPRESSTOUCH OPERATING INSTRUCTIONS
HACCP ACCESS
The ExpressTouch Combitherm meets the requirements
of established HACCP criteria by providing automated
sampling, record keeping, set-point validation, recipe
used, dates and time. Data is captured when Core
Temperature Probe cooking method is chosen. This
information can be downloaded to a USB drive and then
NOTE: You can access this information from the
Upload/Download Screen. See illustrations on page
6 for navigation.
CAUTION: The CombiOven USB port is not
recommended for use with personal
hand held devices.
1. To download the data collected, remove the cap of a
USB port located on the side of the oven and insert the
by the Combitherm, a question mark will appear on
call Alto-Shaam Service.
2.
PRESS TO DOWNLOAD INFORMATION.
3.
WAIT FOR THE ICON TO CHANGE FROM
LOADING TO COMPLETE.
4.
PRESS TO CONFIRM TRANSFER.
USB port.
The download process will automatically create a folder
See illustration below.

SIMPLE CONTROL OPERATING INSTRUCTIONS
C ONTROL PANELs#/-")4(%2-#4%802%334%#(.)#!,3%26)#%-!.5!,s!n9
Cook Time
display area
Oven Temperature
display area
Cleaning Key
START/STOP
CONTROL PANEL IDENTIFICATION
Set Cook
Time
Set Oven
Temperature
Convection Key
Combination Key
Steam Key
DOWN/DECREASE
UP/INCREASE
OVEN COOL DOWN
Cook by Probe
setting
The Steam mode provides the operator with the ability
to steam, poach, or blanch. This mode will automatically
steam at the boiling point of water; quick-steam above the
boiling point for faster cooking results; or low temperature
steam, below the boiling point, for more delicate products
such as pâté, mousse, seafood, or custard.
The Combination mode will prove to be the most
versatile and widely used mode the Combitherm oven
has to offer. It will produce the best possible results on
the widest variety of products — all within the shortest
period of time. The unique control function of this mode
enables the operator to roast or bake with a combination
of steam and convection heat. In addition to shorter
cooking times, this combination of steam and heat offers
less product shrinkage and more moisture retention than
obtained in a standard convection oven.
The Convection mode operates with hot circulated air
within a temperature range of 85° to 485°F (29 to 252°C).
For many applications, better results may be
achieved with the Combination mode; therefore, the
operator may want to consider using the Convection
mode on a more limited basis.
Oven Cool Down Process:
Cooking process must be inactive
Press "Cool Down" button until LED lights (LED
remains ON while in Cool Down mode)
Press "Decrease Value" or "Increase Value" to adjust
cool down temperature
Cook temperature display area is used to display
cool down temperature
Display will show last valid cool down temperature
Cool down temperature range is 85° - 575°F
(30° - 300°C)
Press "Start/Stop" until LED lights to accept cool
down temperature and initiate cool down process
Door must be open to start cool down process;
Cook time display area will display "door" if door
is not open
Cook temperature display area will display set cool
down temperature
Cook time display area will display current cool
down temperature
Fahrenheit or Celsius Function -
choose temperature format:
Unit is not in a cooking or cleaning process
Press "Set Cooking Temperature", "Decrease Value"
and "Increase Value" buttons simultaneously for
1 second
Cooking temperature display area will display last
value "C" or "F"; Display will alternate between "C"
and "F" every 2 seconds
Press "Start/Stop" key when the display is showing
the desired value ("C" or "F")

C ONTROL PANELs#/-")4(%2-#4%802%334%#(.)#!,3%26)#%-!.5!,s!n10
SIMPLE CONTROL OPERATING INSTRUCTIONS
Turn on and preheat the oven
Alto-Shaam recommends preheating the Combitherm
®
before cooking.
UÊ*ÀiÃÃÊÌiÊPowerÊiÞ°
UÊÃiÊ>ÊMode°Ê
UÊ*ÀiÃÃÊOvenÊTemperature iÞ°Ê
UÊ`ÕÃÌÊÌi«iÀ>ÌÕÀiÊÜÌÊ>ÀÀÜÊiÞð
UÊ*ÀiÃÃÊCook Time iÞ°
UÊ`ÕÃÌÊÌiÊÜÌÊ>ÀÀÜÊiÞð
UÊ*ÀiÃÃÊÌiÊStart/StopÊiÞ°
UÊ*Àii>ÌÊÛiÊLivÀiÊ>`}Êv`°
-Ìi> ÛiVÌL
-Ìi> ÛiVÌL
To cook manually by probe
UÊÃiÊ>ÊMode°
UÊÊ*ÀiÃÃÊÌiÊOven Temperature iÞÆÊÊ
>`ÕÃÌÊÌi«iÀ>ÌÕÀiÊÜÌÊ>ÀÀÜÊiÞð
UÊÊ*ÀiÃÃÊÌiÊProbe TemperatureÊiÞÆÊÊ
>`ÕÃÌÊÌi«iÀ>ÌÕÀiÊÕÃ}ÊÌiÊ>ÀÀÜÊiÞð
UÊÊ>`Êv`ÊÌÊÛiÊ>`ÊÃiÀÌÊ«ÀLiÊÌÊv`°
UÊ*ÀiÃÃÊÌiÊStart/StopÊiÞ°
To cook manually by time
UÊÃiÊ>ÊMode°Ê
UÊÊ*ÀiÃÃÊÌiÊOven Temperature iÞÆÊÊ
>`ÕÃÌÊÌi«iÀ>ÌÕÀiÊÜÌÊ>ÀÀÜÊiÞð
UÊÊ*ÀiÃÃÊÌiÊCook Time iÞÆÊ>`ÕÃÌÊÊ
ÌiÊÕÃ}ÊÌiÊ>ÀÀÜÊiÞð
UÊÊ>`Êv`ÊÌÊÛi°Ê
UÊÊ*ÀiÃÃÊÌiÊStart/Stop iÞ°
-Ìi> ÛiVÌL

P REVENTATIVE MAINTENANCEs#/-")4(%2-#4%802%334%#(.)#!,3%26)#%-!.5!,s"n1
PREVENTATIVE MAINTENANCE
Cleaning Agents . . . . . . . . . . . . . . . . . . . . . . . . . . . . . . . . . . . . . . . . . . . . . . . . . . . B-2
Preventative Maintnance ............................................. B-3
Protecting Stainless Steel ............................................. B-4
Cleaning Schedule .................................................. B-5
Express Touch with CombiClean ....................................... B-6
Simple Control with CombiClean ....................................... B-7
Cleaning without CombiClean Program .................................. B-8
Return to Main Table of Contents ...................................... ii

PREVENTATIVE MAINTENANCE
P REVENTATIVE MAINTENANCEs#/-")4(%2-#4%802%334%#(.)#!,3%26)#%-!.5!,s"n2
COMBICLEAN CLEANING AGENTS
NOTE: Use authorized Combitherm cleaner only.
Unauthorized cleaning agents may discolor or harm
interior surfaces of the oven. Read and understand
label and material safety data sheet before using the
oven cleaner.
CAUTION: Causes eye, skin, and respiratory tract
irritation. keep out of reach of children.
PRECAUTIONS:
- Do not take internally.
- Avoid contact with eyes and skin.
- Use rubber gloves when using this product.
- Wash hands thoroughly after handling.
- Avoid mixing with strong, concentrated acids.
FIRST AID:
Skin: Flush with water. Remove contaminated clothing
and do not re-wear until washed. If irritation persists see
a physician.
Eyes: Flush with water for 15 minutes. See a
physician immediately.
Inhalation:
immediately and do not return until dust is settled. If
irritation persists, see a physician.
Ingestion: Drink large quantities of milk or water. DO
NOT INDUCE VOMITING. See a physician immediately.
PROTECTIVE PACKAGING OF TABLETS WILL
BEGIN TO DISSOLVE ONTO SKIN IF HANDLED
WITH DAMP OR WET HANDS.
DANGER
RUBBER GLOVES MUST BE WORN WHEN USING
COMBICLEAN TABLETS OR SPRAY OVEN CLEANER
.
DANGER
PROTECTIVE EYE WEAR MUST BE WORN
WHEN USING SPRAY OVEN CLEANER
.
CombiClean tablets are to be used only with the factory installed automatic cleaning option.

P REVENTATIVE MAINTENANCEs#/-")4(%2-#4%802%334%#(.)#!,3%26)#%-!.5!,s"n3
PREVENTATIVE MAINTENANCE
PREVENTATIVE MAINTENANCE
In addition to the routine cleaning and maintenance
procedures, there are several additional steps to be
taken for both sanitation and to keep the oven running
down time and costly repairs.
DO NOT DISPOSE OF GREASE, FAT, WOOD CHIPS
OR SOLID WASTE DOWN THE OVEN DRAIN.
Fats and solids will eventually coagulate in the drain
system, causing blockage. Consequently, water
will back-up into the condenser and interior oven
compartment, resulting in an oven that is inoperable.
MAKE CERTAIN THE DRAIN SCREEN IS ALWAYS
IN PLACE. REMOVE ANY SOLID WASTE MATERIAL
FROM THE DRAIN SCREEN BEFORE IT ENTERS THE
DRAIN SYSTEM.
The routine removal of solids from the drain screen will
help prevent blockage.
USE THE AUTHORIZED COMBITHERM OVEN
CLEANER ONLY.
The use of unauthorized cleaning agents may discolor or
harm the interior surfaces of the oven.
TO PROLONG THE LIFE OF THE DOOR GASKET,
CLEAN THIS ITEM DAILY.
The acids and related compounds found in fat,
particularly chicken fat, will weaken the composition of
the gasket unless cleaned on a daily basis. Wipe with a
hot, soapy cloth.
TO ADDITIONALLY PROTECT GASKET LIFE,
ALLOW OVEN DOOR TO REMAIN SLIGHTLY OPEN
AT THE END OF THE PRODUCTION DAY.
An open door will relieve the pressure on the door gasket.
ROUTINELY CLEAN DOOR HINGES.
Open oven door to relieve tension. Clean all parts of
the hinge.
PROBE CABLE PLACEMENT.
The probe cable should not be placed near the broiler
element at the top of the oven.
DANGER
AT NO TIME SHOULD THE INTERIOR
OR EXTERIOR BE STEAM CLEANED,
HOSED DOWN, OR FLOODED WITH
WATER OR LIQUID SOLUTION OF
ANY KIND. DO NOT USE WATER JET
TO CLEAN.
SEVERE DAMAGE OR
ELECTRICAL HAZARD
COULD RESULT.
WARRANTY BECOMES VOID IF
APPLIANCE IS FLOODED
When smoking is completed, remove smoker box
waste receptacle.

PREVENTATIVE MAINTENANCE
P REVENTATIVE MAINTENANCEs#/-")4(%2-#4%802%334%#(.)#!,3%26)#%-!.5!,s"n4
PROTECTING STAINLESS STEEL SURFACES
It is important to guard against corrosion
in the care of stainless steel
surfaces. Harsh, corrosive,
or inappropriate chemicals
can completely destroy the
protective surface layer
of stainless steel. Abrasive
pads, steel wool, or metal implements will abrade
surfaces causing damage to this protective coating
and will eventually result in areas of corrosion.
Even water, particularly hard water that contains
high to moderate concentrations of chloride, will
cause oxidation and pitting that result in rust
and corrosion. In addition, many acidic foods
spilled and left to remain on metal surfaces are
contributing factors that will corrode surfaces.
Proper cleaning agents, materials, and
methods are vital to maintaining the appearance
and life of this appliance. Spilled foods should be
removed and the area wiped as soon as possible
but at the very least, a minimum of once a day.
Always thoroughly rinse surfaces after using a
cleaning agent and wipe standing water as quickly
as possible after rinsing.
CLEANING AGENTS
Use non-abrasive cleaning products designed for
use on stainless steel surfaces. Cleaning agents
must be chloride-free compounds and must not
contain quaternary salts. Never use hydrochloric
acid (muriatic acid) on stainless steel surfaces.
Always use the proper cleaning agent at the
manufacturer's recommended strength.
Contact your local cleaning supplier for
product recommendations.
CLEANING MATERIALS
The cleaning function can usually be accomplished
with the proper cleaning agent and a soft, clean
cloth. When more aggressive methods must be
employed, use a non-abrasive scouring pad on
difficult areas and make certain to scrub with the
visible grain of surface metal to avoid surface
scratches. Never use wire brushes, metal scouring
pads, or scrapers to remove food residue.
CLEANING AND PREVENTATIVE MAINTENANCE
CAUTION
TO PROTECT STAINLESS STEEL
SURFACES, COMPLETELY AVOID
THE USE OF ABRASIVE CLEANING
COMPOUNDS, CHLORIDE BASED
CLEANERS, OR CLEANERS
CONTAINING QUATERNARY SALTS.
NEVER USE HYDROCHLORIC ACID
(MURIATIC ACID) ON STAINLESS
STEEL. NEVER USE WIRE
BRUSHES, METAL SCOURING
PADS OR SCRAPERS.
N
O
W
I
R
E
B
R
U
S
H
E
S
N
O
S
T
E
E
L
P
A
D
S
N
O
S
C
R
A
P
E
R
S

P REVENTATIVE MAINTENANCEs#/-")4(%2-#4%802%334%#(.)#!,3%26)#%-!.5!,s"n5
PREVENTATIVE MAINTENANCE
CLEANING SCHEDULE
DAILY GASKET CLEANING
It is important to prolong the life of the oven gasket
by cleaning on a daily basis. Routine cleaning will
help protect the gasket from deterioration caused by
acidic foods.
1. Allow the oven to cool, then wipe the gasket
and crevices with clean cloth soaked in warm
detergent solution.
2. Wipe the gasket and crevices with a cloth and clean
rinse water.
Do not attempt to remove gasket or place
in the dishwasher.
PROBE USAGE AND CLEANING
After each use of the CORE TEMP mode, wipe the probe
tip with a clean paper towel to remove food debris. Follow
by wiping the probe with a disposable alcohol pad. Return
the probe to the proper door bracket position. The probe
cable should not be placed near the broiler element at the
top of the oven.
Probe Cleaning Procedures
1. Remove all food debris from probe between loads and
at the end of each production shift. Wipe the entire
probe, probe cable assembly, and probe holding bracket
with a clean cloth and warm detergent solution.
2. Remove detergent by wiping the probe, cable, and
bracket with a cloth and clean rinse water.
3. Wipe probe and probe bracket with disposable alcohol
pad or sanitizing solution recommended for food
contact surfaces.
4. Allow probe and cable to air dry in the probe
holding bracket. The probe cable should not be placed
near the broiler element at the top of the oven.
5. Wipe the probe with a disposable alcohol pad prior to
inserting into a new food product.
DAILY OVEN CLEANING
To be performed at the end of the production day or
between production shifts.
CLEANING CYCLE NEEDED AFTER SMOKING
To prevent the transfer of smoke residue to non-smoked
products, a cleaning cycle is required before cooking
non-smoked items.
MONTHLY CLEANING
1. Spray Head
2. Water Intake Filters
3. Drain Pipe
DANGER
AT NO TIME SHOULD THE INTERIOR
OR EXTERIOR BE STEAM CLEANED,
HOSED DOWN, OR FLOODED WITH
WATER OR LIQUID SOLUTION OF
ANY KIND. DO NOT USE WATER JET
TO CLEAN.
SEVERE DAMAGE OR
ELECTRICAL HAZARD
COULD RESULT.
WARRANTY BECOMES VOID IF
APPLIANCE IS FLOODED
HAND SPRAYER VALVE
REQUIRES ADDITIONAL
WATER SUPPLY
3/4" G
1-1/2" DRAIN
WATER INLET
CLEAN-OUT
TANK
2
1
3

PREVENTATIVE MAINTENANCE
P REVENTATIVE MAINTENANCEs#/-")4(%2-#4%802%334%#(.)#!,3%26)#%-!.5!,s"n6
VENTLESS HOOD MODEL
TOP EXHAUST VENT
Charcoal Filter: The charcoal filter should be
inspected for contaminant's on a regular basis.
Replacement must be made at a minimum of
three month intervals — more often if heavy
contaminant's are visible or if the filter no
longer controls odors.
To remove the charcoal filter, pull and slide out.
When replacing the filter, ensure that the filter
clip is in place at rear of the filter. Make certain
the air flow arrow(s) point toward the hood fan
(back of unit), and that the filter is replaced
using the filter track in the metal back plate
provided with the hood.
FI-24114
Grease Filter: Cleaning frequency should be
based on oven usage with a maximum of two
weeks between cleaning if the oven is used for
non-grease laden products or steam applications
only. Grease laden products require cleaning
frequency of at least once a week.
Remove the grease filter by pulling it straight
out of the housing. Place the filter in the
dishwasher or wash separately by placing in
hot, soapy water until all grease and particles
have been removed. Rinse thoroughly. Allow
the filter to air dry before reinstalling.
To replace the grease filter, the metal handles
on the filter casing should be facing toward the
front of the unit.
FI-24113
FILTER TRACK
FILTER SWITCH
Page is loading ...
Page is loading ...
Page is loading ...
Page is loading ...
Page is loading ...
Page is loading ...
Page is loading ...
Page is loading ...
Page is loading ...
Page is loading ...
Page is loading ...
Page is loading ...
Page is loading ...
Page is loading ...
Page is loading ...
Page is loading ...
Page is loading ...
Page is loading ...
Page is loading ...
Page is loading ...
Page is loading ...
Page is loading ...
Page is loading ...
Page is loading ...
Page is loading ...
Page is loading ...
Page is loading ...
Page is loading ...
Page is loading ...
Page is loading ...
Page is loading ...
Page is loading ...
Page is loading ...
Page is loading ...
Page is loading ...
Page is loading ...
Page is loading ...
Page is loading ...
Page is loading ...
Page is loading ...
Page is loading ...
Page is loading ...
Page is loading ...
Page is loading ...
Page is loading ...
Page is loading ...
Page is loading ...
Page is loading ...
Page is loading ...
Page is loading ...
Page is loading ...
Page is loading ...
Page is loading ...
Page is loading ...
Page is loading ...
Page is loading ...
Page is loading ...
Page is loading ...
Page is loading ...
Page is loading ...
Page is loading ...
Page is loading ...
Page is loading ...
Page is loading ...
Page is loading ...
Page is loading ...
Page is loading ...
Page is loading ...
Page is loading ...
Page is loading ...
Page is loading ...
Page is loading ...
Page is loading ...
Page is loading ...
Page is loading ...
Page is loading ...
Page is loading ...
Page is loading ...
Page is loading ...
Page is loading ...
Page is loading ...
Page is loading ...
Page is loading ...
Page is loading ...
Page is loading ...
Page is loading ...
Page is loading ...
Page is loading ...
Page is loading ...
Page is loading ...
Page is loading ...
Page is loading ...
Page is loading ...
Page is loading ...
Page is loading ...
Page is loading ...
Page is loading ...
Page is loading ...
Page is loading ...
Page is loading ...
Page is loading ...
Page is loading ...
Page is loading ...
Page is loading ...
Page is loading ...
Page is loading ...
Page is loading ...
Page is loading ...
Page is loading ...
Page is loading ...
Page is loading ...
Page is loading ...
Page is loading ...
Page is loading ...
-
 1
1
-
 2
2
-
 3
3
-
 4
4
-
 5
5
-
 6
6
-
 7
7
-
 8
8
-
 9
9
-
 10
10
-
 11
11
-
 12
12
-
 13
13
-
 14
14
-
 15
15
-
 16
16
-
 17
17
-
 18
18
-
 19
19
-
 20
20
-
 21
21
-
 22
22
-
 23
23
-
 24
24
-
 25
25
-
 26
26
-
 27
27
-
 28
28
-
 29
29
-
 30
30
-
 31
31
-
 32
32
-
 33
33
-
 34
34
-
 35
35
-
 36
36
-
 37
37
-
 38
38
-
 39
39
-
 40
40
-
 41
41
-
 42
42
-
 43
43
-
 44
44
-
 45
45
-
 46
46
-
 47
47
-
 48
48
-
 49
49
-
 50
50
-
 51
51
-
 52
52
-
 53
53
-
 54
54
-
 55
55
-
 56
56
-
 57
57
-
 58
58
-
 59
59
-
 60
60
-
 61
61
-
 62
62
-
 63
63
-
 64
64
-
 65
65
-
 66
66
-
 67
67
-
 68
68
-
 69
69
-
 70
70
-
 71
71
-
 72
72
-
 73
73
-
 74
74
-
 75
75
-
 76
76
-
 77
77
-
 78
78
-
 79
79
-
 80
80
-
 81
81
-
 82
82
-
 83
83
-
 84
84
-
 85
85
-
 86
86
-
 87
87
-
 88
88
-
 89
89
-
 90
90
-
 91
91
-
 92
92
-
 93
93
-
 94
94
-
 95
95
-
 96
96
-
 97
97
-
 98
98
-
 99
99
-
 100
100
-
 101
101
-
 102
102
-
 103
103
-
 104
104
-
 105
105
-
 106
106
-
 107
107
-
 108
108
-
 109
109
-
 110
110
-
 111
111
-
 112
112
-
 113
113
-
 114
114
-
 115
115
-
 116
116
-
 117
117
-
 118
118
-
 119
119
-
 120
120
-
 121
121
-
 122
122
-
 123
123
-
 124
124
-
 125
125
-
 126
126
-
 127
127
-
 128
128
-
 129
129
-
 130
130
-
 131
131
-
 132
132
-
 133
133
-
 134
134
Alto-Shaam Combitherm 4.10CCi Technical & Service Manual
- Type
- Technical & Service Manual
- This manual is also suitable for
Ask a question and I''ll find the answer in the document
Finding information in a document is now easier with AI
Related papers
-
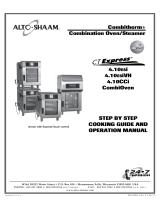 Alto-Shaam CT EXPRESS 4•10ESiVH Operating instructions
-
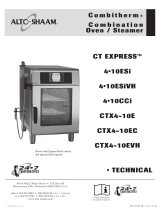 Alto-Shaam CT EXPRESS 4•10ESiVH Technical & Service Manual
-
Alto Shaam COMBITOUCH SERIES 10•20ESG User manual
-
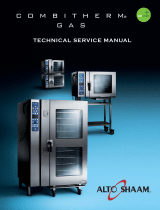 Alto-Shaam COMBITOUCH SERIES 10•20ESG Technical & Service Manual
-
 Alto-Shaam CT Express Combitherm CTX4-10E Operating instructions
-
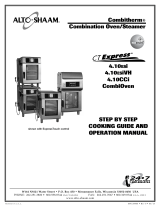 Alto-Shaam CombiOven User manual
-
 Alto-Shaam 4.10ESi User manual
-
Alto-Shaam COMBITHERM CTP20-20G User manual
-
Alto-Shaam COMBITHERM CTP20-20G User manual
-
 Alto-Shaam CombiTouch 7.14es User manual
Other documents
-
Yamaha NS-AP1500 Owner's manual
-
Duke 59-E3C User manual
-
Market Forge M24E24A User manual
-
RBH Sound NCB Bracket Owner's manual
-
 BKI 16/C User manual
-
Moffat, Inc. E27B-2 User manual
-
Jet Tech RW-100 Datasheet
-
Delta Electronics Pulse Generator Card PG-02 User manual
-
Simply45 S45-1710S User manual
-
 Alto Shaam 7.14ESG CombiTouch Operating instructions


