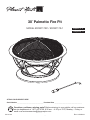
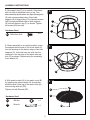
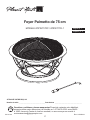
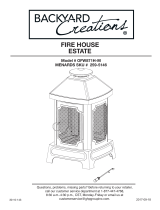
Pleasant Hearth OFW717R-1 is a fire pit that is perfect for outdoor use. It is made of durable materials and features a mesh cover to help prevent sparks from escaping. The fire pit also comes with a poker for easily tending to the fire. With its stylish design, this fire pit is sure to be a hit at your next gathering. Here are some of the features and use cases of the Pleasant Hearth OFW717R-1:
- Outdoor use: The fire pit is designed for outdoor use and should not be used indoors. It is perfect for use on patios, decks, and other outdoor areas.
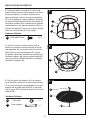
- Durable materials: The fire pit is made of durable materials that are built to last. This includes a sturdy steel frame and a mesh cover that is resistant to heat and sparks.
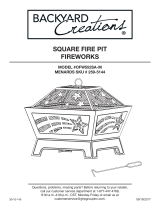
Pleasant Hearth OFW717R-1 is a fire pit that is perfect for outdoor use. It is made of durable materials and features a mesh cover to help prevent sparks from escaping. The fire pit also comes with a poker for easily tending to the fire. With its stylish design, this fire pit is sure to be a hit at your next gathering. Here are some of the features and use cases of the Pleasant Hearth OFW717R-1:
- Outdoor use: The fire pit is designed for outdoor use and should not be used indoors. It is perfect for use on patios, decks, and other outdoor areas.
- Durable materials: The fire pit is made of durable materials that are built to last. This includes a sturdy steel frame and a mesh cover that is resistant to heat and sparks.


-
 1
1
-
 2
2
-
 3
3
-
 4
4
-
 5
5
-
 6
6
-
 7
7
-
 8
8
-
 9
9
-
 10
10
-
 11
11
-
 12
12
-
 13
13
-
 14
14
-
 15
15
-
 16
16
-
 17
17
-
 18
18
-
 19
19
-
 20
20
-
 21
21
-
 22
22
-
 23
23
-
 24
24


Pleasant Hearth OFW717R-1 User manual
- Type
- User manual
- This manual is also suitable for
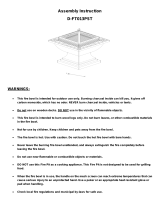
Pleasant Hearth OFW717R-1 is a fire pit that is perfect for outdoor use. It is made of durable materials and features a mesh cover to help prevent sparks from escaping. The fire pit also comes with a poker for easily tending to the fire. With its stylish design, this fire pit is sure to be a hit at your next gathering. Here are some of the features and use cases of the Pleasant Hearth OFW717R-1:
- Outdoor use: The fire pit is designed for outdoor use and should not be used indoors. It is perfect for use on patios, decks, and other outdoor areas.
- Durable materials: The fire pit is made of durable materials that are built to last. This includes a sturdy steel frame and a mesh cover that is resistant to heat and sparks.
Ask a question and I''ll find the answer in the document
Finding information in a document is now easier with AI
in other languages
Related papers
-
Pleasant Hearth 33.5” Solid Steel Fire Ring User manual
-
-
-
-
-
-
-
-
-
Other documents
-
 Jeco FP003 User manual
-
Sunnydaze Decor NB-610037BLK Operating instructions
-
 Backyard Creations OFW871H-M Assembly Instructions Manual
-
BLACK DECKER BD17200 15 Inch Smokeless Wood Fire Pit User manual
-
 Backyard Creations OFW552SA-M Quick start guide
-
 Sunjoy 110501008 Installation guide
-
Hotpoint 52258 Owner's manual
-
Real Flame 968 Owner's manual
-
HotShot 52259 User manual
-
HotShot 52359 User manual


