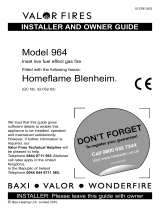
Wonderfire airflame excel mk.3 ac 18xl User manual

Type
User manual

Wonderfire airflame excel mk.3 ac 18xl is a gas fire appliance, designed to provide heat and ambience to your home. It features an easy-to-use Piezo electronic spark ignition system, eliminating the need for batteries or an electrical supply. The fire boasts a realistic coal effect fuel bed, providing a cozy and inviting atmosphere. With adjustable heat settings, you can tailor the warmth to your preference, and the flame supervision device ensures safe operation.

Wonderfire airflame excel mk.3 ac 18xl is a gas fire appliance, designed to provide heat and ambience to your home. It features an easy-to-use Piezo electronic spark ignition system, eliminating the need for batteries or an electrical supply. The fire boasts a realistic coal effect fuel bed, providing a cozy and inviting atmosphere. With adjustable heat settings, you can tailor the warmth to your preference, and the flame supervision device ensures safe operation.

AIRFLAME EXCEL MK.3
AF 18XL 9500360
AC 18XL 9500361
USER MANUAL
Patent applied for
9860370/03
Please leave these Instructions with the user
This appliance is for use in the United Kingdom (GB) and the
Republic of Ireland (IE) only.
2
PLEASE NOTE
1. The Wonderfire Airflame Excel is to be used only with the type of gas for which it
was supplied. Never attempt to use the appliance with other gas types.
2. Always use a fireguard complying with BS6539 or BS6778 for the protection of the
young, elderly, or infirm.
3. The fire is lit by a Piezo electronic spark unit. Batteries and electrical supply are
not required.
4. An odour may be noticeable when your fire is first lit. This is due to the newness of
certain materials used in the manufacture and will disappear after a few hours of
use.
5. Never throw paper, ash, or any other materials onto your fire.
6. The chimney should have been thoroughly swept prior to installation.
7. The chimney should be checked annually to ensure continued clearance of
combustion products, and that no soot or debris has built up behind the appliance.
8. Your fire should be checked annually by a competent person according to the
maintenance requirements in the installation manual and in accordance with the
Gas Safety (Installation and Use) Regulations 1994 (as amended) or the rules in
force.
9. Ensure that any purpose made room ventilation is kept free from obstruction.
10. This appliance is fitted with an A.S.D. (Atmospere sensing device). If the appliance
shuts down after a period of operation for no apparent reason, then stop using the
appliance until the installation and the appliance have been thoroughly checked by
a competent person.
11. Installation must be in accordance with the installation instruction and the rules in
force.
12. If the fire goes out for any reason, wait at least three minutes before attempting to
re-light.
The Hearth
NOTE: Hearth requirements in Figure 1.
The appliance must be mounted behind
a non-combustible hearth (N.B.
conglomerate marble hearths are
considered as non-combustible). The
appliance can be fitted to a purpose
made proprietary class “O”-150°C
surround. The hearth material must be at
least 12mm thick. The periphery of the
hearth (or fender) should be at least
50mm above floor level to
discourage the placing of carpets or
rugs over it.
The surface of the hearth must be
sufficiently flat to enable the bottom
of the front surround and the bottom front cover to be aligned horizontally. Any
excessive unevenness (uneven tiles, Cotswold stone, etc.) should be rectified.
The appliance must not stand on combustible materials or carpets.
Shelf Clearances
The minimum height from the top surface of the hearth to the underside of any shelf
made from wood or other combustible materials is as follows:-
For a shelf up to 150mm deep : Minimum height = 818mm.
For a shelf deeper than 150mm : 818mm + 12.5mm for every 25mm depth over
150mm.
Figure 1
3
Ventilation requirements
Note: see convector instructions if being installed within a Wonderfire convector box for
ventilation requirements.
GB A permanent ventilation grille
of fixed design and having a
minimum free area of 100cm
2
must be fitted with direct
access to outside air to room.
IE Ventilation must be in
accordance with IS 813 1996
(as amended)
Please note: This appliance is not
supplied with a decorative
firefront. A slotted firefront with a
minimum free area as shown
in figure 2 must always be used.
OPERATION OF THE FIRE
This fire is controlled by a four position gas tap mounted in the front of the appliance.
In addition to the OFF setting there is a pilot position and two heat control settings.
To Light the Pilot
Ensure that the control knob is turned to the OFF position. Depress the control knob
and turn anticlockwise until the IGNITION position is reached, continue turning the
knob to activate the piezo ignition. Two ‘clicks’ will be observed, and the pilot should
ignite. Hold the knob in this position (keeping it depressed) for ten seconds to allow
the flame supervision device to establish.
Observe if it alight by looking through the slots to the left hand end of the front coals.
If the pilot does not light immediately, repeat the above procedure, keeping the knob
depressed for several seconds in order to purge any air from the system.
If after ten seconds, ignition has not occurred, turn the control knob back to the OFF
position and repeat the ignition procedure after 3 minutes.
Once the pilot is lit, keep the control knob depressed for ten seconds to allow the
flame supervision device to establish.
When the control knob is released, the pilot should remain lit. If the pilot fails to
remain lit, repeat the ignition procedure, this time keeping the control knob depressed
for a longer period of time.
Lighting the Main Burner
Once the pilot light is established the main burner can be lit by turning the control
knob anticlockwise to the HIGH position.
Controlling the heat setting.
Figure 2
4
In order to change from one setting to another depress the control knob slightly and
turn the knob to the required position. Alternatively, if a setting between LOW and
HIGH is required, then the control knob may be turned to this position.
Note: We recommend you use the appliance at a low setting for the first few hours of
use to reduce the thermal cracking of the surface of the burner.
Surface cracking of the burner is normal and is no cause for concern. Whist binding
materials are being burnt out of the burner there may be a slight odour.
To Turn the Fire back to Pilot Setting
Depress control knob and turn clockwise until pilot setting is reached.
To Turn the Fire OFF Ensure control knob is in pilot position, depress control knob
and turn clockwise to the OFF position.
For fires fitted with Aeration control
For appliances fitted with variable aeration control, the lighting and adjustment
procedures are as normal. To operate the aeration control system, the following
procedure should be followed:
Allow the appliance to warm up, (for at least fifteen minutes) in the fully aerated
position, with the control lever pushed in to the locked position – see figure 3.
Switch to the minimum aerated position by slightly lifting the control lever. A
spring mechanism will close the aeration shutter.
To return to the fully aerated position push the control lever in and slightly
downwards until it rests in its locked position.
Please note : It is advisable to run the fire in its fully aerated mode (control knob
pushed in) at the beginning of each operation and if running at the minimum rate
setting, or to burn off any carbon deposits which may have built up after prolonged
use of the minimum aerated setting.
Figure 3
5
Figure 4
Figure 5
CLEANING
Note: Before attempting any of the following ensure that the fire has been allowed to
cool completely.
Note: Some discoloration of the coals is normal.
The cast parts of the fire should be carefully cleaned with a lint free damp cloth. On
no account should any metal polish or similar be used as this may prove harmful to
the surface.
The coals should normally require no maintenance between the annual inspection
described in the installation and maintenance instructions. However, if your fire is
used frequently the coals may need cleaning. The coals should be removed and any
sooting carefully removed from the surface with a soft brush.
The burner surface can be carefully vacuumed to remove any loose particles. Note:
Surface cracking is normal and no cause for concern.
To reassemble, take the following steps.
PLACING THE COALS
Placing the front coals
Position both front coal pieces as
shown in figure 4.
Placing the fuel matrix
Position on top of the burner as
shown in figure 5. The rear face of
the burner should locate into two
cut-outs on the top face of the rear
legs. Ensure that the matrix sits
flatly on the top of the burner.
6
Figure 7
Figure 6
Figure 8
Figure 9
Placing the dress coals
The dress coals consist of:
6 x Finger coals
18 x Random cut coals
Keep the different types of coals
separate. Begin the coal build by
placing six random shaped coals as
shown in figure 6, ensuring that they
form a bridge between the front coal
and the coal matrix. In order to get
the best flame effect, it is important
that the coals are evenly spaced, and
sit 10-15mm from each other.
Next, take five random shaped coals
and position as shown in figure 7.
This second row of coals should rest
on top of the first row, overlapping by
5-10mm. Again, ensure even spacing
to obtain the best flame effect.
Now take four more random shaped
coals and position as shown in figure
8 to make the third row. These coals
should again overlap the previous
row by about 5mm. Ensure even
spacing between coals.
Next, take four finger coals and position as
shown in figure 9.
7
Placing the dress coals – continued
Finally, take the three remaining
random shaped coals. Place one
in the centre of the matrix
(position ‘a’), place the other two
next to it (position ‘b’) as shown in
figure 9. To complete, place the
two remaining finger coals along
the back of the matrix (position
‘c’) also shown in figure 10.
SPARE PARTS
The ceramic fuel bed items are customer replaceable. When ordering please quote
the number shown below. Only use genuine Wonderfire replacement parts in the
correct quantity, and follow the instructions carefully.
Description Part Number
Front coal 9770100
Coal matrix 9770099
Pack of dress coals 9780050
GUARANTEE
Every Wonderfire product is warranted
for a period of twelve months against
manufacturing faults. Any part found to
be of substandard quality will be
replaced free of charge by your supplier
upon receipt of the original purchase
receipt.
The Guarantee does not extend to cover
misuse, or faults caused by incorrect
installation or operation.
This guarantee may also be void if any
modification has been carried out to the
standard product unless the modification
is authorised within the installation
manual.
‘a’‘b’ ‘b’‘c’ ‘c’
Figure 10
8
LEGAL REQUIREMENT
Every gas appliance should be installed by a competent person. If in doubt always use the
services of a CORGI registered installer.
Please fill in the following information for your own future reference. This information should
always be quoted in any correspondence with your original supplier or Wonderfire service
department.
If you require your fire to be serviced, or in the unlikely event that it should require repair due
to a manufacturing defect then call Wonderfire service department on 0121 386 203, quoting
your details listed below. From the Republic of Ireland call 00 44 373 8111 for all enquiries.
Model: WONDERFIRE AIRFLAME EXCEL MK. 3 18”
Model number: See data label
Suppliers name:
Suppliers address:
Telephone number:
Date of purchase:
Guarantee card number:
MANUFACTURED BY WONDERFIRE
Wood Lane, Erdington, Birmingham, England.
B24 9QP
  • Page 1 1
  • Page 2 2
  • Page 3 3
  • Page 4 4
  • Page 5 5
  • Page 6 6
  • Page 7 7
  • Page 8 8

Wonderfire airflame excel mk.3 ac 18xl User manual

Type
User manual

Wonderfire airflame excel mk.3 ac 18xl is a gas fire appliance, designed to provide heat and ambience to your home. It features an easy-to-use Piezo electronic spark ignition system, eliminating the need for batteries or an electrical supply. The fire boasts a realistic coal effect fuel bed, providing a cozy and inviting atmosphere. With adjustable heat settings, you can tailor the warmth to your preference, and the flame supervision device ensures safe operation.

Ask a question and I''ll find the answer in the document

Finding information in a document is now easier with AI