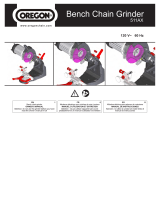
POWXG1066

Powerplus POWXG1066 Owner's manual

  • Hello! I am an AI chatbot trained to assist you with the Powerplus POWXG1066 Owner's manual. I’ve already reviewed the document and can help you find the information you need or explain it in simple terms. Just ask your questions, and providing more details will help me assist you more effectively!
  • What safety precautions should be taken when using the chainsaw grinder?
    How do I set up the chainsaw grinder?
    How do I sharpen a saw chain?
    What maintenance tasks should be performed on the chainsaw grinder?
    What is the power consumption of the chainsaw grinder?
POWXG1066 EN
Copyright © 2020 VARO P a g i n a | 1 www.varo.com
1 APPLICATION ................................................................................... 3
2 DESCRIPTION (FIG A) ...................................................................... 3
3 PACKAGE CONTENT LIST .............................................................. 3
4 SYMBOLS .......................................................................................... 4
5 GENERAL SAFETY INSTRUCTIONS ............................................... 4
5.1 Electric safety precautions: ...................................................................................... 4
5.2 Working with the machine ........................................................................................ 5
5.2.1 Preparation: ................................................................................................................ 5
5.2.2 Operation: ................................................................................................................... 5
5.2.3 Maintenance of your machine: .................................................................................... 6
6 DESCRIPTION OF THE PROCESS .................................................. 6
7 SETTING UP THE MACHINE (FIG B) ............................................... 6
7.1 Installation ................................................................................................................. 6
7.2 Mounting grinding machine ..................................................................................... 6
8 OPERATING THE MACHINE ............................................................ 6
8.1 Switching on and off ................................................................................................. 6
8.2 Sharpening saw chains (Fig C) ................................................................................ 7
8.3 Sharpening instructions ........................................................................................... 7
8.3.1 Inserting saw chain: .................................................................................................... 7
8.3.2 Setting grinding angle:................................................................................................. 7
8.3.3 Adjusting chain stop: ................................................................................................... 7
8.3.4 Sharpening: ................................................................................................................ 7
8.3.5 Checking distance from depth limiter: .......................................................................... 8
9 MAINTENANCE AND CLEANING .................................................... 8
9.1 Cleaning ..................................................................................................................... 8
9.2 Changing grinding wheel (Fig D) ............................................................................. 8
10 TECHNICAL DETAILS ...................................................................... 9
11 NOISE ................................................................................................. 9
12 WARRANTY ....................................................................................... 9
13 ENVIRONMENT ............................................................................... 10
POWXG1066 EN
Copyright © 2020 VARO P a g i n a | 2 www.varo.com
14 DECLARATION OF CONFORMITY ................................................ 11
POWXG1066 EN
Copyright © 2020 VARO P a g i n a | 3 www.varo.com
CHAIN SHARPENER 180W
POWXG1066
1 APPLICATION
This chainsaw grinder is suitable for sharpening common types of chainsaw chains. Not
suitable for professional use.
WARNING! For your own safety, read this manual and the general safety
instructions carefully before using the appliance. Your power tool should
only be given to other users together with these instructions.
2 DESCRIPTION (FIG A)
1. “On/off” switch
2. Grinding head
3. Hand grip
4. Grinding angle gauge (+30° to -30°)
5. Grinding wheel cover
6. Safety guard fastening screws
7. Transparent safety guard
8. Grinding wheel
9. Saw chain clamp screw
10. Adjustable chain stop
11. Chain stop adjusting screw
12. Guide rail
13. Mounting holes for base
14. Rotation table for clamping chain
15. Base
16. Grinding depth stop adjusting screw
17. Ventilation holes
3 PACKAGE CONTENT LIST
Remove all packaging materials.
Remove remaining packing and package inserts (if included).
Check that the package contents are complete.
Check the appliance, the power cord, the power plug and all accessories for transportation
damage.
Keep the packing materials as far as possible till the end of the warranty period. Dispose it
into your local waste disposal system afterwards.
WARNING: Packaging materials are not toys! Children must not play with
plastic bags! Danger of suffocation!
1 x Grinding head with mounted grinding wheel
1 x Base
Tools: (1 socket spanner, 1 x spanner, 1x locking pin)
1 x Manual
If any parts are missing or damaged, please contact your dealer
POWXG1066 EN
Copyright © 2020 VARO P a g i n a | 4 www.varo.com
4 SYMBOLS
In this manual and/or on the machine the following symbols are used:
In accordance with
essential requirements of
the European directive(s)
"Class II - The machine is
double insulated; Earthing wire
is therefore not necessary
Mandatory use of eye
protection.
Wear gloves
Read manual before use
Switch off and remove plug
from mains before adjusting,
cleaning or if the cord becomes
entangled or damaged
Danger! Rotating tool -
risk of injury. Keep hands
at safe distance.
Denotes risk of personal injury
or damage to the tool.
5 GENERAL SAFETY INSTRUCTIONS
This machine is not suitable for use by persons (or children) with physical, sensory, or mental
disabilities or those with lacking proper experience and/or knowledge, unless supervised by a
person responsible for their safety or receiving instruction from the latter on how to use the
machine.
For the sake of safety, this machine is not to be used by children and persons under the age of
16, or by persons unfamiliar with the operating instructions.
5.1 Electric safety precautions:
Caution: In order to prevent accidents and injuries from electrical shock: Only connect the
machine to a power outlet with a leakage current switch (differential switch) with a max.
permitted leakage current of 30mA.
Make sure the mains voltage is the same as that indicated on the specification plate.
Do not expose machine to moisture. Machine may not get damp nor be used in a damp
environment.
Always check power lead and plug for damage prior to using machine. Avoid contact with
grounded parts.
This machine contains spark generating components inside. Do not use machine near
combustible liquids or gasses. Negligence could lead to risk of fire or explosion.
Do not pull on power lead to remove plug from electric socket. Do not expose cable to
heat; keep away from oil and sharp edges.
Only use extension chord of at least 1.0 mm2 diameter. Always unwind rolled up cable
prior to use; check cable for damage.
For use outdoors, only use permissible extension chords.
Keep power lead and extension cable at safe distance from grinding wheel and saw chain.
In case of damage, immediately remove plug from socket. Do not touch cable until
disconnected from power outlet.
Do not use damaged cables and plugs, or ones that do not meet safety regulations.
A worn-out power lead for this machine must be replaced by the manufacturer, its
customer service department, or a similarly qualified person in order to prevent hazard.
POWXG1066 EN
Copyright © 2020 VARO P a g i n a | 5 www.varo.com
5.2 Working with the machine
In order to prevent accidents and injuries:
5.2.1 Preparation:
Always wear proper work clothing and protective gear when use:
Do not wear baggy clothing or jewellery that might get caught in moving parts.
Keep long hair contained under headwear.
Wear safety goggles. Negligence could lead to eye injury from flying sparks or grind
particles.
When working with saw chains wear protective gloves to avoid cut injuries.
Wear dust mask to avoid inhalation of grind particles.
Anti-slip footwear is recommended when working.
Make sure no other persons or animals are near the work area. Do not let anyone touch
the machine or cable. Look out especially for children.
Do not use machine when tired or after having consumed alcohol or medication. Do not
work for too long without taking breaks.
Keep work area orderly. Do not leave tools, objects or cables lying around near the work
area. Ensure proper lighting. Risk of accident.
Before using machine inspect perfect working order of safety features and damaged parts
indicator lights. Check that moving parts work flawlessly and do not get stuck. Regularly
check cable. All parts and safety features, such as the transparent safety guard must be
correctly installed and meet all conditions in order to guarantee flawless performance. Do
not use a machine on which the on/off switch cannot be used. Damaged parts must be
repaired or replaced by recognised qualified personnel at specialised work place, unless
otherwise indicated in the instruction manual.
Do not use a damaged or incomplete machine; do not use machine that has been
modified without the manufacturer’s authorisation. Before using check safe condition of
machine and especially of power cable and switch.
Inspect grinding wheel before using; do not use broken, cracked, or otherwise damaged
products. Change worn grinding wheel.
5.2.2 Operation:
Make sure power switch is in off position when connecting machine to electrical mains.
When working ensure safe posture. Avoid abnormal body postures and keep firm balance.
Keep hands at safe distance from grinding wheel and chain saw teeth when machine is in
use. Do not move change with hands. Risk of injury.
Never put fingers between grinding wheel and rotation table or between grinding wheel
and guard plate. Risk of injury.
Chain gets hot during grinding. Do not touch section under treatment. Risk of burn injury.
Always keep an eye on machine and object under treatment. Never use machine when
not concentrated or distracted.
Only use accessories recommended in this instruction manual. Using equipment other
than the indicated can lead to risk of injury. Do not use saw blades.
Switch machine off and disconnect mains plug:
When machine not in use
Before performing cleaning, inspection, and maintenance work
Before changing grinding wheel
When power chord is damaged or in disarray
If machine is making unusual noises
This power tool meets the applicable safety regulations. All maintenance work not covered
in this instruction manual may only be carried out at a specialised facility, where only
original spare parts are used. Otherwise, accidents might occur.
POWXG1066 EN
Copyright © 2020 VARO P a g i n a | 6 www.varo.com
5.2.3 Maintenance of your machine:
Bolt the machine to an even and stable work bench to facilitate safe operation.
Keep machine clean in order to be able to work safer and better. Carefully follow
maintenance, inspection, and service instructions, as well as instructions for switching
equipment.
Keep hand grip dry, clean, and free of fat or oil.
Remove installation tools and spanners before operating machine.
Only use within the range of capacities indicated. Do not subject grinding wheel to great
pressure. Do not use a machine of moderate capacity for heavy work. Do not use this tool
for purposes for which it is not designed.
Store machine in dry, enclosed place and out of children’s reach. Grinding wheels must be
stored and handled according to manufacturer’s instructions.
6 DESCRIPTION OF THE PROCESS
Prior to being used for the first time the chain sharpening machine is securely mounted to a
work surface. The device is propelled by an electric motor. The grinding angle is easily adjusted
from -30° to +30° by means of a rotating table. The chain guide rail uses an adjustable stop.
The chain is sharpened by applying a grinding head. The machine is equipped with a
transparent safety guard to protect the user. Descriptions of the functions of the different
operating parts are given below.
7 SETTING UP THE MACHINE (FIG B)
7.1 Installation
Place the base (15) on an even, stable surface. Make sure there is enough room so as not
to endanger other people.
Using the bolts, bolt the base securely to the work surface.
7.2 Mounting grinding machine
Position the grinding chassis (2) on the base (15) and insert bolt trough the support holes
of the casing from left to right and mount washer and nut. Hold the bolt head on the left
with socket spanner and tighten the nut on the right with spanner, check if the grinding
chassis can move freely from back to front and vice-versa.
8 OPERATING THE MACHINE
Only use accessories recommended in this intruction manual. Only use
original parts. Before working on machine, always disconnect plug from
mains. Inspect grinding wheel before using: check distance between
transparent safety guard and grinding wheel. Never use broken, cracked or
otherwise damaged grinding wheel. Do not turn machine on before it is
securely mounted on work surface. Risk of injury!
8.1 Switching on and off
Make sure mains voltage coincides with that indicated on machine’s
specification plate.
Make sure on/off” switch (see A no. 1) is switched off (set to “0”) before
connecting to mains outlet.
Connect machine to mains outlet.
POWXG1066 EN
Copyright © 2020 VARO P a g i n a | 7 www.varo.com
To switch on, set “on/off” switch to “I” position; the machine starts (see A no. 1).
To switch off, set “on/off” switch to “0” position; the machine stops (see A no. 1).
The grinder will still continue to run after the machine has been switched off.
Risk of injury. The electric motor is designed for operating mode S1. The
motor switches off automatically wehen overloaded. After a cooling time
(time varies), the motor can be switched on again.
Testing the grinder:
Before using for the first time, and each time the grinding wheel is changed, test by letting grinder
spin freely for at least 30 seconds. Switch machine off if wheel rotation is not round, if significant
oscillations are noticeable, or if machine makes abnormal noises.
8.2 Sharpening saw chains (Fig C)
Incorrect sharpening of the saw chain can lead to a damaged chain, increasing the risk of
the saw bucking!
Ensure the chain is precisely adjusted.
Take correct grinding angle and the saw chain’s minimum dimensions into consideration.
Remove as little matter as possible.
Do not grind non-cutting or connection links, to avoid cracking chain.
Negligence could lead to risk of accident when using the chainsaw.
8.3 Sharpening instructions
After sharpening, all cutting links must be of equal length and width.
Chain is worn down and must be replaced with new one when saw teeth are less than
4mm long.
Make sure suspended transparent safety guard moves freely and does not get stuck. Do
not overly tighten safety guard fastening screws (6).
8.3.1 Inserting saw chain:
Unscrew clamp screw (9) and position saw chain on guide rail (12). The saw teeth must
be facing the grinding wheel (8).
Click chain stop (10) down and pull saw chain back until saw tooth to be sharpened (25)
rests against chain stop (see figure1).
8.3.2 Setting grinding angle:
Set required grinding angle using rotation table (14) and angle gauge (4).
8.3.3 Adjusting chain stop:
Lower grinding head (2). Turn adjusting screw (11) until saw tooth (25) rests against
grinding wheel (8).
Clamp chain link by turning clamp screw (9).
Adjust grinder depth stop using adjusting screw (16) in such a way that grinding wheel (8)
touches base of saw tooth.
8.3.4 Sharpening:
Switch machine on (see “Switching on and off“).
By gently pressing on hand grip, (3) lower grinding wheel (2) and grind saw tooth sharp.
To move the chain along, switch machine off. Loosen clamp screw (9) and clamp
following chain link to be sharpened using adjusted stop (10) and clamp screw (9).
First sharpen the saw teeth from one side of the chain. Then adjust the
grinding angle and sharpen the teeth from the other side.
POWXG1066 EN
Copyright © 2020 VARO P a g i n a | 8 www.varo.com
8.3.5 Checking distance from depth limiter:
The sawing parts of the chain are the cutting links, which consist of a saw tooth (25) and a
shoulder (26) that limits the depth of the saw cut.
The difference in height between the two determines distance A, which limits the cutting depth.
1. After the third sharpening, always check that distance A limiting cutting depth conforms to
the specifications of the manufacturer of the saw chain.
2. File down the depth-limiting shoulder with a flat file and round off the shoulder a little after
sawing depth has been readjusted. The original shape should be retained.
9 MAINTENANCE AND CLEANING
Before working on machine disconnect from mains outlet.
Only have work not described in this instruction manual carried out at a
specialised facility. Use only orginal parts. Allow machine to cool down
before carrying out any maintenance or cleaning work. Risk of burn injury!
Always check machine for visible defects prior to using.
Check grinding wheel in particular. Change damaged parts.
9.1 Cleaning
Chemical substances may cause corrode the machine’s plastic parts. Never
clean machine under running water.
Thoroughly clean machine after every use.
Clean ventilation slits.
9.2 Changing grinding wheel (Fig D)
Switch machine off and disconnect plug from mains. Let machine cool down.
1. Remove grinding wheel cover (5) by unscrewing fastening screws.
2. Lock spindle by inserting the locking pin under the grinding disc into the housing, turn the
grinding disc by hand until locking pin engages and loosen hexagonal nut with socket
spanner.
3. Remove nut, washer, , and grinding wheel.
4. Mount new grinding wheel and screw on cover in the reverse order.
5. Let the machine run for 30 sec.
Position flange with arched side facing away from grinding wheel.
6. If significant oscillations are noticeable or if machine makes abnormal noises, switch off.
POWXG1066 EN
Copyright © 2020 VARO P a g i n a | 9 www.varo.com
10 TECHNICAL DETAILS
Rated voltage
230V
Rated frequency
50Hz
Rated power
180W
Rotation speed
6300min
-1
Material housing
ABS plastic
Optimal heat dissipation
Yes
Alu die cast
Yes
Electric motor type
Brushed
Disc diameter
100mm
Bore size
10mm
Disc width
3.2mm
Cable length
0.25m
11 NOISE
Noise emission values measured according to relevant standard. (K=3)
Acoustic pressure level LpA
Acoustic power level LwA
ATTENTION! Wear hearing protection when sound pressure is over 85 dB(A).
12 WARRANTY
This product is warranted for a 36-month period effective from the date of purchase by the
first user.
This warranty covers all material or production flaws excluding: batteries, chargers,
defective parts subject to normal wear & tear such as bearings, brushes, cables, and
plugs, or accessories such as drills, drill bits, saw blades, etc. ; damage or defects
resulting from maltreatment, accidents or alterations; nor the cost of transportation.
Damage and/or defects resulting from inappropriate use also do not fall under the
warranty provisions.
We also disclaim all liability for any bodily injury resulting from inappropriate use of the
tool.
Repairs may only be carried out by an authorised customer service centre for Powerplus
tools.
You can always obtain more information at the number 00 32 3 292 92 90.
Any transportation costs shall always be borne by the customer, unless agreed otherwise
in writing.
At the same time, no claim can be made on the warranty if the damage of the device is the
result of negligent maintenance or overload.
Definitely excluded from the warranty is damage resulting from fluid permeation, excessive
dust penetration, intentional damage (on purpose or by gross carelessness), inappropriate
usage (use for purposes for which the device is not suitable), incompetent usage (e.g. not
following the instructions given in the manual), inexpert assembly, lightning strike,
erroneus net voltage. This list is not exhaustive.
Acceptance of claims under warranty can never lead to the prolongation of the warranty
period nor commencement of a new warranty period in case of a device replacement.
Devices or parts which are replaced under the warranty therefore remain the property of
Varo NV.
POWXG1066 EN
Copyright © 2020 VARO P a g i n a | 10 www.varo.com
We reserve the right to reject a claim whenever the purchase cannot be verified or when it
is clear that the product has not been properly maintained. (Clean ventilation slots, carbon
brushes serviced regularly, etc.).
Your purchase receipt must be kept as proof of date of purchase.
Your appliance must be returned undismantled to your dealer in an acceptably clean state,
(in its original blow-moulded case if applicable to the unit), accompanied by proof of
purchase.
13 ENVIRONMENT
Should your appliance need replacement after extended use, do not dispose of it
with the household refuse, but in an environmentally safe way.
Waste produced by electrical machine items should not be handled like normal
household rubbish. Please recycle where recycle facilities exist. Check with your
Local Authority or retailer for recycling advice.
POWXG1066 EN
Copyright © 2020 VARO P a g i n a | 11 www.varo.com
14 DECLARATION OF CONFORMITY
VARO Vic. Van Rompuy N.V. Joseph Van Instraat 9 2500 Lier Belgium, declares that,
Product: chain sharpener 180W
Trade mark: POWERplus
Model: POWXG1066
is in conformity with the essential requirements and other relevant provisions of the applicable
European Directives, based on the application of European harmonized standards. Any
unauthorized modification of the apparatus voids this declaration.
European Directives (including, if applicable, their amendments up to the date of signature);
2011/65/EU
2006/42/EC
2014/30/EU
European harmonized standards (including, if applicable, their amendments up to the date of
signature);
EN62841-1 : 2015
EN62841-3-10 : 2015
EN55014-1 : 2017
EN55014-2 : 2015
EN61000-3-2 : 2014
EN61000-3-3 : 2013
Keeper of the Technical Documentation : Philippe Vankerkhove, VARO Vic. Van Rompuy
N.V.
The undersigned acts on behalf of the company CEO,
Philippe Vankerkhove
Certification Manager
20/05/20, Lier - Belgium
/