Page is loading ...

�
CONTEMPORARY LINEAR
VENT-FREE GAS
FIREPLACE MODELS:
VFSL30FP7010(N,P)-1
VFSL30FP70(N,P)-1
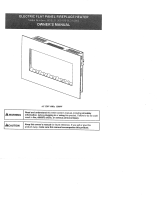
VFMH46389 VFSL30FP70 Shown
WARNING
FIRE OR EXPLOSION HAZARD
Failure to follow safety warnings exactly
could result in serious injury, death or
property damage.
— Do not store or use gasoline or other
ammable vapors and liquids in the
vicinity of this or any other appliance.
— WHAT TO DO IF YOU SMELL GAS
• Do not try to light any appliance.
• Do not touch any electrical switch;
do not use any phone in your building.
• Leave the building immediately.
• Immediately call your gas supplier
from a neighbor’s phone. Follow
the gas supplier’s instructions.
• If you cannot reach your gas
supplier, call the re department.
— Installation and service must be
performed by a qualied installer,
service agency or the gas supplier.
DANGER
If not installed, operated and maintained
in accordance with the manufacturer's
instructions, this product could expose you
to substances in fuel or from fuel combustion
which can cause death or serious illness.
INSTALLER:
Leave this manual with the appliance.
CONSUMER:
Retain this manual for future reference.
This is an unvented gas-red heater. It uses air
(oxygen) from the room in which it is installed.
Provisions for adequate combustion and
ventilation air must be provided. Refer to page 13.
WATER VAPOR: A BY-PRODUCT OF
UNVENTED ROOM HEATERS
Water vapor is a by-product of gas combustion.
An unvented room heater produces approximately
one (1) ounce (30ml) of water for every 1,000 BTU's
(.3KW's) of gas input per hour. Refer to page 13.
This appliance may be installed in an aftermarket
permanently located, manufactured (mobile)
home, where not prohibited by local codes.
This appliance is only for use with the type of gas
indicated on the rating plate. This appliance is not
convertible for use with other gases.
INSTALLATION INSTRUCTIONS
AND OWNER'S MANUAL
GAS-FIRED
Page 1

35775-5-0120Page 2
TABLE OF CONTENTS
BEFORE YOU START .................................................................................................................................. 3
HOMEOWNER REFERENCE INFORMATION ............................................................................................4
CARTON CONTENTS .................................................................................................................................. 4
HARDWARE PACK CONTENTS .................................................................................................................5
IMPORTANT SOOT PREVENTION STEPS ................................................................................................6
PRODUCT SPECIFICATIONS .....................................................................................................................6
INTRODUCTION ..........................................................................................................................................7
ACCESSORIES ............................................................................................................................................8
IMPORTANT SAFETY INFORMATION ................................................................................................ 9 - 10
SAFETY INFORMATION FOR USERS OF PROPANE GAS ..................................................................... 11
IMPORTANT INSTALLATION GUIDELINES ..............................................................................................12
WATER VAPOR: A BY-PRODUCT OF UNVENTED ROOM HEATERS ....................................................13
PROVISIONS FOR ADEQUATE COMBUSTION & VENTILATION AIR ............................................ 13 - 14
SURFACE MOUNTED FIREPLACE .................................................................................................. 15 - 21
SURFACE MOUNTED FIREPLACE DIMENSIONS ........................................................................... 16 - 17
SURFACE MOUNTED FIREPLACE INSTALLATION ........................................................................ 18 - 21
PARTIALLY RECESSED FIREPLACE .............................................................................................. 23 - 31
PARTIALLY RECESSED FIREPLACE DIMENSIONS ....................................................................... 24 - 25
PARTIALLY RECESSED FIREPLACE INSTALLATION ..................................................................... 26 - 31
RECESSED FIREPLACE .................................................................................................................. 33 - 41
RECESSED FIREPLACE DIMENSIONS ........................................................................................... 34 - 35
RECESSED FIREPLACE INSTALLATION ......................................................................................... 36 - 41
GAS SUPPLY ..................................................................................................................................... 42 - 43
COMBUSTIBLE MATERIALS .....................................................................................................................43
MANTEL CLEARANCES ............................................................................................................................ 44
CLEANING AND SERVICING ....................................................................................................................45
LIGHTING INSTRUCTIONS ....................................................................................................................... 46
PILOT FLAME CHARACTERISTICS .........................................................................................................47
OPERATING INSTRUCTIONS / FLAME APPEARANCE ..........................................................................47
IP OPERATING INSTRUCTIONS ..............................................................................................................48
IP WIRING ..................................................................................................................................................49
ELECTRICAL CONSIDERATIONS ............................................................................................................50
IP TROUBLESHOOTING ................................................................................................................... 51 - 53
PARTS LIST ...............................................................................................................................................54
EXPLODED VIEW ......................................................................................................................................55
MASTER PARTS DISTRIBUTOR LIST ......................................................................................................56
HOW TO ORDER REPAIR PARTS ............................................................................................................56
APPLIANCE SERVICE HISTORY ...................................................................................................... 57 - 58
WARRANTY ...............................................................................................................................................59
SECTION PAGE

35775-5-0120 Page 3
BEFORE YOU START
1. Record serial number, model number, etc. on the next page
and page 56.
2. Read the soot-prevention information on page 6.
3. Read the safety information on pages 9 - 11.
4. Determine type of installation. See illustrations on this page.
5. Verify clearances to combustibles. See pages 43 - 44.
6. Determine type of gas shutoff valve to use.
7. Frame the opening.
• SurfaceMountedInstallation:Noopeningrequired.
• PartiallyRecessedInstallation:Seepage27.
• RecessedInstallation:Seepage37.
8. Install the gas line basics. See page 42 - 43.
9. Install the Fireplace.
• SurfaceMountedInstallation:Seepages15-21.
• PartiallyRecessedInstallation:Seepages23-31.
• RecessedInstallation:Seepage33-41.
10. Install the wiring. See page 49.
11. Perform a Leak Test. See page 42.
12. Lightthereplace.Seepages46.
13. Showthehomeownerhowtooperatethereplace.
14. Show the homeowner how to do the basic maintenance.
INSTALLATION CONSIDERATIONS - FIREPLACE
INSTALLATION GUIDELINES
Nopartofthereplace,gasline,orwiringmaybeinstalledina
wall cavity serving as a cold air return.
Inplanningtheinstallationforthereplace,determinewherethe
unitistobeinstalled.Thereplacecanbemountedthreeways:
1. Surface mounted on a wall.
2. Partially recessed in a 2 x 4 or 2 x 6 wall.
3. Recessed in a 2 x 6 wall.
Fireplace must only be permanently installed on or in a wall.
This unit is designed to be installed in a zero-clearance
enclosure. This means the combustible material can come in
contact with the top standoff (recessed in a 2 x 6 wall installation
only)orreplacetop(partiallyrecessed),bottom,andsecuredto
combustibleframingusingthenailingangeprovided.
Determine the following before installation:
• Installationtype
• Anydesiredaccessories
• Gassupplypiping(leftsideaccess).
• Electricalsupplyrequirementsforpoweradaptor.
(120V, 60Hz, 1 Amp) (right side access)
Aselectionofashutoffvalvecontainingaangeandkeyis
recommended.
OPERATING THE FIREPLACE FOR THE FIRST TIME
Duringmanufacture,thisreplaceistreatedwithoils,lmsand
bonding agents. These are not harmful but may produce smoke
andodorastheyburnoffduringinitialoperationofthereplace.
This is normal. Open a window during the initial bake out
period. The following procedure will cure the materials used to
manufacturethereplace.
• Thereplaceshouldberunthreetofourhourscontinuously.
• Turnthereplaceoffandallowittocompletelycool.
• Cleantheglass.
NOTICE:Openwindowsforaircirculationduringreplacebreak-in.
• Somepeoplemaybesensitivetosmokeandodors.
• Smokedetectorsmayactivate.
INSTALLATION TYPE
SURFACE MOUNTED INSTALLATION
Pages 15 - 21
PARTIALLY RECESSED INSTALLATION
Pages 23 - 31
RECESSED INSTALLATION
Pages 33 - 41

35775-5-0120Page 4
HOMEOWNER REFERENCE INFORMATION
Werecommendthatyourecordthefollowinginformationaboutyourreplace.
Model Number: _____________________________ Date purchased: ________________________
Serial Number: _____________________________ Locationofreplace: _____________________
Dealer Name: ______________________________ Dealer Phone: _________________________
Notes: ______________________________________________________________________________
____________________________________________________________________________________
CARTON CONTENTS
2
3
5
1
4
Items not shown to scale.
Index No. Description Quantity
Used On Installation Type:
Surface Mounted Partially Recessed Recessed
1 Fireplace 1 YES YES YES
2 Non-combustible board - Top 1 NO YES YES
3 Non-combustible board - Side 2 NO NO YES
4 Glass Panel 1 YES YES YES
5 Standoff 1 NO NO YES
Not Shown Hardware Pack 1 YES YES YES
See Parts Lists on page 54 for ordering replacement parts. Do not order batteries, bolts, screws, washers or nuts. They are standard
hardware items and can be purchased at any local hardware store.

35775-5-0120 Page 5
HARDWARE PACK CONTENTS
Items not shown to scale.
Index
Number
Description
Quantity
Supplied
Used On Installation Type:
Surface
Mounted
Partially
Recessed
Recessed
1 Switch Extension Wire Kit 1 YES YES YES
2 Switch and Cover 1 YES YES YES
3 Battery Pack Extension Wire Kit 1 YES YES YES
4 Cord Grip 2 YES YES YES
5 Wire Nut 2 YES YES YES
6 Snap-In Receptacle 1 YES YES YES
7 Flex Line 1 YES YES YES
8 AC Power Adaptor 1 YES YES YES
9 Battery Pack 1 YES YES YES
10 AA Battery 4 YES YES YES
11 #10-32 x 1/2 inch Hex Head Screw* 10 NO YES YES
12 1-1/4 inch Phillips Drywall Screw* 16 NO YES YES
13 Nailing Flange 4 NO YES YES
* Not all of the screws will be used on each installation.
See Parts Lists on page 54 for ordering replacement parts. Do not order batteries, bolts, screws, washers or nuts. They are standard
hardware items and can be purchased at any local hardware store.
1-1/4” PHILLIPS DRYWALL SCREW
#10-32 X ½” HEX HEAD SCREW
NAILING FLANGES
SWITCH EXTENSION WIRE KIT
BATTERYPACK EXTENSION WIRE KIT
CORD GRIP
FLEX LINE
WIRE NUT
SWITCH AND COVER
BATTERYPACK
AA BATTERY
SNAP-IN RECEPTACLE
POWER ADAPTER
VFSL30\CDR\Hardware Pack Contents -111815

35775-5-0120Page 6
CAUTION
Failure to keep the primary air openings of the burner
clean may result in sooting and property damage.
CAUTION
Donotallowfanstoblowdirectlyintooratthereplace.
Avoidanydraftsthatalterburneramepatterns.Pay
particular attention to ceiling fans and exhaust fans.
IMPORTANT SOOT PREVENTION STEPS
IMPORTANT NOTICE
INSTALLER - SERVICE PERSON - HOMEOWNER
SOOT MAY BE CREATED IF THE FOLLOWING DIRECTIONS ARE NOT FOLLOWED.
PRODUCT SPECIFICATIONS
VFSL30FP(70,7010)N
Natural Gas
(inches w.c.)
VFSL30FP(70,7010)P
Propane Gas
(inches w.c.)
Manifold pressure setting 3.5 10.0
Gas inlet pressure
Max. 10.5 13.0
Min. 5.0 11.0
Model Gas Type Valve Type Orice
Recommended
Manifold Pressure
(inches w.c.)
BTUH
Max. Rate
VFSL30FP70P Propane IP #60 10.0 12,000
VFSL30FP70N Natural IP #50 3.5 14,000
VFSL30FP7010P Propane IP #64 10.0 10,000
VFSL30FP7010N Natural IP 1.50mm 3.5 10,000
• Ensureburnerandprimaryairholesarefreeofdust,
lint, animal hair (i.e. cat and dog) or anything that may
blocktheneededairow.SeeCleaningandServicing,
page 45.
• Donotplaceanythingontheburnerincludinglogs,
rock wool, decorative glass, etc.
• Donotusescentedairfreshenersorcandleswhilethe
replaceisinoperation.Theycancausesoot.
• Haveyourdealerorqualiedservicetechnician
perform an annual inspection and cleaning to prevent
malfunction or sooting.
• Verifytheburnertubeisnotbentordistorted.The
mainburneroricemustbecenteredintheburner
tube for proper combustion to prevent sooting.

35775-5-0120 Page 7
INTRODUCTION
Important
All correspondence should refer to complete Model Number and
Serial Number.
NOTICE: Duringinitialringofthisreplace,itspaintwillbake
out, and smoke will occur. To prevent triggering of smoke alarms,
ventilate the room in which the unit is installed.
Qualied Installing Agency
Installation and replacement of gas piping, gas utilization
equipmentoraccessoriesandrepairandservicingofequipment
shallbeperformedonlybyaqualiedagency.Theterm"qualied
agency"meansanyindividual,rm,corporationorcompany
which either in person or through a representative is engaged
in and is responsible for (a) the installation or replacement of
gas piping or (b) the connection, installation, repair or servicing
ofequipment,whoisexperiencedinsuchwork,familiarwithall
precautionsrequiredandhascompliedwithalltherequirements
of the authority having jurisdiction.
Commonwealth of Massachusetts: The installation must be
madebyalicensedplumberorgastterintheCommonwealth
of Massachusetts.
SellersofunventedPropaneorNaturalGas-redsupplemental
replacesshallprovidetoeachpurchaseracopyof527CMR
30 upon sale of the unit.
In the Commonwealth of Massachusetts, unvented Propane
andNaturalGas-redspaceheatersshallbeprohibitedin
bedrooms and bathrooms.
The installation must conform with local codes or, in the absence
of local codes, with the National Fuel Gas Code, ANSI Z223.1.*
*Available from the American National Standards Institute, Inc.
1430 Broadway, New York, N.Y. 10018.
Sample Warnings and Denitions:
DANGER
Indicates a hazardous situation which, if not avoided, will
result in death or serious injury.
WARNING
Indicates a hazardous situation which, if not avoided, could
result in death or serious injury.
CAUTION
Indicates a hazardous situation which, if not avoided, could
result in minor or moderate injury.
NOTICE: Addresses practices not related to personal injury.
Instructions to Installer
1. Leave instruction manual with owner after installation.
2. Haveownerlloutproductregistrationcardsuppliedwiththe
vent-freereplace.
3. Showownerhowtostartandoperatethereplace.
Consult your local Building Department regarding regulations,
codes or ordinances which apply to the installation of an
unventedreplace.
Thisreplacemaybeinstalledinanaftermarket*manufactured
(mobile) home, where not prohibited by state or local codes.
*Aftermarket: Completion of sale, not for purpose of resale,
from the manufacturer.
Well Head Gas Installations
Some Natural Gas utilities use “well head” gas. This may affect
the Btu output of the unit and promote sooting. Units shall not be
converted to use well head gas.
This appliance is only for use with the type of gas indicated on the
rating plate. This appliance is not convertible for use with other gases.
WARNING
Any change to this replace or its controls can be dangerous.
Improper installation or use of the replace can cause
serious injury or death from re, burns, explosion or carbon
monoxide poisoning.
Thisreplaceseriesisdesigncertiedinaccordancewith
American National Standard Institute (ANSI) Z21.11.2 by the
Canadian Standards Association Laboratories (CSA) as an
Unvented Room Heater and should be installed according to
these instructions.
Any alteration of the original design, installed other than as
shown in these instructions or use with a type of gas not
shown on the rating plate is the responsibility of the person
and company making the change.
WARNING
This appliance is equipped for Natural or Propane Gas. Field
conversion is not permitted.

35775-5-0120Page 8
ACCESSORIES
Required Accessories for Surface Mounted Installation
Decorative Front (One Required)
Part Number Description
DFSL30MBL Decorative Front - Mitered, Black
Decorative Wrap (One Required)
DCSL30LBL Decorative Wrap - Black
Required Accessories for Partially Recessed Installation
Decorative Front (One Required)
Part Number Description
DFSL30MBL Decorative Front - Mitered, Black
Optional Accessory for Recessed Installation
Part Number Description
DFSL30PBL Decorative Trim - Black
Optional Control Accessories - All Installation Types
Part Number Description
FRBC* Battery Remote, ON/OFF
FRBTC* Battery Remote, Thermostat
FRBTP* Programmable Remote
TRW* Wireless Wall Thermostat
TMV Wall Thermostat - Reed Switch
*Requiresjunctionboxoutsideofthereplace.
Attention: Certainaccessoriesarerequired,butsoldseparately.
Mitered Front Dimensions
21-3/32”
37-13/16”
1-13/16
”
Wall Trim Dimensions
13-5/32”
29-3/4”
13/16
”

35775-5-0120 Page 9
WARNING
Whenusedwithoutadequatecombustionandventilationair,
appliance may give off CARBON MONOXIDE, an odorless,
poisonous gas.
Do not install appliance until all necessary provisions are
made for combustion and ventilation air. Consult the written
instructions provided with the appliance for information
concerning combustion and ventilation air. In the absence
of instructions, refer to the National Fuel Gas Code, ANSI
Z223.1/NFPA 54, Air for Combustion and Ventilation, or
applicable local codes.
ThisapplianceisequippedwithaPILOT LIGHT SAFETY
SYSTEM designed to turn off the appliance if not enough fresh
air is available.
Do not tamper with pilot light safety system!
Ifreplaceshutsoff,donotrelightuntilyouprovidefreshair.
Ifreplacekeepsshuttingoff,haveitserviced.Keepburner
and control compartment clean. See installation and operating
instructions accompanying heater.
Carbon monoxide poisoning may lead to death.
Earlysignsofcarbonmonoxidepoisoningresembletheu,with
headache, dizziness and/or nausea. If you have these signs,
replacemaynotbeworkingproperly.Get fresh air at once!
Havereplaceserviced.
Some people — pregnant women, persons with heart or lung
disease,anemia,thoseundertheinuenceofalcohol,those
at high altitudes — are more affected by carbon monoxide than
others.
DANGER
The installer of this product is responsible for testing all
connections for gas leaks. A gas leak will create a situation
whereare,explosion,orproductionofcarbonmonoxidemay
result causing property damage, personal injury or loss of life.
WARNING
Do not use a blower insert, heat exchanger insert or other
accessory not approved for use with this heater.
WARNING
Thisreplaceneedsfreshairforventilationtorunproperly.
ThisreplacehasanPilotLightSafetySystem(Oxygen
DepletionSensor-ODS)whichwillshutdownthereplaceif
adequatefreshairisnotavailable.Seetroubleshootingsection
in the instructions.
WARNING
Donotallowfanstoblowdirectlyintooratthereplace.Avoid
anydraftsthatalterburneramepatterns.
WARNING
DONOToperatethisreplaceunlessallcomponentsincluding
burners and controls are in good working condition.
Replacement components are available through your local
dealer as indicated in the How to Order Repair Parts section of
thereplacemanual.
WARNING
Failure to keep the primary air opening(s) of the burner(s) clean
may result in sooting and property damage.
IMPORTANT SAFETY INFORMATION

35775-5-0120Page 10
• Donotusescentedairfresheners(plugintypeair
fresheners,etc.)whilethereplaceisinoperation.Air
fresheners produce a residue in the air similar to candles
and may produce soot.
• Donotusescentedordecorativecandleswhilethereplace
is in operation. Candles produce a residue in the air that
createssoot.Burningcandleswhilethereplaceisoperating
magniestheproblem.Itshouldbenotedthatcandles,in
general, produce soot. The amount of time burned and the
quantityofcandlesburnedwilldeterminetheamountofsoot
produced and deposited.
• Installation and repair should be done by a QUALIFIED
SERVICE PERSON. Thisreplaceshouldbeinspected
before use and at least annually by a professional service
person.Morefrequentcleaningmayberequireddueto
excessive lint from carpeting, bedding materials, etc. It
is imperative that control compartments, burners and
circulatingairpassagewaysofthereplacebekeptclean.
• Donotplacedebris,logsorotherarticlesontheburner
during operation.
• Donotinstallanunventedroomreplacewithaninputrating
of more than 6,000 Btu per hour in a bathroom.
• Donotinstallanunventedroomreplacewithaninputrating
of more than 10,000 Btu per hour in a bedroom or bathroom.
• Duetohightemperatures,thereplaceshouldbelocatedout
oftrafcandawayfromfurnitureanddraperies.
• Alertchildrenandadultstothehazardofhighsurface
temperatures. High surface temperatures can cause burns or
ignite clothing.
• Youngchildrenshouldbecarefullysupervisedwhentheyarein
thesameroomwiththereplace.
• Donotplaceclothingorotherammablematerialonornear
thereplace.
• DONOTuse this room heater if any part has been under
water.Immediatelycallaqualiedservicetechnicianto
inspect the room heater and to replace any part of the
control system and any gas control which has been under
water.
• Youmustoperatereplacewithglasspanelinplace.
• Duringmanufacture,thisreplaceistreatedwithcertainoils,
lmsandbondingagents.Thesebondingagentsarenot
harmful but may produce annoying smoke and odors as they
areburnedoffduringinitialoperationofthereplace.Thisis
a normal temporary occurrence. A window should be opened
during the initial bake out period.
• Keepreplaceareaclearandfreefromcombustible
materials,gasolineandotherammablevaporsandliquids.
• Sooting: Avent-freereplaceorburnerdrawsroomairto
support combustion. Lightweight particles suspended in the
air–includingdust,carpetbers,candleortobaccosmoke,
andpethair–willbedrawntowardthereplace.Thesecan
leadtosootbuilduponreplacewallsandevenwallsofthe
room. To prevent malfunctions and sooting, have your dealer
perform an inspection and cleaning each year – before the
heating season. If you have pets or excessive dust, more
frequentcleaningmaybenecessary.Seecleaningand
service section in this manual.
• UseNon-CombustibleMaterialswhereindicatedforthe
replaceinstallation.Non-combustiblematerialdonot
igniteorburnasaresultofusingthereplace.These
include metal, brick, ceramic, concrete, slate, glass, and
plaster. Adhesives must be rated for high temperatures. Any
mechanical fasteners used to install material must also be
non-combustible, including wall anchors and tile spacers.
Materials that pass the ASTM E 136 test (Standard Test
Method for Behavior of Materials in a Vertical Tube Furnace
at 750C) are considered non-combustible.
• Combustiblematerialsincludewood,compressedpaper,
plantbers,orothermaterialsthatwillburn.Thesematerials
areconsideredcombustibleevenwhentreatedwithre-
retardantchemicals.See"ClearancestoCombustibles"for
your installation.
• Donotplaceembers(rockwool)orlavarocksinthis
replace.
• Avoidanydraftsthatalterburneramepatterns.Donot
allowfanstoblowdirectlyintooratthereplace.Donot
placeablowerinsidetheburnerareaoftherebox.Ceiling
fansmaycreatedraftsthatalteramepatterns.Sootingand
improper burning will result.
• Installingatelevisionaboveareplacehasbecomea
desirable feature; however, the following information should
be considered.
Allreplaces,whetherdecorativeorheaterrated,create
heat. Most television manufacturers recommend not placing
a television near a heat source. Because there is a large
variety of television manufacturers, styles and sizes, it is
impractical to test every potential installation. If you install
atelevisionabovethisreplace,EmpireComfortSystems
accepts no responsibility for damage or injuries. Follow the
television manufacturer’s installation instructions, including
any recommendations regarding proximity to heat sources.
IfyouhaveaTVaboveyourreplace,turnoffthereplace
and let it cool completely before servicing or touching any
buttons on the TV. In all cases, the television manufacturer’s
instructions and warnings should be followed.
IMPORTANT SAFETY INFORMATION

35775-5-0120 Page 11
SAFETY INFORMATION FOR USERS OF PROPANE GAS
Propane is a ammable gas which can cause res and
explosions. In its natural state, propane is odorless and
colorless. You may not know all the following safety
precautions which can protect both you and your family
from an accident. Read them carefully now, then review
them point by point with the members of your household.
Someday when there may not be a minute to lose,
everyone’s safety will depend on knowing exactly what
to do. If, after reading the following information, you feel
you still need more information, please contact your gas
supplier.
PROPANE GAS WARNING ODOR
If a gas leak happens, you should be able to smell the gas
because of the odorant put in the Propane Gas.
That's your signal to go into immediate action!
• Donotoperateelectricswitches,lightmatches,useyour
phone. Do not do anything that could ignite the gas.
• Geteveryoneoutofthebuilding,vehicle,trailer,orarea.Do
that IMMEDIATELY.
• Closeallgastankorcylindersupplyvalves.
• PropaneGasisheavierthanairandmaysettleinlowareas
such as basements. When you have reason to suspect a gas
leak, keep out of basements and other low areas. Stay out
untilreghtersdeclarethemtobesafe.
• Useyourneighbor’sphoneandcallatrainedPropaneGas
servicepersonandtheredepartment.Eventhoughyou
may not continue to smell gas, do not turn on the gas again.
Do not re-enter the building, vehicle, trailer, or area.
• Finally, lettheservicemanandreghterscheckfor
escaped gas. Have them air out the area before you return.
Properly trained Propane Gas service people should repair
theleak,thencheckandrelightthegasreplaceforyou.
NO ODOR DETECTED - ODOR FADE
Some people cannot smell well. Some people cannot smell
the odor of the chemical put into the gas. You must nd
out if you can smell the odorant in propane. Smoking can
decrease your ability to smell. Being around an odor for a time
can affect your sensitivity or ability to detect that odor. Sometimes
other odors in the area mask the gas odor. People may not smell
the gas odor or their minds are on something else. Thinking
about smelling a gas odor can make it easier to smell.
The odorant in Propane Gas is colorless, and it can fade
under some circumstances. For example, if there is an
underground leak, the movement of the gas through soil can
ltertheodorant.OdorantsinPropaneGasalsoaresubjectto
oxidation. This fading can occur if there is rust inside the storage
tank or in iron gas pipes.
The odorant in escaped gas can adsorb or absorb onto or into
walls, masonry and other materials and fabrics in a room. That
will take some of the odorant out of the gas, reducing its odor
intensity.
Propane Gas may stratify in a closed area, and the odor intensity
could vary at different levels. Since it is heavier than air, there
may be more odor at lower levels. Always be sensitive to the
slightest gas odor. If you detect any odor, treat it as a serious
leak. Immediately go into action as instructed earlier.
SOME POINTS TO REMEMBER
• LearntorecognizetheodorofPropaneGas.Yourlocal
Propane Gas Dealer can give you a “Scratch and Sniff”
pamphlet.Useittondoutwhatthepropaneodorsmells
like. If you suspect that your Propane Gas has a weak or
abnormal odor, call your Propane Gas Dealer.
• Ifyouarenotqualied,donotlightpilotlights,perform
service,ormakeadjustmentstoreplacesonthePropane
Gassystem.Ifyouarequalied,consciouslythinkaboutthe
odor of Propane Gas prior to and while lighting pilot lights or
performing service or making adjustments.
• Sometimesabasementoraclosed-uphousehasamusty
smell that can cover up the Propane Gas odor. Do not try to
light pilot lights, perform service, or make adjustments in an
area where the conditions are such that you may not detect
the odor if there has been a leak of Propane Gas.
• Odorfade,duetooxidationbyrustoradsorptiononwalls
of new cylinders and tanks, is possible. Therefore, people
should be particularly alert and careful when new tanks or
cylinders are placed in service. Odor fade can occur in new
tanks,orreinstalledoldtanks,iftheyarelledandallowed
tosettoolongbeforerelling.Cylindersandtankswhich
have been out of service for a time may develop internal rust
which will cause odor fade. If such conditions are suspected
to exist, a periodic sniff test of the gas is advisable. If you
have any question about the gas odor, call your Propane
Gas Dealer. A periodic sniff test of the Propane Gas is a
good safety measure under any condition.
• If,atanytime,youdonotsmellthePropaneGasodorant
and you think you should, assume you have a leak. Then
take the same immediate action recommended above for the
occasion when you do detect the odorized Propane Gas.
• Ifyouexperienceacomplete“gasout,”(thecontainer
is under no vapor pressure), turn the tank valve off
immediately. If the container valve is left on, the container
may draw in some air through openings such as pilot light
orices.Ifthisoccurs,somenewinternalrustingcouldoccur.
If the valve is left open, then treat the container as a new
tank. Always be sure your container is under vapor pressure
by turning it off at the container before it goes completely
emptyorhavingitrelledbeforeitiscompletelyempty.

35775-5-0120Page 12
Fans and Cold Air Returns Near the Fireplace
Anydraftcreatedaroundavent-freereplacecancausethe
ametocreatesoot.Uponinstallation,beawareofanycoldair
returnsorventsintheproximityofthereplace.Ceilingfansand
oortypefansneedtobemonitoredduringtheoperationofthis
vent-freereplace.Iftheairowdisruptstheame,thesource
ofairowshouldbeturnedofforredirected.Reversingtheblade
directionceilingfansmaypossiblyeliminateameimpingement.
Floor fans should be redirected.
WARNING
Donotallowfanstoblowdirectlyintooratthereplace.Avoid
anydraftsthatalterburneramepatterns.
NOTICE: Nopartofthereplace,gasline,orwiringmaybe
installed in a wall cavity serving as a cold air return.
Candles
Avoidtheuseofscentedordecorativecandleswhilethereplace
is in operation. Candles produce a residue in the air that creates
soot.Burningcandleswhilethereplaceisoperatingmagnies
the problem. It should be noted that candles, in general,
producesoot.Theamountoftimeburnedandthequantityof
candles burned will determine the amount of soot produced and
deposited.
Plug-In Air Fresheners
Avoidtheuseofscentedairfreshenerswhilethereplaceisin
operation. Air fresheners produce a residue in the air similar to
candles and may produce soot.
Television Considerations
Installingatelevisionaboveareplacehasbecomeincreasingly
popular;however,theareaaboveanyreplacegetshotandmost
TV manufacturers recommend against placing their products
near a heat source.
Ifyouinstallatelevisionabovethisreplace,EmpireComfort
Systems accepts no responsibility for damage or injuries. Follow
the television manufacturer’s installation instructions, including
any recommendations regarding proximity to heat sources.
IfyouhaveaTVaboveyourreplace,turnoffthereplaceand
let it cool completely before servicing or touching any buttons on
the TV.
IMPORTANT INSTALLATION GUIDELINES

35775-5-0120 Page 13
Water vapor is a by-product of gas combustion. An unvented
room heater produces approximately one (1) ounce (30ml) of
water for every 1,000 BTU's (.3KW's) of gas input per hour.
Unventedroomreplacearerecommendedassupplemental
heat (a room) rather than a primary heat source (an entire
house). In most supplemental heat applications, the water vapor
does not create a problem. In most applications, the water vapor
enhances the low humidity atmosphere experienced during cold
weather.
The following steps will help insure that water vapor does not
become a problem.
1. Besurethereplaceissizedproperlyfortheapplication,
including ample combustion air and circulation air.
2. Ifhighhumidityisexperienced,adehumidiermaybeusedto
help lower the water vapor content of the air.
3. Donotuseanunventedroomheaterorreplaceasthe
primary heat source.
Thisreplaceshallnotbeinstalledinaroomorspaceunless
therequiredvolumeofindoorcombustionairisprovidedbythe
method described in the National Fuel Gas Code, ANSI Z23.1/
NFPA 54, the International Fuel Gas Code, or applicable local
codes.
Installation in a Conned Space
Aconnedspaceisanareawithvolumelessthan50cubic
feetper1,000Btuhofthecombinedinputratesofallreplaces
drawing combustion air from that space. Small areas such as
equipmentroomsareconnedspaces.Furnacesinstalledin
aconnedspacewhichsupplyheatedairtoareasoutsidethe
space must draw return air from outside the space through tightly
sealedreturnairducts.Aconnedspacemusthave2openings
into the space for combustion air. One opening must be within
12 inches of the ceiling and the other must be within 12 inches
oftheoor.Therequiredsizingoftheseopeningsisdetermined
by whether inside or outside air is used to support combustion,
the method by which the air is brought to the space (vertical or
horizontalduct)andbythetotalinputrateofallreplacesinthe
space.
Unusually Tight Construction
The air that leaks around doors and windows may provide
enough fresh air for combustion and ventilation. However, in
buildings of unusually tight construction, you must provide
additional fresh air.
Unusually tight construction is dened as construction
where:
a. Walls and ceilings exposed to the outside atmosphere
have a continuous water vapor retarder with a rating of
one perm or less with openings gasketed or sealed, and
b. Weather-stripping has been added on openable windows
and doors, and
c. Caulking or sealants are applied to areas such as joints
around window and door frames, between sole plates and
oors,betweenwall-ceilingjoints,betweenwallpanels,at
penetrations for plumbing, electrical, and gas lines, and at
other openings.
If your home meets all of the three criteria above, you must
provide additional fresh air. See “Ventilation Air From
Outdoors,” page 14.
Determining if You Have a Conned or Unconned Space
Usethisworksheettodetermineifyouhaveaconnedor
unconnedspace.
Space:Includestheroominwhichyouwillinstallreplaceplus
any adjoining rooms with doorless passageways or ventilation
grills between the rooms.
1. Determine the volume of the space (length x width x height).
Length x Width x Height =
cu. ft. (volume of
space)
Example: Space size 16 ft. (length) x 10 ft. (width) x 8 ft.
(ceiling height) = 1,280 cu. ft. (volume of space)
If additional ventilation to adjoining room is supplied with
grills or openings, add the volume of these rooms to the total
volume of the space.
2. Divide the space volume by 50 cu. ft. to determine the
maximum BTU/hr the space can support.
(volume of space) ÷ 50 cu. ft. = (maximum
BTU/hr the space can support)
Example: 1,280 cu. ft. (volume of space) ÷ 50 cu. ft. = 25.6 or
25,600 (maximum BTU/hr the space can support)
3. AddtheBTU/hrofallfuelburningreplacesinthespace.
Vent-freereplace
BTU/hr
Gas water heater BTU/hr
Gas furnace BTU/hr
Ventedgasreplace BTU/hr
Gasreplacelogs BTU/hr
Othergasreplaces* + BTU/hr
Total = BTU/hr
Example: Ventedgasreplace 20,000 BTU/hr
Vent-freereplace + 18,000 BTU/hr
Total = 38,000 BTU/hr
*Donotincludedirect-ventgasreplaces.Directventdraws
combustion air from the outdoors and vents to the outdoors.
4. Compare the maximum BTU/hr the space can support with the
actual amount of BTU/hr used.
BTU/hr (maximum the space can support)
BTU/hr (actual amount of BTU/hr used)
Example:
25,600 BTU/hr (maximum the space can support)
38,000 BTU/hr (actual amount of BTU/hr used)
WARNING
Iftheareainwhichthereplacemaybeoperatedissmaller
thanthatdenedasanunconnedspaceorifthebuildingisof
unusuallytightconstruction,provideadequatecombustionand
ventilation air by one of the methods described in the National
Fuel Gas Code, ANSI Z223.1/NFPA 54, Air for Combustion and
Ventilation, or applicable local codes.
WATER VAPOR: A BY-PRODUCT OF UNVENTED ROOM HEATERS
PROVISIONS FOR ADEQUATE COMBUSTION & VENTILATION AIR

35775-5-0120Page 14
PROVISIONS FOR ADEQUATE COMBUSTION & VENTILATION AIR (continued)
Thespaceintheexampleonpage12isaconnedspace
because the actual BTU/hr used is more than the maximum BTU/
hr the space can support. You must provide additional fresh air.
Your options are as follows:
A. Rework worksheet, adding the space of an adjoining room. If
theextraspaceprovidesanunconnedspace,removedoor
to adjoining room or add ventilation grills between rooms.
See Ventilation Air From Inside Building.
B. Vent room directly to the outdoors. See Ventilation Air
From Outdoors.
C. InstallalowerBTU/hrreplace,iflowerBTU/hrsizemakes
roomunconned.
If the actual BTU/hr used is less than the maximum BTU/hr the
spacecansupport,thespaceisanunconnedspace.Youwill
need no additional fresh air ventilation.
Ventilation Air
Ventilation Air From Inside Building
Thisfreshairwouldcomefromanadjoiningunconnedspace.
Whenventilatingtoanadjoiningunconnedspace,youmust
provide two permanent openings: one within 12 inches of
theceilingandonewithin12inchesoftheooronthewall
connecting the two spaces (see options 1 and 2, Figure 1). You
can also remove door into adjoining room (see option 3, Figure
1). Each ventilation grill or opening shall have a minimum free
areaofonesquareinchper1,000BTUHofthetotalinputrating
ofthegasequipmentintheconnedspace.
12”
(305mm)
OPTION 1.
VENTILATION GRILLS
INTO ADJOINING ROOM
12”
(305mm)
OPTION 2. VENTILATION GRILLS
INTO ADJOINING ROOM
OPTION 3. REMOVE DOOR INTO ADJOINING ROOM
Figure 1
Rework worksheet on page 13, adding the space of the
adjoining unconned space. The combined spaces must
have enough fresh air to supply all appliances in both
spaces.
Ventilation Air From Outdoors
Provide extra fresh air by using ventilation grills or ducts. You
must provide two permanent openings: one within 12 inches of
theceilingandonewith12inchesoftheoor.Connectthese
items directly to the outdoors or spaces open to the outdoors.
These spaces include attics and crawl spaces. In most cases for
direct communication with the outdoors or direct communication
throughaverticalductafreeareaopeningofonesquareinchper
4,000BTU/hrofreplaceinputratingforeachgrill.Ifahorizontal
duct is used, a grill free area or duct opening shall have a free
areaopeningofonesquareinchper2,000BTU/hrforeachgrill.
Follow the National Fuel Code ANSI Z223.1/NFPA54, Air for
Combustion and Ventilationforrequiredsizeofventilationgrills
or ducts.
IMPORTANT: Do not provide openings for inlet or outlet air into
attic if attic has a thermostat-controlled power vent. Heated air
entering the attic will activate the power vent.
OUTLET
AIR
OUTLET
AIR
VENTILATED
ATTIC
INLET
AIR
TO
ATTIC
TO
CRAWL
SPACE
INLET
AIR
VENTILATED
CRAWL SPACE
Figure 2
A1 A2
B1
B2
A1 x B1 = C1
A2 x B2 = C2
C1+C2=Sq.In.Required
Example:Fora30,000BTUFireplace,1sqinper1,000BTU
equals30sq.in.ofopening.
(A1) 5in
2
x (B1) 3in
2
= (C1) 15in
2
(A2) 5in
2
x (B2) 3in
2
= (C2) 15in
2
(C1) 15in
2
+(C2)15in
2
= 30in
2
Figure 3

35775-5-0120 Page 15
SURFACE MOUNTED FIREPLACE

35775-5-0120Page 16
SURFACE MOUNTED FIREPLACE DIMENSIONS
GAS LINE
ACCESS
REAR VIEW
K1
W1
U1
V1
V2
OPTIMUM
ELECTRIC LINE
ACCESS
LOW VOLT
120 V
A1
E
D
FRONT VIEW
A
T
Q
SIDE VIEW
C1
B1
GAS LINE
ACCESS
TOP VIEW
K2
W2
B2
V3
V4
U2
A2
C2
FRONT VIEW
SIDE VIEW
FIREPLACE
DECORATIVE WRAP

35775-5-0120 Page 17
INDEX
LETTER
DIMENSION DESCRIPTION
VFSL30FP
Dimensions in Inches
A1 Themaximumheightofreplaceface 17-7/8
A2 The maximum height of decorative wrap 20
B1 Themaximumwidthofthereplaceface 30-1/4
B2 The maximum width of decorative wrap 35
C1 Themaximumdepthofthereplace 5-1/2
C2 The maximum depth decorative wrap 4-1/2
D Theheightofthereplaceopening 11-3/4
E Thewidthofthereplaceopening 28-3/8
F Theinteriordepthofthereplace(notshown) 4-3/16
K1 Heightfromthebottomofthereplacetothegaslineaccess 2-1/16
K2 Height from the bottom of the decorative wrap to the gas line access 2-1/16
N Glasspanelheight(notshown)inreplace 2
O Glasspanelwidth(notshown)inreplace 27-1/2
Q Distancefromoortoreplaceopening 4-1/16
T Openinglipofreplace 9/16
U1 Heighttoelectricalaccessofreplace 1-1/16
U2 Height to electrical access of decorative wrap 1-1/16
V1 Distancefromrightsideofreplaceto120Vaccess 1
V2 Distancefromrightsideofreplacetolow-voltageaccess 3-1/16
V3 Distance from right side of decorative wrap to 120V access 3-9/16
V4 Distance from right side of decorative wrap to low voltage access 5-5/8
W1 Distancefromleftsideofreplacetogasaccess 2-5/8
W2 Distance from left side of decorative wrap to gas access 5-1/4
SURFACE MOUNTED FIREPLACE DIMENSIONS

35775-5-0120Page 18
SURFACE MOUNTED FIREPLACE INSTALLATION
Provided Materials:
Fireplace
Battery Pack with 10-ft extension wire
(4) AA Batteries
AC Power Adaptor
Gas Flexline
Glass Panel
(2) Cord Grip
(2) Wire Nut
Snap-in Receptacle
ON/OFF Switch with 10-ft extension wire and cover (or other
control accessory - sold separately)
Required Materials - Not Provided:
Decorative Front (Sold Separately, contact your Empire Dealer)
Decorative Wrap (Sold Separately, contact your Empire Dealer)
Shutoff Valve
(2) Electrical Junction Boxes (external)
Junction Box Cover (external)
120V Wire
Gas Piping
(4) 2 inch Cabinet Drywall Screw
Tools Needed:
Level
Drill/Phillips Screwdriver
Wrenches
LeakDetectionLiquid
Tape Measure
DANGER
ThisreplacemustbeinstalledbyadealerorcertiedNational
Fireplace Institute technician. A professional will understand
therequirementsforgas,electrical,andframingneedsforthis
installation.
Step 1: Find location for replace and install decorative
wrap.
1. Surface-mountedinstallationmeansthatthereplacewill
be completely outside of the wall. In selecting a location, be
cautious of electrical wires, air ducts, water pipes, cold air
returns, etc. that may make gas line or electric installation
difcult.
2. See Clearances to Combustibles, pages 43 - 44.
3. Once the location has been found, arrange for gas lines
toruntothereplace.Allgaslinesmustbeinstalledbya
qualiedinstaller.Ashut-offvalvemusttobeincludedinthe
gas line installation. Follow local codes for installing the gas
line and shutoff valve.
4. Arrangefora120Vlinetoruntotherightofthereplace.
5. To ensure the proper location of the gas line and electrical
line, install the decorative wrap. See Figure 4.
a. Locate two studs behind the decorative wrap.
b. Start one cabinet screw into a stud on the top set of
holes, but leave screw loose. Place the level under
the hook and level the wrap. Insert the second cabinet
screw into the other stud on the top set of holes. Tighten
both screws.
c. Place the level on the side of the wrap along the rear
wall. When the side is plumb, insert two cabinet screws
into studs in the bottom set of mounting holes.
d. Testthesquarenessofthewrapbymeasuringthe
diagonals. The diagonal distances must match.
GAS INLET
BOTTOM
MOUNTING HOLES
LOW-VOLT
AGE
ACCESS
120V ACCESS
HOOK FOR
FIREPLACE
TOP MOUNTING HOLES
SHUT OFF VALVE
(NOT PROVIDED)
Figure 4
6. The decorative wrap can be used as a template for locating
the gas inlet and wiring locations.
7. Bringgaslinewithshutoffvalvelocatedoutsideofreplace
and 120V power to the locations indicated above. Gas line
mustbeinstalledbyaqualiedinstaller.
NOTICE for this application only: The battery back-up
may be placed inside the decorative wrap outside of the
replace'srightside.Forthistypeofinstallation,onlyone
junctionboxandswitchextensionwireharnessisrequired.

35775-5-0120 Page 19
SURFACE MOUNTED FIREPLACE INSTALLATION
8. Run extension wire harness(es) from opening to junction
box(es)(notprovided)outsideofthereplace.Onejunction
box is for the switch (or other control). The other junction box
isforthebatterypackandwillrequireacover.Extension
wires are 10-ft in length and must connect to battery pack
using the connector end with side walls. Do not extend wires
beyond the 10 feet provided as this will cause the controls to
malfunction. See Figure 5.
DECORATIVE
WRAP
ON\OFF
SWITCH
BATTERY
PACK
10FT
EXTENSION
WIRE
SWITCH
COVER
JUNCTION BOX
COVER
10FT
EXTENSION
WIRE
EXTERNAL
JUNCTION BOX
EXTERNAL
JUNCTION BOX
Figure 5

35775-5-0120Page 20
SURFACE MOUNTED FIREPLACE INSTALLATION
Step 2: Prepare Fireplace
1. Remove the screw securing the standoff on top of the
replace.Discardboththescrewandthestandoff;theyare
not used in this installation.
2. The glass panel is wrapped in cardboard and shipped in the
spaceabovethereplaceopening.Locateglasspanel,and
set aside in a safe location.
3. Remove screen by lifting slightly and pulling out. Remove
contents above burner assembly. See Figure 6.
Figure 6
4. Removescrewsat"E".Removethebottompanelbylifting
and set aside in a safe location. See Figure 7.
5. Removescrewsat"F".Removeburnerassemblyandset
aside in a safe location. See Figure 7.
E
F
F
E
Figure 7
6. Remove junction box on right by removing the screw
securingittothereplace.See Figure 8.
Figure 8
7. Removetheknockoutsinthebackofthereplaceonly.If
using battery pack inside of decorative wrapper, open top
knockoutonthesideofthereplace.See Figure 9.
REMOVE KNOCKOUT
FOR LOW
-VOLTAGE WIRING
REMOVE KNOCKOUT
FOR 120V WIRING
REMOVE KNOCKOUT
FOR BATTERYPACK
IF LOCATED INSIDE
DECORATIVE WRAP
Figure 9
8. Locate snap-in receptacle and snap into junction box.
9. Wire the junction box. See Figure 66, page 50.
Step 3: Install the Fireplace
1. Liftreplaceandhooktoplipontowrapperhook.Let
replacebottomswingintowrap.Carefullyadjustany
wiringthatmaygetintothepathofthereplacethroughthe
corresponding hole. See Figure 10.
FIREPLACE
DECORATIVE
WRAP
TRUSS
HEAD
SCREWS
Figure 10
2. Insert two truss-head screws (provided with the decorative
wrap kit) through the bottom of the decorative wrap and into
thebottomofthereplace.
3. Connecttheexlinetothegasline.
/